
This guide will teach you how to integrate Amazon with your accounting system. Learn more about QuickBooks Amazon integration. Once you set it up (don’t worry, it is pretty quick and straightforward), Synder will funnel the data from your Amazon account with all the detailed customer, item, tax and other information right into your accounting system. Just follow the simple steps below and enjoy seamless synchronization.
Overview:
Start Amazon integration from scratch
1. Create an account
If you’re getting started with Synder you’ll need to create a free Trial account and connect your accounting system first. Check out this guide if you would like to integrate your payment platform with QuickBooks Online or Xero, and this article to connect your QuickBooks Desktop company.
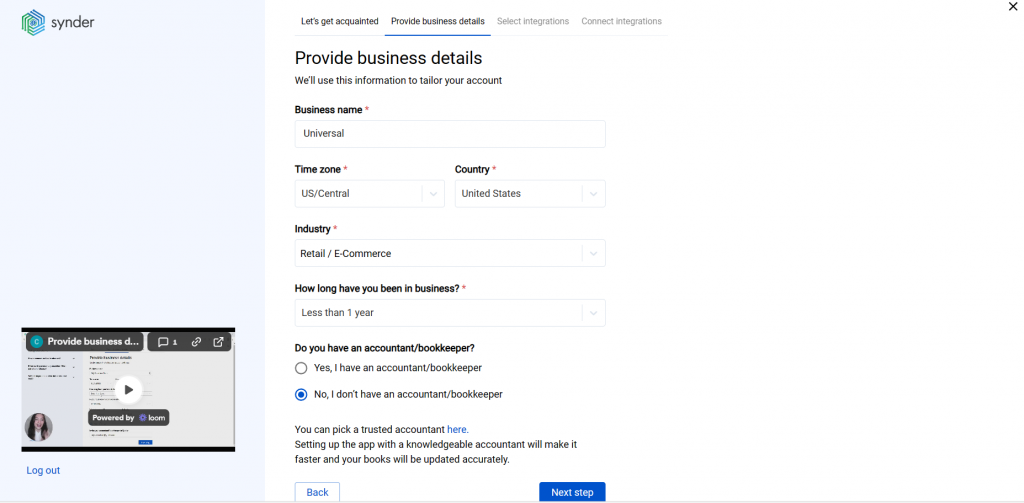
2. Provide your business details
Going through the set-up process of an Organization for your QuickBooks/Xero company, fill in the information about your business and hit the Next step button.
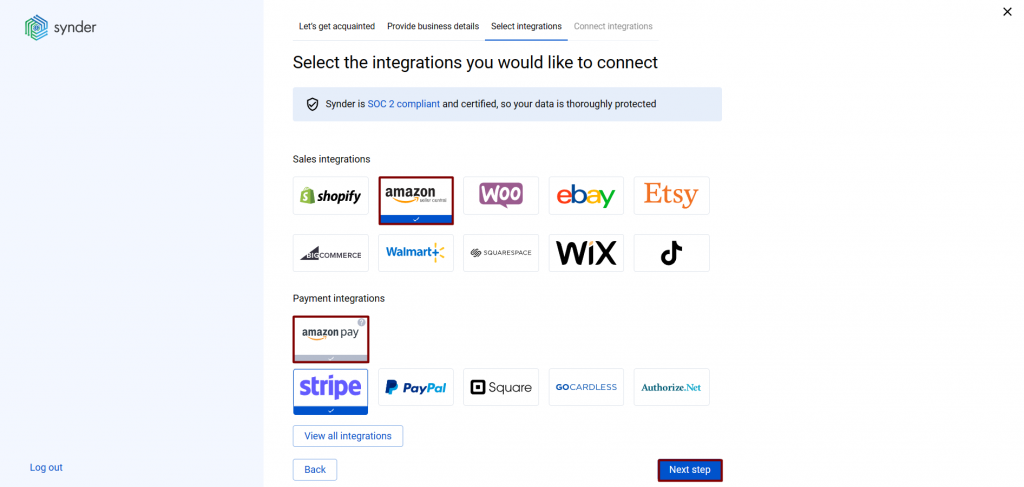
3. Select the platforms you’d like to integrate
Now you need to select the platforms you would like to connect to Synder. Click View all integrations to see the list of all available platforms.
Note: Mark all the services you are using to receive payments, you will be able to connect all of them right away or skip the connection of particular integrations and set them up any time later.
4. Connect your accounting platform
Select the accounting company you’d like to connect to Synder and click on Next step.
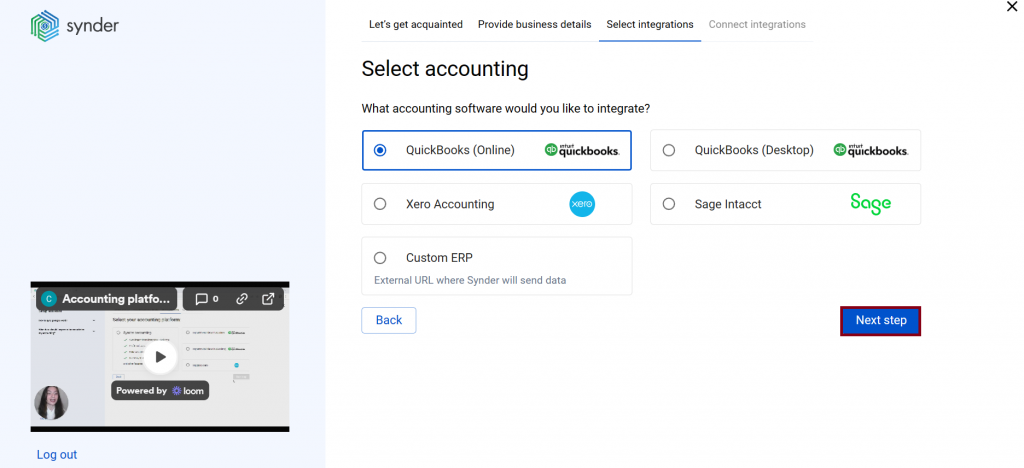
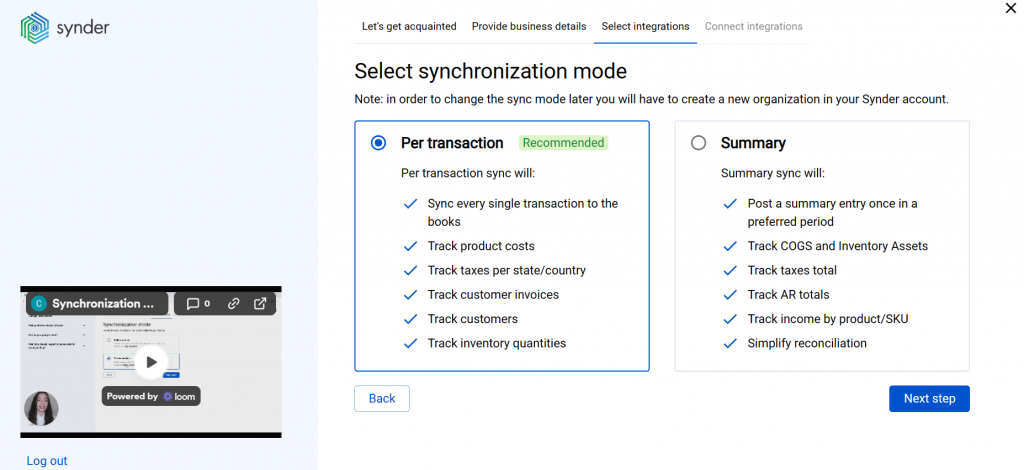
Note: If you are connecting QuickBooks Online or Xero, you will be prompted to select the sync mode. Proceed with the desired option.
Click on Connect to connect your accounting company.
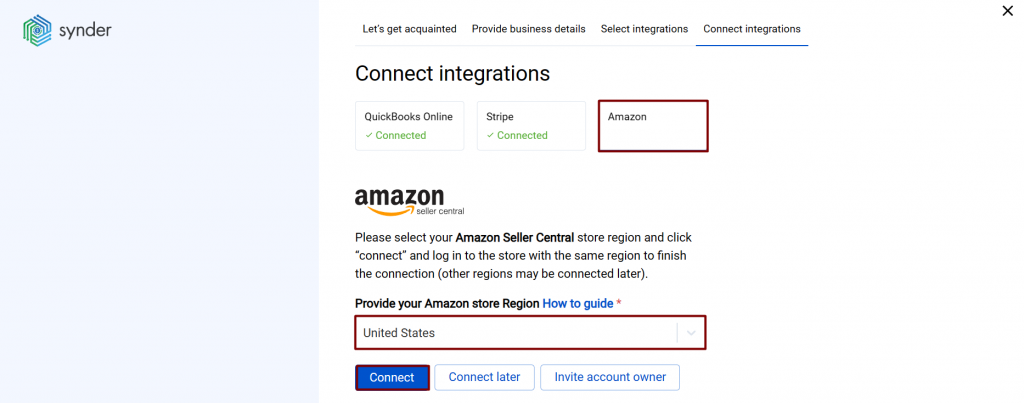
5. Connect your Amazon store
Almost there! To complete the setup, you just need to connect your Amazon Seller Central account from any region to Synder, along with other sales platforms. You can integrate them one by one: just hit the Connect button (if you are an admin) or Invite account owner (to invite the account owner).
To connect Amazon, provide your store region and click on Connect.
6. Set up the Amazon integration
To complete the setup for the Amazon integration, choose an account for payouts (usually, your Checking account) that will allow smooth reconciliation of your Amazon transactions in one click.
Connect Amazon to an already existing account
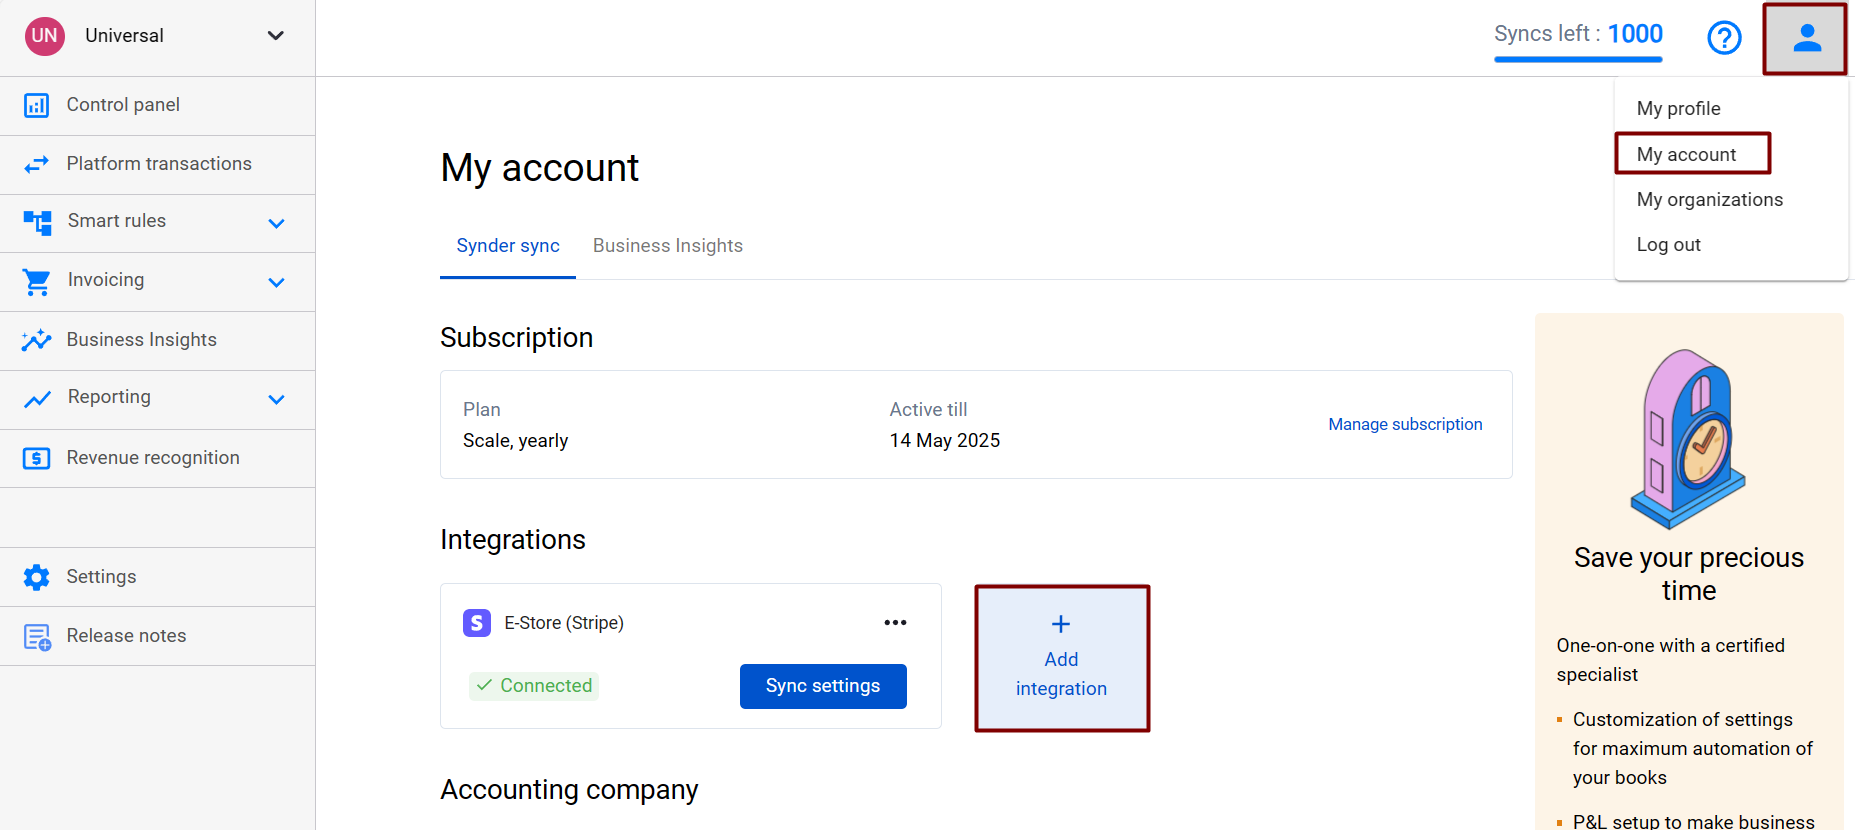
If you already have a Synder account and would like to integrate your Amazon store, follow the steps below:
1. Switch to the needed Organization in the top-left corner of the Synder page.
2. Click on the Person icon in the upper-right corner and select Organization settings.
3. In the Integrations section, click Add integration.
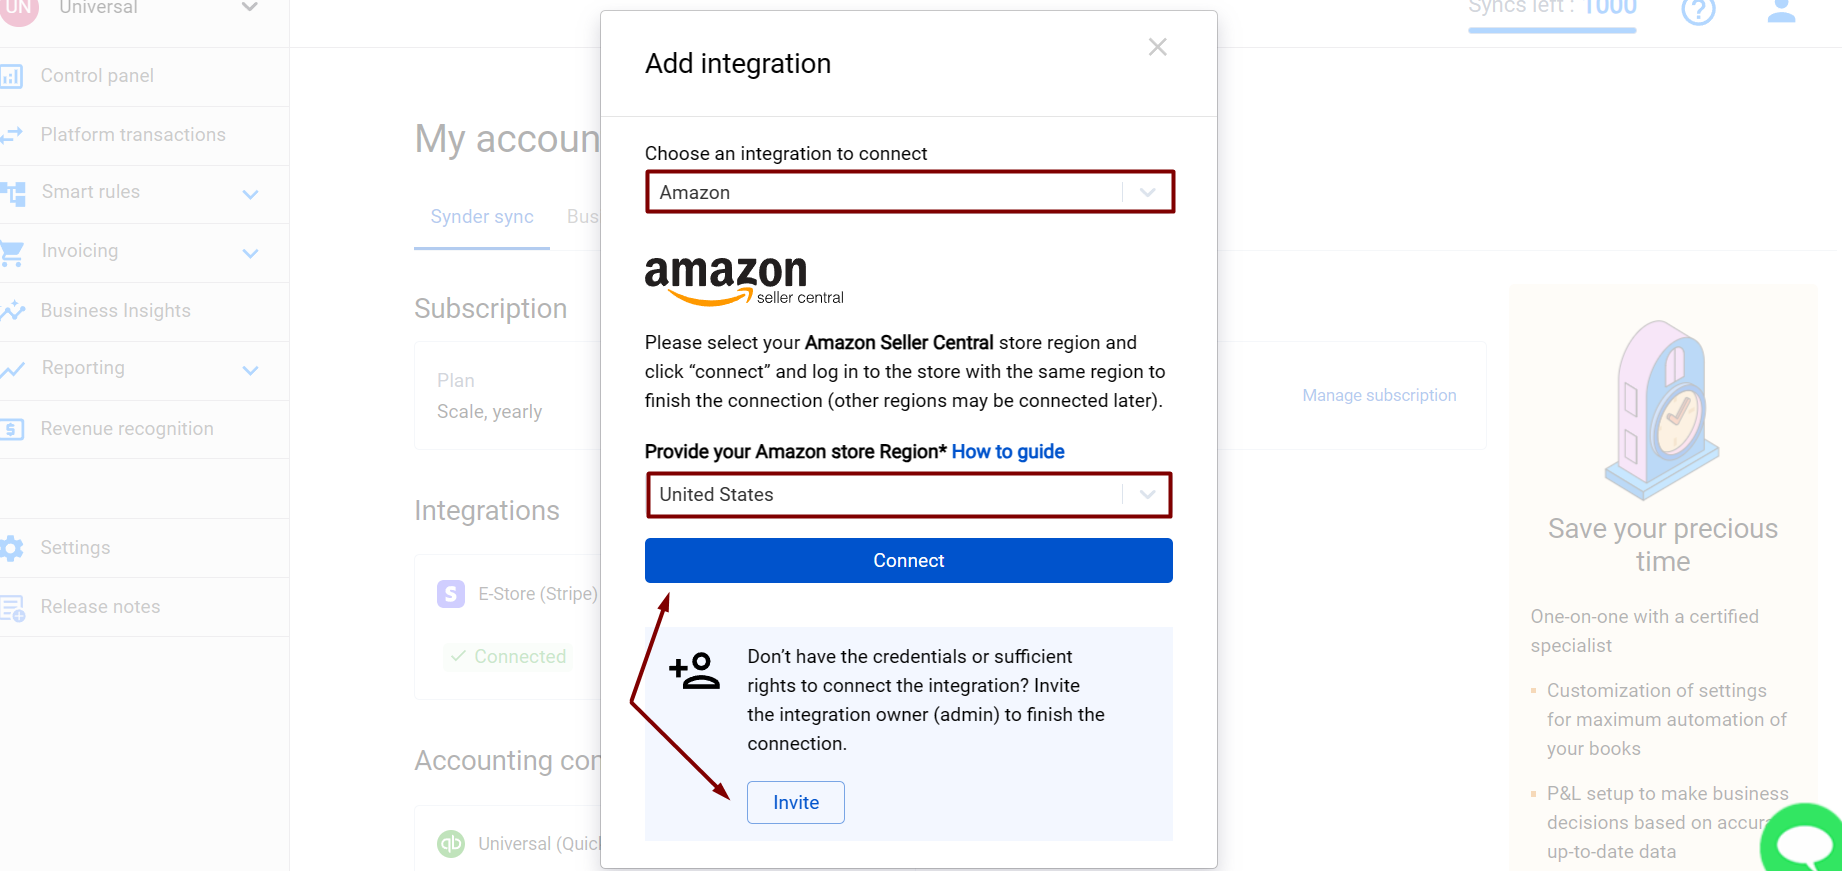
4. Select Amazon and click on Connect. If you don’t have admin rights, send an invitation to the account owner.
Tips and tricks on Amazon integration
Note 1: Importing historical transactions from Amazon, please, note that you can not import more than 6 months – 1 year of historical sales and 2 years of historical payouts due to the API limitation (API is like a language apps use to talk with each other). On a trial, you can go 1 month back to import your historical data and try the system.
Note 2: Due to agreements with specific states in the USA, Amazon collects taxes on your behalf. However, these taxes are still to be accounted for in your books, as they are associated with your business. Synder will handle it properly and record all the details, including taxes.
Note 3: We recommend turning on Apply generic customer in the Synder settings for Amazon in the Sales tab and typing in Amazon customer so it’s auto-applied to all synced transactions from Amazon. Due to API restrictions, Synder cannot transfer Amazon customers’ details at the moment, so each transaction would otherwise have a newly generated customer name.
Note 4: Synder is able to apply classes to your expenses so that you don’t have to do that manually, thanks to its brand-new smart rules feature. Check out How to categorize Amazon Fees with Synder Smart rules and apply classes to Expenses.
Note 5: Amazon payouts can be synced into your accounting software 14 days after they were imported to Synder due to the Amazon API restriction (API is like a language apps use to talk with each other). During this time, the payouts will have the “Pending” status in Synder, and then they will be synced automatically.
Note 6: If your Amazon account hasn’t been connected, you are likely to have selected the wrong location, i.e., a country name. To connect the correct Amazon account, please click on the Person icon in the upper-right corner and select Organization settings → click on Add integration → select Amazon and choose the correct location → click on Connect.
Note 7. Synder currently integrates with Amazon Seller Central. If you have Amazon Pay transactions, ensure you have Amazon Seller Central connected so Synder can fetch all the data.
Reach out to the Synder team via online support chat, phone, or email with any questions you have – we’re always happy to help you!