
Having accurate and neat books is very important for a business to thrive and flourish. With a great amount of data and a fast-moving world, it’s essential to put all the sales info into your accounting company quickly and safely. Looking for an easy, fast and reliable way to sync your data smoothly between your sales channels and payment platforms and your QuickBooks Online company or Xero company? Then search no more! The Synder is here for you, allowing automatic synchronization and categorization of your sales and expenses, and one-click reconciliation of the synced data in QuickBooks Online or Xero. In Xero, you can also benefit from the Automatic Xero Bank Reconciliation feature.
Already excited? Let’s see how to connect a QuickBooks or Xero company to Synder.
Overview:
Сonnecting QuickBooks Online and Xero to a new Synder account
1. Create your account in Synder
If you are getting started with Synder you will need to create a free Trial account first. You can either sign up using your Xero/QuickBooks/Google account credentials or create an account with Synder credentials.
Sign up with accounting platforms:
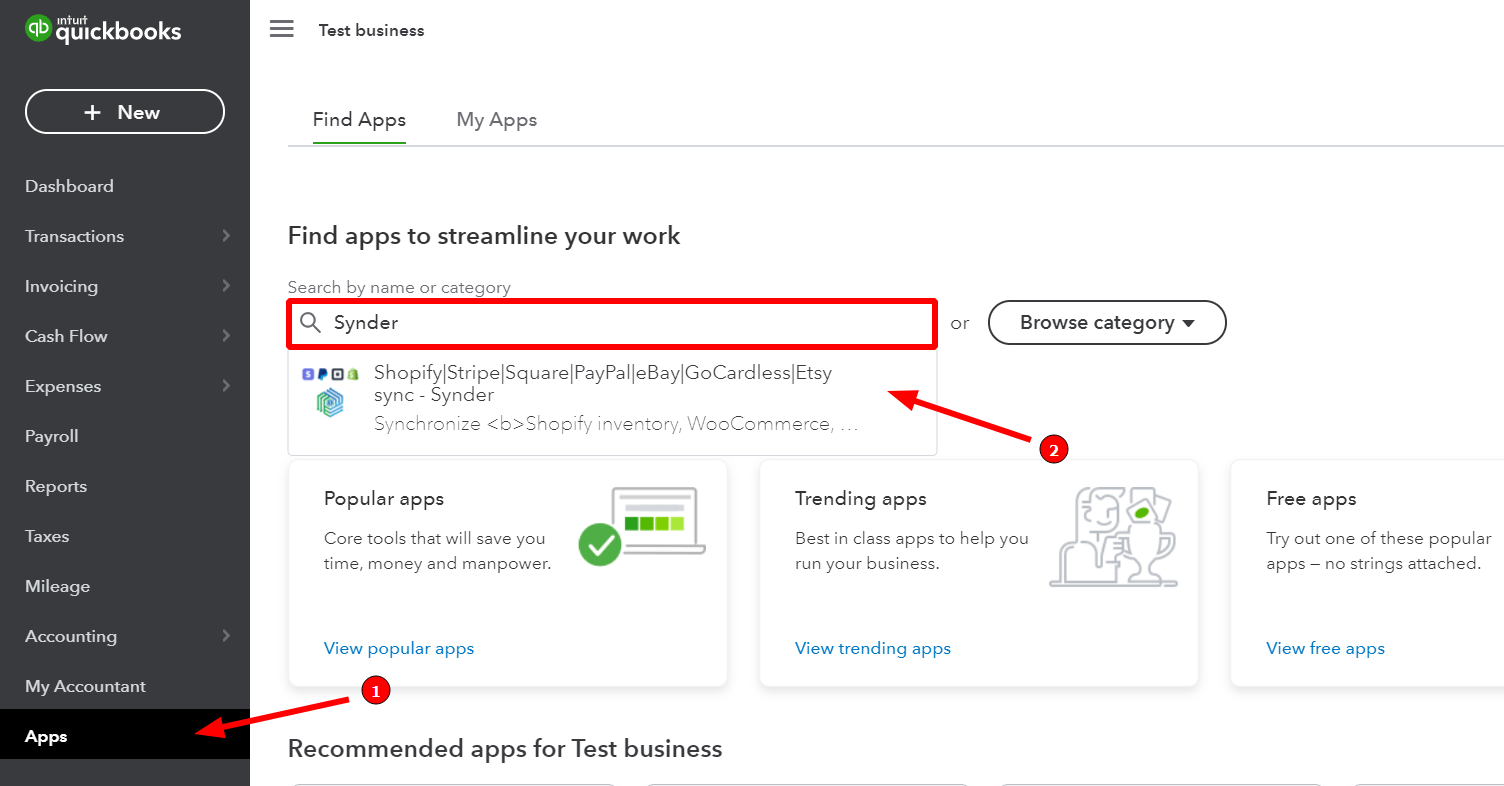
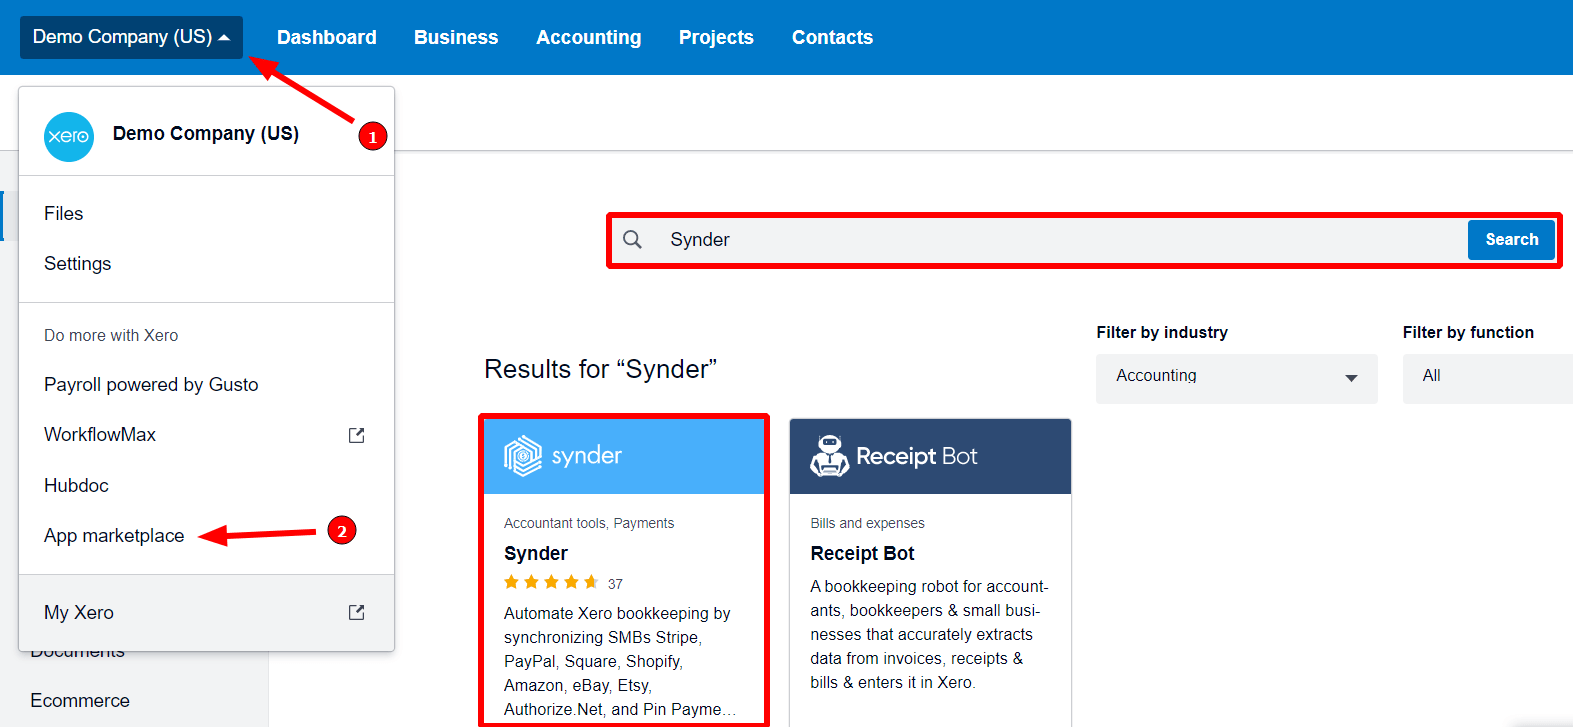
| Sign up through QuickBooks Online: | Sign up through Xero: |
| Go to the Apps tab on the left menu bar → Find app. Click on Synder → Get app now button → Install. | Go to the Organization menu on the left → App marketplace. Click on Synder → Get app now button → Allow access. |
Sign up from the Synder site:
- Fill in the registration form with your name, email, and password.
- Click Sign Up and verify your email following the instructions sent to it.
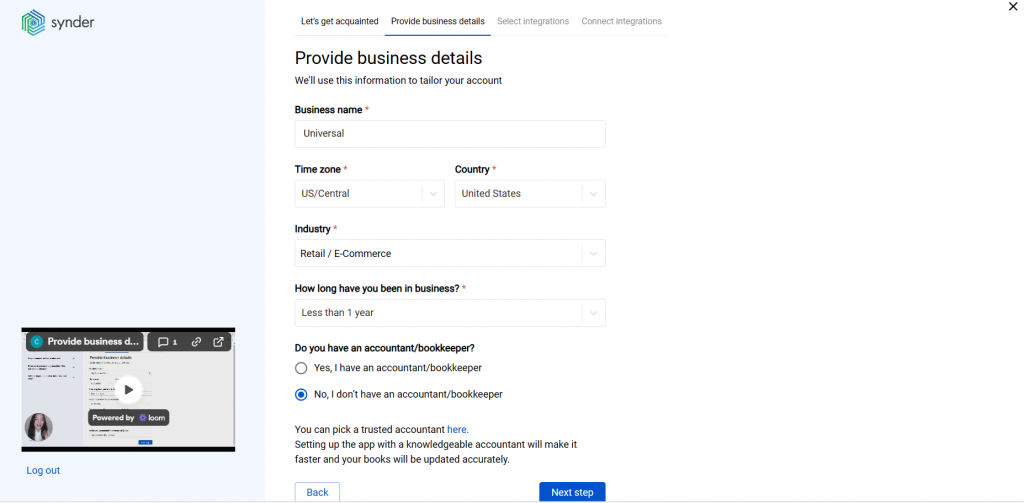
2. Provide your business details
Create an Organization for your QuickBooks Online or Xero company (learn more about Organizations management in Synder) by filling in the information about your business and clicking the Next step button
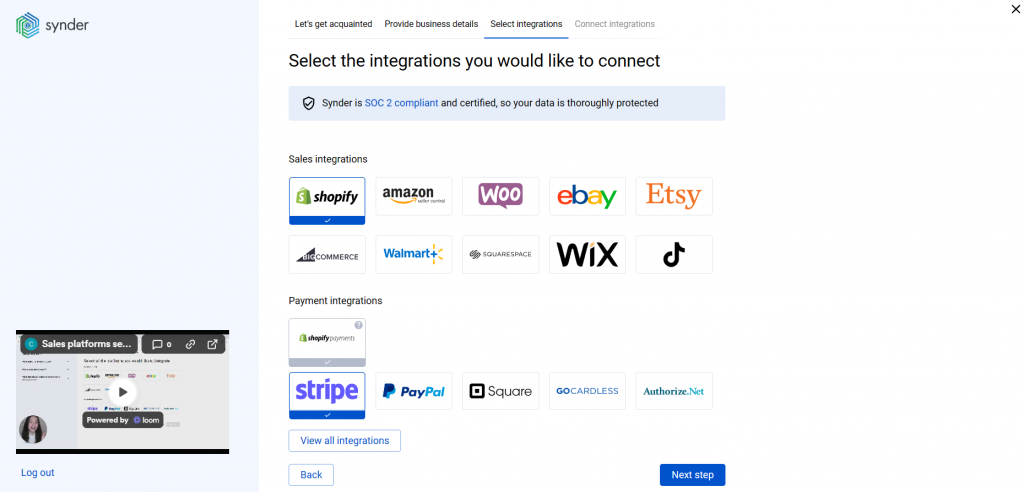
3. Select the platforms you would like to integrate
Now you need to select the platforms you would like to connect to Synder. Click View all integrations to see the list of all available platforms.
Note: Mark all the services you are using to receive payments, you will be able to connect all of them right away or skip the connection of particular integrations and set them up any time later.
4. Select your accounting platform
Select the accounting company you’d like to connect to Synder and click on Next step.
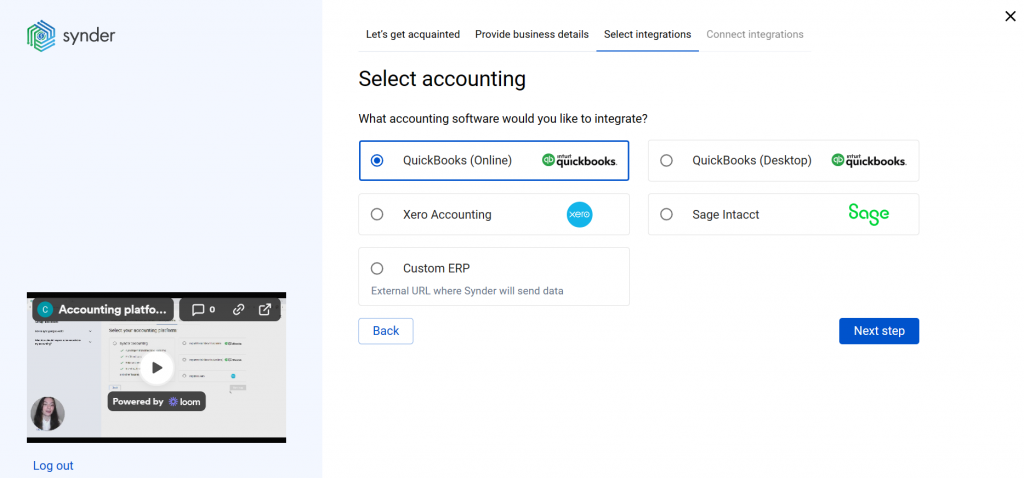
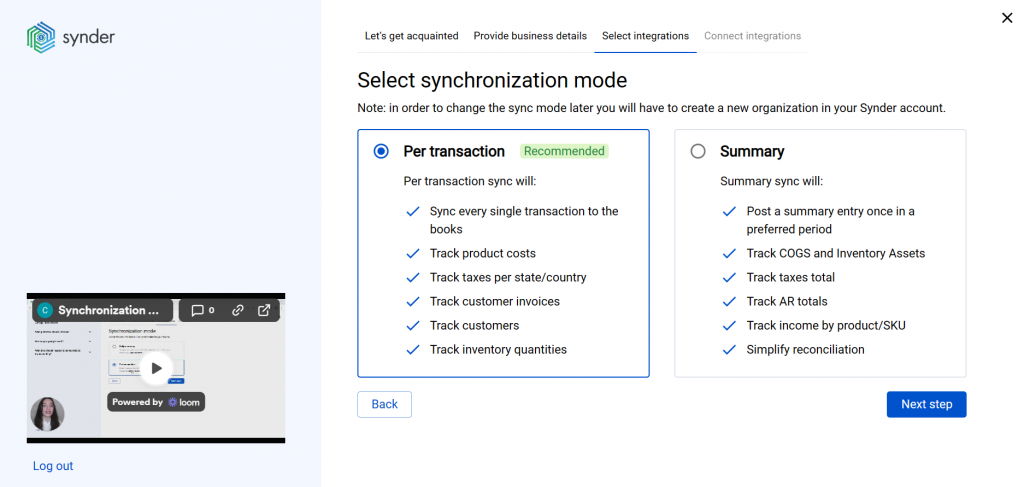
You will be prompted to select the sync mode. Proceed with the desired option.
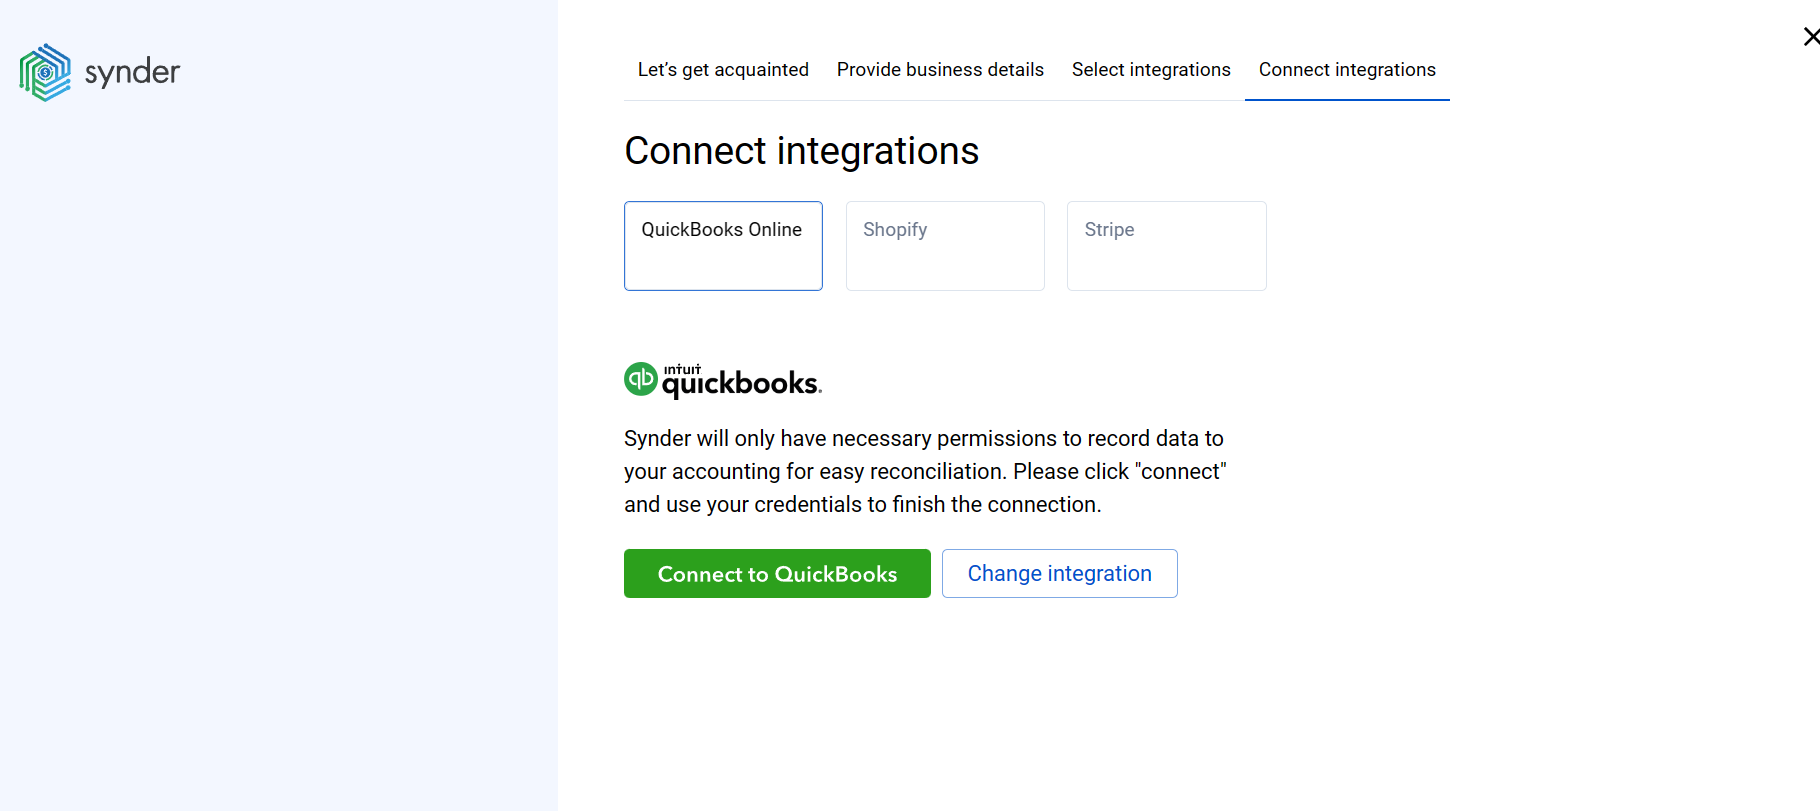
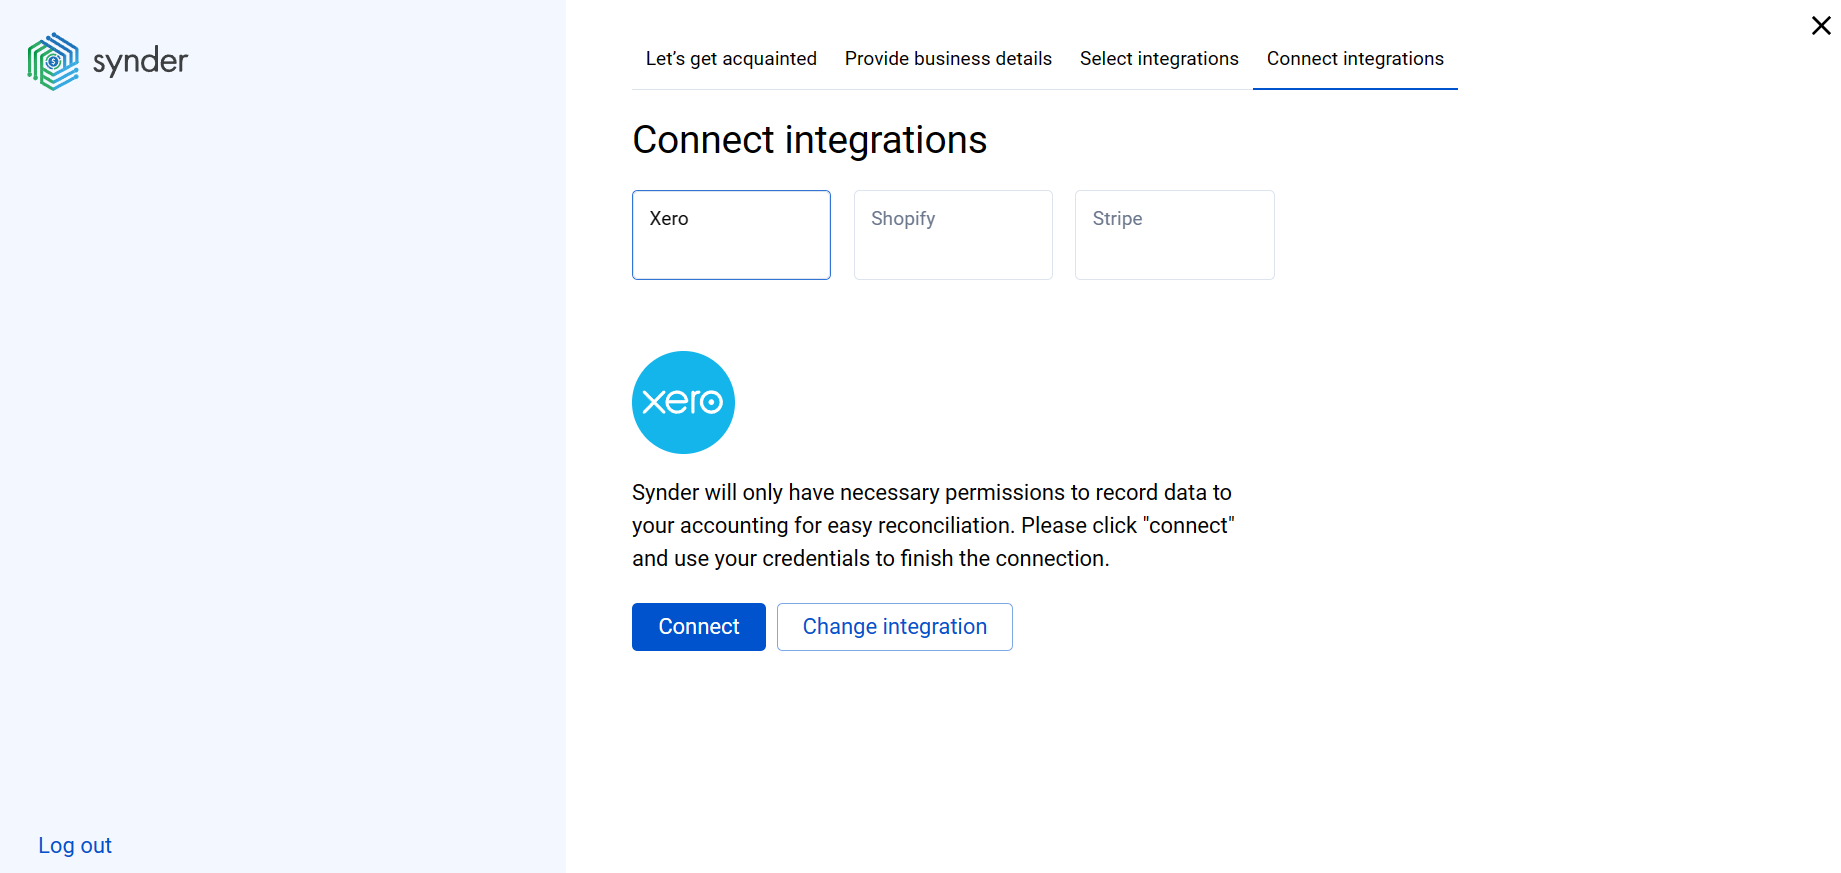
5. Connect your accounting platform
Click on Connect and proceed with the connection.
Note: make sure you have admin rights to connect QuickBooks Online or Xero to Synder
Adding another company (client) to Synder
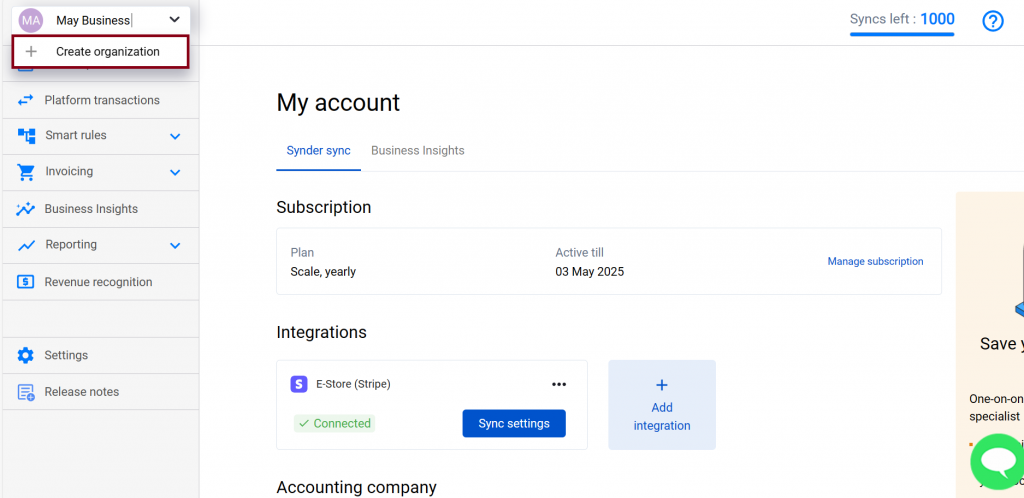
To connect a new company in addition to an already existing one, click on your current organization in the upper left corner → hit Create organization (learn more about Organizations management in Synder):
Follow the instructions described above starting from Step 2 “Provide your business details”.
Important notes
Note 1: Each of QuickBooks or Xero companies is treated as a separate Organization and each organization has its own billing.
Note 2: Synder is constantly working on adding new sales channels and payment platforms to the list of supported integrations. However, if you use some other provider not mentioned in the list of direct integrations, you will find the Excel import feature very helpful. It allows you to import any data from an Excel spreadsheet to Synder and then operate with the uploaded data as with regular transactions by syncing and reconciling them in your accounting.
Note 3: Check out our 3 Must-Watch beginner guides to find out how Synder can help you automate your bookkeeping.
Reach out to the Synder team via online support chat, phone, or email with any questions you have – we’re always happy to help you!