
Overview:
What can you do with rules?
By using our Smart Rules, you can fill in the gaps in the data you are missing during synchronization, or build a flow to trigger an action such as sending a notification email (thank you emails/reminders), a text message, etc. such as send a notification email (thank you emails/reminders), a text message, etc.
You can apply or edit classes/locations/tax/payment method/product names etc. in your accounting software for synchronized transactions based on customer/product names/description/amount etc.
Why is data missing? Simply because the systems like let’s say Stripe and QuickBooks Online are built for different tasks, which means Stripe doesn’t have any accounts or classes, but you might want to have them in QuickBooks Online.
Missing data filling example: Let’s say you want all transactions from Stripe where the total amount is equal to or greater than 100 to be applied to a specific class, e.g., Food, in QuickBooks Online.
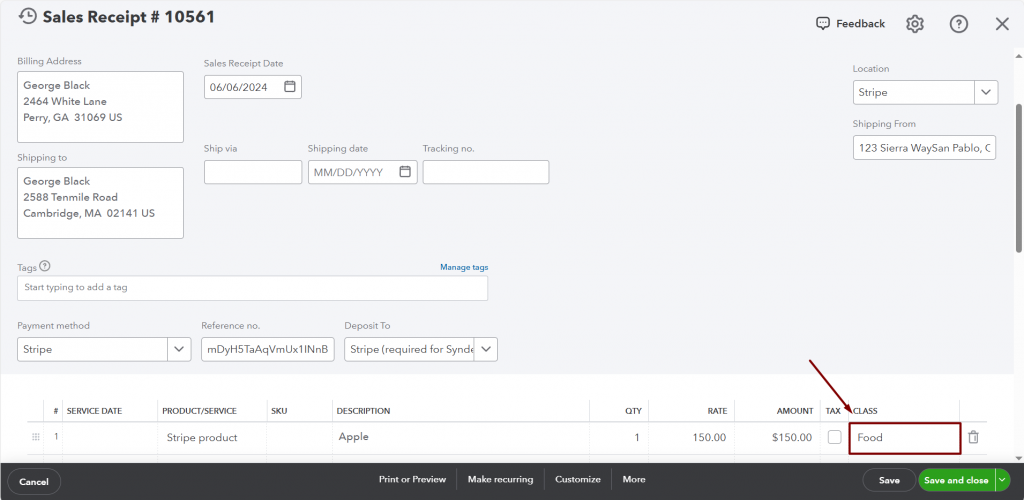
Once a Sales Receipt/Invoice is synchronized to your QuickBooks Online, it triggers an update of the receipt and the class selected in Synder will be applied.
Here is the transaction in QuickBooks Online after the sync and update:
By creating a rule, you can update any synchronized transaction adding missing data or correcting recorded data to make sure there is nothing you need to edit manually to have your books accurate and detailed. This provides you with each and every detailed reporting opportunity and ability to take informed decisions for your business.
How do Rules work?
Rules work on the basis of if-then conditions, so you can create flows and make Synder adapt to your needs. The process contains 2 phases:
- Synchronization of a transaction from the payment processor/e-commerce to your accounting system.
- Update of the created QuickBooks Online transaction based on the information inside of it, which happens almost instantly based on the conditions of the flow.
Below is an example on how to create a rule to apply the class for payment transactions. However, you can use the same principle to build any flow and adjust Synder to your specific needs.
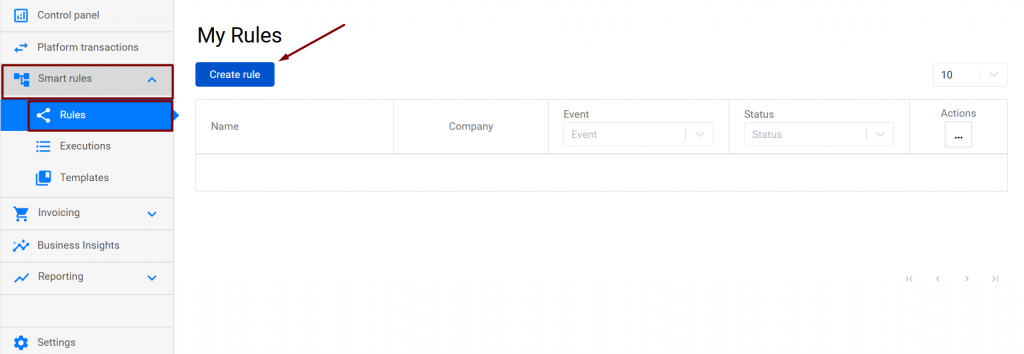
1. Go to the Smart rules tab on the left menu → Rules → click Create rule.
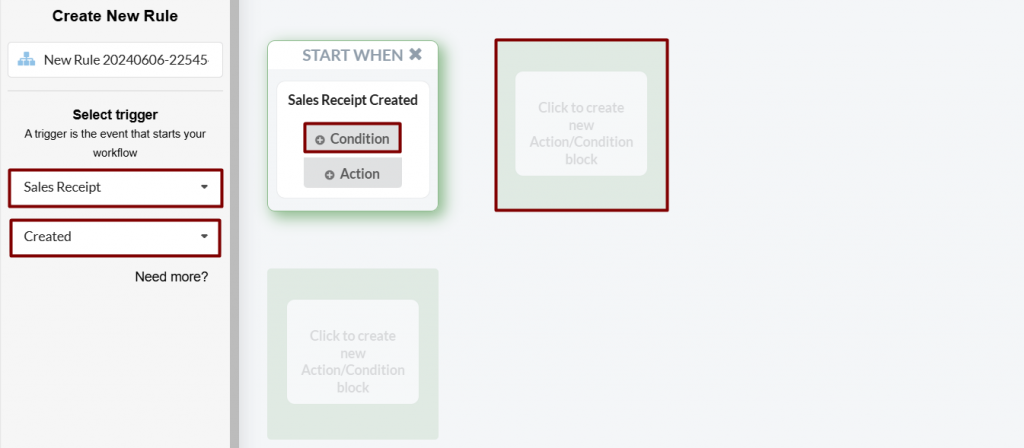
2. As a trigger that starts the flow, we select the Sales Receipt → Created. Once you sync a transaction via Synder, you will have both Expense and Sales Receipt/Invoice created in QuickBooks Online, and the created sales receipt will trigger a rule to work.
Condition means that you are going to specify additional conditions for the rule to be applied to specific Sales Receipts. You can select Action right away if you want the flow to be applied to each of the synchronized Sales Receipts.
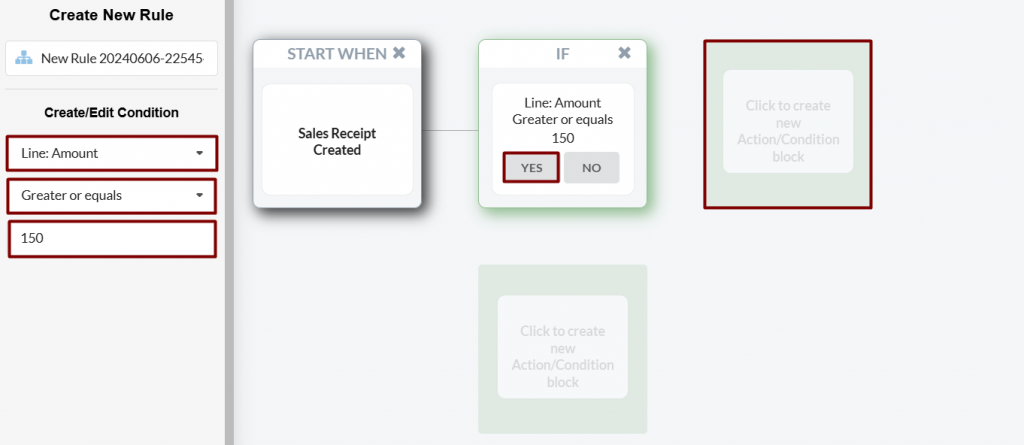
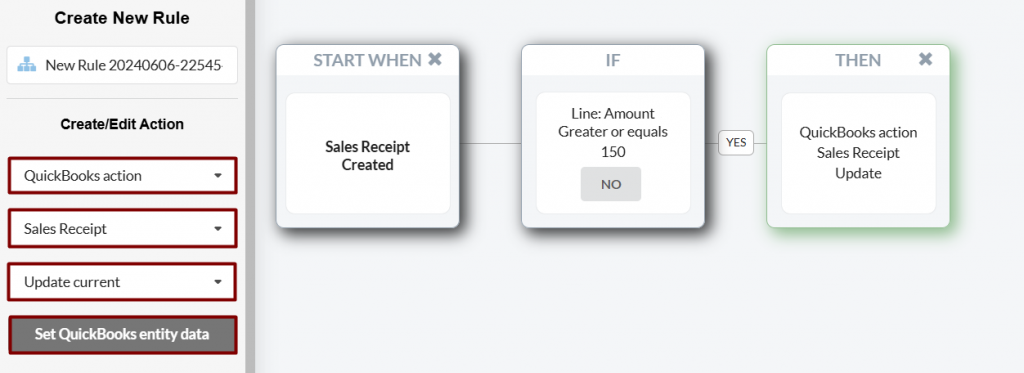
3. Now we start to build our if-then algorithm. From the “Select field” dropdown select Amount → Greater or equals → 100 → click Yes. That means if the amount of a transaction equals or is greater than 100, then the action described at the next step will be applied to the sales receipt.
4. You can continue creating conditions, but for our current flow, we select the Actions button. Select QuickBooks action to be applied to Sales Receipt → Update current* → Set QuickBooks entity data.
*Update Current is an option to update the whole synchronized Sales Receipt which triggered the flow.
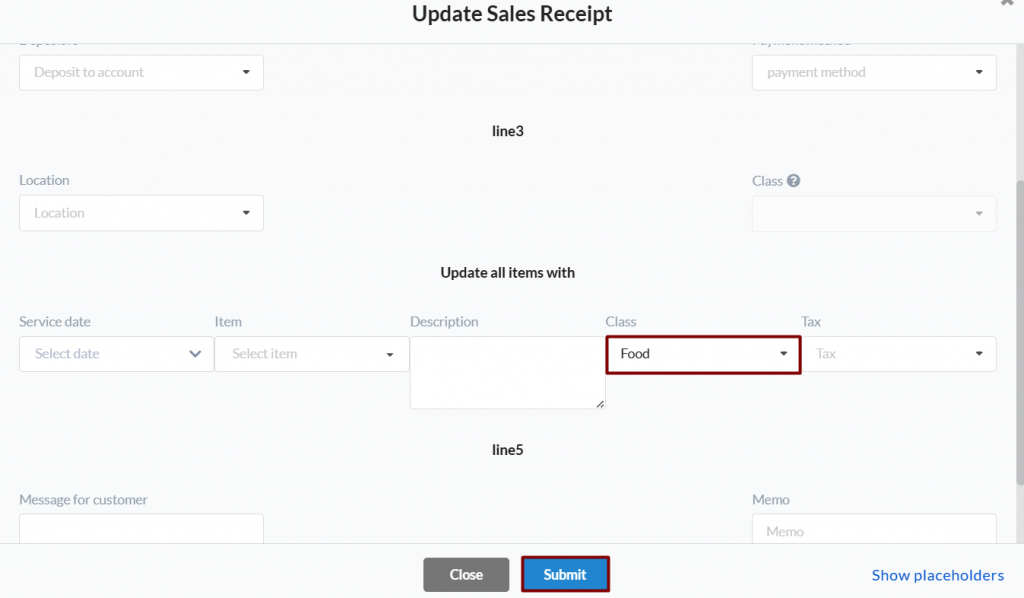
5. Enter the class you want to apply → click the Submit button.
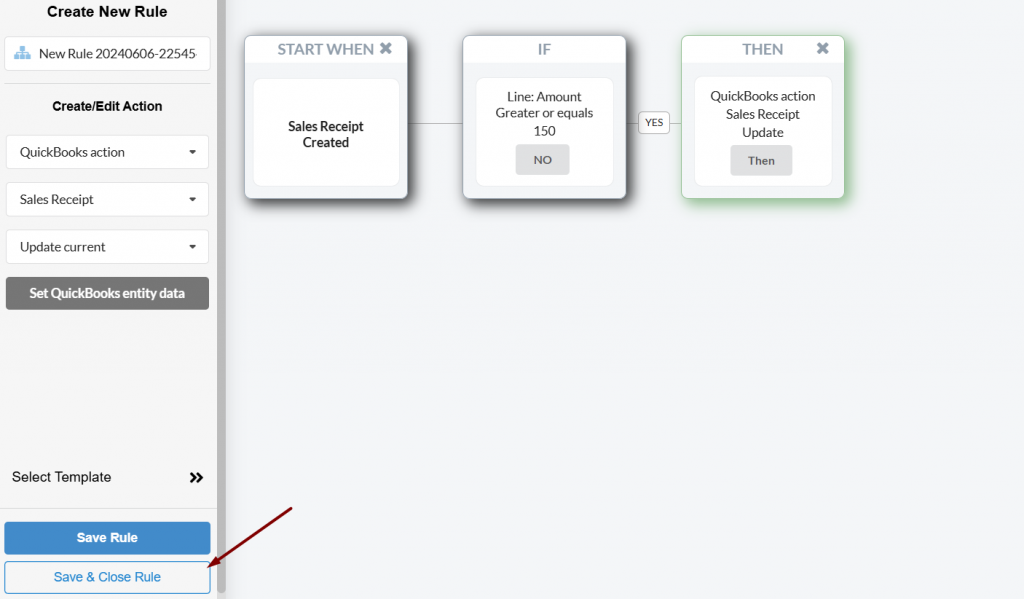
6. Click on Save & Close Rule.
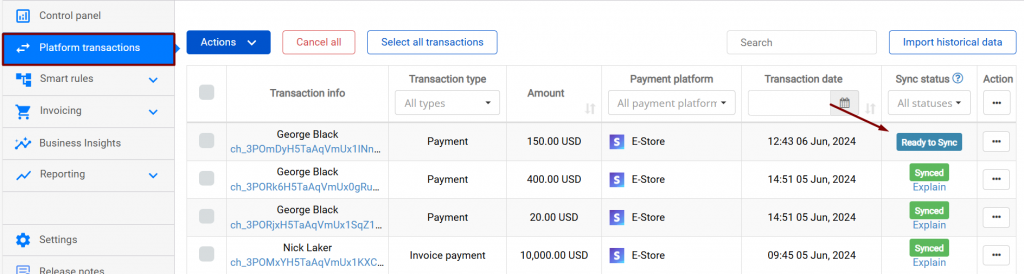
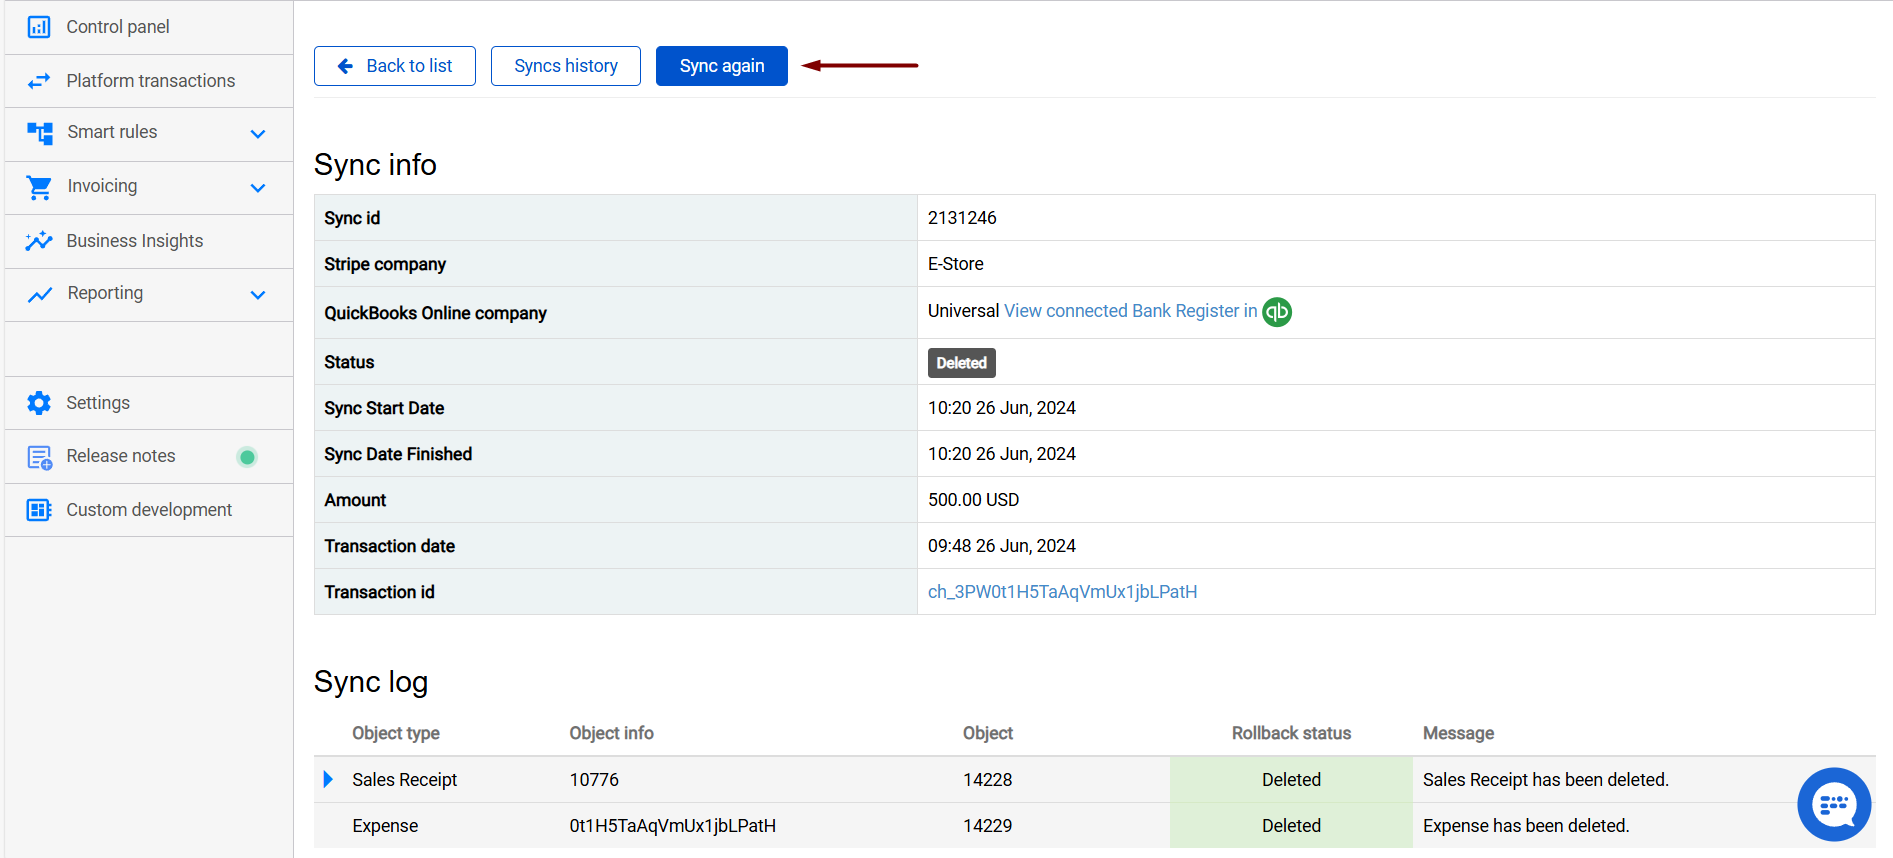
7. Go to the Platform transactions tab and sync a few transactions to check the result.
You can also rollback and resync historical transactions if you want them to be recorded according to the rule.
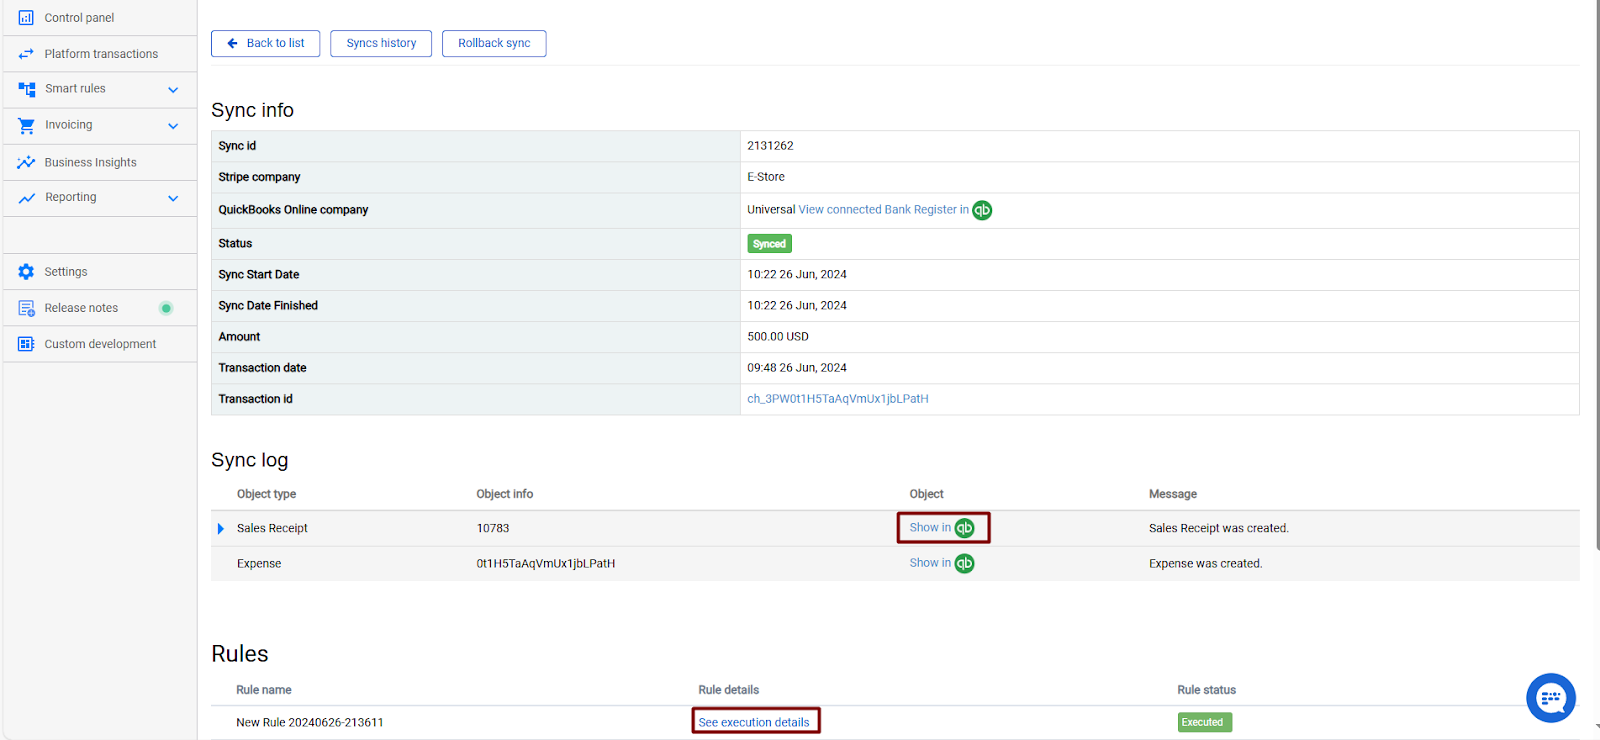
8. Once a transaction that meets the selected criteria is synced, you can check whether the smart rule was applied under the Sync log.
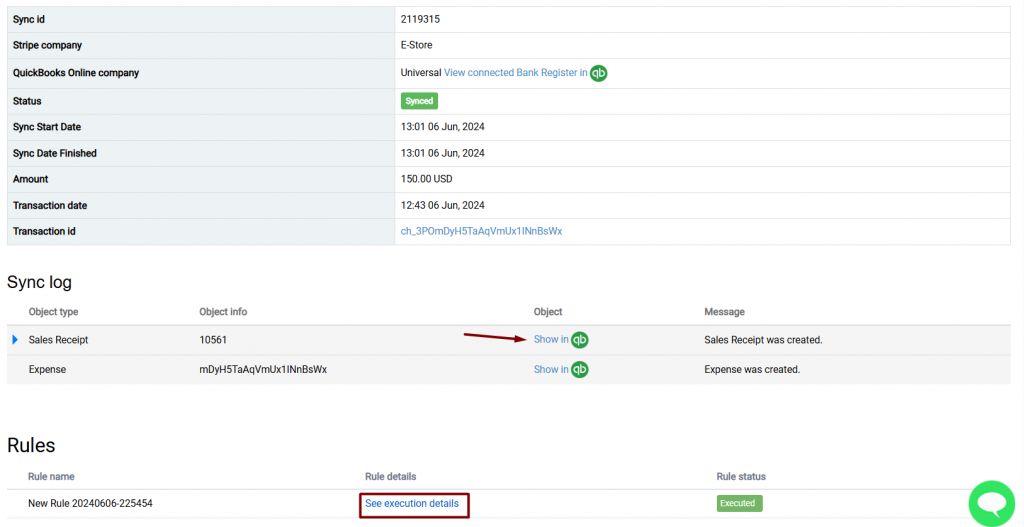
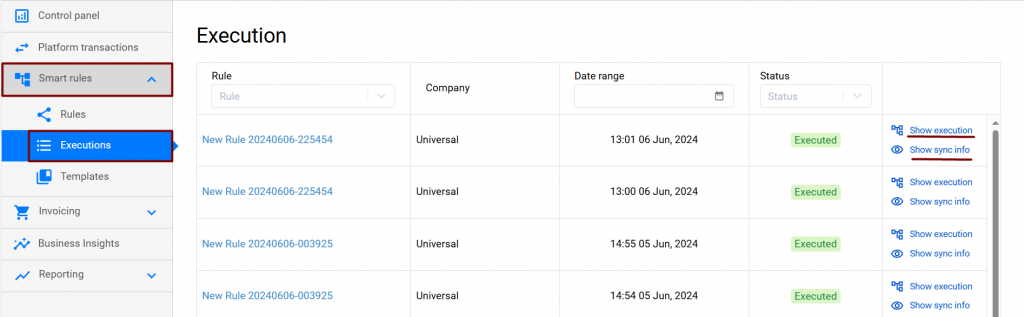
Alternatively, go to Smart rules → Executions tab to check if the rule was triggered and applied. Use the “Show sync info” link to open the log of the transaction updated by the flow.
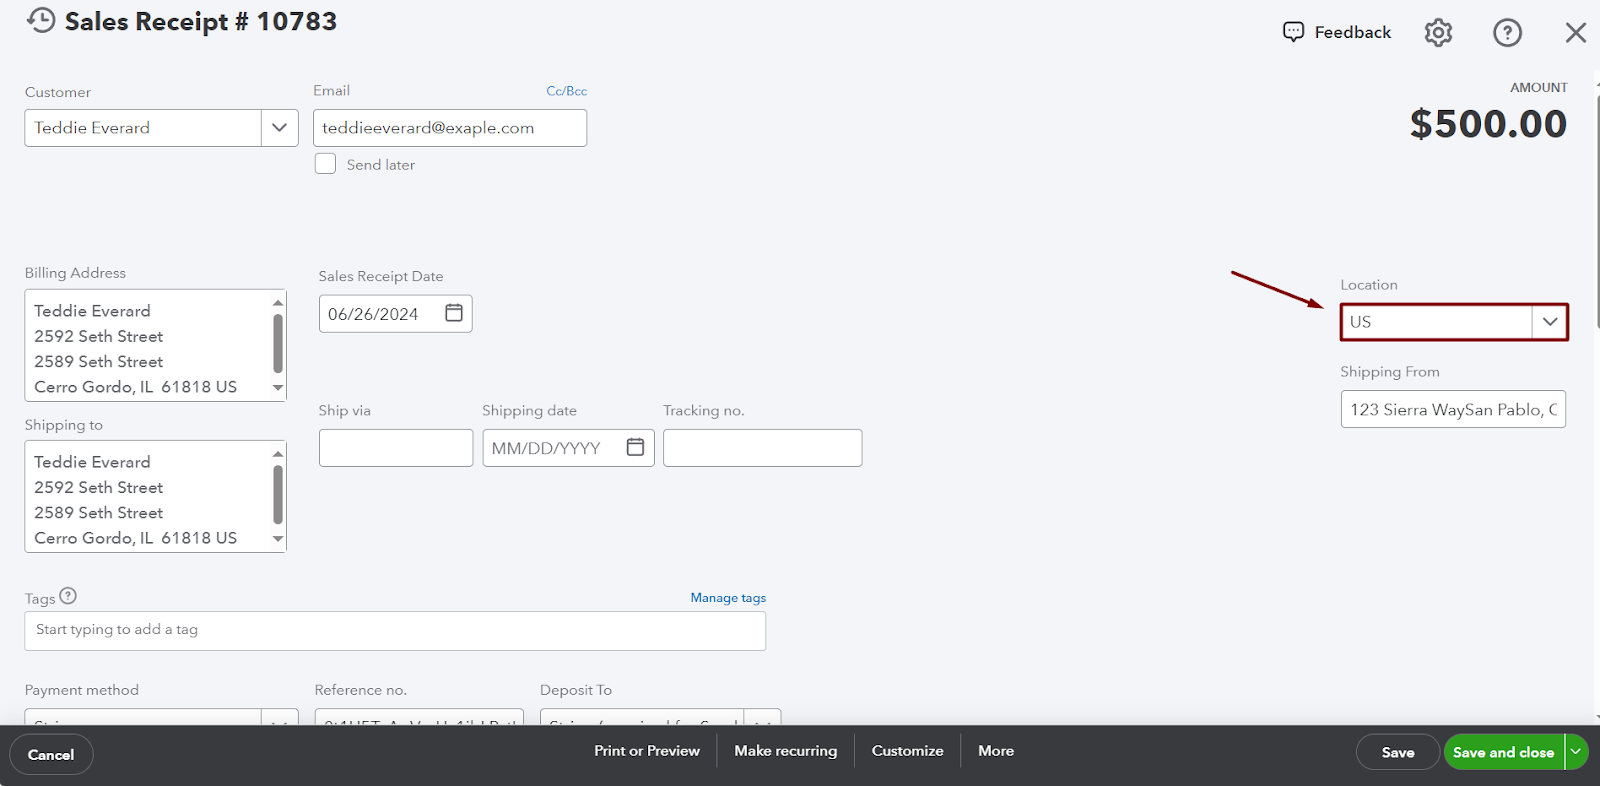
9. Check the results on the QuickBooks side to see that the class is applied automatically. Here you go:

Troubleshooting issues with Smart Rules
Cases it may cover: When you have smart rules that involve nullable fields, i.e., fields that might sometimes be empty. Examples include:
Sales transactions: Billing address, shipping address, description, etc.
Fee transactions: Payee (vendor), payment method, etc.
Potential issue: Your smart rule might incorrectly update transactions that should not be updated due to improper handling of nullable fields, or it might not execute at all.
Solution: Create a separate condition box with “Set” at the very beginning of your smart rule.
Example scenario: You want to update a location in your Stripe transactions based on the shipping address. For instance, if the shipping address has “US,” Synder should record such transactions to the US location.
So the initial rule condition will look like this:
Shipping address → Country → Contains → US OR United States
And the action looks like this.
The issue lies with handling nullable fields. First, You need to inform Synder that this field is set, so the app can check this field during the sync and take the necessary action (in this case, updating the location).
This is how you will need to change the rule:
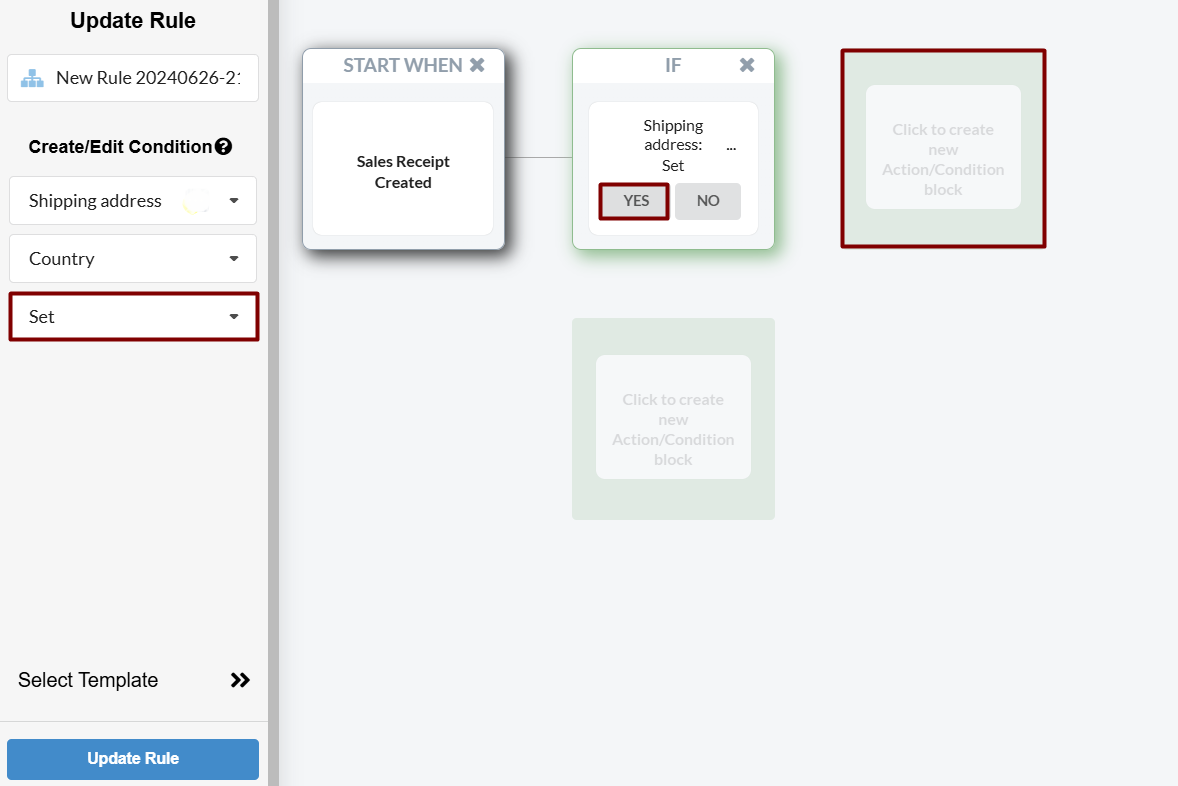
1. Select Set instead of Contains, click on Yes and hit the nearest box to add another condition.
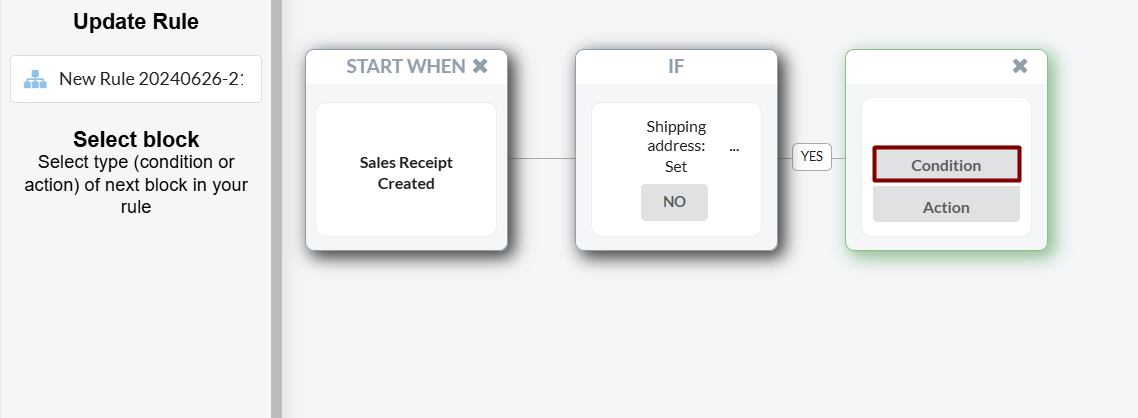
2. Select Condition.
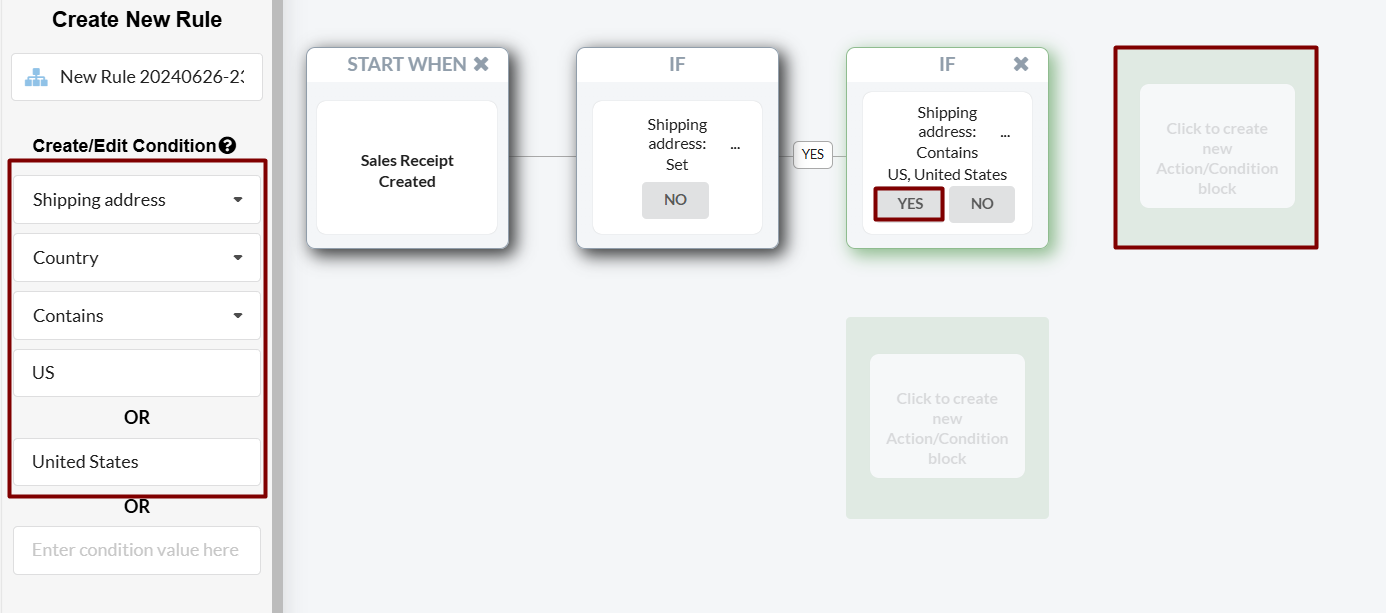
3. Specify the same conditions you had before. In our example, it is Shipping address → Country → Contains → US OR United States. Then, click Yes and hit the nearest box.
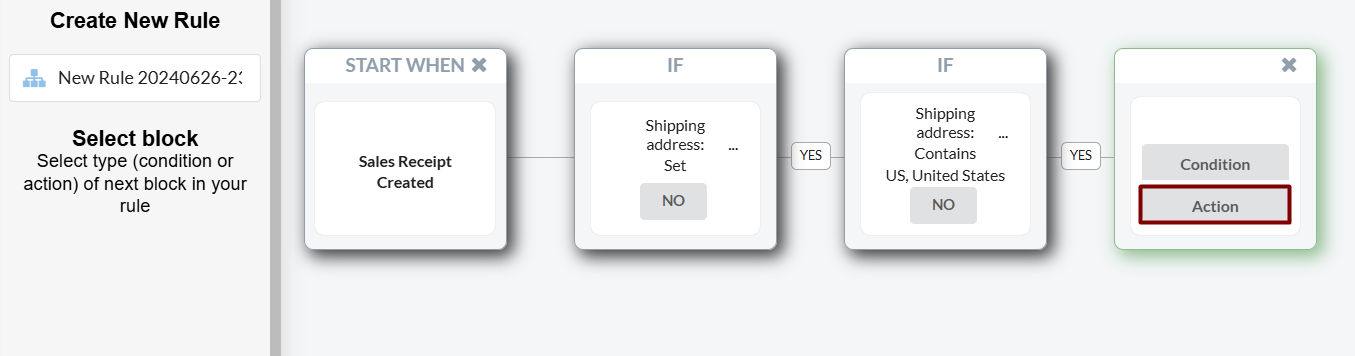
4. Click on Action.
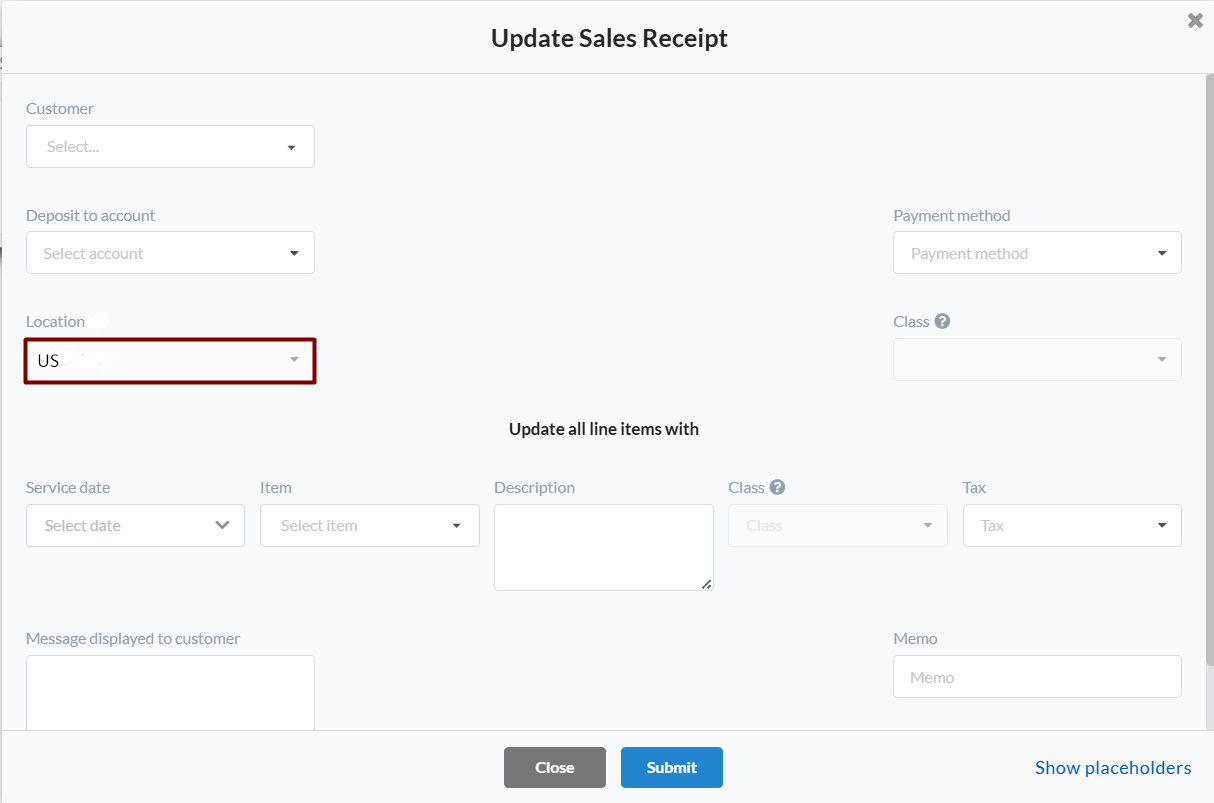
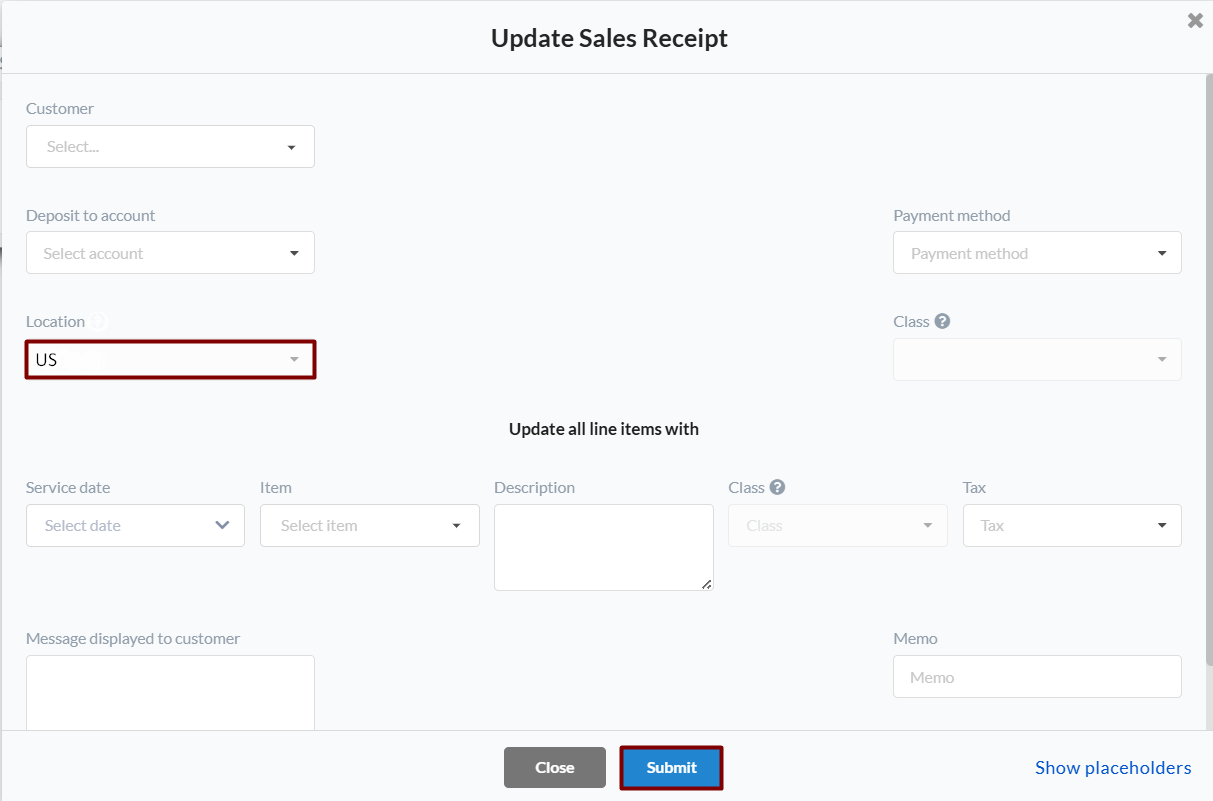
5. Choose QuickBooks action → Sales Receipt → Update current → Set QuickBooks entity data.
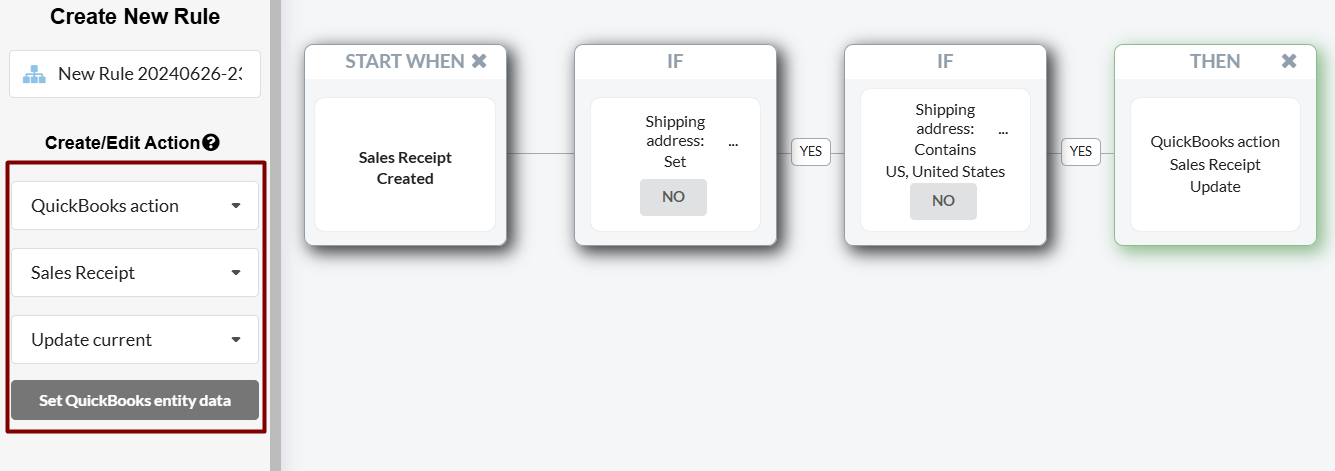
6. Choose the needed action. E.g., Location in this case and click on Submit.
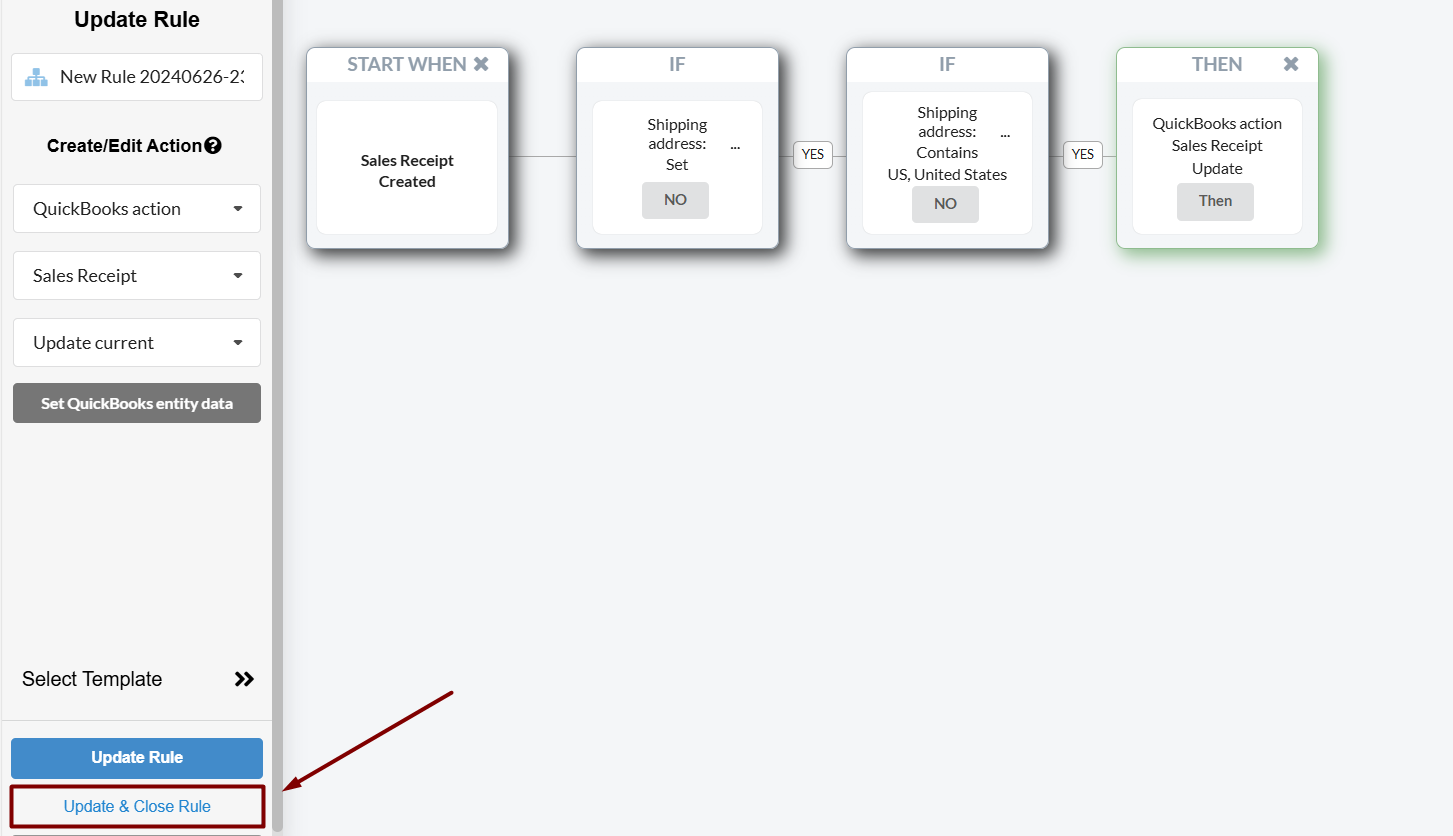
7. Click on Update & Close Rule.
8. Rollback and re-sync one of the transactions in the Platform transactions tab to check the result.
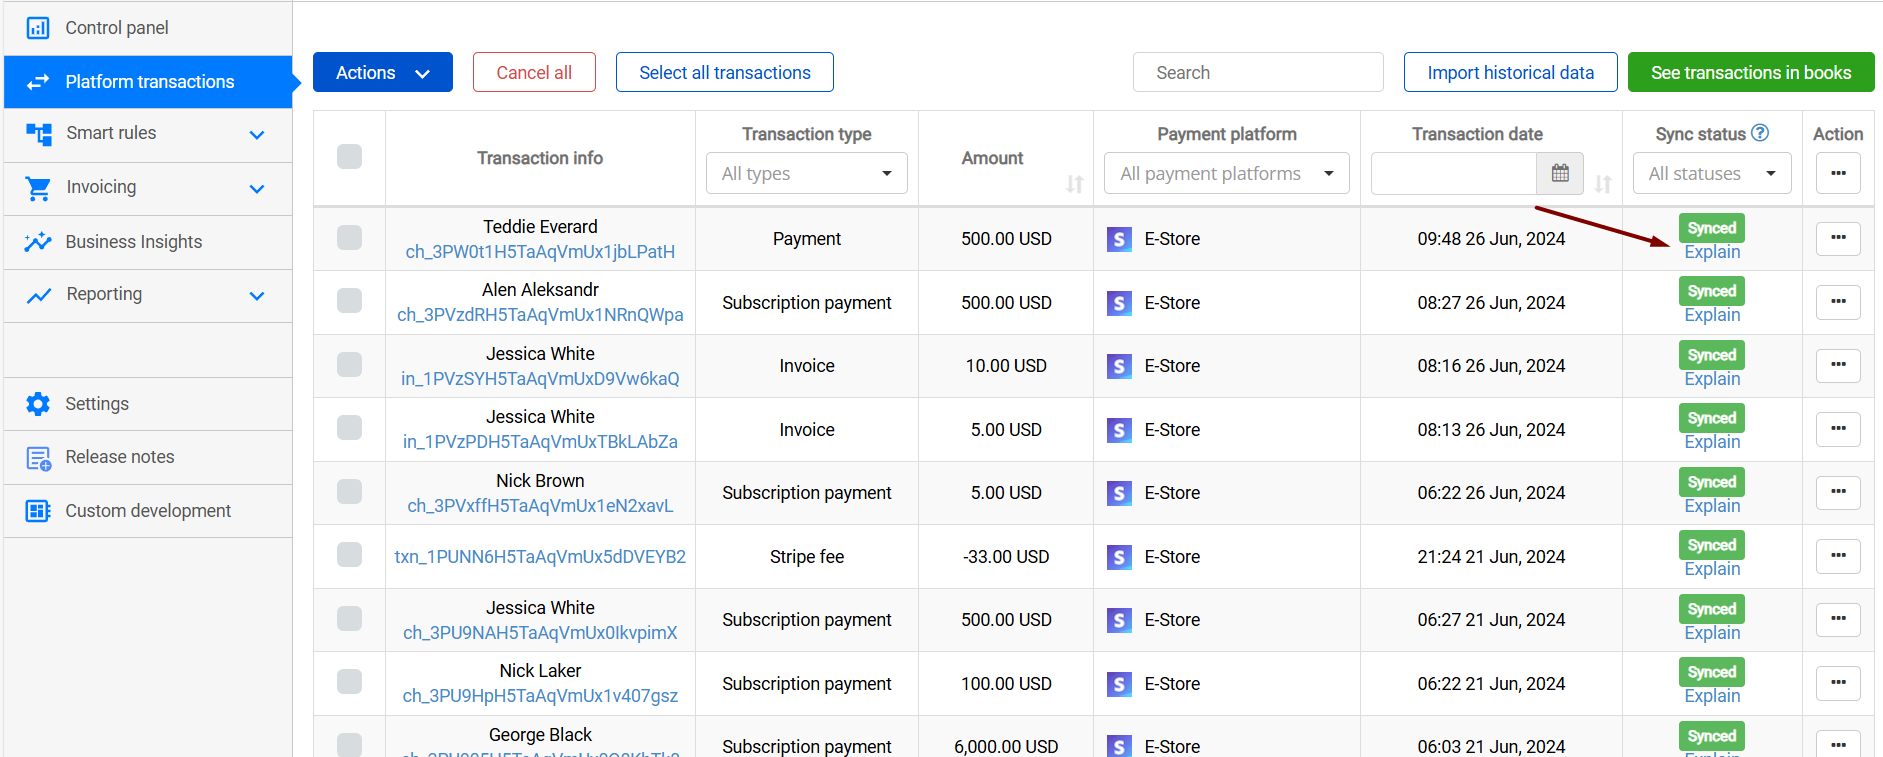

9. Check the result in your books by clicking on Show in qb and review the smart rule execution.
10. Here’s the result in your accounting company.
Smart Rules Add-on: Pricing
Smart Rules are available as a paid add-on on the Basic, Essential, and Desktop Sync plans, and are included with Pro and Pro Max plans. On the Essential plan, you can choose from the following tiers:
| Tier | Monthly price |
|---|---|
| Up to 3 rules | $29.99/mo |
| Up to 5 rules | $39.99/mo |
| Up to 10 rules | $59.99/mo |
| Up to 30 rules | $119.99/mo |
| Up to 100 rules | $239.99/mo |
To add or change your Smart Rules tier, go to Settings → Billing in Synder.
That’s it! Now you know how smart rules work and how to ensure they function correctly.
Reach out to the Synder Team via online support chat, phone, or email with any questions you have – we’re always happy to help you!