
According to experienced business specialists, the key to gain new customers is to cover more channels of communication with potential clients. Sales platforms such as Stripe, PayPal, Shopify, and eBay provide your customers with an easy and convenient way to complete purchases online so that business owners can enjoy the benefits of an incoming stream of customers. However, many business owners struggle to handle the accounting part that might seem tricky at first glimpse.
This is where Synder comes into play, being a smart accounting software Synder mirrors the actual money flow happening in your Bluefin and records live transactions and historical data in your accounting system providing you with precise tax, customer, item, and other transaction details. With Synder, you will be able to track inventory and manage Accounts Receivable by closing open QuickBooks invoices with Bluefin payments automatically.
Follow easy steps in this helpful guide, and enjoy seamless synchronization with Synder.
Overview:
- Start the Bluefin integration from scratch
- Connect Bluefin to an already existing account
- Tips and tricks on the Bluefin integration
Start the Bluefin integration from scratch
- Create an account
If you’re getting started with Synder you’ll need to create a free Trial account and connect your accounting system first. Check out this guide if you would like to integrate your payment platform with QuickBooks Online or Xero, and this article to connect your QuickBooks Desktop company.
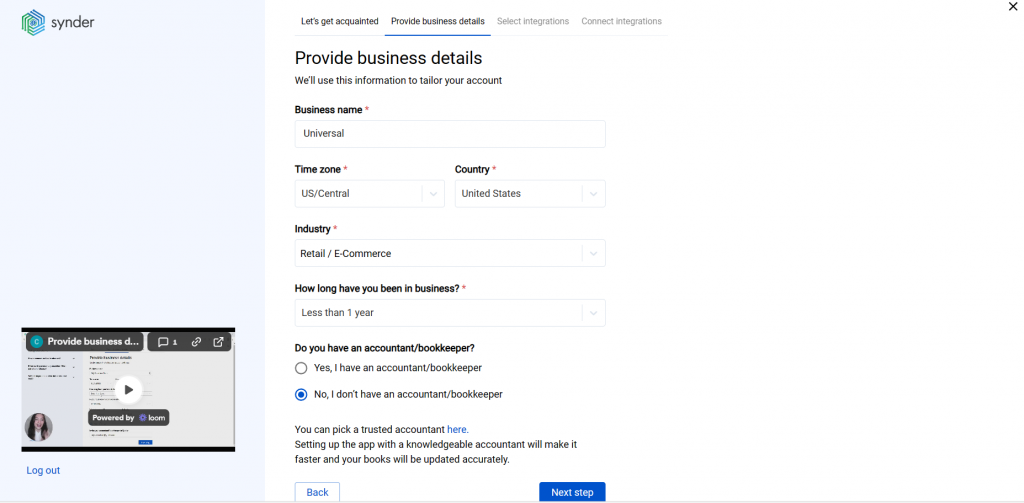
- Provide your business details
Going through the set-up process of an Organization for your QuickBooks/Xero company, fill in the information about your business and hit the Next step button.
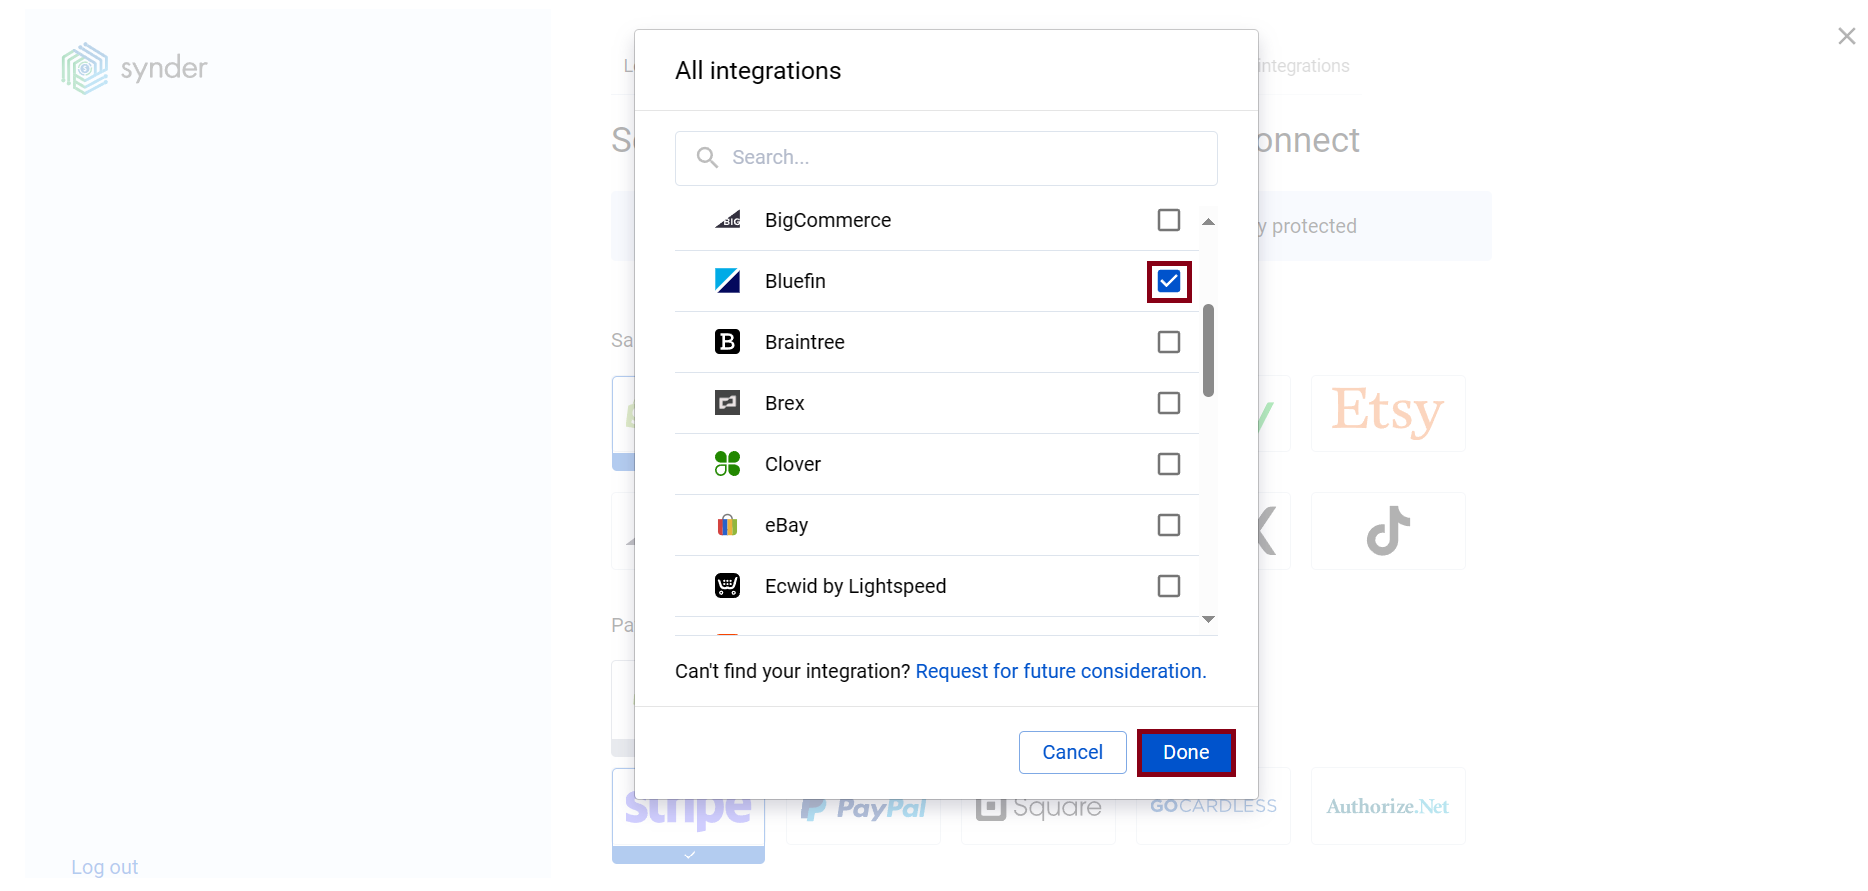
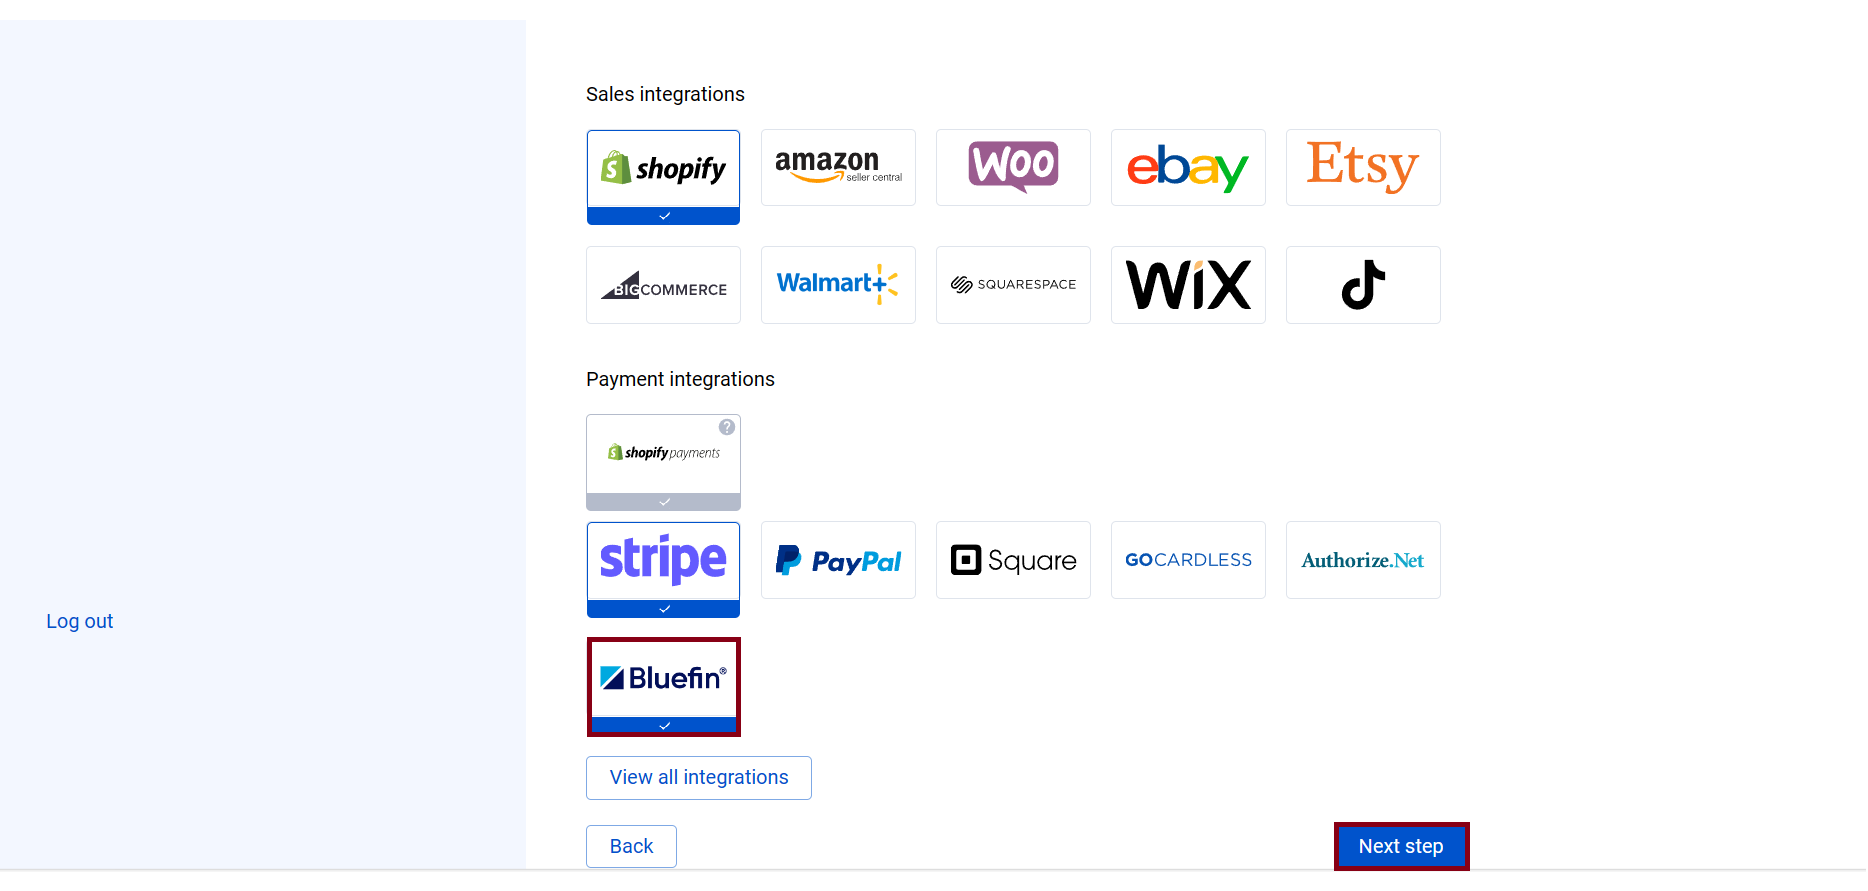
- Select the platforms you would like to integrate
Now you need to select the platforms you would like to connect to Synder. Click View all integrations to see the list of all available platforms.
Note: Mark all the services you are using to receive payments, you will be able to connect all of them right away or skip the connection of particular integrations and set them up any time later.
- Connect your accounting platform
Select the accounting company you’d like to connect to Synder and click on Next step.
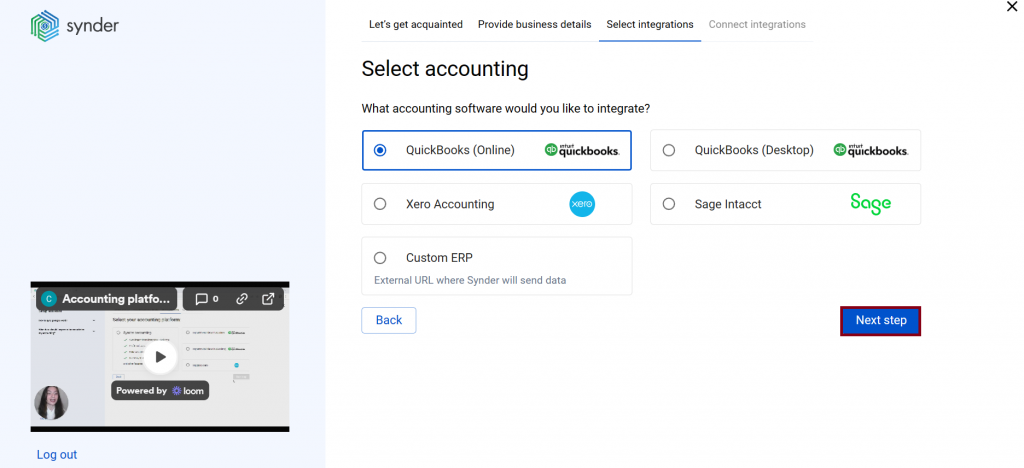
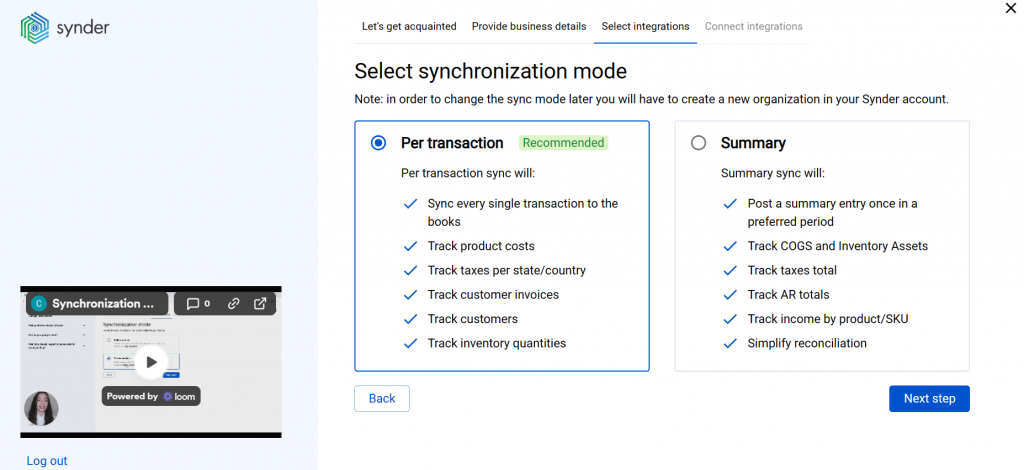
Note: If you are connecting QuickBooks Online or Xero, you will be prompted to select the sync mode. Proceed with the desired option.
Click on Connect to connect your accounting company.
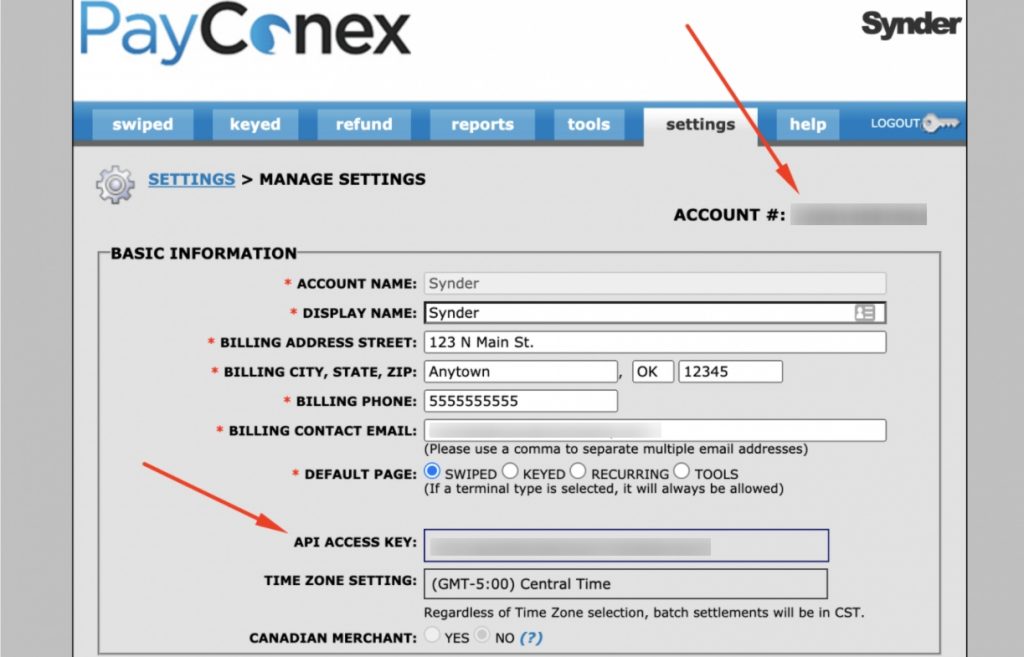
- Connect your Bluefin account
Almost there! To complete the setup you just need to connect your Bluefin and other sales platforms to Synder. Please follow the steps below to acquire the details needed from your Bluefin account (Account ID and API Access Key):
- Access Bluefin|PayConex settings by clicking Settings → Manage Settings.

- Copy your Account ID and API Access Key from there.
- Paste your Bluefin details to the corresponding fields in Synder and hit Connect to grant permission to Synder.
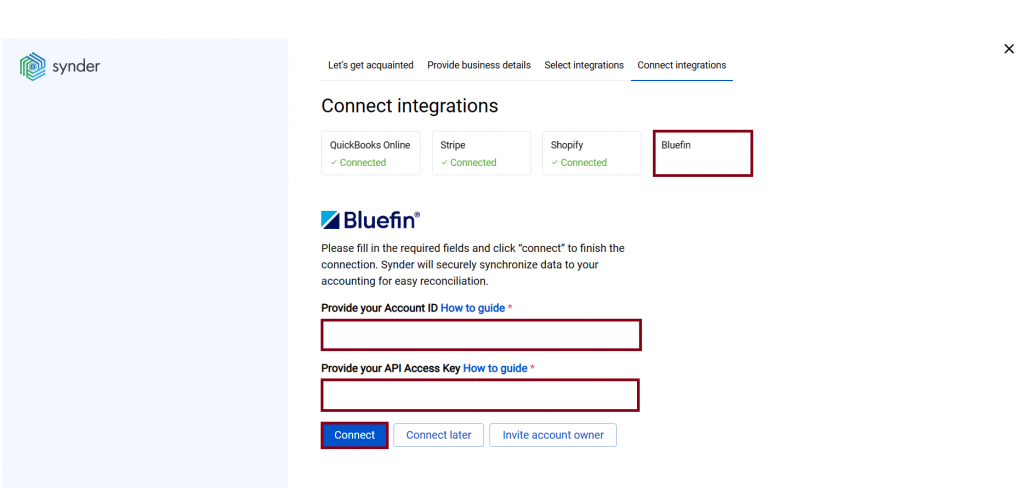
You can integrate sales platforms one by one straight away or skip the connection for other additional payment processors and set them up later in the Settings: click on the Person icon in the upper-right corner, then select Organization settings, and click on Add integration.
Note: You can find our detailed guides on how to connect your sales channels and payment providers to Synder in our Help center.
Connect Bluefin to an already existing account
If you already have a Synder account and would like to integrate one more Bluefin account, follow the steps below:
- Switch to the needed Organization in the top-left corner of the Synder page.
- Click on the Person icon in the upper-right corner and select Organization settings.
- In the Integrations section, click Add integration.
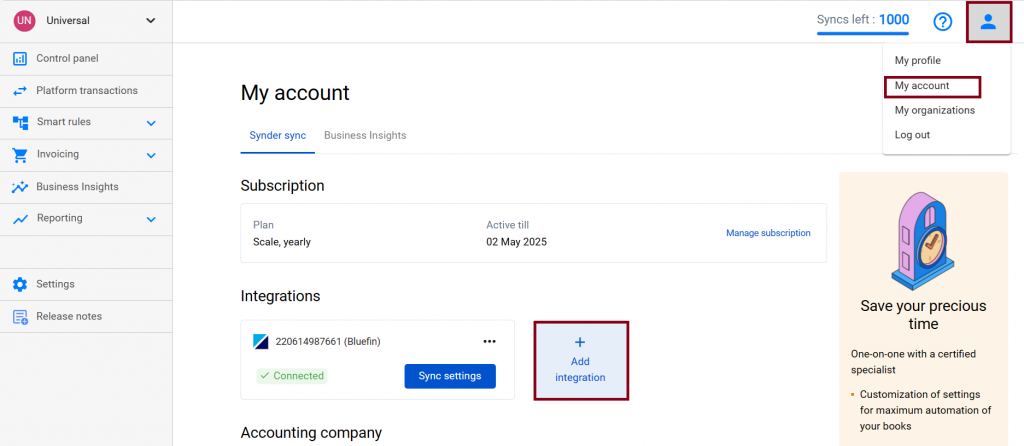
- Choose Bluefin in the dropdown menu and hit the Connect button (check Step 5. Connect your Bluefin account above to learn how to acquire the details needed from your Bluefin account to integrate it with Synder).
Tips and tricks on the Bluefin integration
Note 1. Synder mirrors real money flow in your accounting by recording sales in the Clearing account (Bluefin Bank account in your books) that Synder creates automatically during the accounting company connection.
Note 2. Synder protects your data with two flagship features: duplicate detector and rollback. You can give yourself peace of mind knowing that all the power is in your hands and your accounting is secured.
Note 3. Get familiar with the software in our 3 Must-Watch beginner guides and Features of Synder taking your experience to the next level to find out how Synder can help you automate your bookkeeping.
That’s it, you’ve successfully connected your Bluefin account to Synder, enjoy the ride!
Reach out to the Synder team via online support chat, phone, or email with any questions you have – we’re always happy to help you!