.png)

The checkout page is an interesting thing—it partitions the world of customers from that of the sellers. On one side, you have colorful buttons and simple fill-out fields. But behind that curtain lies the land of APIs, integrations, sandbox environments, and yes, the test cards too.
As a merchant looking to use Stripe for processing payments, you’re standing at the deep end of the pool. There’s plenty of documentation that Stripe will share with you—all key and important for setting up your checkout and payment processing correctly. But there’s a lot to take in.
That’s why, we prepared this article to start you off so that you’re ready for the real thing. And we’re very well-equipped to share this knowledge as we work directly with Stripe (and many other payment gateways, like Square, or PayPal, for example) integrating Stripe payments into our customers’ accounting software. So let’s start.
If you’re looking for financial management software that can import all your transactional Stripe data into your accounting system, check out Synder, Stripe Verified Partner!
TL;DR
- Stripe test cards are essential for safely simulating real transactions and ensuring your payment processing systems are properly integrated.
- Testing with Stripe includes scenarios for successful transactions, declined payments, fraud prevention, 3D Secure authentication, disputes, refunds, and more.
- Integrating Stripe with accounting software automates bookkeeping, invoice management, and reconciliation, saving time and reducing errors for businesses.
- After thorough testing, transitioning to live mode involves replacing test API keys with live keys to start processing real transactions smoothly.
Contents:
1. What is a Stripe test card?
2. What does it mean to test the cards?
3. What you need to start testing
- Testing successful payments
- Stripe test card numbers by brand
- Stripe test card numbers by country
- Testing declined payments
- Declined payments due to buyer behavior
- Declined payments: Special scenarios
- Testing Stripe Radar system: Fraud prevention
- Testing 3D Secure
- Testing disputes and refunds
- Testing rare scenarios
What is a Stripe test card?
A Stripe test card is a simulated credit or debit card number provided by Stripe, designed specifically for testing. This means it isn’t an actual, physical card but just a digital number.
Stripe has a whole list of these numbers, publicly available to anyone who wants to use them (we’ll share them in the later sections).
All businesses and developers use the exact same numbers for the same testing purposes. But there’s more to them.
There’s no real money involved
Transactions made with Stripe test cards don’t involve real funds and they aren’t connected to any real bank accounts. They only mimic the behavior of real transactions but won’t result in any monetary transfer.
Different credit and debit cards test specific behaviors
Stripe test cards are designed to produce specific outcomes. You’d think they simply test whether the payment is successful. That is true but not the whole story.
As you test, you want to see that payments behave as they should when a transaction is successful but also when it fails. And it can fail for numerous reasons.
It might sound redundant to test how things don’t work but this step is vital. Let’s think about it, if a buyer is using a fraudulent card, for example, you want Stripe to block this payment, and what’s more, flag it in your system that it was declined due to suspected fraudulent activity.
That’s exactly why testing for when things work and when they don’t, is so important.
Test cards can only be used in Stripe’s sandbox environment
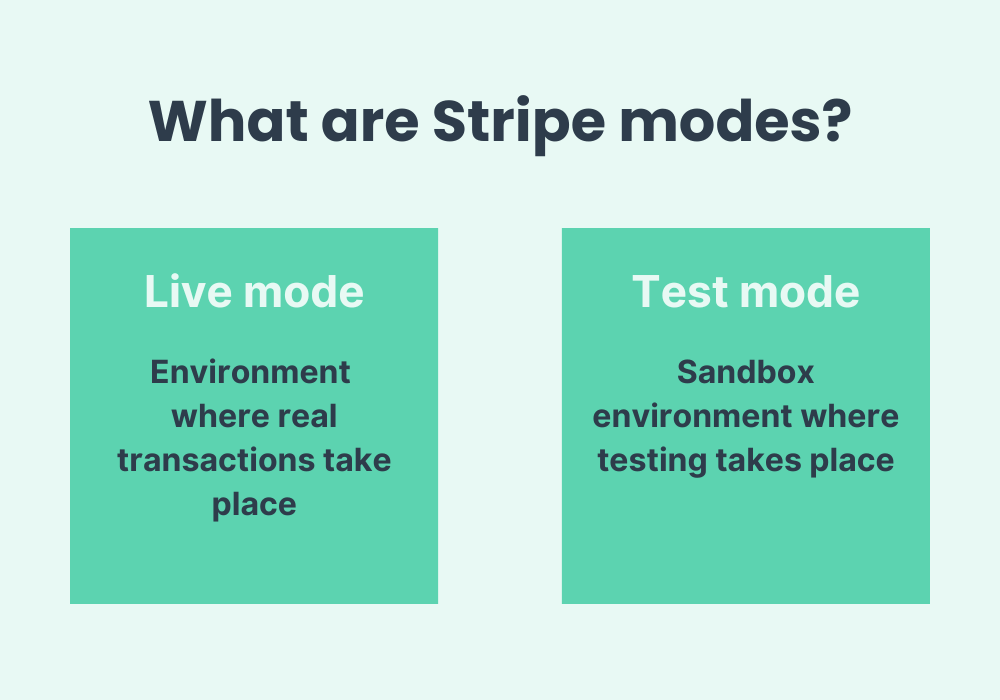
Stripe provides you with 2 modes:
- Live mode (where real transactions take place);
- Test mode (sandbox environment where testing takes place).
You can use test cards only in Stripe’s test mode. By the same token, Stripe prohibits the use of any real card in its test mode.
However, in this sandbox environment, you can safely use test cards, as it’s completely separate from the live mode. It has an ecosystem of its own. And every action undertaken in the test mode is logged in detail so that you can track, analyze, and troubleshoot these tests.
What does it mean to test the cards?
You’re testing credit and debit card payments to see how they are processed by Stripe.
To test these payments, you have a few options to do so.
Option 1. Checkout + Stripe
To test Stripe integration, you input the test credit and debit card details into your own sandbox checkout page.* Then you inspect the checkout side of the transaction, and after that, you peek behind the curtain to see the Stripe side. Here, card testing lets you examine both sides back and forth.
This is the option we’ll be showing you in this article.
*You can also pay for a test invoice.
Option 2. Stripe Dashboard
Test your integration straight from Stripe Dashboard is also a popular option. In the Dashboard, you can input all the test cards and see the results straight in there without any major complexities.
Option 3. Stripe API requests
API requests are the most advanced and technical solution for Stripe card testing. API stands for Application Programming Interface which is essentially a specific set of rules, tools, data formats, and protocols to make communication between distinct systems possible (like Stripe and your online checkout).
API requests or calls let test different scenarios to see how well your website has integrated with Stripe’s payment system.
N.B. You’ll need test API keys (publishable and secret), which you can think of as kinds of passwords for options 1 and 3.
Stripe API keys are a topic of its own, so if you want to dive deeper into this, you can read our guide.
What you need to start testing Stripe test cards
Depending on which option you choose, you can either head straight to Stripe and test directly from there or go to your website (for example, Shopify, WooCommerce, or any other platform).
To begin testing, you need to access your Stripe account and set it to the test mode, as well as go to your website (if you’re using it for testing), find Stripe in your settings, and switch it to testing as well. This way both, your Stripe Dashboard and your Stripe payment in your chosen website are set to testing mode or sandbox environment.
During this process, you may need test API keys which you can find in your Stripe Dashboard under the Developers section. Once there, go to click on API keys. Copy the Publishable key and Secret key from the Test data. If you want to test everything straight from your Stripe Dashboard, you don’t need the API keys.
You’re ready to start testing.
Make a list of possible scenarios
Stripe on its website gives you multiple choices of various payment situations (we’ll go through many of them here) but you might not need each and every single one of them. That’s why it’s good to review different types of payment scenarios and pick the ones that apply to your checkout experience.
Make a mock buy of your product
To see how payments work on your website, you’ll be making fake purchases—fake as everything is set in the test mode. But other than that, you’ll be following the exact same steps as your customers would.
To buy the product, you need to open a new browser window or incognito mode.
Choose the right Stripe test card numbers
Stripe test cards are arranged based on different criteria, like country, card type, issuer, scenario, etc.
These card numbers are linked to particular situations you want to test so always match your testing scenario with the right set of test cards—that’s the cardinal rule of testing (apart from being in the test mode in the first place)!
Using Stripe test cards: Common testing scenarios
Once you’ve got everything ready, we can start testing different scenarios.
For a full list of all possible scenarios offered by Stripe, you can visit their documentation site.
Testing successful payments
To test it, you need to use general-purpose Stripe test cards designed to produce successful transactions. You can test them by brands like Visa, Mastercard, American Express*, etc., and countries (choose whatever categories apply to your shop). For anything that isn’t listed, like the cardholder name, for example, you can just make it up or use any generic data.
*Use any 4-digit CVC for American Express cards, and any 3-digit CVC for all other cards.
Step 1. First, check it from the perspective of your customer. See whether sales details are generated correctly and that all post-transaction actions (like email notifications) look as they correct.
Step 2. Now, head to your Stripe account and see what this payment looks like there. Are the order details such as amount, customer data, etc., all as you entered them?
Step 3. Congratulations! You’ve tested your first credit and debit card Stripe transaction. You’ll be repeating these steps for different scenarios and checking whether all looks and works as it should.
Stripe test card numbers by brand
| BRAND | NUMBER | CVC | DATE |
|---|---|---|---|
| Visa | 4242 4242 4242 4242 | Any 3 digits | Any future date |
| Visa (debit) | 4000 0566 5566 5556 | Any 3 digits | Any future date |
| Mastercard | 5555 5555 5555 4444 | Any 3 digits | Any future date |
| Mastercard (2-series) | 2223 0031 2200 3222 | Any 3 digits | Any future date |
| Mastercard (debit) | 5200 8282 8282 8210 | Any 3 digits | Any future date |
| Mastercard (prepaid) | 5105 1051 0510 5100 | Any 3 digits | Any future date |
| American Express | 3782 822463 10005 | Any 4 digits | Any future date |
| American Express | 3714 496353 98431 | Any 4 digits | Any future date |
| Discover | 6011 1111 1111 1117 | Any 3 digits | Any future date |
| Discover | 6011 0009 9013 9424 | Any 3 digits | Any future date |
| Discover (debit) | 6011 9811 1111 1113 | Any 3 digits | Any future date |
| Diners Club | 3056 9300 0902 0004 | Any 3 digits | Any future date |
| Diners Club (14-digit card) | 3622 720627 1667 | Any 3 digits | Any future date |
| BCcard and DinaCard | 6555 9000 0060 4105 | Any 3 digits | Any future date |
| JCB | 3566 0020 2036 0505 | Any 3 digits | Any future date |
| UnionPay | 6200 0000 0000 0005 | Any 3 digits | Any future date |
| UnionPay (debit) | 6200 0000 0000 0047 | Any 3 digits | Any future date |
| UnionPay (19-digit card) | 6205 5000 0000 0000 004 | Any 3 digits | Any future date |
Stripe test card numbers by country
Americas
| COUNTRY | NUMBER | BRAND |
|---|---|---|
| United States | 4242 4242 4242 4242 | Visa |
| Argentina | 4000 0003 2000 0021 | Visa |
| Brazil | 4000 0007 6000 0002 | Visa |
| Canada | 4000 0012 4000 0000 | Visa |
| Chile | 4000 0015 2000 0001 | Visa |
| Colombia | 4000 0017 0000 0003 | Visa |
| Costa Rica | 4000 0018 8000 0005 | Visa |
| Ecuador | 4000 0021 8000 0000 | Visa |
| Mexico | 4000 0048 4000 8001 | Visa |
| Mexico | 5062 2100 0000 0009 | Carnet |
| Panama | 4000 0059 1000 0000 | Visa |
| Paraguay | 4000 0060 0000 0066 | Visa |
| Peru | 4000 0060 4000 0068 | Visa |
| Uruguay | 4000 0085 8000 0003 | Visa |
Europe and Middle East
| COUNTRY | NUMBER | BRAND |
|---|---|---|
| United Arab Emirates | 4000 0078 4000 0001 | Visa |
| United Arab Emirates | 5200 0078 4000 0022 | Mastercard |
| Austria | 4000 0004 0000 0008 | Visa |
| Belgium | 4000 0005 6000 0004 | Visa |
| Bulgaria | 4000 0010 0000 0000 | Visa |
| Belarus | 4000 0011 2000 0005 | Visa |
| Croatia | 4000 0019 1000 0009 | Visa |
| Cyprus | 4000 0019 6000 0008 | Visa |
| Czech Republic | 4000 0020 3000 0002 | Visa |
| Denmark | 4000 0020 8000 0001 | Visa |
| Estonia | 4000 0023 3000 0009 | Visa |
| Finland | 4000 0024 6000 0001 | Visa |
| France | 4000 0025 0000 0003 | Visa |
| Germany | 4000 0027 6000 0016 | Visa |
| Gibraltar | 4000 0029 2000 0005 | Visa |
| Greece | 4000 0030 0000 0030 | Visa |
| Hungary | 4000 0034 8000 0005 | Visa |
| Ireland | 4000 0037 2000 0005 | Visa |
| Italy | 4000 0038 0000 0008 | Visa |
| Latvia | 4000 0042 8000 0005 | Visa |
| Liechtenstein | 4000 0043 8000 0004 | Visa |
| Lithuania | 4000 0044 0000 0000 | Visa |
| Luxembourg | 4000 0044 2000 0006 | Visa |
| Malta | 4000 0047 0000 0007 | Visa |
| Netherlands | 4000 0052 8000 0002 | Visa |
| Norway | 4000 0057 8000 0007 | Visa |
| Poland | 4000 0061 6000 0005 | Visa |
| Portugal | 4000 0062 0000 0007 | Visa |
| Romania | 4000 0064 2000 0001 | Visa |
| Saudi Arabia | 4000 0068 2000 0007 | Visa |
| Slovenia | 4000 0070 5000 0006 | Visa |
| Slovakia | 4000 0070 3000 0001 | Visa |
| Spain | 4000 0072 4000 0007 | Visa |
| Sweden | 4000 0075 2000 0008 | Visa |
| Switzerland | 4000 0075 6000 0009 | Visa |
| United Kingdom | 4000 0082 6000 0000 | Visa |
| United Kingdom | 4000 0582 6000 0005 | Visa (debit) |
| United Kingdom | 5555 5582 6555 4449 | Mastercard |
Asia and Pacific
| COUNTRY | NUMBER | BRAND |
|---|---|---|
| Australia | 4000 0003 6000 0006 | Visa |
| China | 4000 0015 6000 0002 | Visa |
| Hong Kong | 4000 0034 4000 0004 | Visa |
| India | 4000 0035 6000 0008 | Visa |
| Japan | 4000 0039 2000 0003 | Visa |
| Japan | 3530 1 1 1 3 3330 0000 | JCB |
| Malaysia | 4000 0045 8000 0002 | Visa |
| New Zealand | 4000 0055 4000 0008 | Visa |
| Singapore | 4000 0070 2000 0003 | Visa |
| Taiwan | 4000 0015 8000 0008 | Visa |
| Thailand | 4000 0076 4000 0003 | Visa (credit) |
| Thailand | 4000 0576 4000 0008 | Visa (debit) |
Testing declined payments
We’re moving on to declined payments now. To simulate different payment errors and test your system’s response, find specific test cards designed to mimic declined payments. These Stripe test cards produce errors with designated codes. If you use successful payment test cards, the transaction simply won’t decline in the test mode.
Make sure error messages show up correctly and users get a notification that explains what to do to fix the issues. Same on your Stripe side, check whether the payment was declined and the right error code shows up for you.
Declined payments due to buyer behavior
Sometimes, errors occur simply due to user input, like entering an incorrect CVC or card number. To check how such activity behaves, you don’t need a specific test card, simply put the blatantly wrong data. For example, for the expiry date, you can choose a date 1000 years from now, for CVC write only 2 numbers, etc.
You can really play with these to see what happens. Assess if the system gives feedback that’s clear and actionable, guiding the buyer to correct their mistake. This way, in a real situation, your customers can finish the transaction and you can make the sale.
Declined payments: Special scenarios
Beyond just knowing that a payment was declined, you should know why it happened. This could be due to many reasons, for example, insufficient funds, or the card being stolen, lost, or expired. So choose the right test cards that correspond to specific decline reasons, like insufficient funds or an expired card to test these situations.
As always, make sure that customers will get user-friendly error messages that guide them on what went wrong and how to rectify it. Then check how declined payments show up in your Stripe account.
Testing Stripe Radar system: Fraud prevention
Here’s something you should know. Stripe’s Radar system helps prevent fraud by blocking high-risk payments or those that don’t pass verification. To check how your Radar settings and integration handle these issues, use specific test cards that mimic certain risk elements.
Depending on your Radar configurations, these factors can lead to payment blocks. This means that the exact behavior of these payments can be different depending on the settings you chose.
All blocked payments using Radar will generate card errors indicating fraud.
Testing 3D Secure
Continuing the safety options, 3D Secure is an extra layer of security for online credit and debit card transactions. It stands for Three-Domain Secure and involves three parties:
- the bank;
- the technology that processes the transaction;
- the card network (like Visa or Mastercard).
3D Secure helps prevent fraud by requiring the cardholder to complete an additional authentication step, usually a password or a one-time code sent to their phone.
You should test this as well using test card numbers to simulate 3D Secure scenarios.
Testing disputes and refunds
Disputes and refunds are quite real situations that you’ll definitely be dealing with.
Here, you’ll only be able to see the behavior on your Stripe side, as they get triggered only after a customer completes the transaction.
How disputes work
Once you use the correct test card for a dispute, you can then test the outcomes (winning or losing the dispute) by providing appropriate evidence. In a real-life situation, you’ll be submitting actual evidence via your Stripe Dashboard. In the test mode, you can use your Dashboard or API request, whichever you prefer.
Make sure to test both outcomes, so you can verify the process for winning and losing a dispute.
How refunds work
For refunds, use refund-specific cards to create—as Stripe calls it—the asynchronous payment process (asynchronous success or asynchronous failure).
It doesn’t sound straightforward, but what it simply means is that refunds can change their status inside Stripe (from pending to successful or failed, for example). And refunds cards let you test this changing behavior in the test mode.
Testing rare scenarios
Make sure to also test for unusual situations. They represent rare scenarios that might not occur frequently but can disrupt the payment experience if not handled properly, such as when rapid successive transactions might hit rate limits or when a card setup might fail. Stripe has all the right test cards for them as always.
Your goal is to check that the system is resilient, can recognize these edge cases, and provide users with information or fallback options.
What to do next?
The entire process is there to help you confirm that all is working as it should. Once you can see that’s the case, you can start transitioning into the live mode. You’ll need to replace the test keys with the live ones. Make sure you have the right API keys here: live publishable API keys and live secret API keys.
You can then safely switch to the live mode and start accepting payments.
But what happens when you encounter problems? That’s more tricky if you aren’t a developer.
If you have a developer on your team, they’d know what to do. If you don’t, you can reach out to the Stripe support team and they may be able to guide you through the process of fixing the issue. However, if you find the whole thing overwhelming (which we totally understand can be), it’s best to outsource a developer’s help for this task.
Going live after testing
Getting your integration live is a big thing! But that’s just opening virtual doors to your store. Next comes linking your Stripe to your accounting software, otherwise, you’re looking at manually importing transactions which we don’t recommend at all.
The good news is that with Synder, the process is very easy and the syncing is fully automated. No API requests, test modes, or technical skills are needed.
How do Synder and Stripe work together?
Synder, as a Stripe Verified Partner, lets businesses connect Stripe to their accounting software and sync all transaction data straight into the books. It can sync your Stripe payments into:
Synder automates your bookkeeping bringing sales, discounts, taxes, fees, products and customer names, and other transaction data straight into the right accounts in your accounting software. It all happens automatically and in real time.
What’s more, as a Verified Partner, Synder will create an expense each time a card is used and sync it into your books. It’s a simple and important feature but only verified partners like us have API access that lets them do it.
If you’re using QuickBooks for your accounting needs, find out how to connect Stripe to QuickBooks Online.
Automated closing of open invoices
If you’re using invoices for your business, Synder will close open invoices as soon as a payment comes through Stripe. No more looking through payments and matching them with open invoices manually. Once you set this feature, all happens automatically. This makes management of such payments and later reconciliation so easy.
Straightforward reconciliation
Speaking of reconciliation, Synder pre-matches every transaction for you based on numerous pieces of information that it gets from Stripe (i.e. time stamps, amounts, etc.) This means that once reconciliation time comes, you have every sale neatly aligned with the corresponding bank statement payout amount. And all you need to do is just confirm these matches, and that’s it.
Special Stripe payments
For subscription-based businesses that are using revenue recognition, we have a fully automated Synder RevRec solution that allocates the proportions of the payments based on chosen schedules to match it to the recognized revenue. If you’re doing this manually, you know how complex and time-consuming this process is. Synder will recognize the correct revenue automatically, once set up.
Also, if you’re using Stripe Capital for funding your business and you’re making repayments, Synder can allocate every portion of that transaction into the right accounts in your books.
And there’s even more we can do with Stripe payments! We offer daily summaries, financial statements, and a host of customization features to help our clients manage their bookkeeping in a way that works best for them.
If you’re interested in finding out more about Synder, book a seat at our Weekly Public Demo or Themed Webinars.
Are you managing a platform or a marketplace? Find out how Stripe can split payments in Stripe Connect.
Bookkeeping beyond Stripe
Synder can sync transactions from more than 30 different platforms, including PayPal, Square, Shopify, Amazon, eBay, TikTok and many more.
So if you run a multi-channel business or you accept payments via different payment gateways, Synder can bring all that data straight into your accounting software, automatically.
To see Synder’s functionality, sign up now for a 15-day free trial.
Using Stripe test cards in business: Closing thoughts
Using Stripe as your payment gateway requires testing credit and debit card transactions. While this might seem complex, our guide breaks down the process, making it approachable for merchants who find integration testing daunting.
Don’t worry—this essential step can be safely and easily done in the Stripe testing environment. And even if you encounter issues during that time, none of your actions will affect any real transactions, so you can rest assured that all will be good. To solve those issues, you might need help though.
Once you have your integration up and running, make sure to establish a reliable process for automatically syncing data into your books. There’s so much software like Synder can offer—greatly simplifying your accounting, reducing errors, and saving you valuable time.
Share your experience
Have you used Stripe test cards to streamline your payment testing process? We’d love to hear about your experiences and any tips you have for making the most of this powerful tool.