.png)

Importing invoices into QuickBooks Online is straightforward once you know which method fits your situation. Whether you’ve got a CSV spreadsheet, a folder of PDFs, or an ecommerce platform generating hundreds of transactions a day, there’s a path that saves you from re-keying data by hand.
Manual invoice entry is still surprisingly common. A SAP Concur and IFOL report found that 60% of finance professionals were still manually keying invoices into accounting or ERP software, which is still a significant chunk of avoidable work. This guide covers every practical method for importing invoices into QuickBooks Online, when to use each, and how to go beyond one-off imports toward fully automated invoice management.
TL;DR
- For high-volume businesses, manual import doesn’t scale: Recurring imports from platforms like Stripe or Shopify are best handled through an accounting automation solution like Synder, which syncs invoices and transactions automatically.
- QuickBooks has a built-in import tool: You can upload up to 100 customer invoices at a time via CSV directly in QuickBooks Online settings.
- Vendor invoices (bills) follow a separate flow: QuickBooks treats bills and sales invoices differently; the import path for each is distinct, though both use the same CSV-based approach.
- PDF invoices require a workaround: QuickBooks Online doesn’t natively import invoice data from PDFs, so you’ll need OCR-based software or the QuickBooks mobile receipt capture feature.
What you need before importing invoices into QuickBooks Online
Getting the import right starts well before you click any buttons. QuickBooks Online requires invoice data in a specific format, and mismatches between your file and its expected fields are the most common reason imports fail or produce messy records.
Two things matter most upfront:
- Your file format and your customer list. QuickBooks Online’s native import tool accepts CSV and Excel files (.xlsx). If your invoices are in a different format, like IIF, XML, or PDF, you’ll need to convert them or use a different approach (covered below). On the customer side, QuickBooks matches incoming invoice data against existing customer records by name. If a name in your file doesn’t match one in QuickBooks, the import will either create a new customer automatically or throw an error, depending on your settings.
- It’s also worth enabling custom transaction numbers before you start. Go to Settings → Account and Settings → Sales → Sales form content and turn on Custom transaction numbers. This lets QuickBooks accept your original invoice numbers rather than generating new ones, which is critical when migrating from another system or keeping records aligned with an external platform.
Get a step-by-step guide on how to create and customize invoices in QuickBooks.
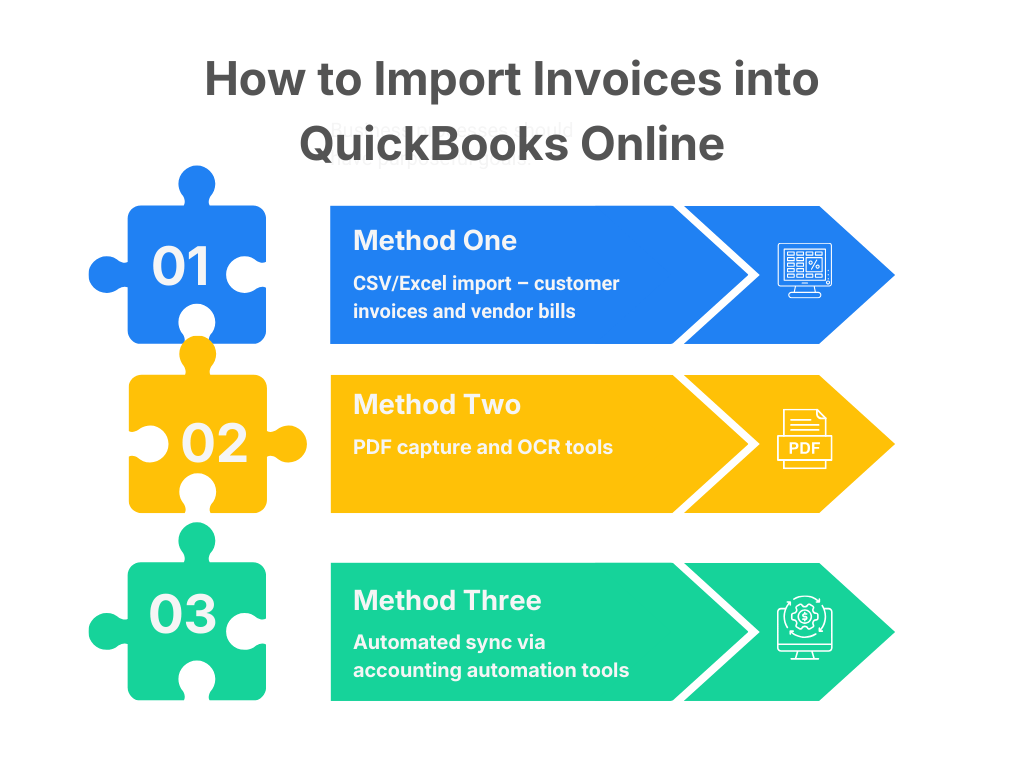
Method 1: CSV/Excel import – customer invoices and vendor bills
The native QuickBooks import tool is the quickest starting point for most businesses, bringing in a batch of invoices. It requires no additional software, handles single and multi-line entries, and covers both transaction types you’ll commonly need to import: customer invoices and vendor bills. The process is the same for both. The only differences are which option you select on the import screen and which fields your CSV needs to include.
The main constraints to know upfront: you can import a maximum of 100 invoices per upload with a 1,000-row limit per spreadsheet, and the tool doesn’t support discounts, credit memos, or negative amounts.
Importing customer invoices via CSV
- Log in to your QuickBooks Online account and click the gear icon in the upper-right corner.
- Under the Tools section, select Import data.
- On the import screen, select Invoices.
- Click Download a sample file to get QuickBooks’ CSV template. This shows the exact column headers expected: Invoice No., Customer, Invoice Date, Due Date, Terms, Item (product/service name), Item Description, Item Quantity, Item Rate, Item Amount, and Item Tax Code.
- Fill in your data using the sample template as a guide. Each line item on an invoice gets its own row; use the same Invoice No. across multiple rows to represent a multi-line invoice.
- Save your completed file as a CSV, then click Browse to upload it and click Next.
- On the mapping screen, match your column headers to QuickBooks fields. If you used the same headers as the sample file, most fields should map automatically.
- Review the data preview for errors, then click Start import.
QuickBooks will show you a summary of how many invoices were imported successfully and flag any rows with errors. If a row fails, the error message usually tells you exactly what’s wrong: missing customer name, unrecognized product, or invalid date format. Fix those in your CSV and re-import.
You can also import using your own column names rather than QuickBooks’ defaults. If your spreadsheet has “Client” instead of “Customer,” just match it to the Customer field during the mapping step. The flexibility is there; you just can’t skip the mapping step entirely.
Importing vendor invoices (bills) via CSV
Vendor invoices – the bills you receive from suppliers – are a different transaction type in QuickBooks. They live under Accounts Payable and are recorded as Bills, not Invoices, with different required fields. The import process is identical, though: Settings → Import data, then select Bills instead of Invoices.
The required fields for bills include Vendor, Bill Date, Due Date, Account (the expense account the cost maps to), Description, and Amount. QuickBooks won’t import a bill without a matching vendor name, so make sure your vendor list is up to date beforehand. The same 100-transaction, 1,000-row limits apply, so plan your batches accordingly.
Method 2: PDF capture and OCR tools
PDF invoices are trickier because QuickBooks Online doesn’t parse PDF files into structured invoice data natively. What it does offer is a receipt and document capture feature. You can drag a PDF into QuickBooks’ inbox or use the mobile app to photograph a document, and QuickBooks will attempt to extract data from it using OCR. This works reasonably well for simple vendor bills with standard layouts, and it creates a bill entry with the PDF attached as supporting documentation.
Note: For a few invoices a week, this is fine. For anything more than that, the manual review step becomes the bottleneck. Each uploaded PDF still requires you to confirm the extracted data, assign the correct accounts, and approve the entry, so the time savings are partial at best.
For businesses dealing with high volumes of incoming PDF invoices, dedicated OCR-based software is the more practical solution. These tools extract structured data from PDFs, let you review and correct it in a consolidated view, and push approved entries directly into QuickBooks. Look for tools that attach the original PDF to the posted transaction. That way, you maintain an audit trail without separate document storage.
Method 3: Automated sync via accounting automation tools
CSV and PDF imports work for historical data or migrations. But for ongoing operations across multiple platforms, manual uploads are slow and error-prone. The better approach is connecting QuickBooks directly to payment processors and sales platforms so data flows automatically.
Accounting automation tools remove the export-upload cycle. They sync transactions to QuickBooks automatically and handle mapping, customer matching, and categorization.
Synder is an accounting automation tool that syncs invoices, payments, fees, and refunds from platforms like Stripe, Shopify, PayPal, and Amazon directly into QuickBooks Online: per transaction or as summaries, depending on your preference. It handles field mapping, customer matching, and categorization automatically, keeping your books current without a manual step.
The impact on day-to-day workload can be significant. numberCrunch, an outsourced accounting firm using Synder to connect Stripe and QuickBooks Online, eliminated 96 hours of manual data entry annually. Their financial manager summed it up: “All of the invoices and payments automatically go to QuickBooks, which makes the whole reconciliation process much easier. I just need to go there once at the end of the month and check the balance — that’s it.“
For businesses with subscription billing or high transaction volumes, automation also removes the 100-invoice ceiling that limits the native import tool. Synder processes each transaction as it occurs, meaning there’s no ceiling on volume and no backlog to catch up on.
If you’re managing invoices from Stripe, Shopify, PayPal, or other platforms, see how Synder’s automated sync keeps your QuickBooks books current without manual uploads: start a free trial or book a demo to walk through your specific setup.
Comparing the 3 invoice import methods in QuickBooks Online
| Method | Best for | File format | Volume limit | Handles PDFs | Ongoing automation |
| Method 1 – CSV/Excel import | One-time or batch imports of invoices and bills | CSV, Excel | 100 records / 1,000 rows | No | No |
| Method 2 – PDF capture / OCR tools | PDF-based vendor bills, low to high volume | PDF, images | Low (native) / High (OCR tools) | Yes | Partial |
| Method 3 – Automated sync | Continuous import from payment platforms | Direct API connection | Unlimited | N/A | Yes |
Bringing it all together
Importing invoices into QuickBooks Online doesn’t follow a single standard approach. The best method depends on how many invoices you’re dealing with, where they’re coming from, and whether you need a one-time fix or an ongoing workflow. For occasional batches, QuickBooks’ native CSV import gets the job done with no extra tools. For PDF-heavy accounts payable, a receipt capture or OCR approach handles what CSV can’t. For businesses continuously receiving transactions from ecommerce or payment platforms, manual import is a ceiling you’ll hit fast – automated sync removes it entirely.
Regardless of which method you choose, the fundamentals stay the same: clean data in, accurate records out. Making sure your customer and vendor lists are current, your file format matches QuickBooks’ expectations, and your column mapping is correct before importing will save more time than any tool on its own.
FAQ
How do I manually import data into QuickBooks Online?
Go to Settings (gear icon) → Import data, then select the data type – Invoices, Bills, Customers, etc. Prepare a CSV or Excel file with the required fields, upload it, map your columns to QuickBooks fields, and click Start import. The 100-invoice-per-upload limit applies.
Can I import PDF invoices into QuickBooks Online?
QuickBooks Online doesn’t parse PDFs directly into invoice records. You can use the built-in receipt capture feature to upload PDFs, which uses OCR to extract data and creates a bill entry for review. For high-volume PDF imports, third-party OCR tools offer better throughput and accuracy.
How do I import a CSV file into QuickBooks?
Click the gear icon in QuickBooks Online, go to Tools → Import data, and choose your transaction type. Upload a CSV file with columns matching QuickBooks’ expected fields (download the sample template for reference), complete the mapping step, and run the import. QuickBooks accepts up to 100 records at a time.
Can you upload previous invoices to QuickBooks?
Yes. Using the native import tool or an automation platform with a historical data import feature, you can bring past invoices into QuickBooks. Make sure dates and customer names match your existing records to ensure transactions land in the correct accounting period.
What if my invoice file has errors during import?
QuickBooks shows a row-by-row error report after the import attempt. Common issues include unrecognized customer names, invalid date formats, missing required fields, or duplicate invoice numbers. Fix the flagged rows in your CSV and re-import – successful rows are already in your books regardless.