

Overview:
- What tracking categories are in Xero
- Before you start
- Step 1: create the tracking category in Xero
- Step 2: build the rule in Synder
- Tag every line or just one line
- Good to know
New to sync modes? See How Smart Rules Work in Synder.
Also, if you are coming from QuickBooks, tracking categories are the Xero equivalent of classes and locations.
▶ Watch: automate Xero categorization with Smart Rules
What tracking categories are in Xero
In short, tracking categories are Xero’s built-in way to segment your books. You name them to fit your business — Department, Product Line, Cost Centre, Region — and then tag transactions with them.
Tagged transactions let you run a segmented Profit and Loss report. You can compare departments or locations side by side, and your chart of accounts stays clean.
However, Xero sets two limits:
- Two active tracking categories per organization.
- Up to 100 options inside each category.
Because Synder works with both of them, the rule builder shows Tracking category 1 and Tracking category 2, in the same order they sit in Xero.
Before you start
Check these three things first:
- First, Smart Rules work with Xero in Per-Transaction mode. See How Smart Rules Work in Synder for pricing and availability.
- Second, the category has to exist in Xero before Synder can use it. Step 1 covers that.
- Third, Synder reads your Xero data only when you ask it to. Click Fetch data from Xero at the bottom of the left panel, or your dropdowns stay empty.
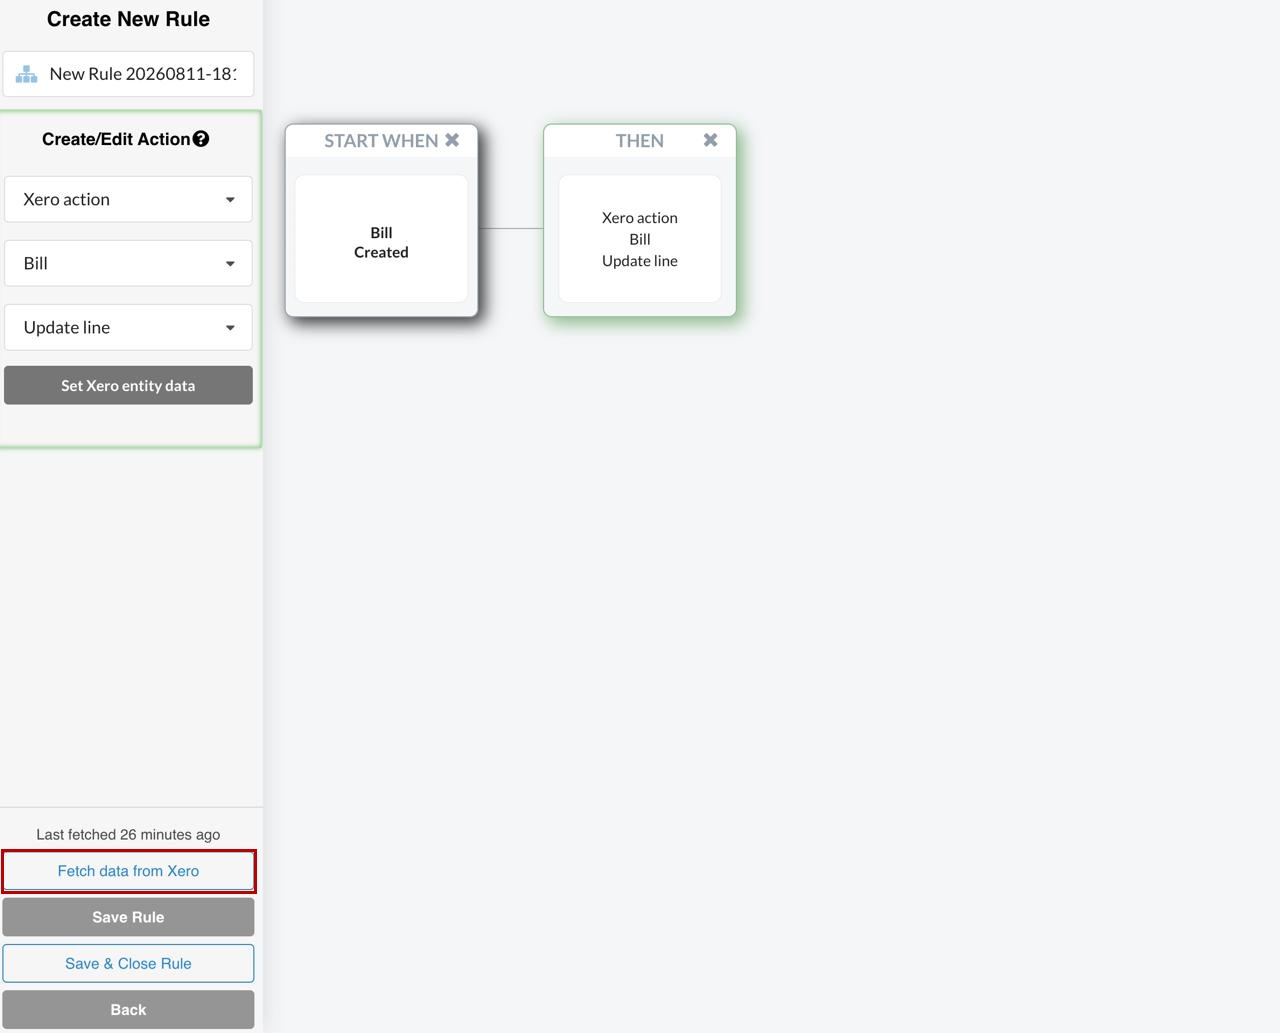
Above the button, the panel also shows a Last fetched timestamp. Added a new category option in Xero? Then click the button again to pull it in. For more detail, see Accessing Xero Entities in Smart Rules Dropdowns.
Step 1: create the tracking category in Xero
Do this on the Xero side first:
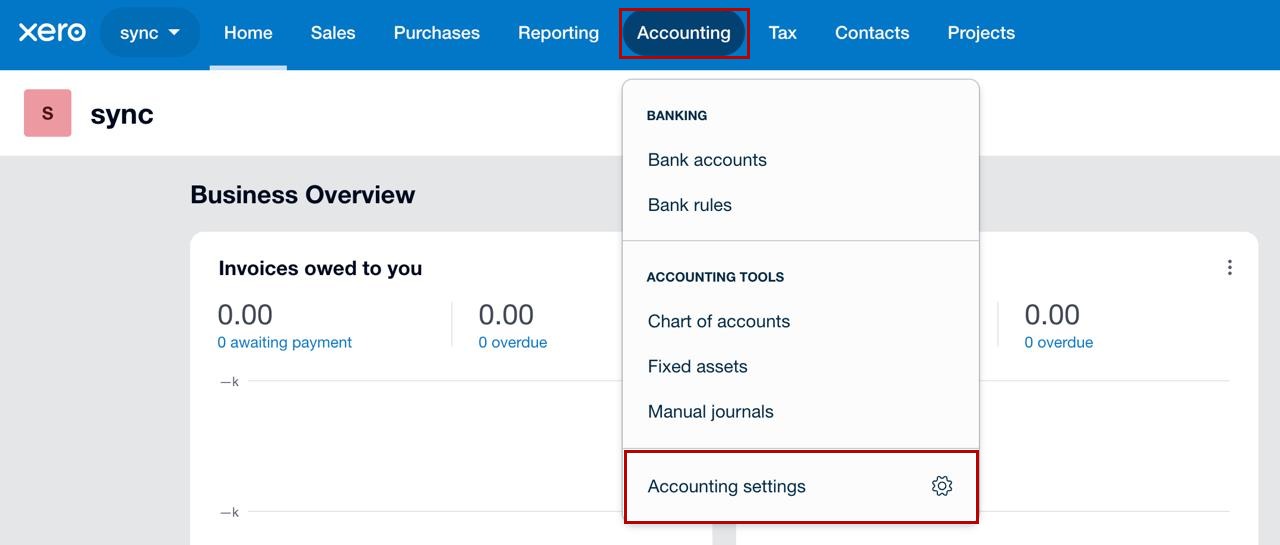
1. First, in Xero, open the Accounting menu and select Accounting settings.
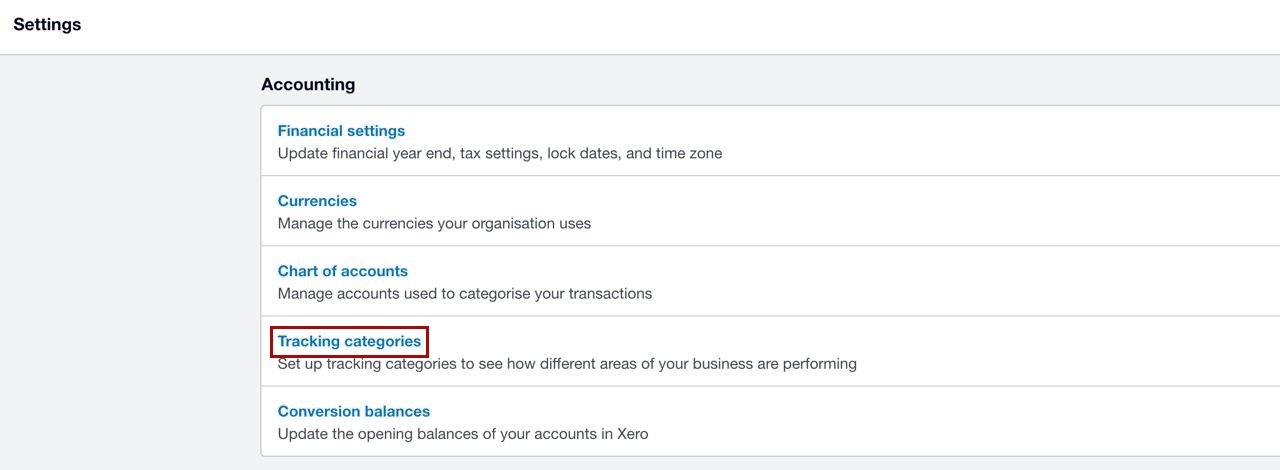
2. Then, under Accounting, click Tracking categories.
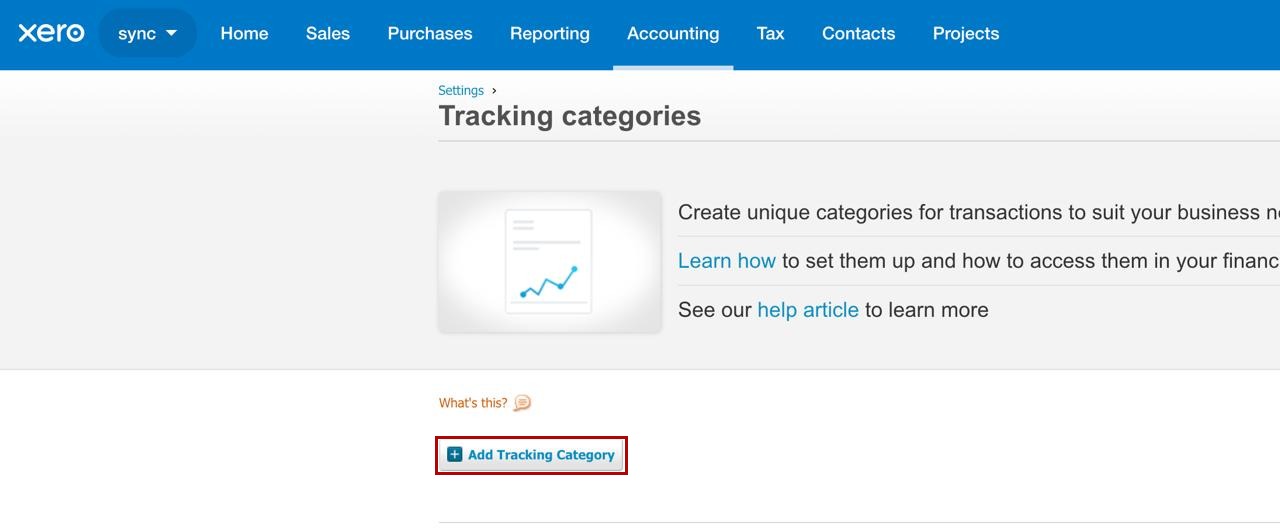
3. Next, click Add Tracking Category.
4. Finally, give the category a name that describes what you want to track. Under Category options, add one option for each value, using Add another item as needed. Then click Save. For example, the category below tracks three US states.
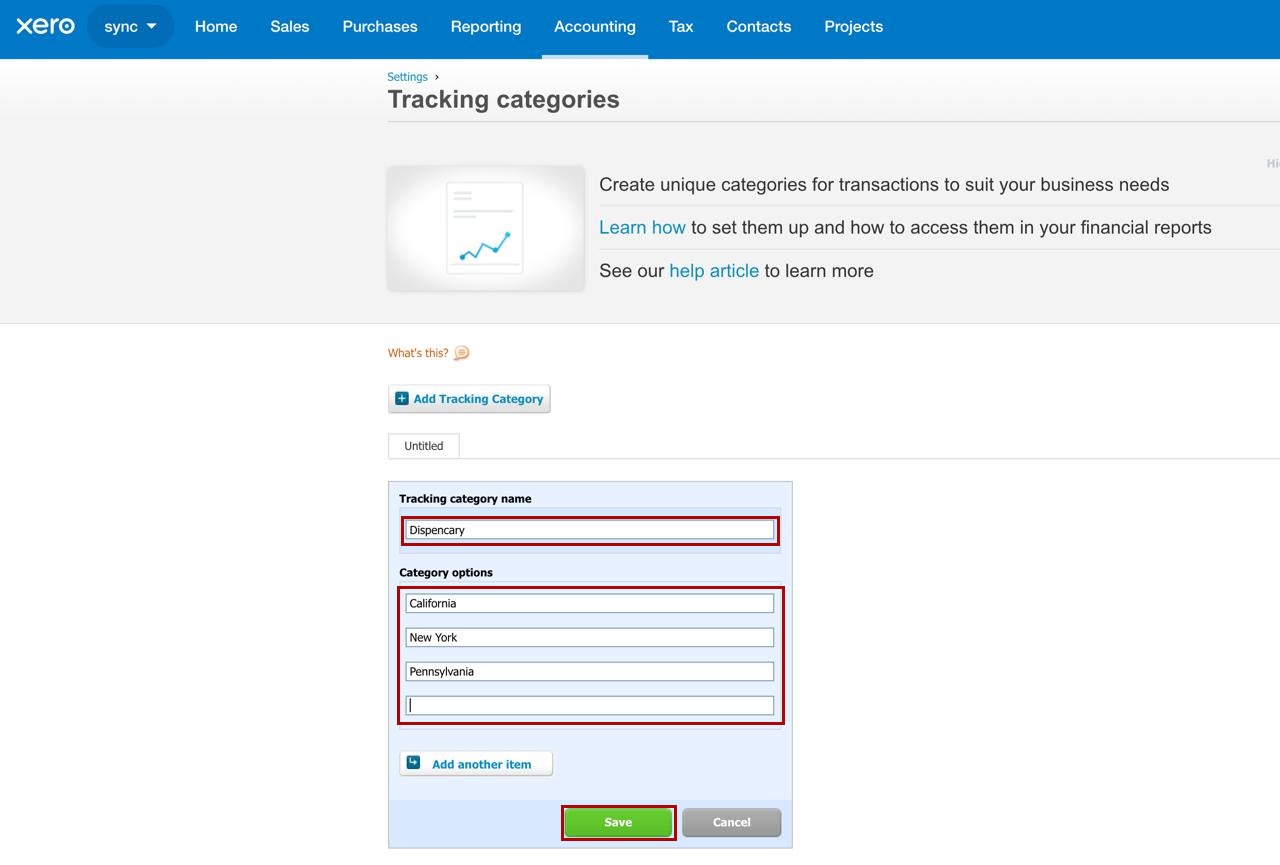
Xero’s own instructions live in Set up tracking categories and options on Xero Central.
After that, back in Synder, click Fetch data from Xero so the new category reaches your dropdowns.
Step 2: build the rule in Synder
In this example, every invoice of 150 or more gets tagged automatically. Your condition can be anything you like, such as a description, a customer name or a product. Either way, the action stays the same.
Open your account in Synder and go to Smart rules → Rules → Create a rule.
1. Set the trigger. Select Invoice and Created, then click Condition.
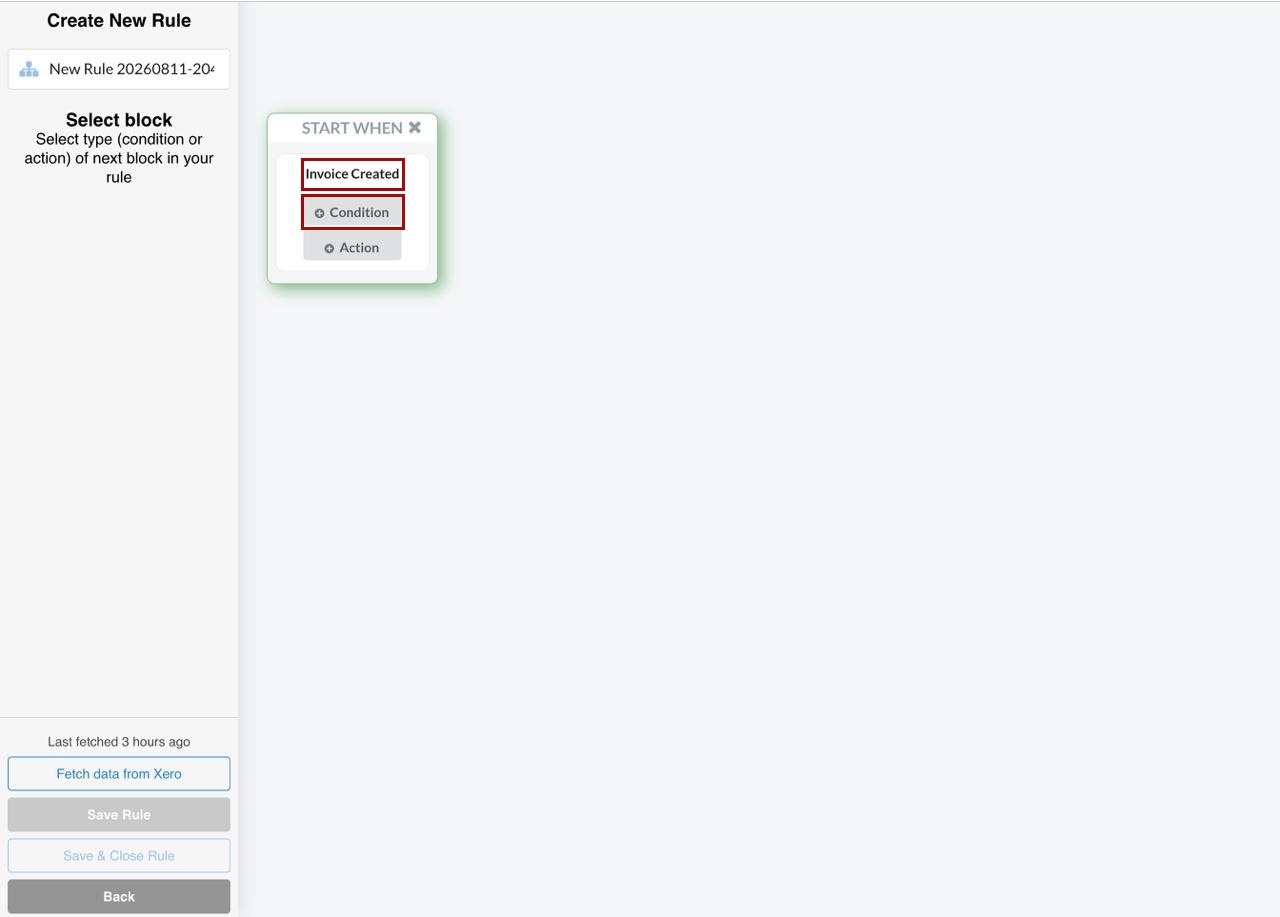
Note: Xero has no Sales Receipt. Where a QuickBooks guide uses one, use Invoice instead. Xero invoices also trigger on Created only, so you will not see a Sent or Updated option.
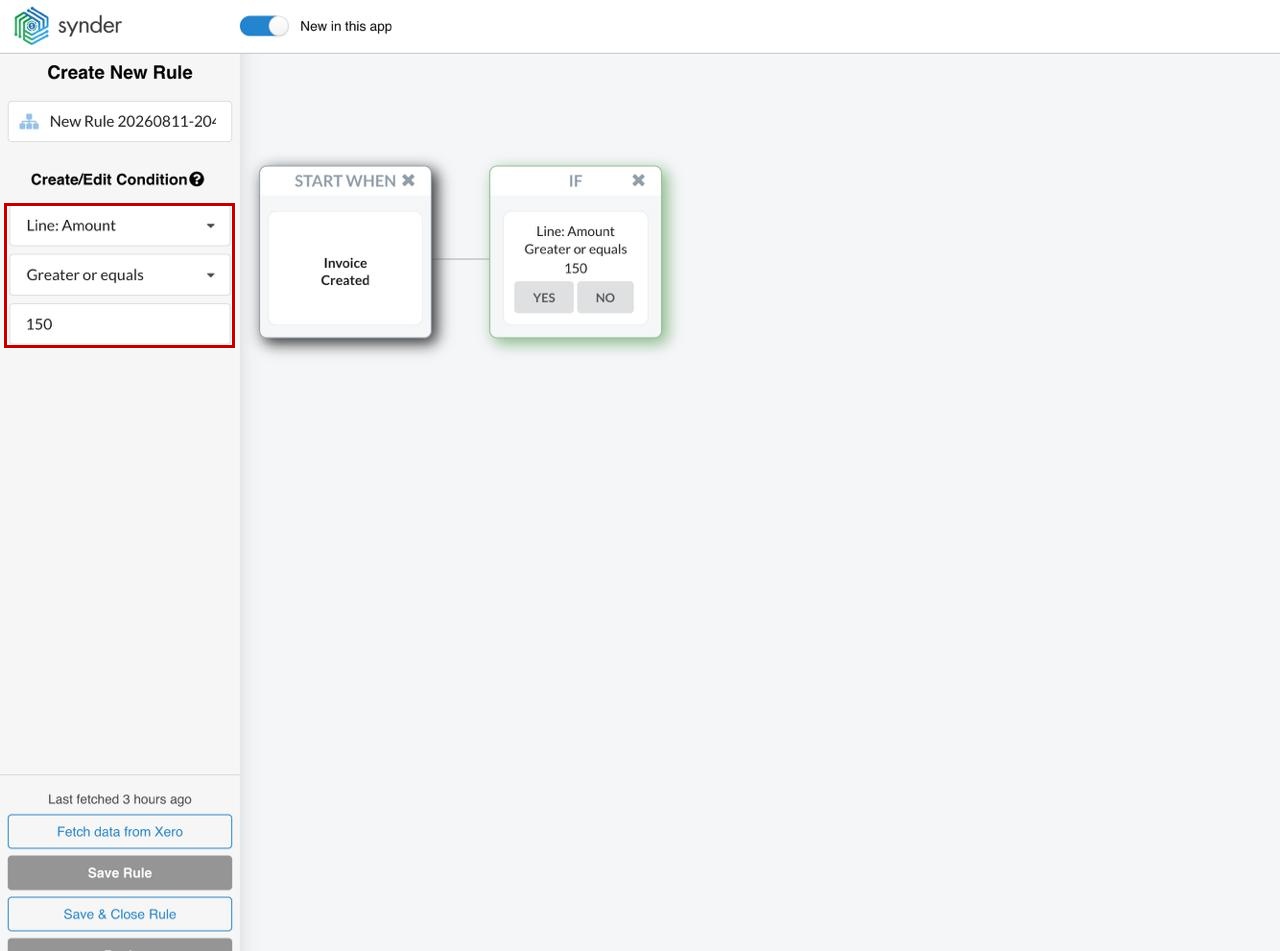
2. Define the condition. Here it is Line: Amount → Greater or equals → 150. Click YES so the rule continues when the condition is met. Use the OR field to add more values.
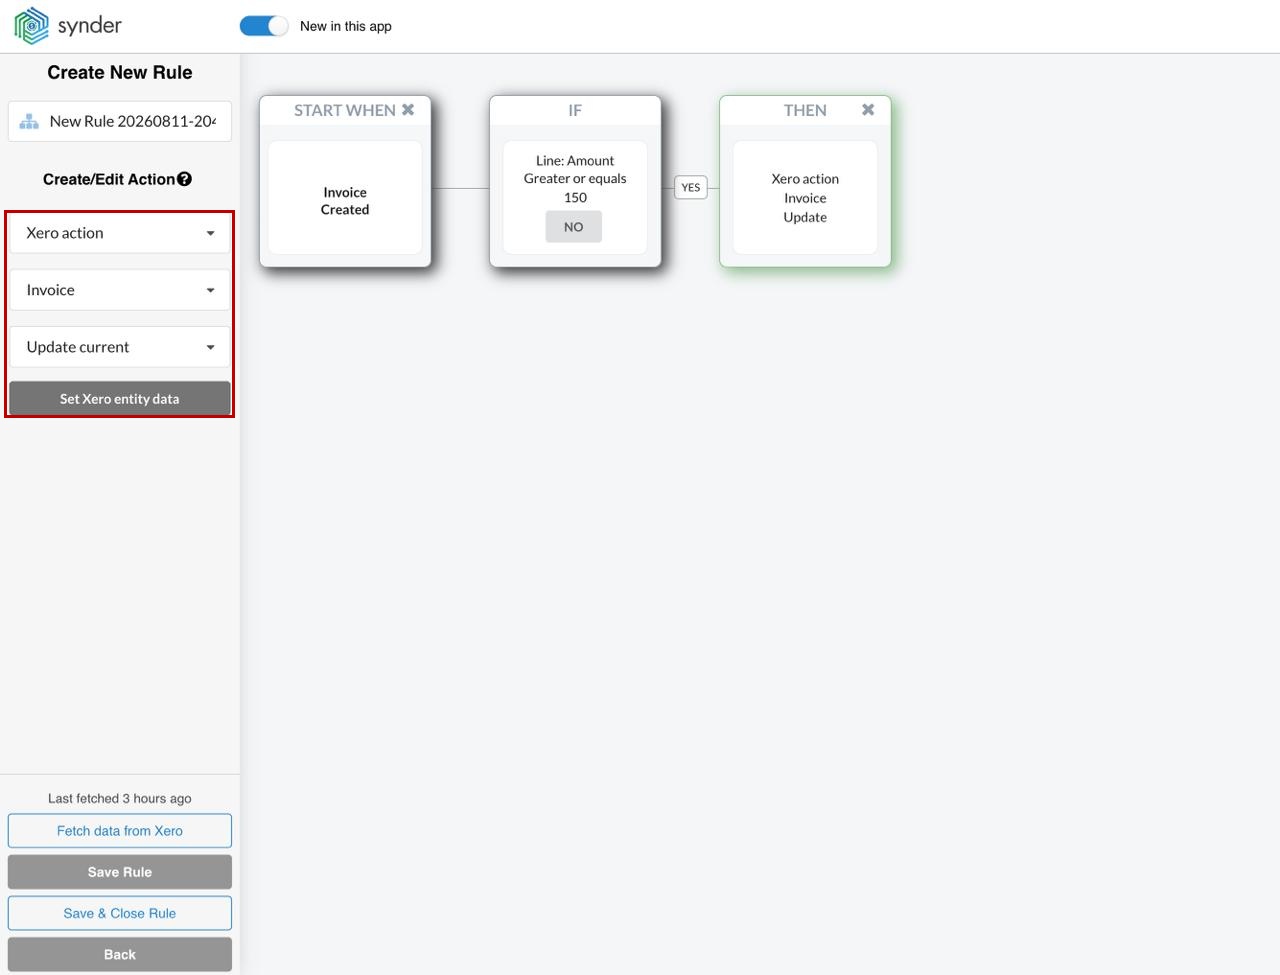
3. Then add an Action block. Choose Xero action → Invoice → Update current, then click Set Xero entity data.
4. Once the Update Invoice window opens, pick your option under Update all line items with, in Tracking Category 1. For example, the rule below uses Median Sale. Click Submit, then save and close the rule.
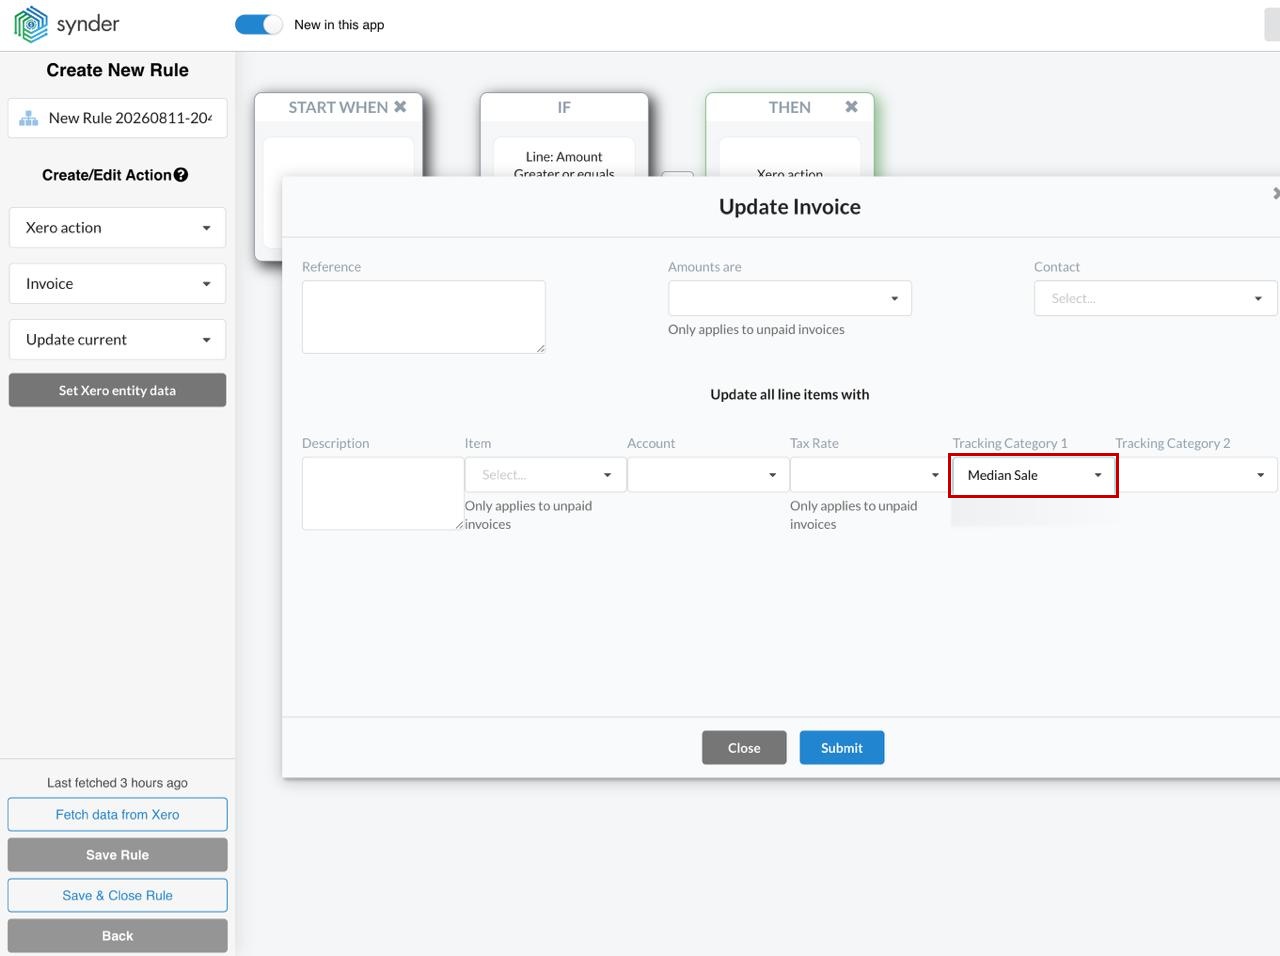
As a result, every new invoice that matches your condition now carries that tracking category. Then, in Xero, run a Profit and Loss report filtered by the category to see the split.
Tag every line or just one line
Two actions can set a tracking category, and the choice matters:
- Update current tags every line on the transaction. Use it when the whole sale or bill belongs to one department.
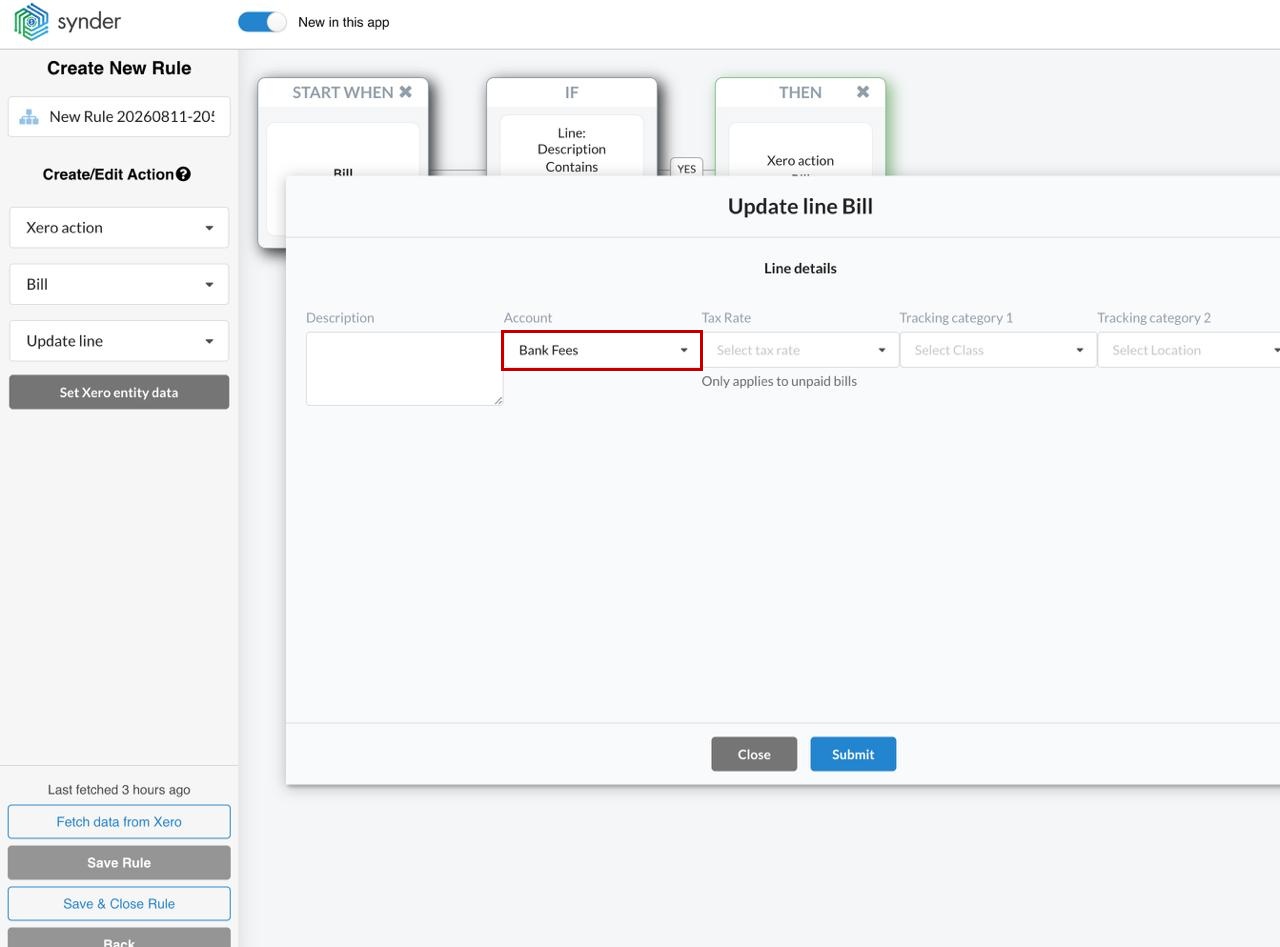
- Update line tags only the line that matched your condition. Use it when one transaction mixes several departments.
Also, the two dropdowns appear in both action windows. For example, the screenshot below shows them in Update line Bill, under Line details, next to Description, Account and Tax Rate.
Good to know
- Paid invoices can receive new categories. On a paid invoice or bill, Xero blocks three fields: Item, Tax Rate and Amounts are. Tracking categories carry no such limit. Therefore this rule works whether the invoice is paid or not.
- Option missing from the dropdown? First confirm it exists in Xero, then click Fetch data from Xero.
- Which transactions can be tagged. Invoices and bills accept tracking categories. Credit notes and payments do not, because Xero does not allow Synder to update them. Rules on those entities can only send an email.
- Classes and locations do not exist in Xero. Any guide that applies a QuickBooks class or location translates to a tracking category here.
For the full picture of what Smart Rules can and cannot do in Xero, see Smart Rules for Xero: Entities, Actions and Limitations. The QuickBooks version of this workflow is How to Apply QuickBooks Classes Automatically Using Synder Smart Rules.
Reach out to the Synder team via online support chat, phone, or email with any questions you have – we’re always happy to help you!
