
Overview:
What are the classes in QuickBooks for?
Classes are used to allow for additional, more detailed income or expenses tracking in QuickBooks Online and can make your Profit and Loss even more informative. This lets you get clearer insights on your sales, expenses, or profitability by business segment. Using Synder you can automatically assign classes to income or expense transactions based on the amount, description, memo or other fields in the transaction.
Read further to learn how to use smart rules in Synder to apply classes to sales transactions based on description. In our example, Synder will add class “Fruit” to any transactions where the description contains the word “apples”.
QuickBooks Online setup
First, you would need to:
- make sure you have class tracking enabled in your QuickBooks Online account settings (learn how to enable them here). Synder supports classes both for each line in transaction and for each transaction.
- After you turn on class tracking, create classes needed in QuickBooks, so that you can select them in Synder.
Synder setup
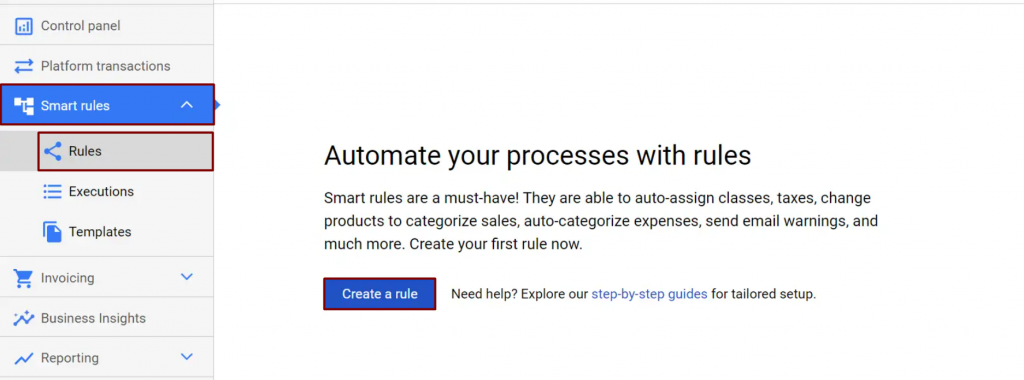
When that is done, open your account in Synder. Click on Smart rules → Rules → Create a rule.
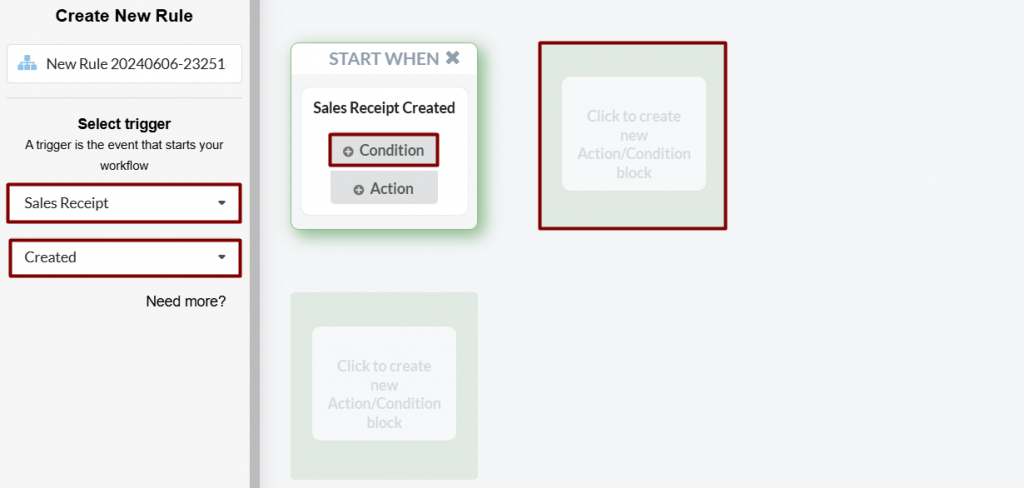
Step 1. Set a trigger, that will automatically start the rule, and select a QuickBooks entity from the dropdown to build your rule around it. Selecting “Sales receipt” and “Created”, you tell Synder to automatically run this rule whenever it creates a sales receipt in your QuickBooks.
Step 2. Click on Condition and hit the nearest box to specify the criteria based on which Synder should update transaction details.
Note: if you want to create a final *action* at this point, click Action.
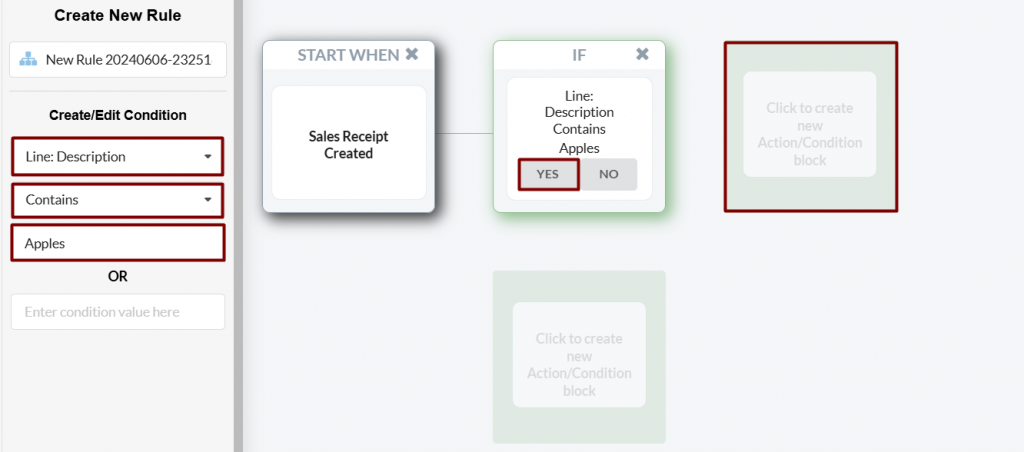
Step 3. For our rule, we are to build a *condition* to check if there is a word/words needed in the description. So we go with “Line:Description” contains the word “Apples”. So, any time the description in any line of sales receipt contains “Apple” (like “Thank you for purchasing apples!”) Synder will apply the rule. You can keep adding options like “apples”, “bananas”, “oranges”, etc. using OR fields.
Then click “yes” so that the rule continues working when this condition is met.
You may select any field from the dropdown, the operands in the next line and enter the condition value at the end. Conditions may be set up based on your needs, for example, sum of transactions, names of clients or items or any other information.
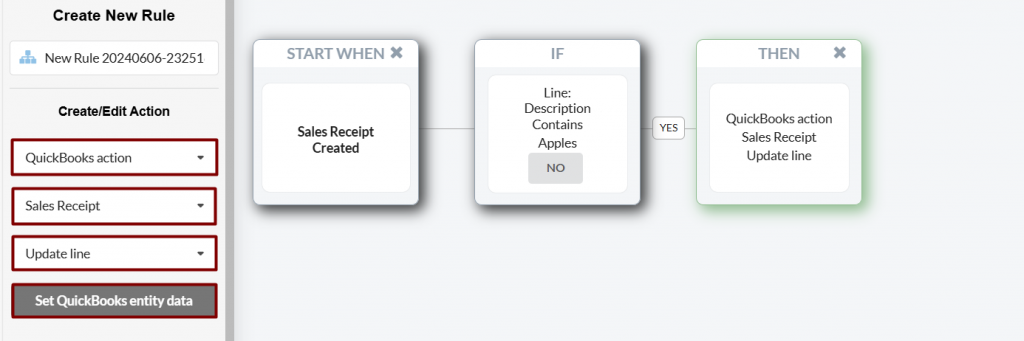
Step 4. Start defining the parameters of the action of this rule. You can send email, or SMS, however in our example we would need it to add class in QuickBooks for the same sales receipt that triggered the rule, so we go with “QuickBooks action” → “Sales Receipt” → “Update line”. When that’s done, press “Set QuickBooks entity data“.
Note: The “Update line” option allows updating individual line item details, while the “Update current’ option updates the entire transaction.
Step 5. Choose the class “Fruit” from the dropdown of QuickBooks Online classes available → Click on Submit → Save and close the rule.

Note 1: If you have classes per transaction then the field will be above the line, if you have classes per line then in the line itself.
Note 2: If the rule didn’t work, check if you really have the word set up in QuickBooks line description, as the rules work based on the information stored in QuickBooks, not in your payment processor.
Congrats, you did it! Now synchronize a transaction which matches the criteria set to check how it works.
Reach out to the Synder team via online support chat, phone, or email with any questions you have – we’re always happy to help you!