
This guide walks you through connecting Xero to Synder in Summary Sync mode, using Shopify as the sales platform. Summary Sync posts a single consolidated entry into Xero per day, grouped by sales platform, instead of one entry per transaction. Use it if you process a high volume of orders and want clean, aggregated books in Xero.
Use this guide if you:
- Use Xero as your accounting system
- Want daily summarized entries in Xero instead of individual transactions
- Are connecting Shopify (or any other supported sales platform) to Xero through Synder for the first time
How to Confirm It Worked
The integration is set up correctly when all of the following are true:
- Your Xero company appears as Connected on the Synder Integrations page.
- Synder imports a few recent transactions during the final setup step and they appear in the Transactions tab in Synder.
Main Flow
Set up the integration
Follow these steps in order during Synder onboarding:
- Create your Synder account at go.synder.com/auth.
- Fill in your role and how you heard about Synder.
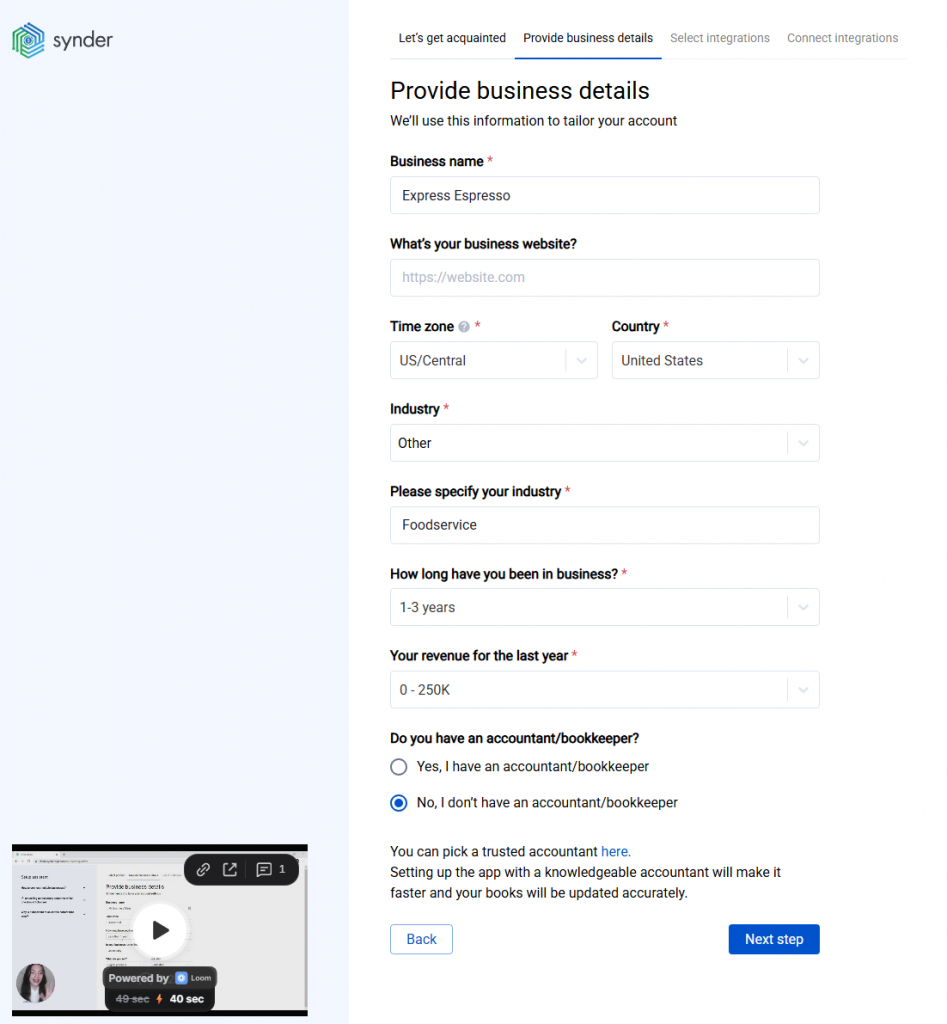
- Provide your business details, including the correct time zone your business operates in.
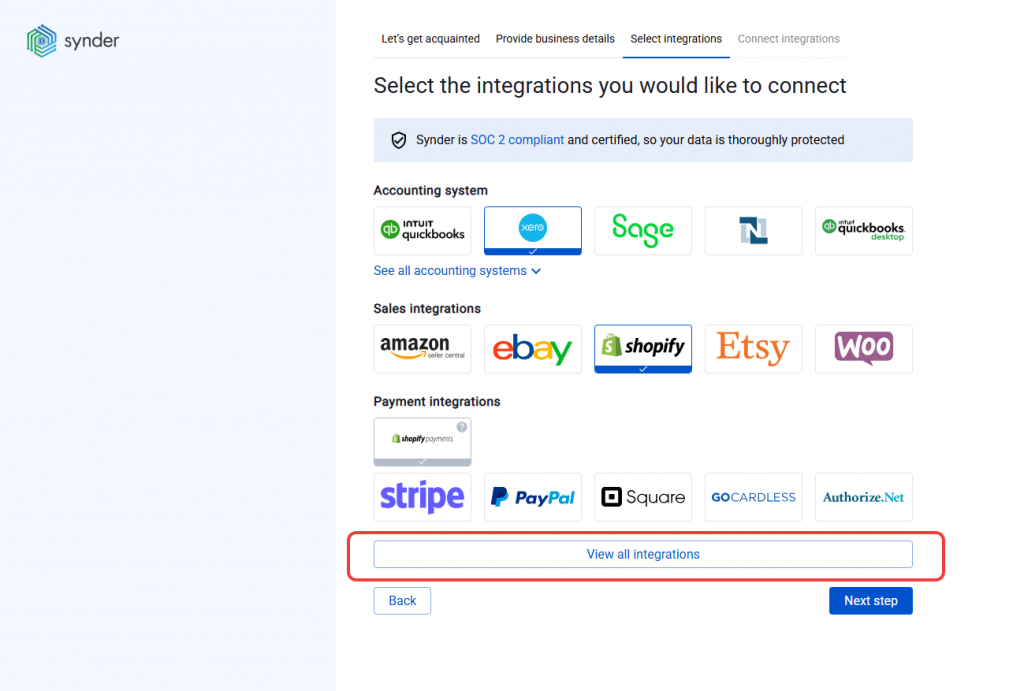
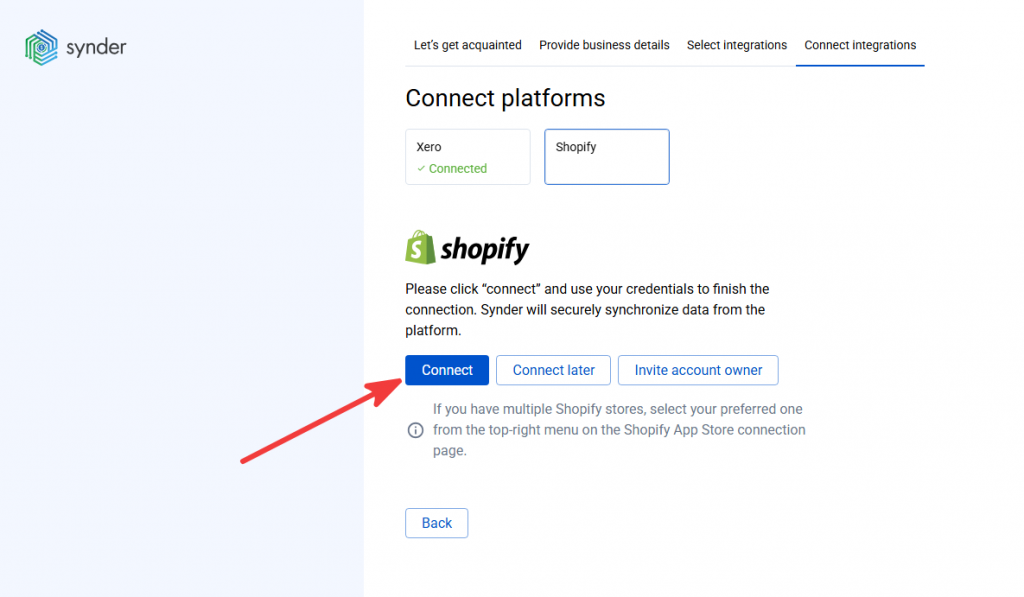
- Select Xero accounting and your Sales or Payment integration. For this guide we will use Shopify.
If your integration is not available in the list – click on View all integrations button.
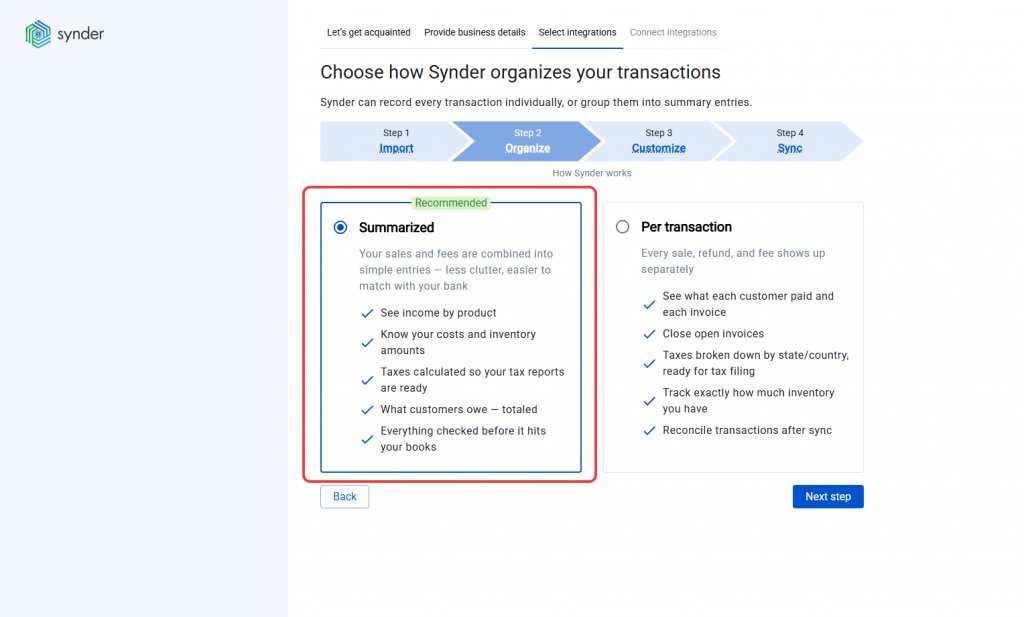
- Select Summarized synchronization mode.
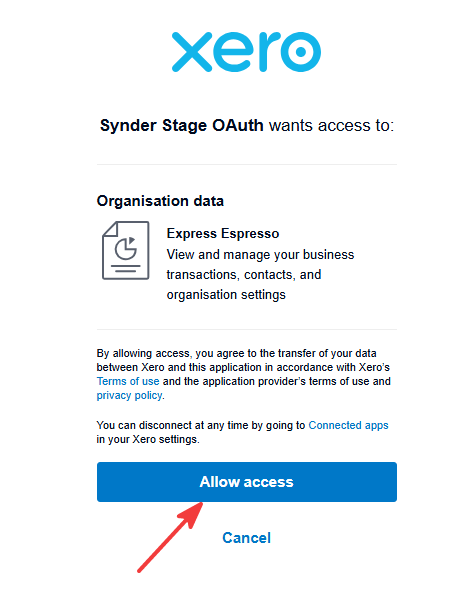
- Connect Xero accounting, and grant Synder permission to access your Xero company.
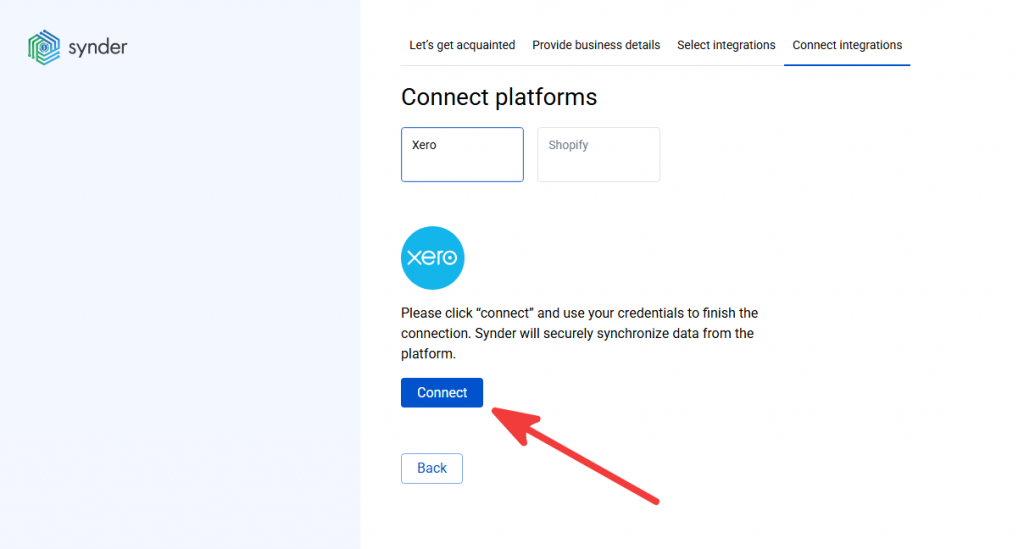
- Connect your paymenr or\and sales integration.
- Select your aggregation mode and import up to last 2 months of data.
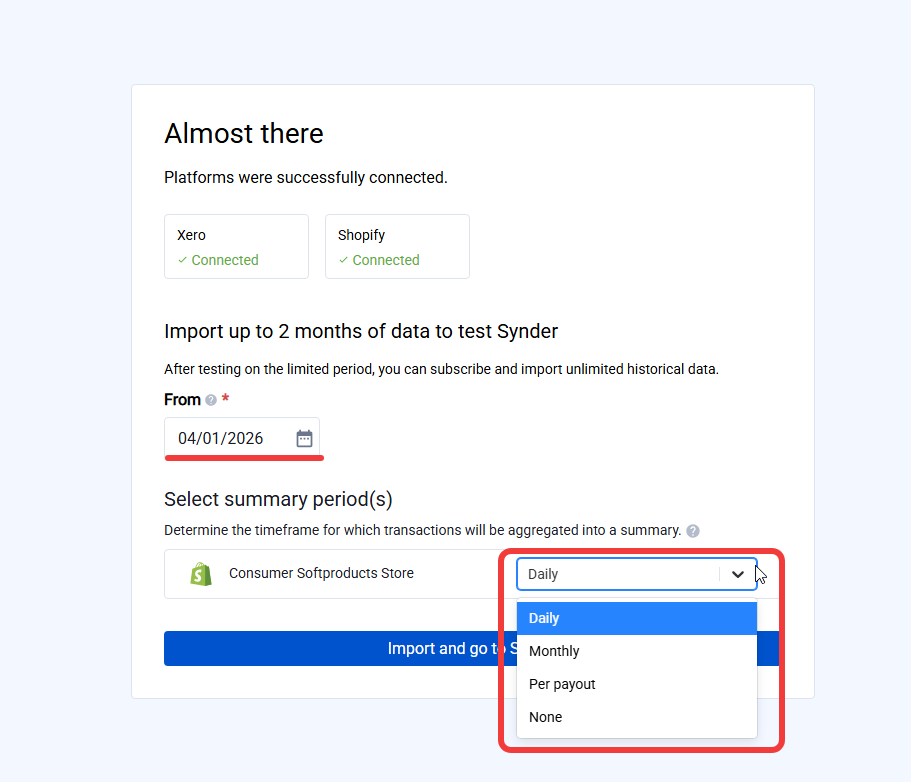
Synder will import your transactions to confirm the connection is working.
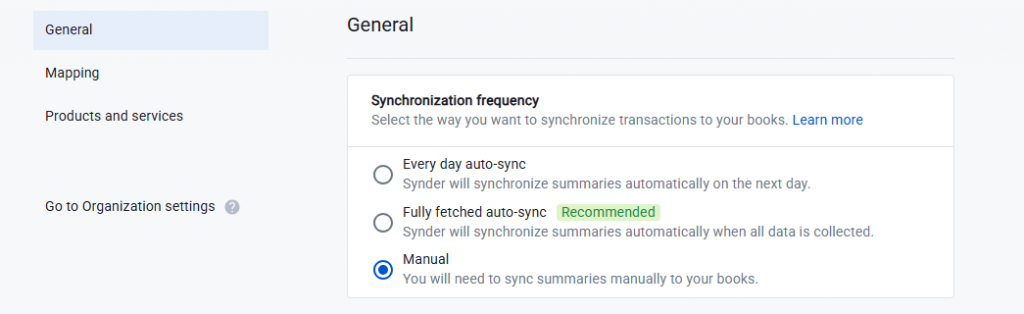
Set synchronization frequency
Synder offers three sync modes. Navigate to settings and pick the one that fits how you want summaries to land in Xero:
- Every day auto-sync
Synder posts each day’s summary automatically the next day, even if some transactions are still being fetched. - Fully fetched auto-sync
Synder waits until it has collected all transaction data, then posts the summary automatically. - Manual
Synder prepares the daily summary but does not post it. You review and sync each summary yourself from the Transactions tab.
Note: You can check more details about the Summary setting by following this guide
FAQ
Can I switch from Summary Sync to Per Transaction sync later?
No. See how to switch between sync modes. Note that switching does not retroactively change entries that have already been synced.
Can I connect more than one Shopify store to the same Synder organization?
Yes. Use the Add integration flow in Organization settings (see “Add Shopify to an existing Synder organization” above) to connect additional Shopify stores.
Can I connect other sales platforms to Xero alongside Shopify?
Yes. During onboarding, check every sales platform you use on the sales platforms screen, or add more later via Add integration in Organization settings. Each platform syncs to Xero independently.
What happens if my accountant needs access?
Invite them from Synder and assign the appropriate user role. If you don’t have an accountant, Synder offers a list of trusted partners you can choose from.
I use a payment platform Synder doesn’t support. Can I still sync that data to Xero?
Yes. Use the Excel import feature to bring those transactions into Synder, then sync them to Xero like any other transaction.
What to Do Next
- Review your daily summary in Xero after the first auto-sync runs to confirm the entries look the way you expect.
- If you want more detailed breakdowns in your summaries (for example, splitting Shopify fees by type), set up manual mapping groups.
- Choose a paid plan when your trial ends — see the pricing page.
Reach out to Synder Team via online support chat or email with any questions you have – we are always happy to help you!