

Looking for an easy way to communicate your Shopify stores with your accounting company? With Shopify integration by Synder all your sales and expenses will be automatically recorded and prepared for one-click reconciliation in your QuickBooks or Xero (learn more about our automatic bank reconciliation feature for Xero in this article). The system allows multi-currency accounting for your Shopify payments and Shopify orders paid via alternative payment providers like Stripe, PayPal, Amazon Pay, etc., providing you with accurate records of your Shopify sales along with processing fees, taxes, customers, discounts, and other transaction details. Synder will help you track inventory in QuickBooks or Xero and categorize all synced data automatically to keep your books up-to-date and precise.
Excited? Let’s connect your Shopify store to Synder and automate your books!
Overview:
Important note 1: If your Shopify store accepts payments via different channels other than Shopify Payments (e.g. PayPal, Stripe, etc.) you need to connect these payment platforms to Synder as well for the system to recognize all transactions and sync them successfully.
Important note 2: If you manually create and mark orders as “paid”, have Shopify POS (point of sale) orders, or receive payments via alternative payment providers that are not supported by Synder directly, check out how to sync Shopify manual orders, Shopify POS orders and Shopify Other Orders guides respectively to learn how to set Synder to process them as well.
Start the Shopify integration from scratch
1. Create an account
If you’re getting started with Synder you’ll need to create a free Trial account and connect your accounting system first. Check out this guide if you would like to integrate your payment platform with QuickBooks Online or Xero, and this article to connect your QuickBooks Desktop company.
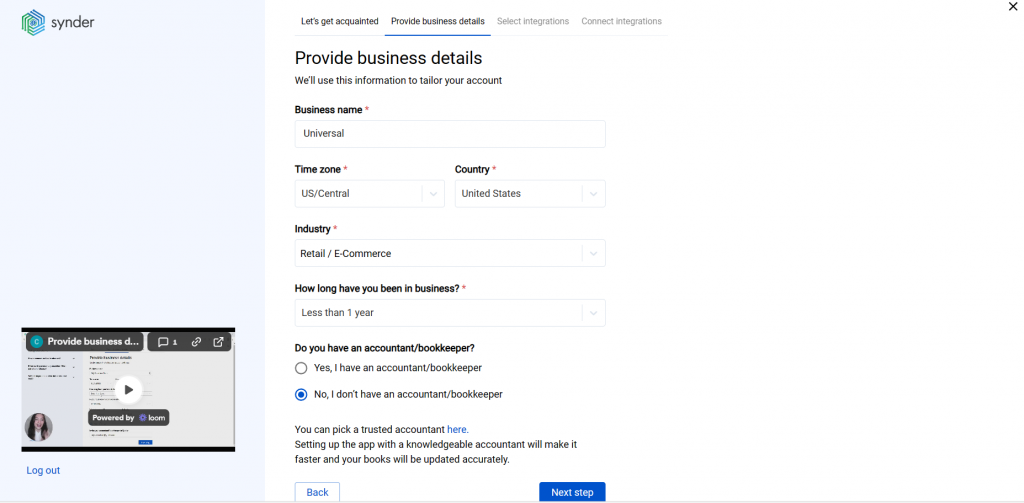
2. Provide your business details
Going through the set-up process of an Organization for your QuickBooks/Xero company, fill in the information about your business and hit the Next step button.
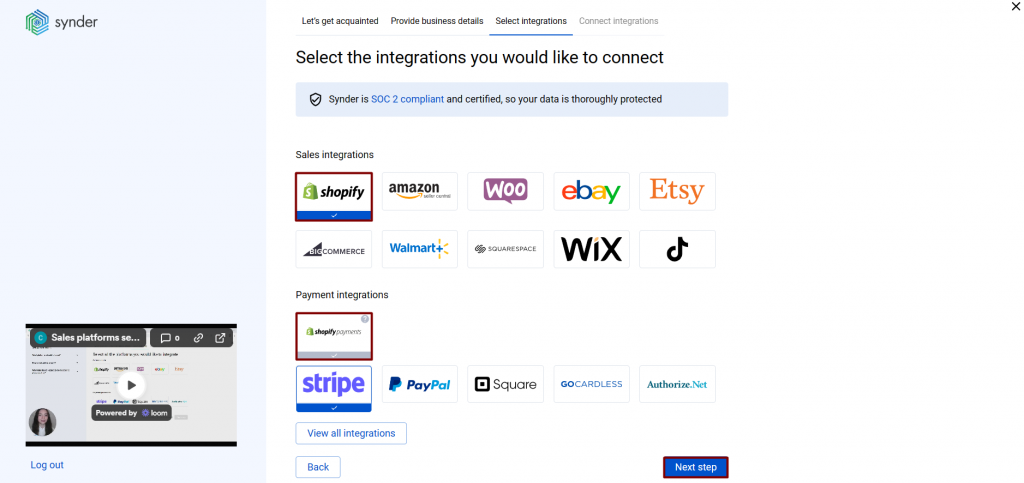
3. Select the platforms you’d like to integrate
Now you need to select the platforms you would like to connect to Synder. Click View all integrations to see the list of all available platforms.
Note: Mark all the services you are using to receive payments, you will be able to connect all of them right away or skip the connection of particular integrations and set them up any time later.
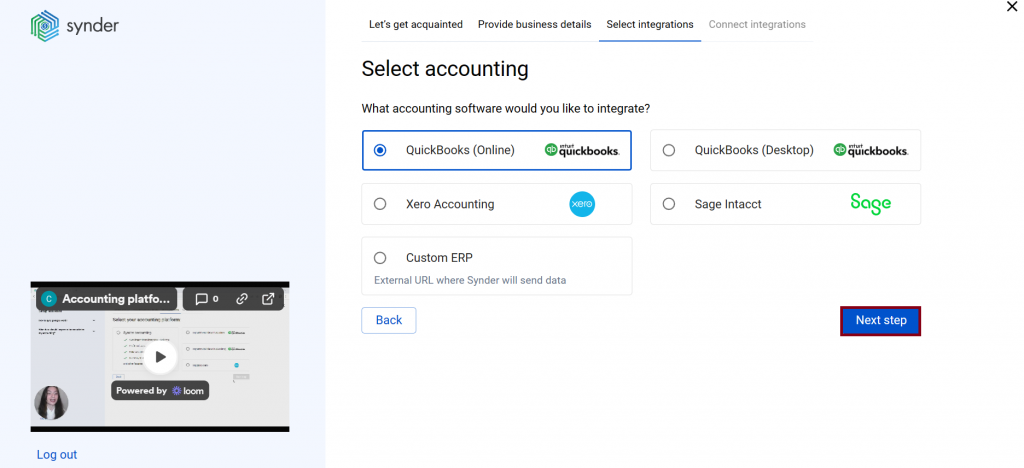
4. Connect your accounting platform
Select the accounting company you’d like to connect to Synder and click on Next step.
Note: If you are connecting QuickBooks Online or Xero, you will be prompted to select the sync mode. Proceed with the desired option.
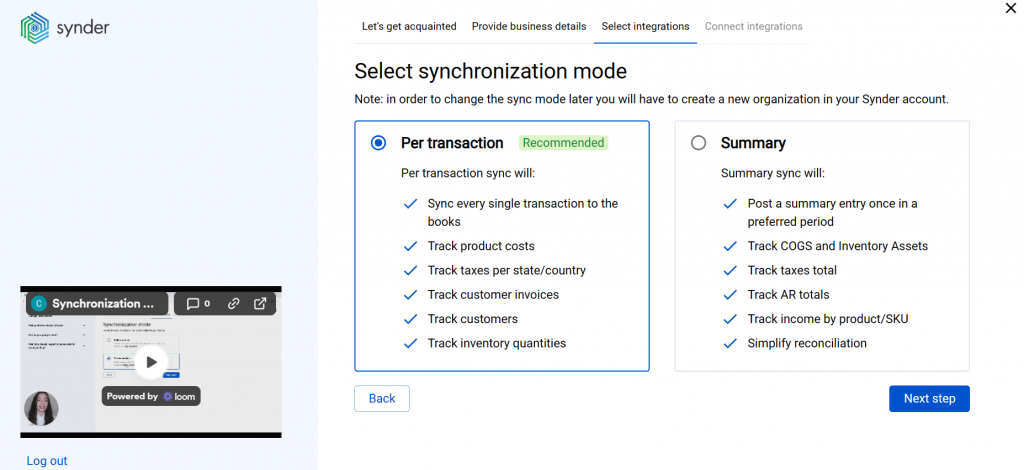
Click on Connect to connect your accounting company.
- Connect your Shopify store
To finalize the setup, follow these steps to connect your Shopify and other sales platforms to Synder:
-Open a separate tab and log in to the Shopify store you want to connect.
-If you have admin rights, simply click on Connect in Synder. If not, invite the account owner to approve the connection. Alternatively, you can connect the platform later once you’ve obtained the necessary rights.
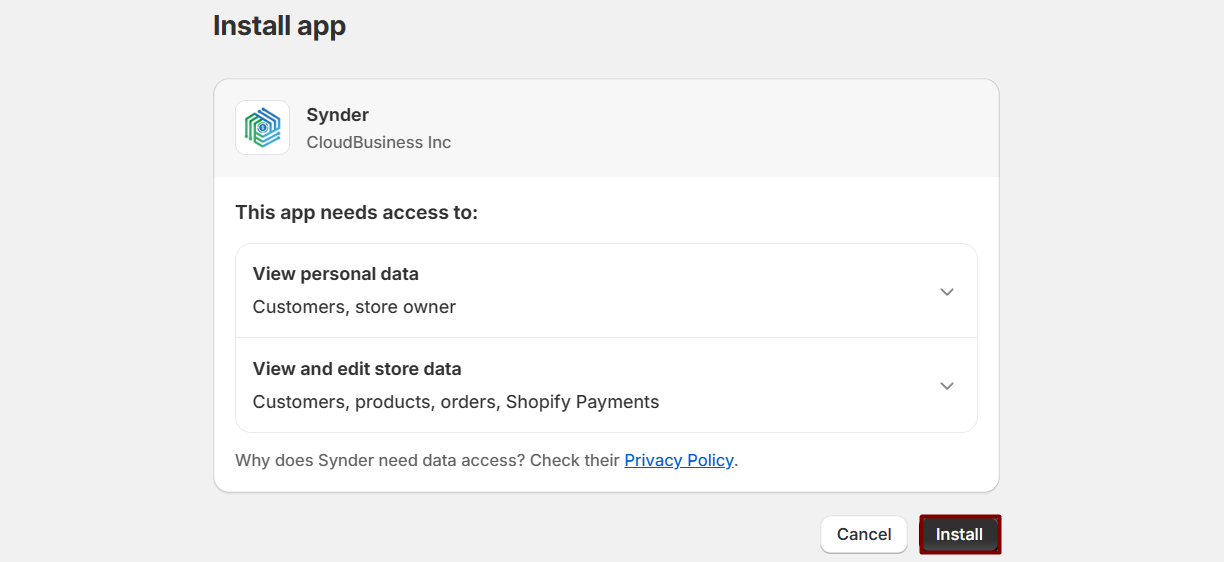
-You’ll be redirected to the Installation page. Click on Install app to link Synder to Shopify.
Note: If you have admin rights in Shopify but are not the organization creator in Synder, you won’t be able to connect it yourself. In this case, ensure that either the organization creator has admin rights to connect the store on their end, or send an invitation to the account owner.

- Set up the Shopify integration
To complete the setup for the Shopify integration choose an account for payouts (usually, your Checking account) that will allow smooth reconciliation of your Shopify transactions in one click. Hit Continue to finish the configuration.

Connect Shopify to an already existing account
If you already have a Synder account and would like to integrate one more Shopify store follow the steps below:
1. Switch to the needed Organization in the top-left corner of the Synder page.
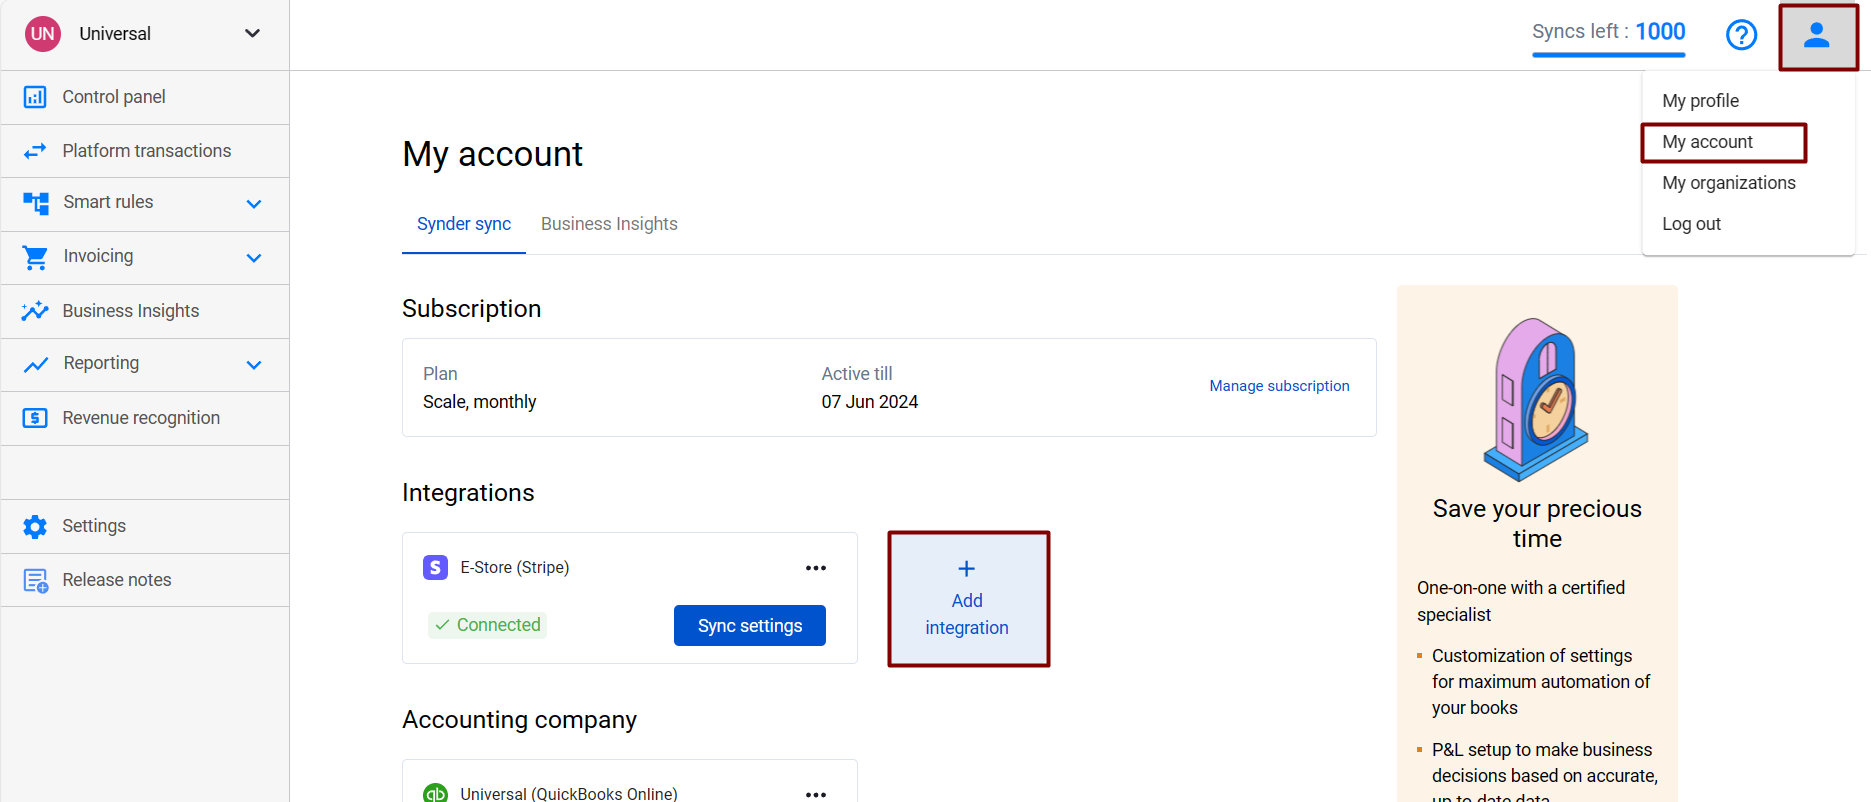
2. Click on the Person icon in the upper-right corner and select My account.
3. In the Integrations section, click Add integration.
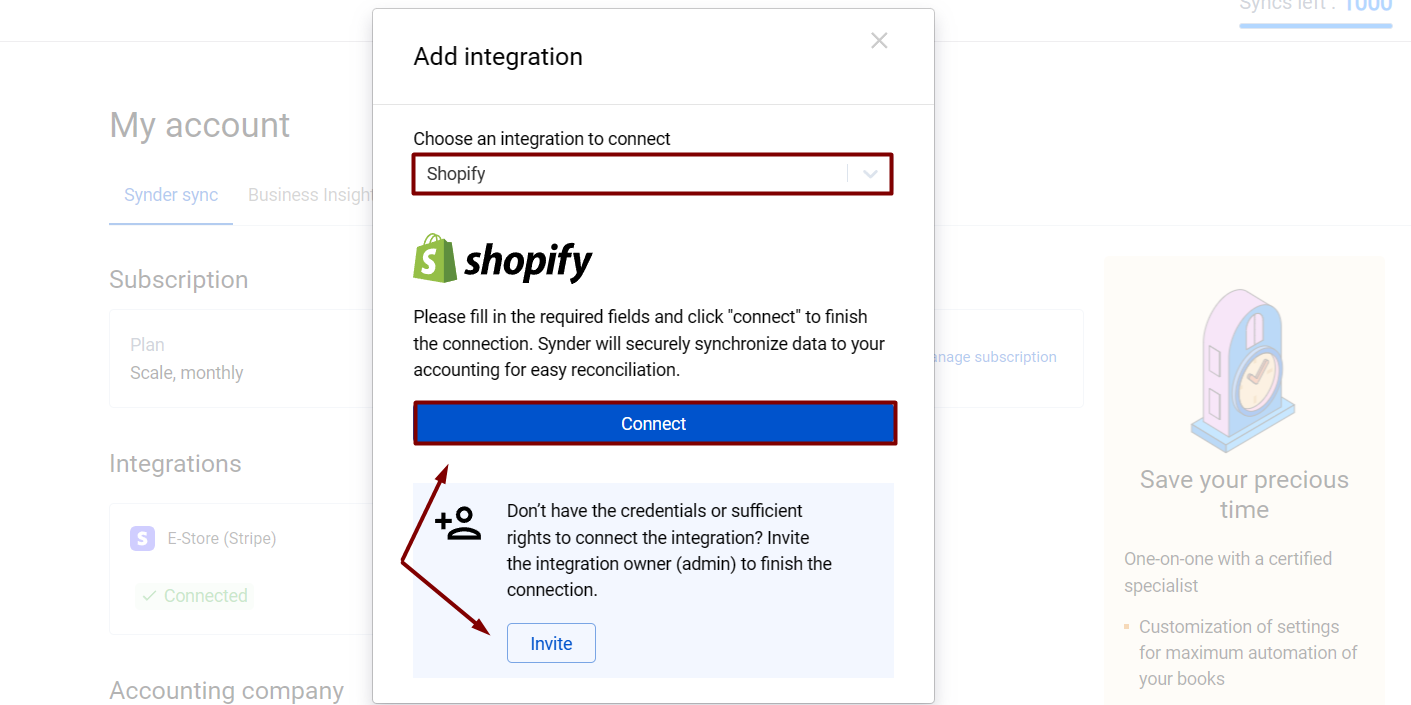
4. Select Shopify.
5. To complete the setup for the Shopify integration choose an account for payouts (usually, your Checking account) that will allow smooth reconciliation of your Shopify transactions in one click. Hit Continue to finish the configuration.
Tips and tricks on Shopify integration
Note 1: Shopify transactions will be synchronized to the Shopify (required for Synder) account – a clearing account automatically created by Synder in your Chart of Accounts for storing all of your Shopify transactions in one place. And once money payout happens, Synder will create a transfer to your checking account for easy reconciliation.
Note 2. If you accept payments via Shopify Payments, you only need to connect your Shopify store to Synder. If you use some alternative payment gateways (e.g. Stripe, PayPal, Amazon Pay, etc.), make sure to connect all payment providers to Synder in order to get flawless and automated records of sales, fees, refunds, and payouts from those payment platforms with additional information provided by Shopify orders.
Reach out to the Synder team via online support chat, phone, or email with any questions you have – we’re always happy to help you!
I have worked with your tech to get Synder setup. All payouts from Shopify are coming into QBO, but the Sales Receipts are not posting into the clearing account. I cannot figure out why not?
Hello Stephanie! The reason sales receipts aren’t recorded in the clearing account might be because you have a different account selected for sales. Please navigate to Synder settings, choose Shopify in the Integration dropdown, and ensure you have the correct clearing account selected for Sales and Fees tabs for the Shopify integration. If you still have questions, please contact our support team at [email protected].