
As a business owner, your choice of payment gateway can directly influence customer trust, operational efficiency, and, ultimately, your bottom line. Stripe, with its comprehensive suite of tools and features, emerges as a frontrunner in the online payment domain. However, leveraging its full potential requires more than just signing up; it demands a strategic and informed approach.
This guide is designed to walk you through not only the basics of setting up your Stripe account but also the nuances of optimizing it for your specific business needs. Let’s embark on this journey to enhance your ecommerce operations and ensure a seamless experience for your customers.
If you’re looking to ease your Stripe bookkeeping, try Synder – financial management software designed for ecommerce. Various integrations with marketplaces, payment gateways, and accounting software make it an ideal solution for ecommerce businesses. Try it out for free!
Overview of Stripe and its services
What is Stripe? Stripe is a technology-driven payment platform designed for businesses of all sizes to accept payments, manage subscriptions, handle marketplaces, and more. With the diverse services that Stripe offers, you can facilitate many business processes:
- Stripe Payments: Effortlessly process online transactions.
- Stripe Billing: Manage recurring payments and subscription models.
- Stripe Connect: Facilitate payments on platforms and marketplaces.
- Stripe Atlas: Assistance for startups, from incorporation to managing initial operations.
- Stripe Radar: Advanced fraud detection and prevention.
- … and many more, including financial reporting and integrations.
Preparation stage
Before you begin the setup of your Stripe account, invest a little bit of time in examining Stripe offerings and requirements. Preparation is paramount; ensuring clarity in your business details and goals will expedite the setup process and prevent future hiccups
Familiarize yourself with Stripe’s products
Reflect on your business model. Are you selling products online? Do you offer subscription services? Are you looking to expand to global markets? Your answers will dictate which Stripe tools are best suited for you. For example, if you’re launching a subscription box service, Stripe’s Billing might be ideal. For those running an online marketplace with multiple vendors, Connect would be beneficial.
By understanding and aligning its offerings with your business model, you not only simplify financial operations but also provide your customers with a seamless payment experience.
If uncertain about the best Stripe product for your business, consulting with a financial expert or fellow business owner can provide insights tailored to your specific situation.
Ensure you have all the necessary details
Here is a short list of must-have information that you need to create your Stripe account:
Business information
This includes your legal business name, address, and taxpayer identification number (TIN or EIN in the US). Keeping this information consistent with official records is vital for tax reporting and compliance.
Bank details
Ensure you have your current business bank account details handy. This will be where Stripe deposits the funds from your transactions. Remember, using a business bank account instead of a personal one helps in maintaining a clear division of finances and aids in accounting.
Contact information
A valid email address is essential. This will be your primary communication channel with Stripe for alerts, updates, and support.
Guide to setting up your Stripe account
Once you have everything ready, it’s time to set up your account. Let’s start.
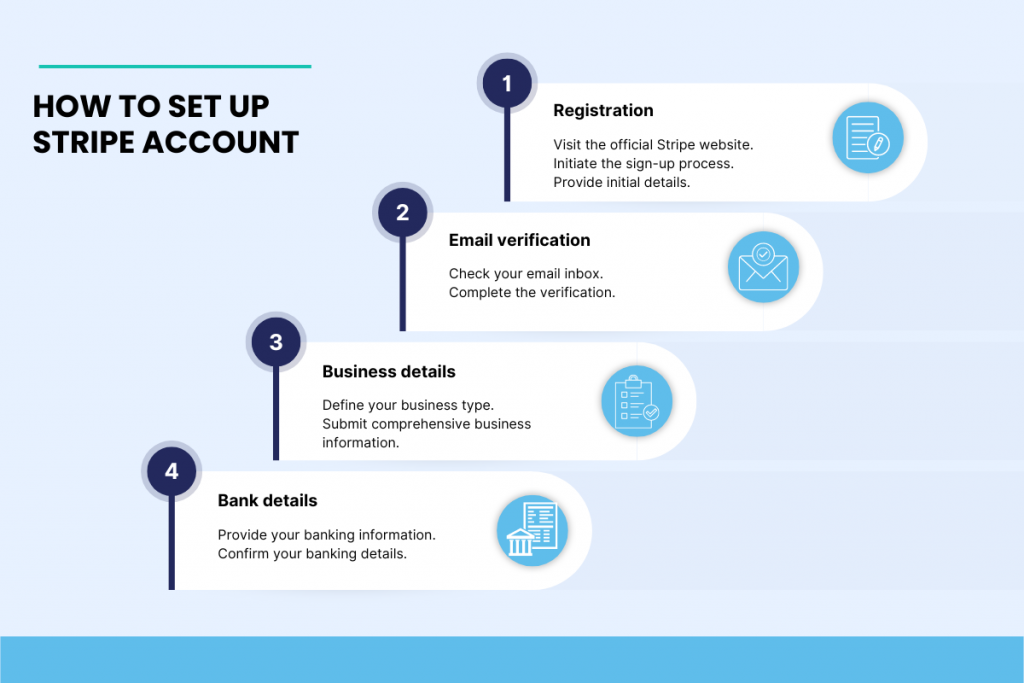
Step 1. Registration
- Visit the official Stripe website: Ensure you’re on the genuine Stripe website. Look for the secure lock symbol next to the URL, and be wary of any suspicious links or pop-ups.
- Initiate the sign-up process: Click on the “Start Now” or “Sign Up” button.
- Provide initial details: You’ll be prompted to input both personal and business details. Be meticulous when entering this information. Any discrepancies can lead to issues down the line, especially when it comes to legal and financial matters.
Step 2. Email address verification
- Check your email inbox: Stripe will send a verification email to the address you provided. If you don’t see the email, check your spam or junk folders.
- Complete the verification: Click on the provided confirmation link in the email. This not only activates your account but also confirms that the email you provided is active and valid. It’s a crucial step to ensure you receive timely notifications about payments, disputes, and other essential account matters.
Step 3. Business details
- Define your business type: Stripe will need to know the nature of your business – whether you’re an individual (sole proprietor), LLC, corporation, or another type. Select the option that adequately represents your official business structure. This categorization influences regulatory compliance, taxation, and other legal nuances. If unsure, consult with your legal or business advisor.
- Submit comprehensive business information: Enter your complete business address, contact number, and any other requested details. Keep this information consistent with official records, licenses, or any other legal documents related to your business. Consistency helps during potential audits, account reviews, or when you’re trying to resolve payment disputes.
Step 4. Bank details
- Provide your banking information: Stripe will ask for your bank account number and the associated routing number. As mentioned above, use a dedicated business bank account. Mixing business and personal finances can lead to complicated accounting issues and potential legal complications.
- Confirm your banking details: Once you provide your banking details, Stripe will make two small deposits to the account. This is a security measure to ensure the accuracy and validity of the bank account. Monitor your bank account over the next few days. Once you notice the deposits, verify the amounts on the Stripe platform. This not only secures your Stripe account but also confirms that your payments will be correctly deposited in the future.
Guide to advanced Stripe configuration
Opening up the account is just a first step. Let’s dive into the aspects of setting up payment methods, customizing the checkout experience, testing the setup, and configuring notifications on Stripe.
Setting up payment methods
Credit & debit card payments
- Activating card payments: Navigate to your Stripe dashboard and look for the payment settings section to enable credit and debit card payments. Accepting card payments is fundamental for online businesses. However, be aware of transaction fees and the types of cards (e.g., Visa, MasterCard) your target audience commonly uses.
- Choose your regions and card types: Decide which countries or regions you want to cater to and which card types (Visa, MasterCard, American Express, etc.) you’ll accept. Understand your customer base. If you have a significant customer segment in Europe, for instance, ensure you accept popular card types from that region. It’s all about making the payment process smooth for your customers.
Alternative online payment methods
- Enabling modern payment methods: From your dashboard, select and enable methods like Apple Pay and Google Pay. With the increasing shift towards mobile commerce, tools like Apple Pay and Google Pay can enhance user experience by offering quick and secure transactions.
- Incorporate country-specific payment methods: For instance, if you have a European audience, consider adding iDEAL for the Netherlands or SEPA for broader Europe. Catering to local payment preferences can boost your sales. It shows your international customers that you care about their convenience.
To find out more about fees, read our comprehensive guide to Stripe fees.
Customizing checkout experience
Stripe offers a standalone Stripe Checkout page or Stripe Elements (UI components). You can also use embedded forms that fit directly on your site. For beginners or those without custom development resources, Stripe’s hosted checkout is a breeze. However, if you want a seamless brand experience, investing in Stripe Elements for your checkout might be worthwhile.
Customize the look and feel of your checkout page to align with your brand’s colors, logo, and style. Brand consistency builds trust. A checkout page that reflects your brand assures customers they’re in the right place.
If you’re on platforms like WooCommerce or Shopify, leverage their Stripe integration plugins.
Integrations save time and ensure compatibility. Rather than custom coding, using a trusted plugin can provide a secure and efficient connection between your ecommerce platform and Stripe.
Testing your setup
Before going live, switch your Stripe account to test mode and simulate transactions. Always test before going live. This helps identify potential friction points and ensures your customers will have a smooth payment experience.
Perform a series of transactions to validate the functionality and test various scenarios – successful payments, failed transactions, refunds, etc. This comprehensive approach ensures you’re prepared for real-world scenarios.
Take note of any hiccups or challenges faced during the test. By identifying issues in advance, you reduce the risk of lost sales or disgruntled customers when you go live.
Configuring notifications & alerts for payments and beyond
Configure notifications for successful payments, failed transactions, refunds, and other important events. Staying informed allows you to act swiftly. Immediate knowledge of failed payments, for instance, lets you reach out to customers and potentially save a sale.
Webhooks notify your systems or applications of events on Stripe instantly. Real-time data can be crucial. For instance, once a payment is successful, you might want your inventory system to automatically update or your CRM to highlight the customer for a thank-you message.
Conclusion
Setting up Stripe is just the beginning; optimizing it for your business needs is where the magic happens. By understanding and leveraging Stripe’s vast capabilities, you ensure that the financial aspect of your online business runs smoothly.
Always prioritize your customers’ experience and stay informed to make proactive decisions. Remember, every detail counts towards building a trustworthy brand.
Read our articles and learn more about How to make a Stripe express account and Stripe POS.