.png)

If you run your own business or deal with accounting, you must have heard the name of the most popular accounting software for small businesses in 2023 according to Forbes Advisor-QuickBooks. Best known for its bookkeeping software, QuickBooks provides many other accounting and finance solutions that might help you run a business and even help you to run your personal finances. QuickBooks is highly scalable and adapting to the changing business needs. So when it comes to accounting software, QuickBooks can be named ubiquitous.
In this article, we’ll take a look at QuickBooks Undeposited Funds Account and how multiple payments should be combined in QuickBooks.
Contents:
1. What is the Undeposited Funds Account in QuickBooks?
2. How does the Undeposited Funds Account work in QuickBooks?
- Sending invoices and recording sales receipts
- Receiving payments and depositing to Undeposited Funds
- Making a bank deposit
What is the Undeposited Funds Account in QuickBooks?
As it goes with all the software, there’s always a demanding learning curve. In other words, with more experience the tasks are done quicker and easier. So it makes sense to read or watch some tutorials when it comes to functions. Let’s look closer at what the Undeposited Funds Account in QuickBooks is.
The Undeposited Funds Account is a special account in QuickBooks where you can send invoices, record sales receipts, receive payments, and then combine them later and deposit them to your real-life checking account. It’s compared to a lockbox where you’d keep all the cash and checks before taking them to the bank and making a deposit. As the example from QuickBooks goes: five checks $100 each will be deposited as one $500 deposit. So these five $100 checks should be combined in one $500 to match the bank record. Same with the QuickBooks Undeposited Funds Account which accumulates all the invoice payments and sales receipts and then allows to combine them. After getting the deposit slip, the bank deposit in QuickBooks should match the combined payments in Undeposited Funds. The final goal is to make the bank deposit in QuickBooks match your bank records, which simplifies your reconciliation procedure.
How does the Undeposited Funds Account work in QuickBooks?
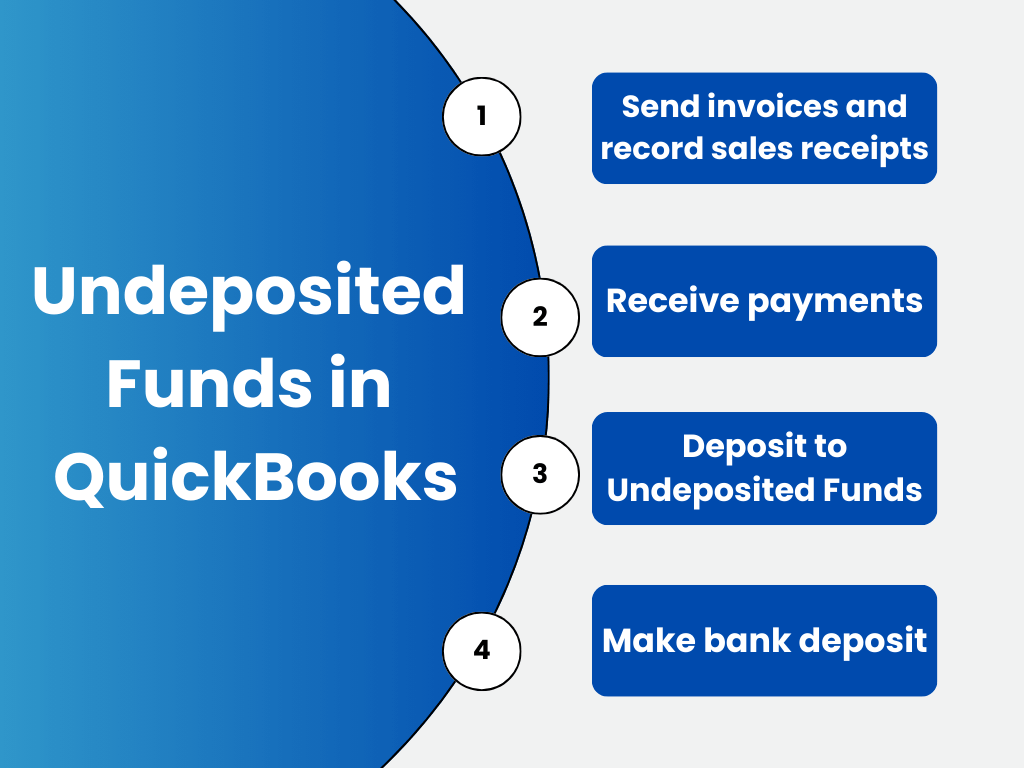
The whole process consists of four steps:
- Sending invoices and recording sales receipt
- Receiving payments
- Depositing to Undeposited Funds
- Making a bank deposit
Let’s look at them in more detail to get a better hold on how to work with the Undeposited Funds Account in QuickBooks.
Sending invoices and recording sales receipts
Situation 1: Sending invoices through QuickBooks
When processing invoice payments through QuickBooks Payments for Desktop, QuickBooks takes care of everything and there’s no need to combine payments or move them to the Undeposited Funds Account.
Situation 2: Sending invoices outside of QuickBooks
While processing invoice payments outside of QuickBooks and receiving payments for an invoice, QuickBooks will put them into Undeposited Funds automatically. Then you can deposit the payments to your bank account later.
Situation 3: Recording sales receipts outside of QuickBooks
While recording sales receipts for payments outside of QuickBooks, sales receipt payments are put into the Undeposited Funds account by default. You just have to create a sales receipt.
The most common way to record sales for retail businesses and restaurants with QuickBooks desktop is to use sales receipts and charge a customer who will pay immediately. This method to record sales or donations when you receive a payment right away can be used by any business.
Let’s look at how to record sales receipts and deposit the money you receive in QuickBooks. When you select Create Sales Receipts, you see the Sales Receipt window.
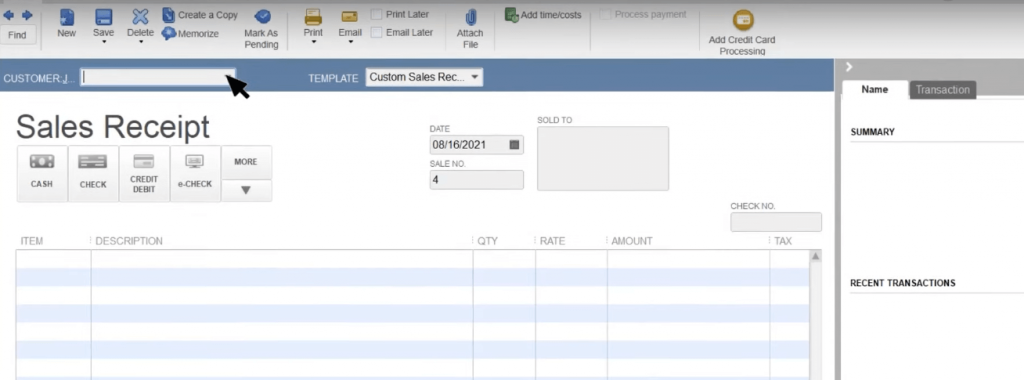
The options (Save, Print, Email the Sales Receipt) are in the ribbon, so you can choose whether you want to print or email the sales receipt immediately or in a batch later on.
Sales receipts have four sections that help collect and organize details about a sale and payment: the header, the payment information, the item table, and the footer. QuickBooks uses them to collect specific information which helps run reports later. For example, QuickBooks doesn’t require a customer’s name when you record a sales receipt but it’s necessary if you want to run reports on total sales by customer later.
In short, you can create sales receipts the following way:
- Enter the customer’s name in the Customer Job field (pointed by the arrow in the picture).
- Select the Payment Method (select the arrow to see more methods and add your own if needed)
If a customer paid with a check or their payment comes with a reference number, you can record that information in QuickBooks as well.
- Record what you charge your customer for. Choose an item or service from the list and select Add New if needed. After that the sale description and sales price automatically go onto the form.
- Select the Print button to print the sales receipt now, or select the Print Later checkbox to print it later.
- Save and close the sales receipt. QuickBooks deposits the payment into the Undeposited Funds Account.
Receiving payments and depositing to Undeposited Funds
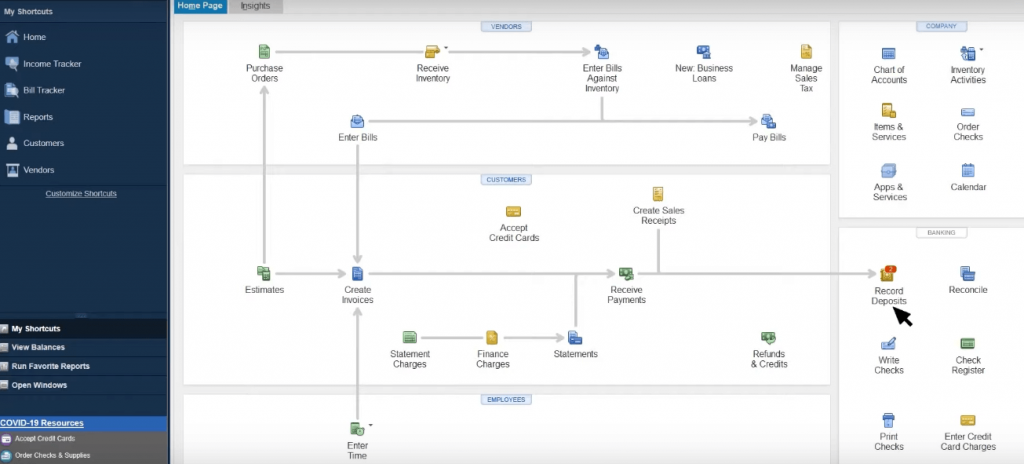
The process described in the previous section repeats for as many sales receipts as needed. The payments you collect from the customers go to Undeposited Funds. Finally, you can see the number of payments in Undeposited Funds on the Record Deposits icon.
Making a bank deposit
When you deposit the payments together at the bank, you record that in QuickBooks as well.
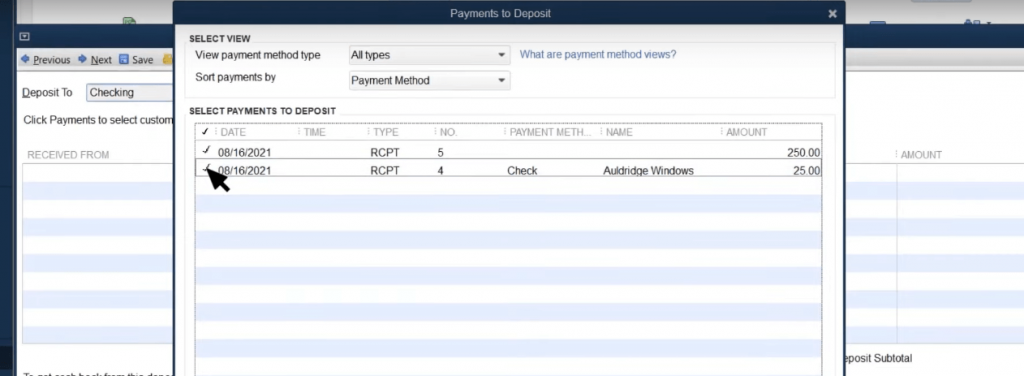
- Select Record Deposits.
- Choose the sales that you want to deposit. (Make sure to select the correct bank account and date.)
- Save the deposit.
QuickBooks moves the money from Undeposited Funds into your bank account, just like your actual bank deposit. All payments in the Undeposited Funds Account will automatically appear in the Bank Deposit window.
Note: Your bank may record a single payment as its own deposit. In that case you don’t need to combine it with others in QuickBooks and you can put payments directly into an account and skip Undeposited Funds.
If you have any questions left and some other features to discover in QuickBooks, you probably have a lot of transactions and it is the situation when accounting integration like Synder can be of great assistance. The software provides an automatic sync of your clients’ transactions with QuickBooks Online or Desktop version reducing manual bookkeeping and accounting processes and making your reconciliation process impeccable .
Finally, there’s a recommendation from QuickBooks to periodically check the Undeposited Funds Account to clear out any payments that are waiting to be moved. This can be done following the steps below:
- From the Lists menu, select Chart of Accounts;
- Right-click Undeposited Funds and choose QuickReport: Undeposited Funds;
- From the Dates drop-down menu and click All;
- Select Customize Report; open the Filters tab, scroll down and select Cleared;
- In the Cleared section, click No. Then select OK.
Bottom line
The Undeposited Funds Account in QuickBooks is a temporary account holding payments that are planned to be deposited to the bank account later. It allows you to combine a number of payments into a single deposit if needed. Following the simple procedure described in this article, you’ll be able to make your reconciliation process smoother.