.png)

Invoices aren’t just a request for payment; they reflect your brand’s professionalism and attention to detail.This is an important part of running your business because it is how you shape your customers’ impression of your services. But creating and editing an invoice template can be difficult.
However, with QuickBooks, template customization will be much easier. You can automatically fill out standard information, saving time and ensuring all your invoices look the same. So, let’s take a closer look at the process of creating a custom invoice template in QuickBooks.
Contents:
1. What is invoice customization in QuickBooks?
2. How to edit your invoice template in QuickBooks
3. Types of invoice templates in QuickBooks
4. Tips to improve your invoice template in QuickBooks
- Change fonts and colors in your custom templates
- Add your logo to your invoice templates correctly
- Add discount to your invoice
5. Mistakes to avoid while creating custom invoice template in QuickBooks
- Incorrect client information
- Missing or inaccurate payment terms
- Duplicate invoices
- Unreconciled transactions
6. Optimize your workflow with QuickBooks
Key takeaways
- Customizing your invoice templates in QuickBooks is crucial for making your business look more professional.
- Adding your brand’s identity to your invoices improves how your customers perceive your business.
- QuickBooks provides easy-to-use tools that allow you to customize various aspects of your invoice templates.
What is invoice customization in QuickBooks?
QuickBooks invoice creation and customization lets you personalize the look and content of your invoices to match your company’s style and needs. Here’s some tools and options for invoice customization:
- Template customization: You can choose from QuickBooks various invoice templates and tweak them by changing fonts, colors, and styles. You can also add or remove fields and sections according to your preferences.
- Logo and branding: Add your company logo to your invoices to enhance your brand identity and professionalism.
- Custom fields: Include extra fields on your invoices to capture specific information relevant to your business or industry.
- Terms and conditions: Specify your payment terms, return policies, or any other necessary terms and conditions directly on your invoices.
- Custom messages: Personalize your invoices by adding special messages or notes in QuickBooks, like thank-you messages or promotional offers.
Why is it important to customize your QuickBooks invoices?
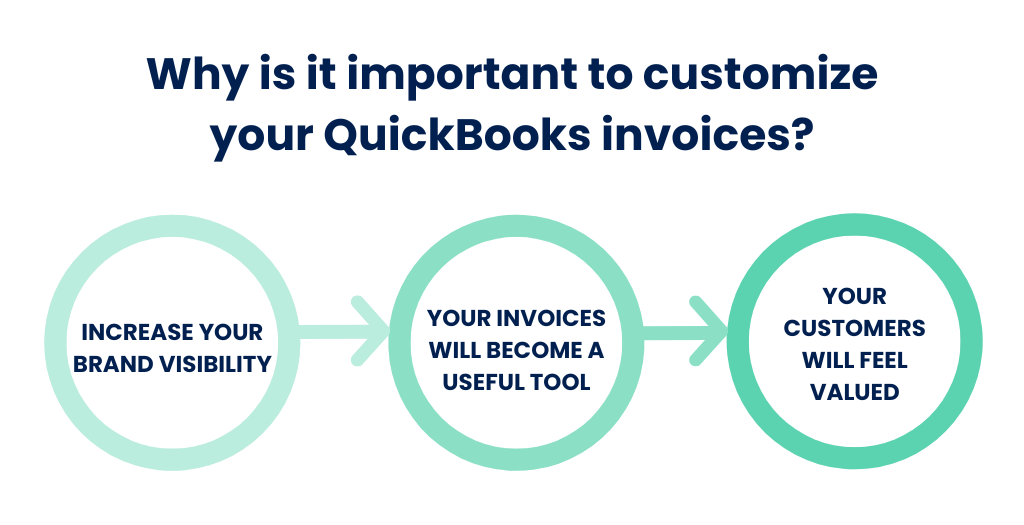
1. Increase your brand visibility
After making a sale, it’s crucial to ensure your customers remember your business for future transactions. After creating or importing invoices, you can edit them and that can play a key role in achieving this.
With QuickBooks’ customizable invoice feature, you can highlight important details like your company’s logo or business name. By doing so, you boost brand recognition and customer retention, making it more likely for your business to stick in customers’ minds for future purchases and referrals. This helps foster long-term relationships and growth.
2. Your invoices will become a useful tool
When you set up invoices in QuickBooks, don’t miss the opportunity to provide more than just basic transaction details. You can include additional information, such as warranty expiration dates or upcoming service appointments, which can really improve your service experience.
Instead of a regular invoice, your invoice becomes a valuable resource for your customers. This is something they will find really useful.
By doing this, you provide better service and optimize your workflow. All the information you need is included right on the invoice, making the entire process easier for everyone involved.
3. Your customers will feel valued
Around 90% of leading marketers say personalization significantly contributes to business profitability. Your invoice can also play an important role in it.
Setting up QuickBooks invoices is important to making your customers feel valued. This software makes it easy to include your customers’ names and other personalized details directly into invoices. This will show your customers that your business values them as individuals and truly cares about their satisfaction.
How to edit your invoice template in QuickBooks
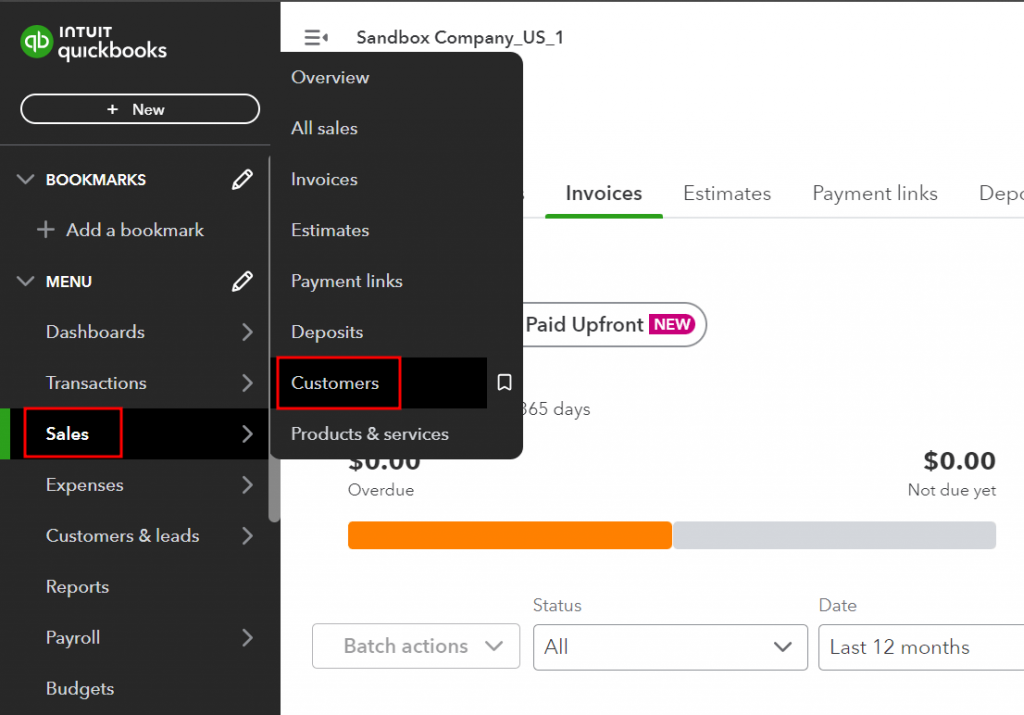
Step 1: Customers section
Open QuickBooks and locate the “Sales” section, open “Customers” option on the menu bar. This is usually found at the left part of the screen.
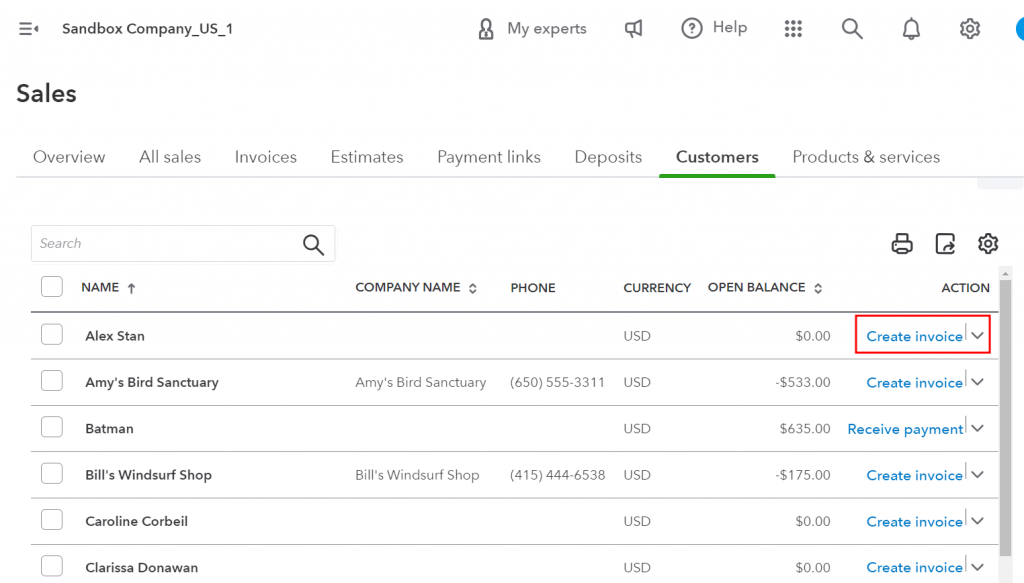
Step 2: Create invoice
Click on the “Customers” menu, then choose “Create Invoices” from the drop-down menu that appears. This action will help you to write an invoice.
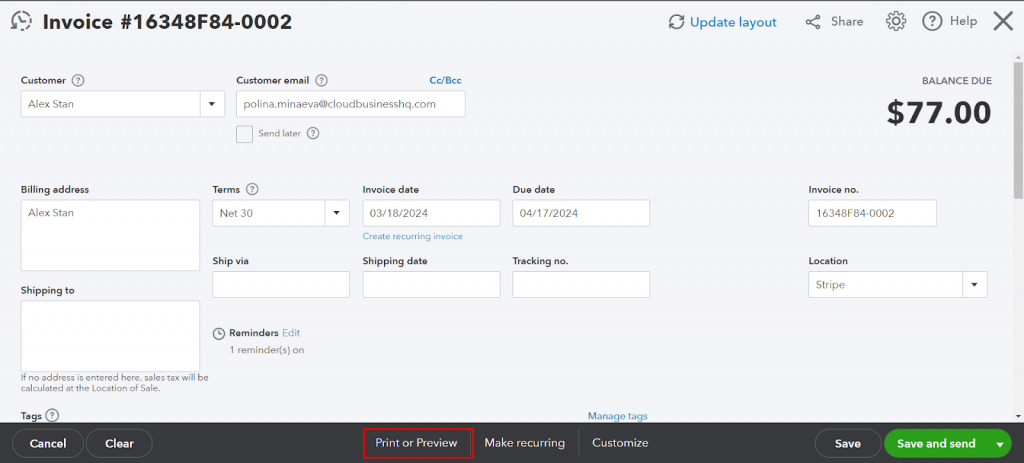
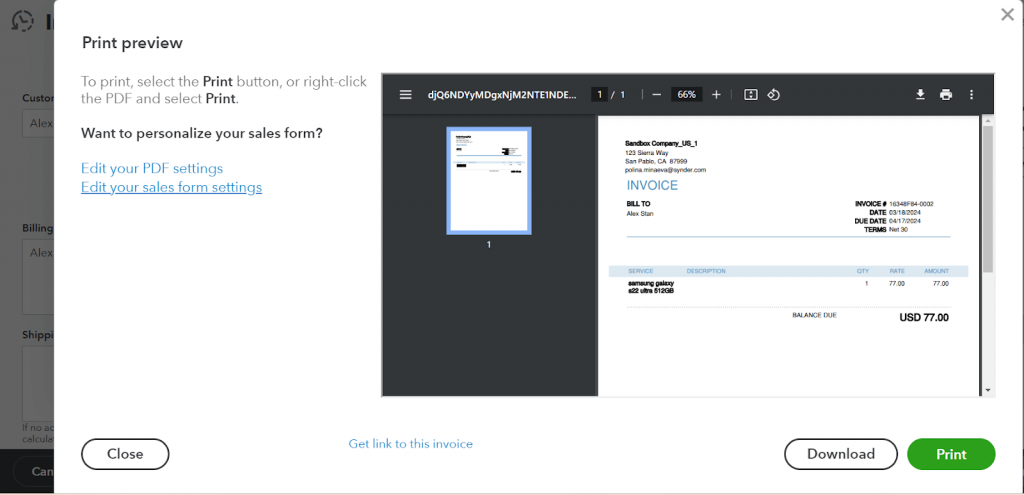
Step 3: Preview the invoice
Once you’re on the invoice creation screen, take a moment to preview how the invoice will appear. Click on the “Print Preview” option to see a preview of the invoice layout. After reviewing, close the preview window to return to the creation screen.
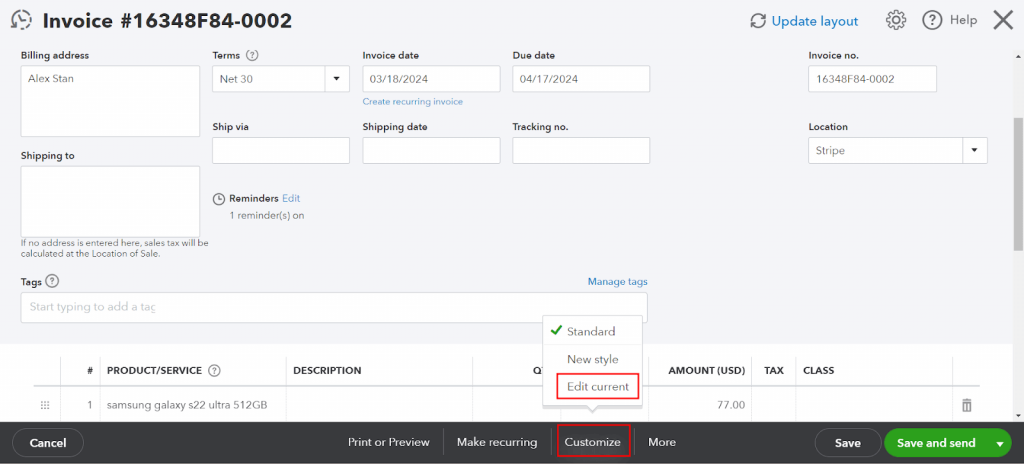
Step 4: Start customization
On the “Create Invoices” screen, locate the “Customize” option from the drop-down menu. Click on it, and then select “Edit current” from the available options.
Step 5: Choose invoice template
From the template management window, browse through the available templates and select the one that best suits your preferences. Click on the template to highlight it, then click “OK” to customize the invoice template.
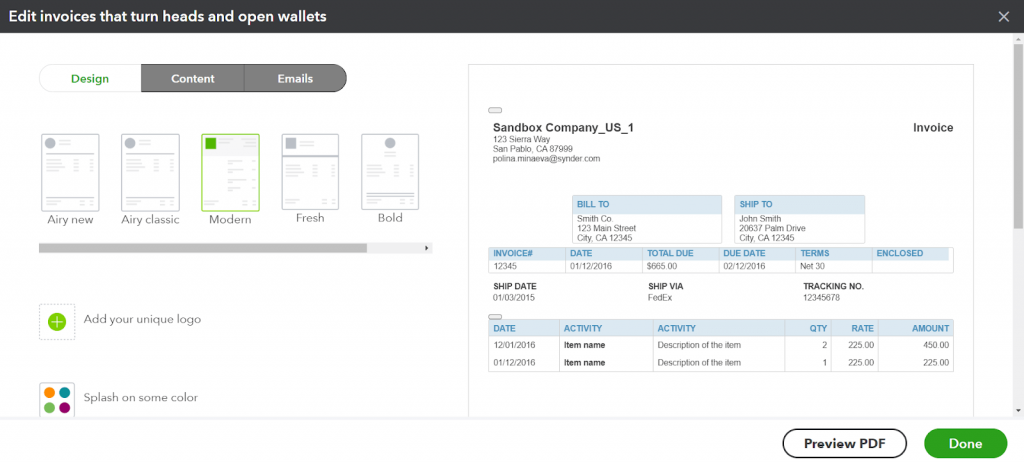
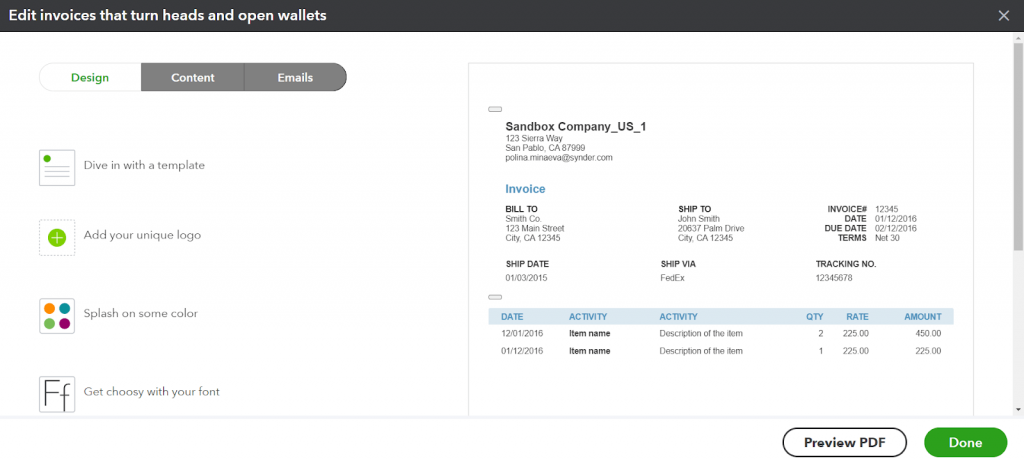
Step 6: Edit the template
Once the template is open, you’ll have access to various customization options. Use these options to modify the template according to your specific requirements. You can change elements such as fonts, colors, logos and more. If you wish to include additional information, like notes or special terms, this is the time to do so.
Step 7: Save template
After editing the template to your satisfaction, it’s important to review your changes. Click on “Print Preview’‘ once again to see how your customized invoice will look. If everything looks good, click “OK” to exit the preview mode.
Finally, click on the “Save” or “Save & Close” button to save your changes. You can go back to any step to make sure you have customize invoices correctly.
Types of invoice templates in QuickBooks
QuickBooks provides a variety of invoice templates to suit different business needs. These templates are designed to handle different situations encountered by businesses. Here’s the common types of invoice templates available in QuickBooks:
| Type | Description |
| Standard invoice | This is the typical invoice used by freelancers and businesses to detail what clients need to pay. It includes all the necessary information. |
| Credit/Debit Memo | These documents keep track of owed amounts between parties. |
| Mixed invoice | Unlike regular invoices, mixed invoices can include both positive and negative entries |
| Prepayment invoice | When a client pays in advance for work not yet completed, a prepayment invoice is issued. |
| Withholding tax invoice | This template records the remittance of withholding tax to local tax authorities. |
| Expense report | Employees use expense reports to get reimbursed for company-related expenses. |
| PO default invoice | If there are differences between an old purchase order and a new one, a PO default invoice records these changes. |
| Quick match invoice | This template speeds up the invoicing process for high-volume transactions that don’t need extensive validation. |
| Recurring invoices | These invoices are automatically generated at regular intervals for services provided on a recurring basis. |
Tips to improve your invoice template in QuickBooks
1. Change fonts and colors in your custom templates
Customizing your invoice fonts and colors in QuickBooks brings your brand’s personality and style to your invoices.
When choosing fonts in QuickBooks, consider the feelings you want to convey. Whether it’s modern and elegant or classic and sophisticated, it sets the tone for your account. Likewise, choosing colors that match your brand’s palette or reflect your brand’s values can improve the overall look of your invoices.
Here’s how you can edit fonts and colors of your invoice:
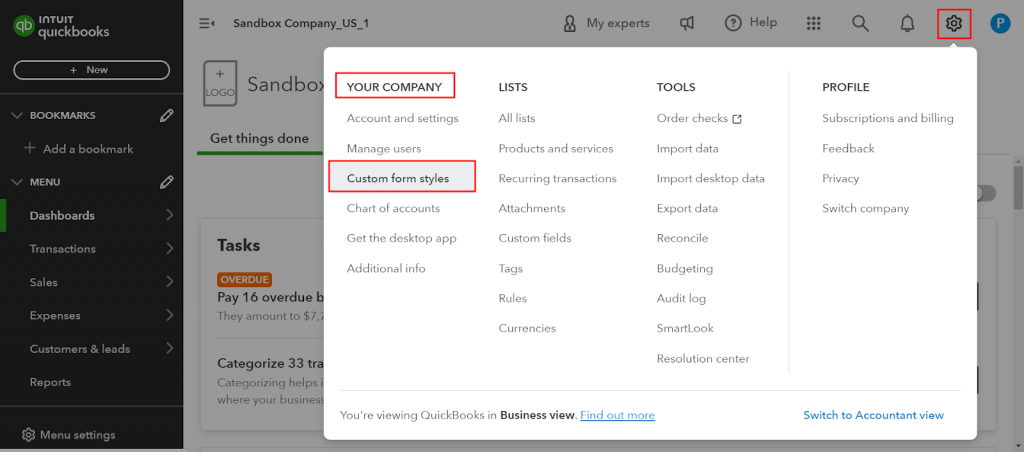
To start customizing invoices in QuickBooks, first, find the Gear Icon located in the upper right-hand corner of your dashboard. Click on it and then select “Custom form styles” under the “Your company” section.
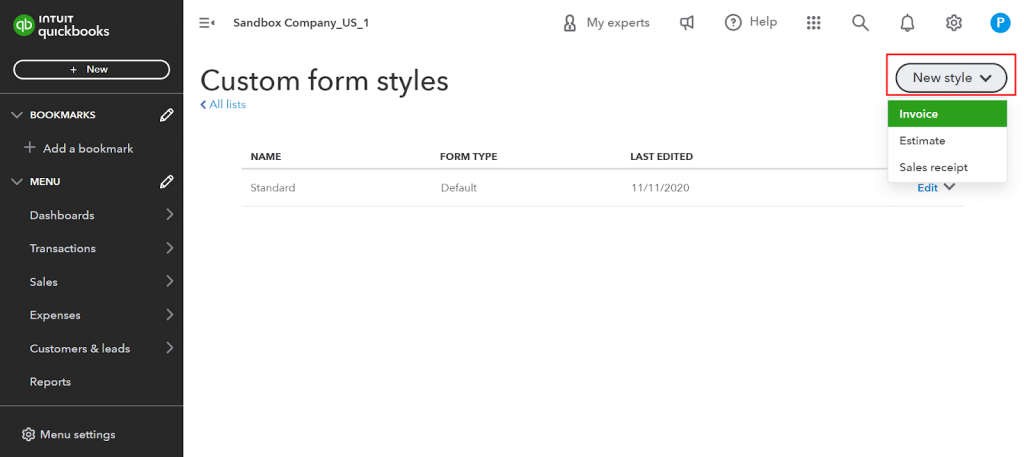
Once there, click on “New style” and choose “Invoice” from the options that appear.
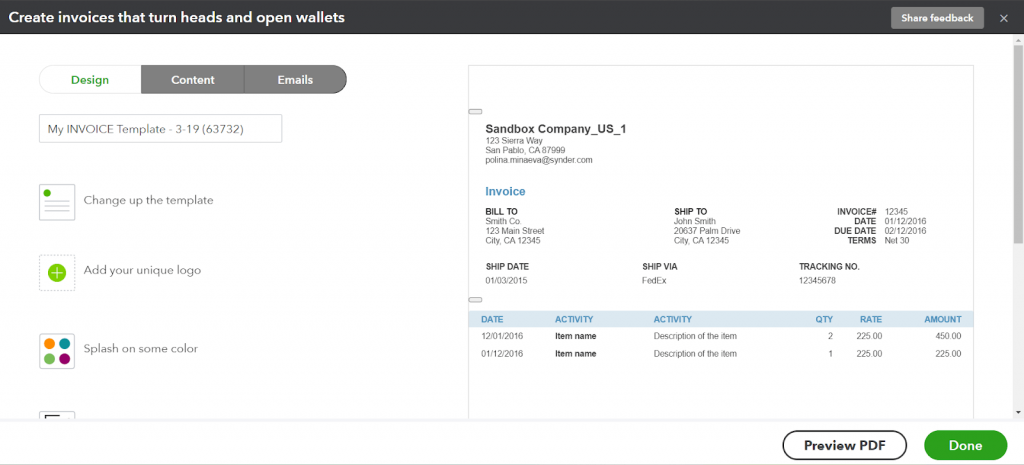
Now, look for the “Design” section. This is where you can make changes like adding your logo, picking colors, and selecting fonts to personalize the look of your invoices.
2. Add your logo to your invoice templates correctly
As you start organizing your invoices, don’t forget to add your logo. Your logo represents your brand and will appear on all your sales forms in QuickBooks.
These are some tips to add your logo correctly:
- Your logo file should be in formats like .gif, .bmp, .png, .jpg, .jpe, or .jpeg.
- Keep the file size under 10 MB.
- Ensure your logo has a bit depth of 24-bits or less.
- Aim for a square or circular shape for the best display on your invoices.
3. Add discount to your invoice
First, you need to ensure QuickBooks tracks discounts accurately, follow these steps:
- Navigate to Settings ⚙️ and choose Account and Settings.
- Click on Sales.
- In the Sales form content section, click Edit ✎.
- Enable the Discount setting.
- Click Save, then Done.
Now you can add the discount field to your invoice template in QuickBooks:
- Return to the invoice template settings by navigating to Settings ⚙️ and selecting Custom form styles.
- Choose Invoices. If you need to edit an existing invoice, locate it in the list and select View/Edit from the dropdown arrow ▼ under the Action column.
- Go to the Content tab.
- Click on the pencil icon ✎ to edit the footer section.
- Check the Discount checkbox.
The discount field will now be included in the invoice subtotal, visible to your customers only if a discount is applied.
Mistakes to avoid while creating custom invoice template in QuickBooks
1. Incorrect client information
Mistakes in customer data such as names, addresses or contact information can cause problems such as delivery delays and communication problems.
To avoid this, it is important to regularly review and update customer information. By maintaining accurate records, you ensure that invoices and supplies reach the right people on time. Implementing reminders or automated systems for updating customer information can streamline this process and improve overall efficiency, demonstrating your commitment to providing excellent service.
This is a simplified guide to setting up automatic invoice reminders:
- Go to Settings ⚙️ and select Account and settings.
- Choose the Sales tab.
- Under the Reminders section, click on the Edit box or pencil icon.
- Turn on Automatic invoice reminders.
- Toggle on Reminder 1 and select when you want the reminder to be sent before or after the invoice due date.
- Customize Reminder 1 by choosing the number of days before or after the due date.
- You can also set up additional reminders if needed, like Reminder 2 and Reminder 3.
2. Missing or inaccurate payment terms
Failing to specify payment terms or including incorrect terms on the invoice can confuse customers and lead to payment delays.You have to be clear about the exact payment terms before sending invoices.
Payment terms should include:
- The due date;
- Accepted payment methods;
- Any late fees;
- Early payment discounts.
Knowing these terms and conditions in advance ensures smooth invoice payment processing and helps build customer trust.
3. Duplicate invoices
Creating duplicate invoices can be confusing for both business and its customers, leading to billing errors and unnecessary communication.
Regularly check invoices for duplicates before sending them. Use unique account numbers and keep detailed transaction logs to simplify the process. Staff training and the use of automated software can also help prevent duplicate invoices. These steps ensure accurate billing and increase customer satisfaction.
Here’s how to preview your invoice:
- Go to the Email tab.
- Select “Preview PDF”. This will open a window displaying a PDF version of the invoice your customer will receive.
- If you need to change anything, simply close the window to return to the editing screen.
- Once you’re satisfied with everything, select “Done”. This finalizes the invoice and prepares it for sending.
4. Unreconciled transactions
Sending invoices before matching them with the corresponding transactions in the accounting records may result in inaccuracies and errors in the financial statements. This can lead to confusion and misinterpretation of financial data.
To avoid these problems, it’s important to regularly review and reconcile transactions. This means comparing transactions recorded in your accounting system, such as sales or expenses, with transactions in bank statements or other external records. By doing this regularly with QuickBooks, you can catch any discrepancies early and ensure that your financial reports remain accurate and reliable.
Optimize your workflow with QuickBooks
Doing your bookkeeping manually can be very tedious. You can easily get confused with records, taxes or invoices and lose a lot of time even if you’re an accountant. Here’s a solution: Synder Sync – an accounting software that makes managing your business’ financial information easier.
Synder connects your customers’ sales channels and payment platforms with QuickBooks Online. This ensures transactions are accurately recorded and classified in real time, instantly updating financial records. By managing customer information, sales tax, invoices, and shipping costs, Synder ensures consistency across platforms, simplifying the accounting process for your clients.
With Synder, you can simplify your business tasks, and improve your overall online sales process.
Learn how to improve your business operations by using Synder’s free trial. For additional insights and advice, reserve your spot in Synder’s informative Weekly Public Demo.
Note: Synder supports integrations with both QuickBooks Online and QuickBooks Desktop.
Conclusion
Customizing an invoice template in QuickBooks is critical for businesses because it enhances professionalism and simplifies invoicing. By tailoring invoices to match your brand, you improve the customer experience and strengthen your brand identity, which helps your business grow.
As we’ve discovered, QuickBooks makes the task of editing invoices easy. With customizable templates, you can easily add logos and brand colors, ensuring all invoices are consistent and accurate. This integration of customization features into QuickBooks empowers your invoicing process, contributing to the overall success of your business.
FAQs
How do I change the invoice layout in QuickBooks?
Here’s how you can change template for specific transactions right from the form:
- Create or import an invoice, sales receipt, or estimate.
- At the bottom of the form, click on “Customize”.
- From the list that appears, choose the custom template you want to use.
- After selecting the template, click on “Save and close”.
How to customise a quotes template in QuickBooks?
Tips to create or customise a quotes in QuickBooks:
- Go to Sales and then click on Customers.
- Choose a customer from the list.
- To create a new quote, select “Quote” from the New transaction dropdown menu. If you want to edit an existing quote, find the quote in the list and select “View/Edit” from the dropdown menu under the Action column.
Where do I find my templates in QuickBooks?
To access the form templates list in QuickBooks, follow these steps:
- Go to the Lists menu located at the top of the QuickBooks window.
- From the Lists menu, select “Templates”.