
In today’s dynamic business landscape, it’s super important for businesses to manage finances efficiently. One key part of keeping your financial records accurate and showing your business’s true money situation is handling partially paid invoices properly. In this article, we’ll talk about why it’s so important to know how to deal with partially paid invoices properly and look at how Synder works in this scenario.
We’ll walk you through the steps on how to perfectly manage partially paid invoices, writing the remaining difference off as bad debts in QuickBooks.
Overview:
1. How to apply payments to unpaid invoices
2. How the Stripe ‘Automatically Write-Off Invoices’ feature works
3. How to manage invoice write-offs
4. How you can handle a partial payment and the remaining balance in QuickBooks
– How to create a Bad Debt Expense account
– How to create a Bad Debt line item
5. Step 1: Create a Credit Memo
6. Step 2: Apply the Credit Memo to the invoice
7. Pro tips and tricks for seamless invoice management with Synder
How to apply payments to unpaid invoices
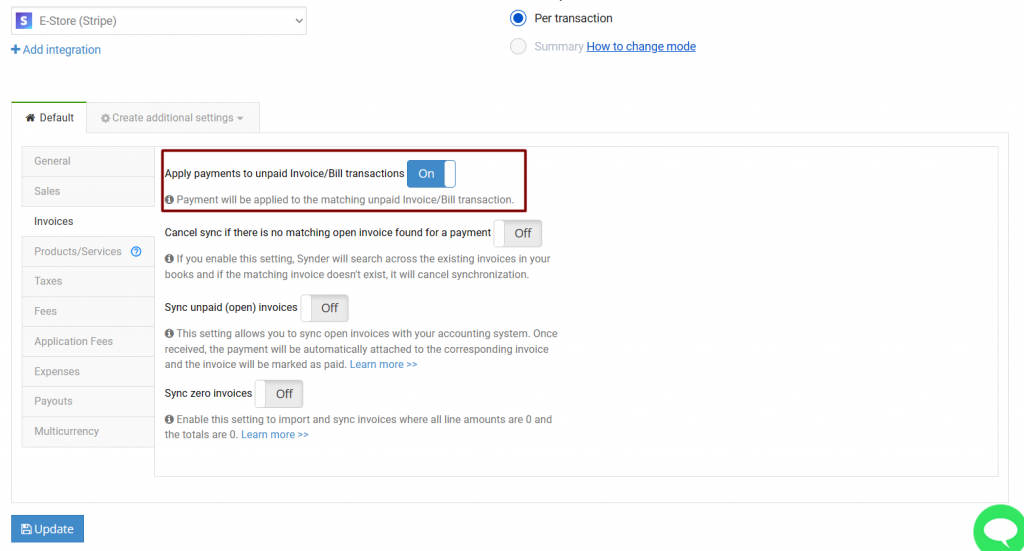
In Synder, there’s a feature called “Apply payments to unpaid Invoice/Bill transactions.” When enabled, the system automatically applies payments to unpaid invoices based on a 100% match of the customer name, marking the corresponding invoice as closed. Here’s a picture of where to find this feature in Synder and what it looks like:
- Select the Organization needed at the top left of the page.
- Go to Settings on the left-side menu.
- Select your Stripe integration in the Integrations dropdown.
- Go to the Invoices tab.
- You’ll see the Apply payments to unpaid Invoice/Bill transactions setting.
How the Stripe ‘Automatically Write-Off Invoices’ feature works
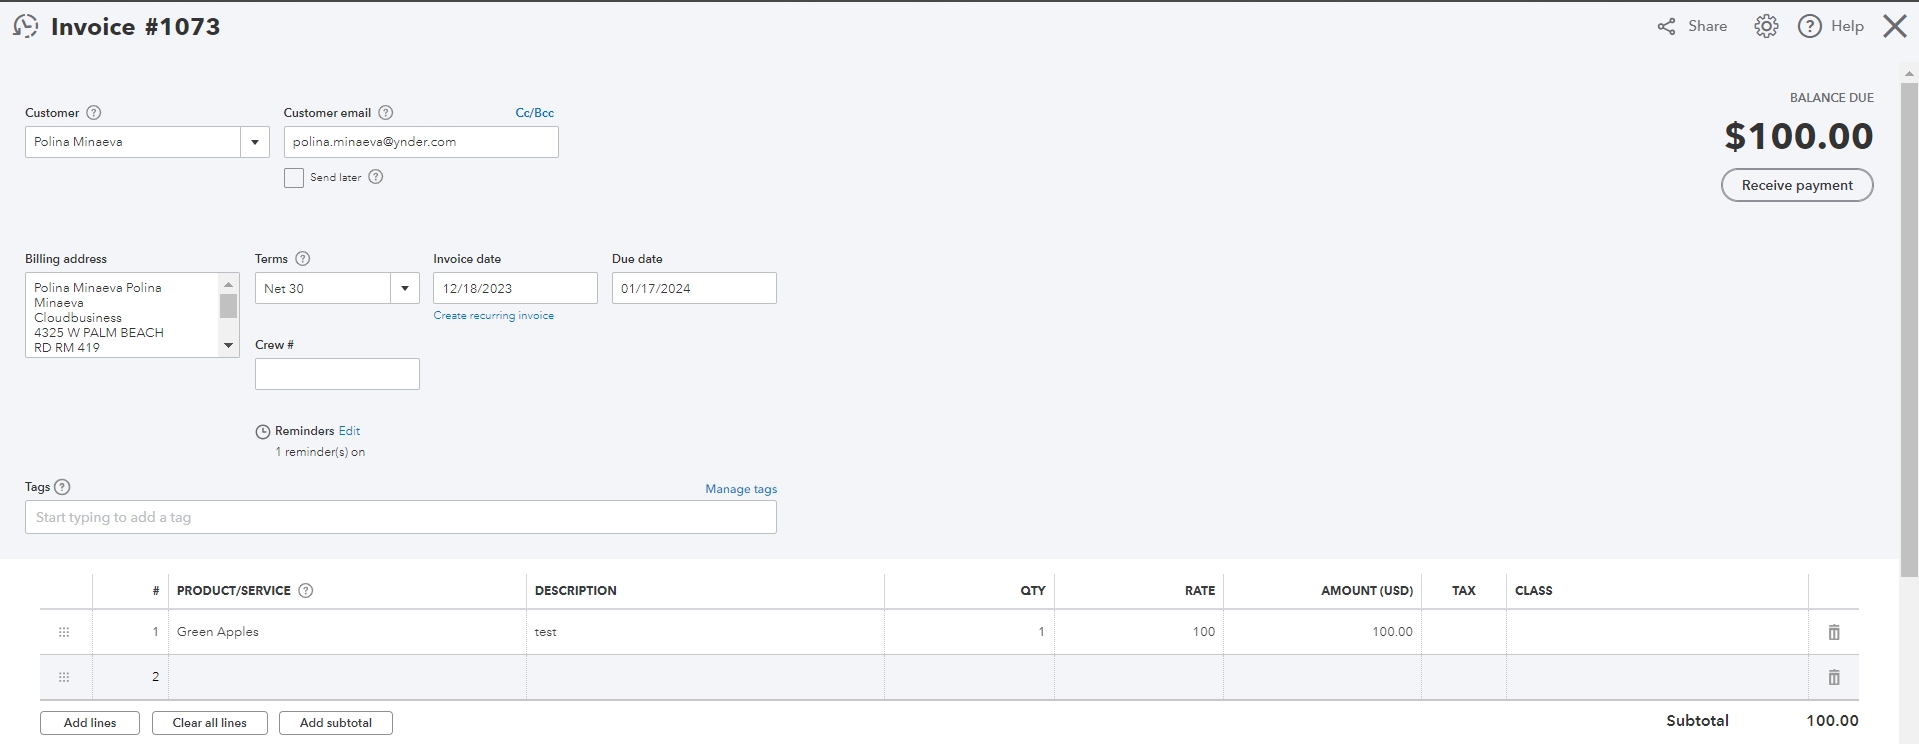
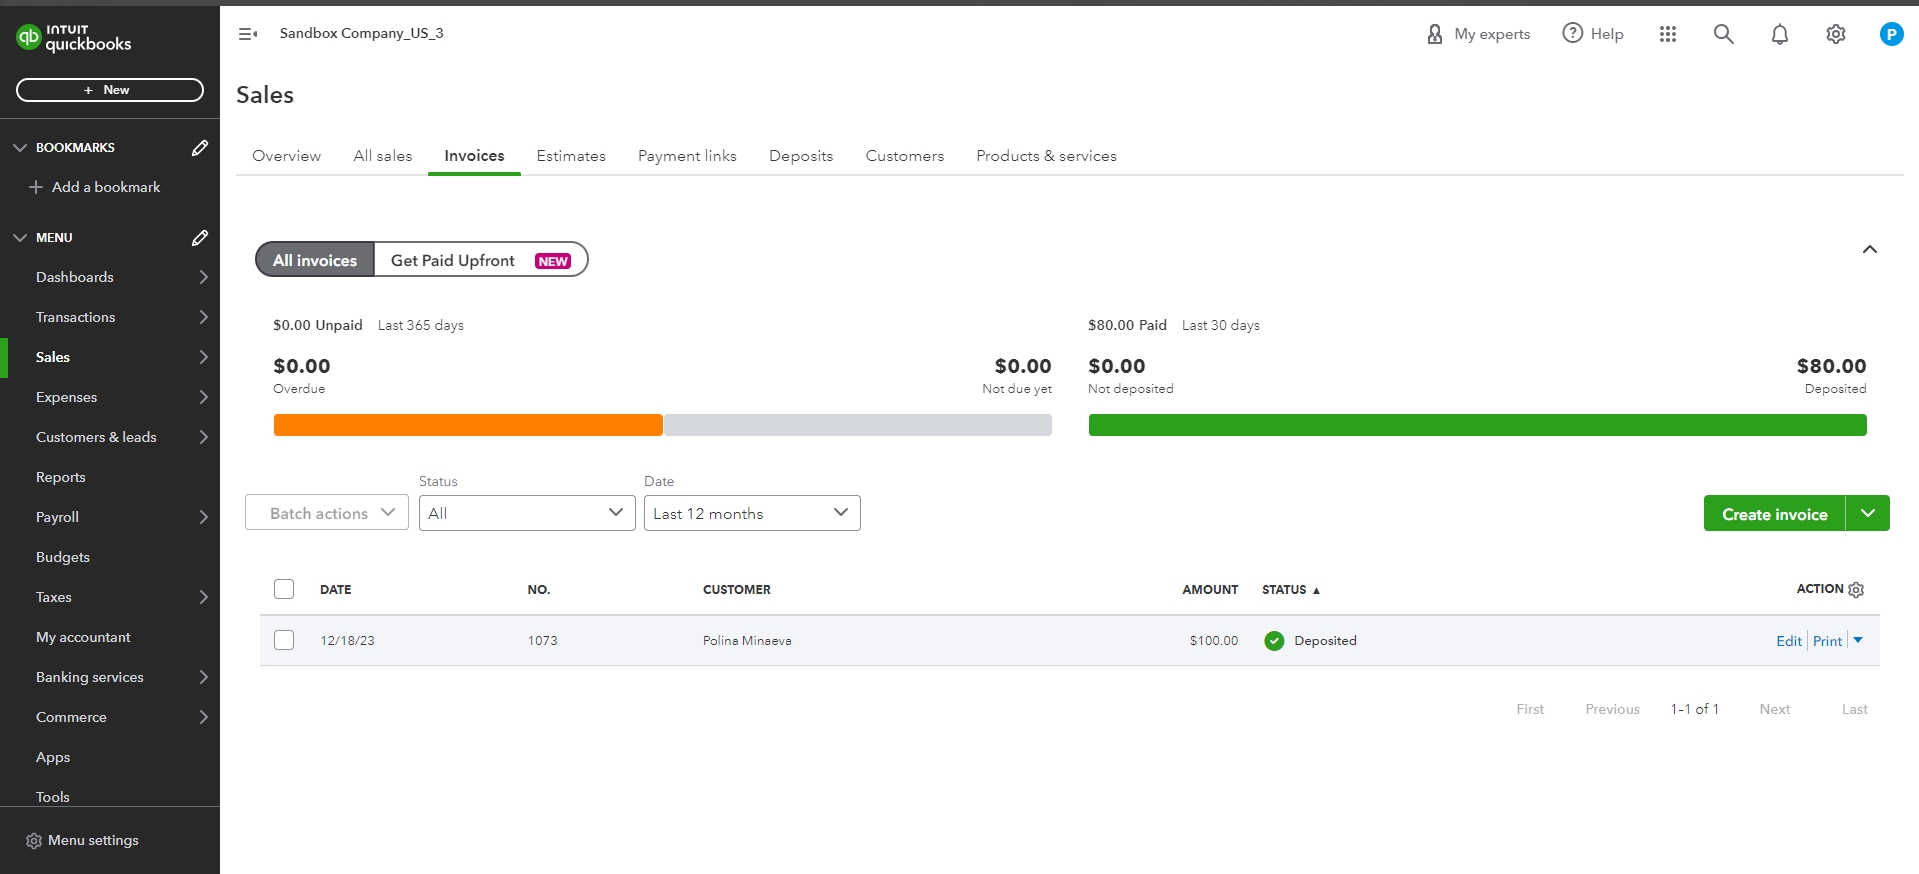
Sometimes we encounter situations that require us to handle exceptions. Picture this: a customer makes a payment that doesn’t quite match the amount on an invoice. For instance, you have an invoice in Stripe for $100, specifically for Green Apples. However, when the customer pays, it’s only $80. This means there’s still an outstanding balance of $20 in your QuickBooks.
For these situations, Stripe offers a feature called “Automatically Write-Off Invoices” designed to automatically consider an invoice as paid and credit the remaining amount if it drops below a specified threshold (e.g., $20 or less, which can be customized based on your preferences). It provides a convenient way to automate handling small outstanding balances, streamlining the accounting process.

However, currently, if a payment is less than the invoice amount, Synder can’t close such an invoice, even if the “Automatically Write-Off Invoices” feature is enabled on Stripe’s side. Instead, the invoice will be marked as “Partially Paid” and remain “Open”. To address the difference, such as the $20 in this case, you’ll need to manually record it. The recommended approach is to classify it as a “Bad Debt” for proper accounting.
How to manage invoice write-offs
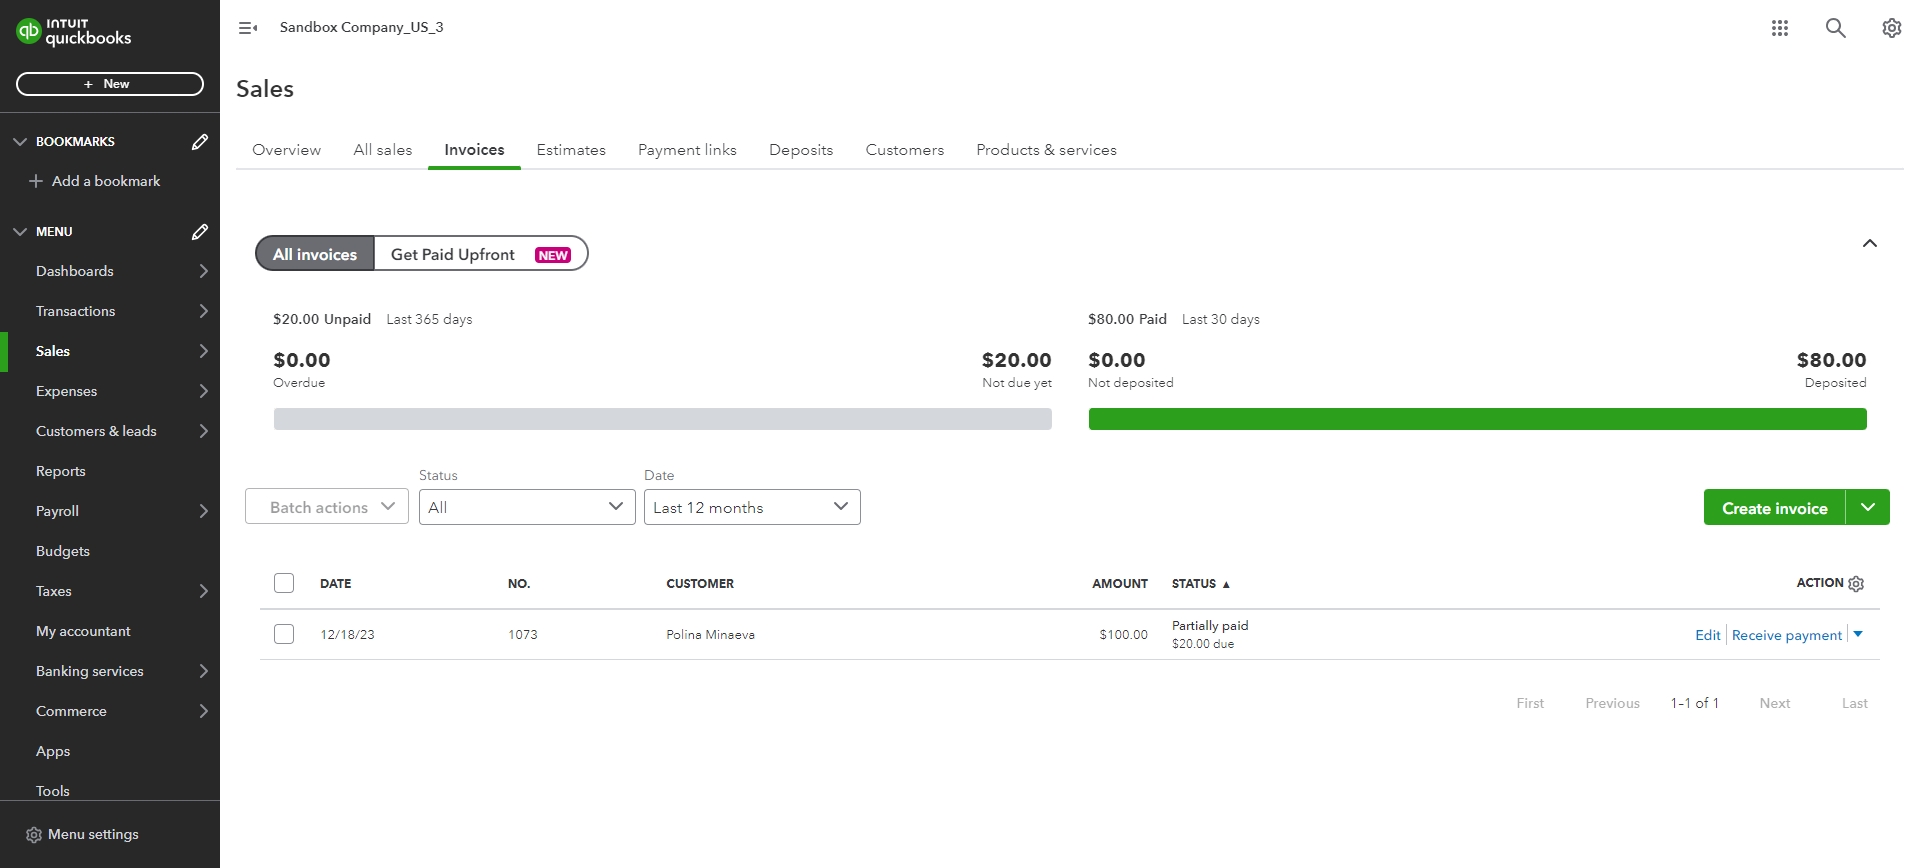
In this scenario, if you receive a payment from a customer that is less than the invoice amount, Synder typically doesn’t automatically record the difference, such as $20, as a “Bad Debt”.
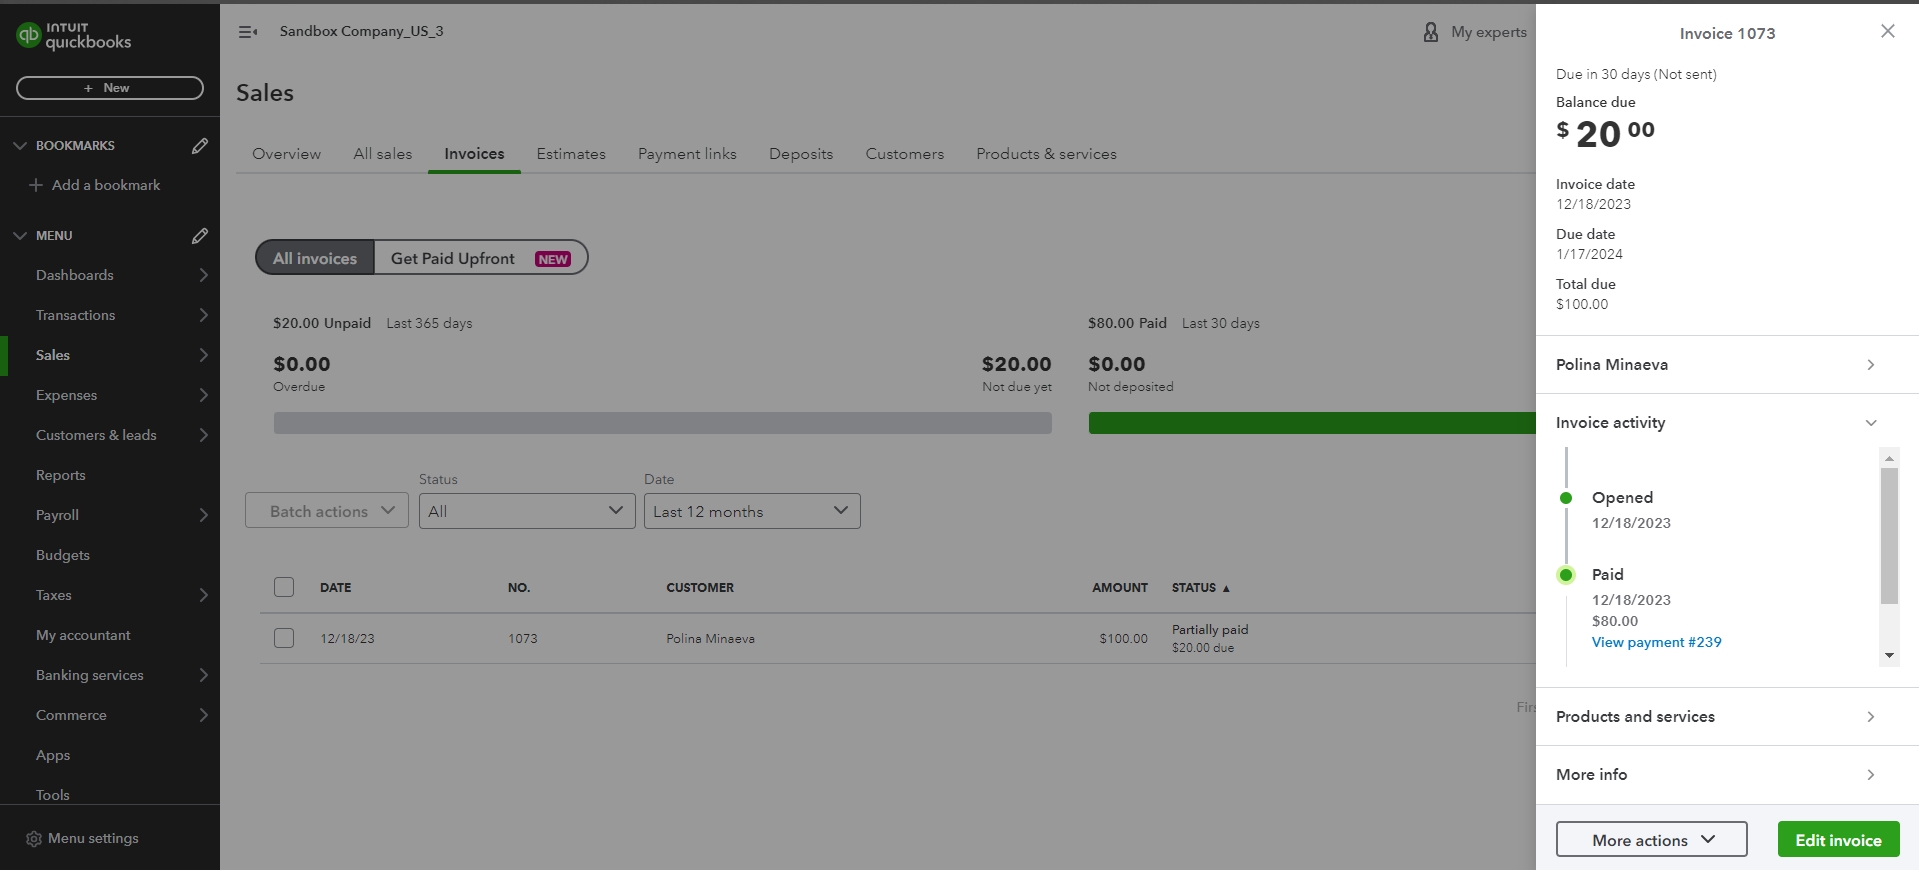
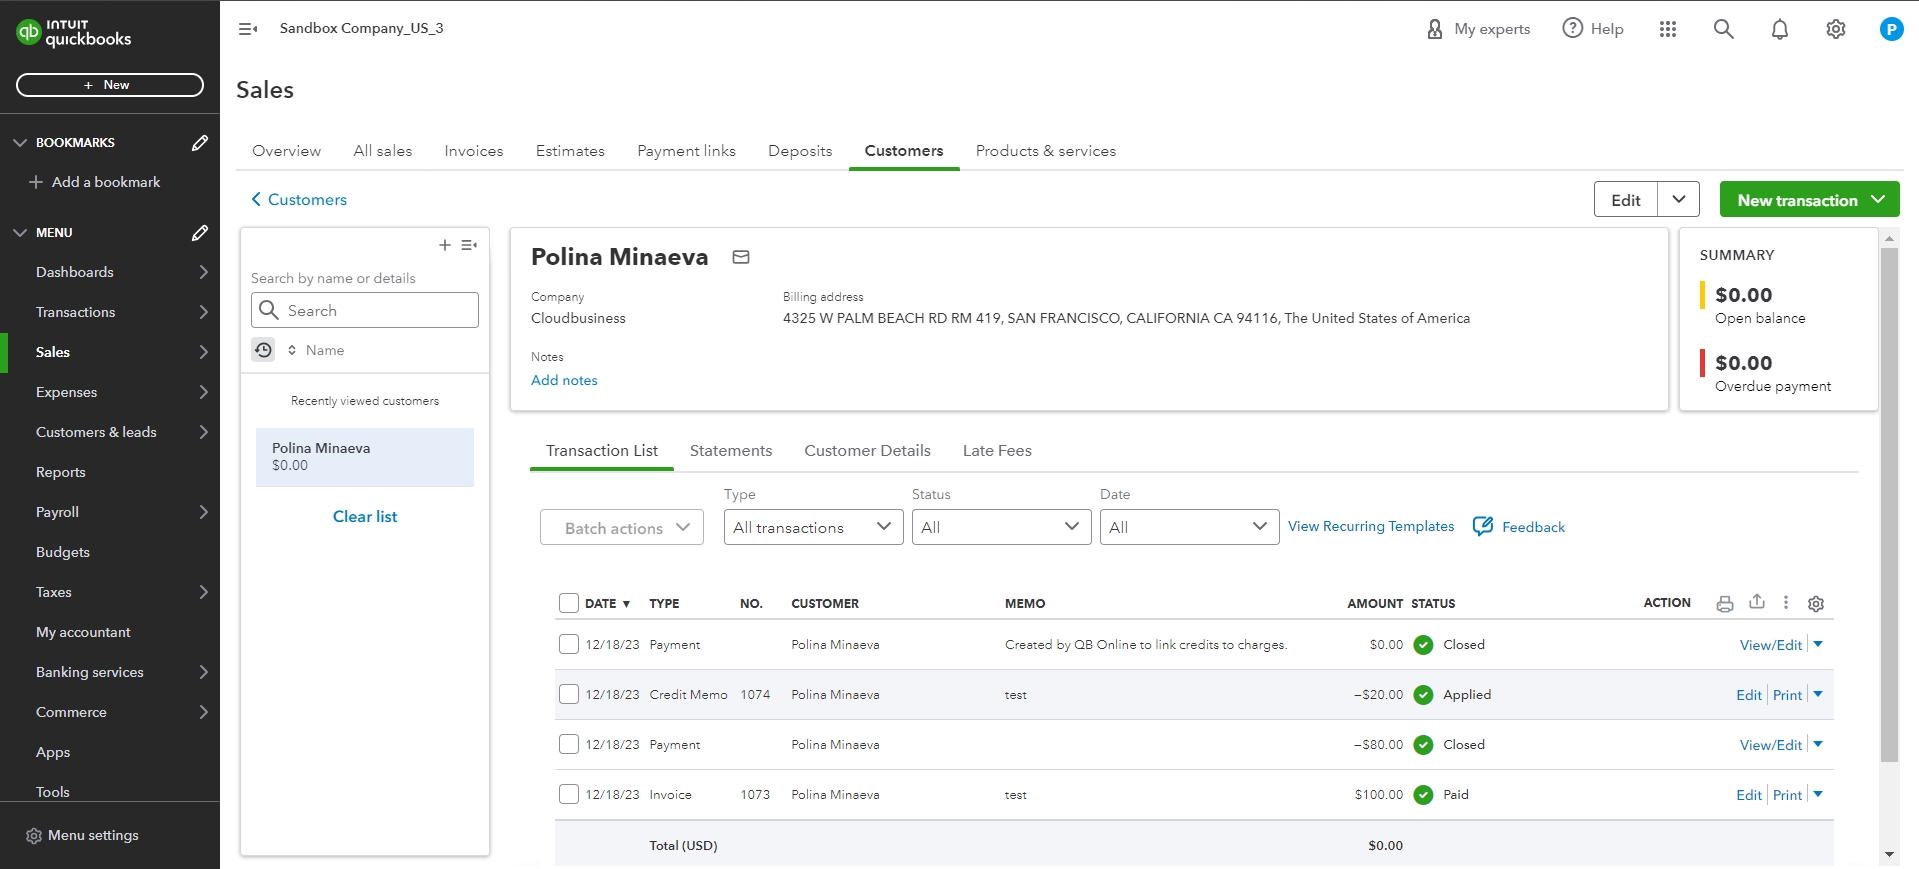
Initially, Synder will synchronize the $100 invoice and mark it as “Open” in your QuickBooks. Subsequently, when the $80 payment is applied to this invoice, it’ll be labeled as “Partially Paid.” Any remaining balance, including the $20 difference, are to be addressed manually.
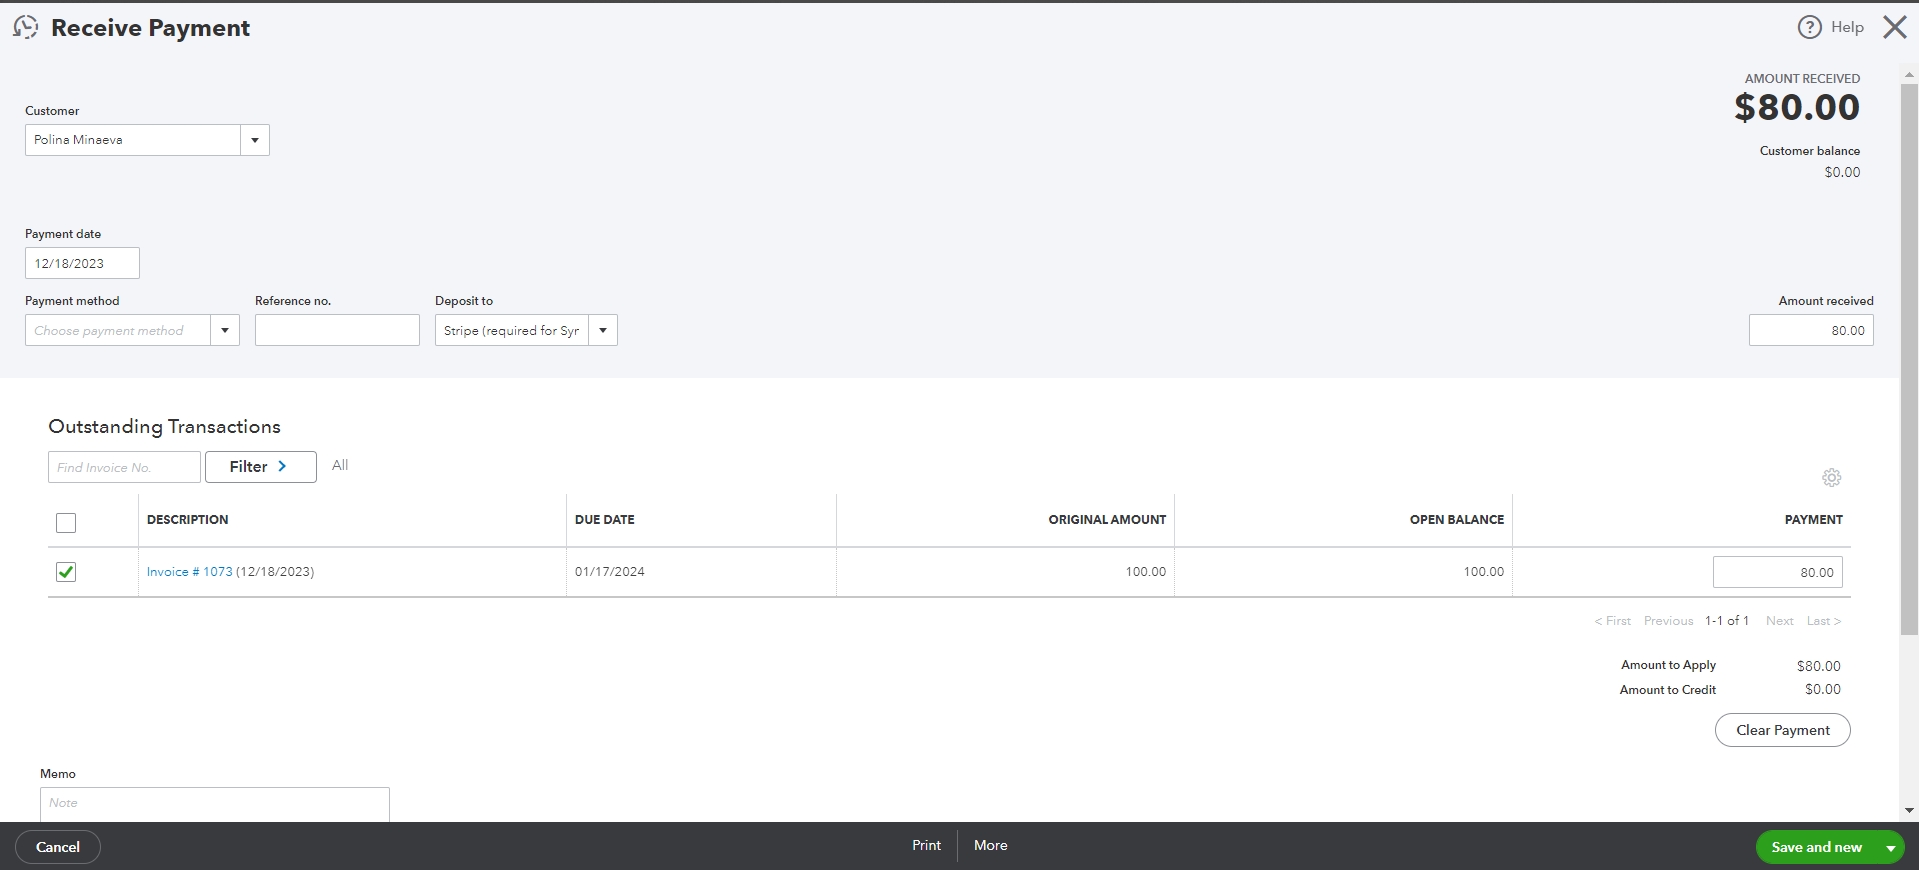
How you can handle a partial payment and the remaining balance in QuickBooks
In your QuickBooks, you’ll have the remaining balance of $20 on the invoice. You can categorize this outstanding $20 as a “Bad Debt” and proceed to write it off. We’ll walk you through writing off the $20 difference on the invoice to a “Bad Debt Expense” account. We’ll be using a simple 2-step method to implement this:
Step 1. Create a Bad Debt Expense account and link a “Bad Debt” line item (product) to it if you don’t yet have such a product.
Step 2. Create a Credit Memo with this product.
Step 3. Apply the Credit Memo to the Invoice.
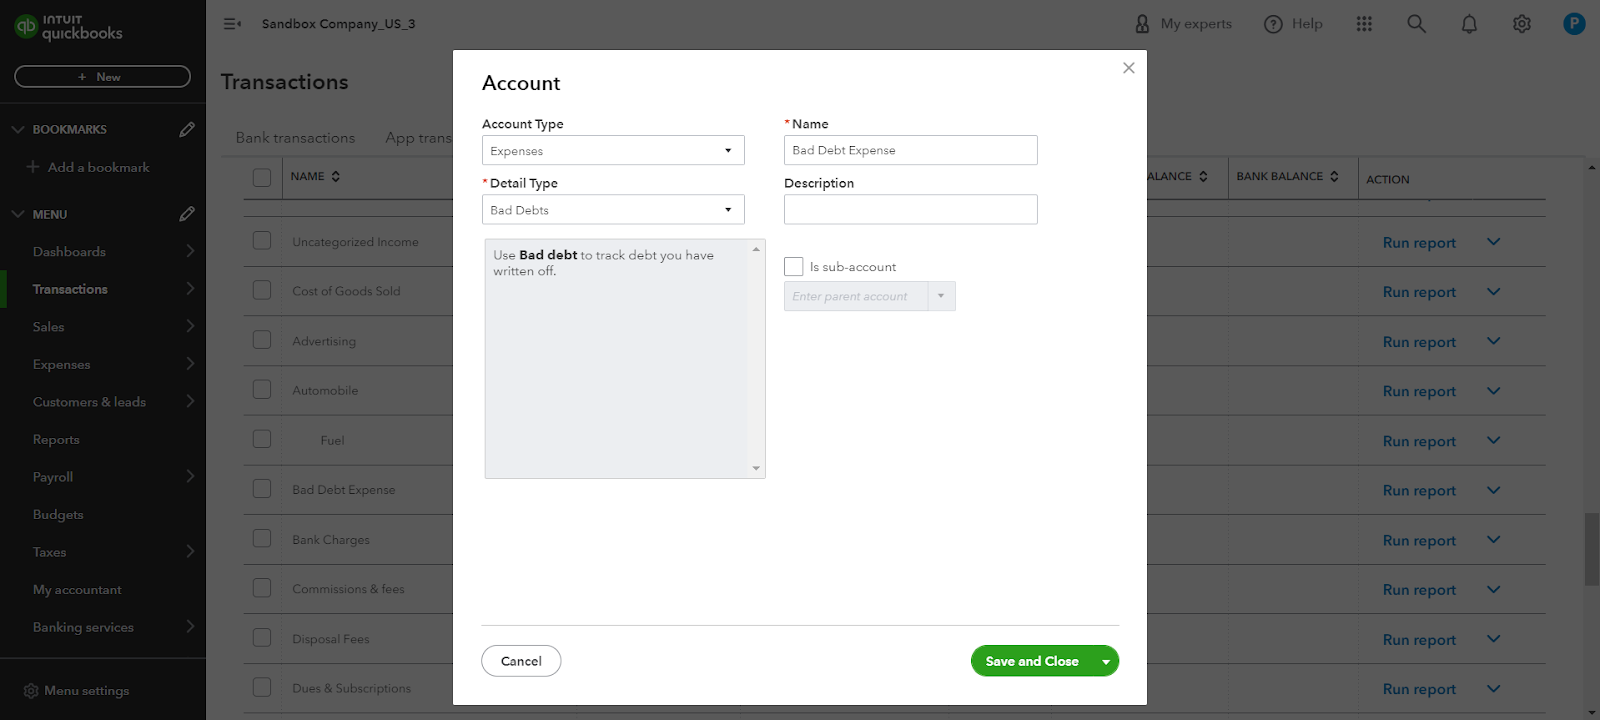
How to create a Bad Debt Expense account
Next, you need to create a Bad Debt Expense account in QuickBooks. Establishing a Bad Debt Expense account is crucial in maintaining accurate financial records and managing potential losses. The following steps outline a simple yet effective method to generate a Bad Debt Expense account within QuickBooks, ensuring that your financial records reflect a comprehensive overview of your business’s fiscal health.
- Go to the Accounting tab and navigate to the Chart of Accounts.
- Click on + New to create a new account.
- Select Expense as the account type.
- Name the account as “Bad Debt Expense“.
- Save the account.
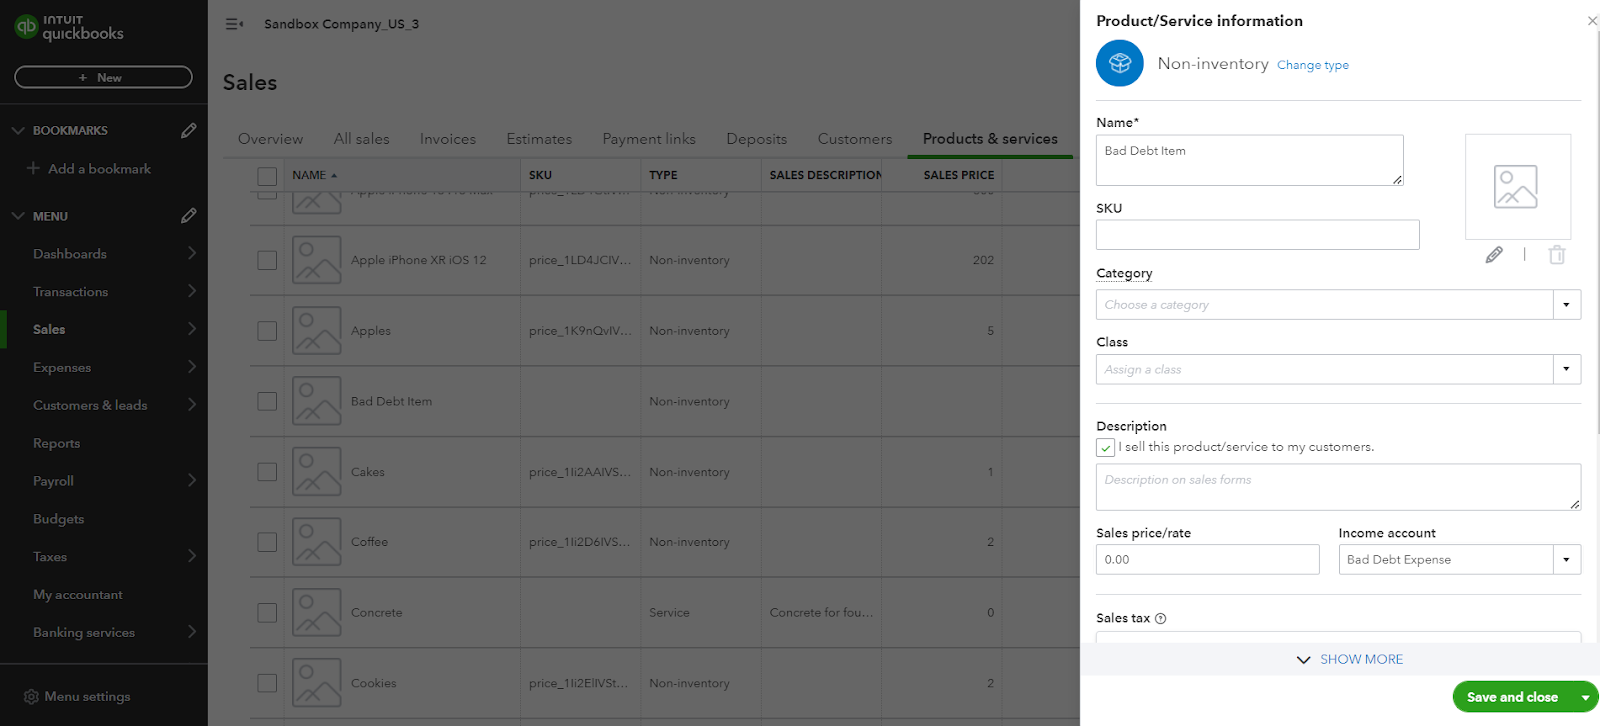
How to create a Bad Debt line item
Establishing a Bad Debt line item is a straightforward process too. The following steps outline an approach to creating a Bad Debt line item within the Sales module of QuickBooks.
- Go to Sales, then select Products & Services.
- Select + New.
- Select Non-inventory or Service.
- Enter a Name for the product or service and an SKU if you track them.
- Select the account you want to use from the Income account dropdown – a “Bad Debt Expense” account.
- When you’re done, select Save and Close.
Now that the preparations stage is over, let’s move on to the two-step process of writing off the $20 difference.
Step 1: Create a Credit Memo
Once you’ve established both the Bad Debt Expense account and the Bad Debt line item, you’re prepared to generate a Credit Memo within QuickBooks to formally recognize and write off the incurred $20 difference as a bad debt. Follow these steps to create a Credit Memo:
- Select + New in the upper-left corner.
- Select Credit Memo.
- In the Customer dropdown, select the customer’s name who owes the bad debt.
- Select the “Bad Debt Expense” product created earlier as the line item.
- Enter the Credit Memo details, such as the Date and the Amount.
- When you’re done, select Save and Close.

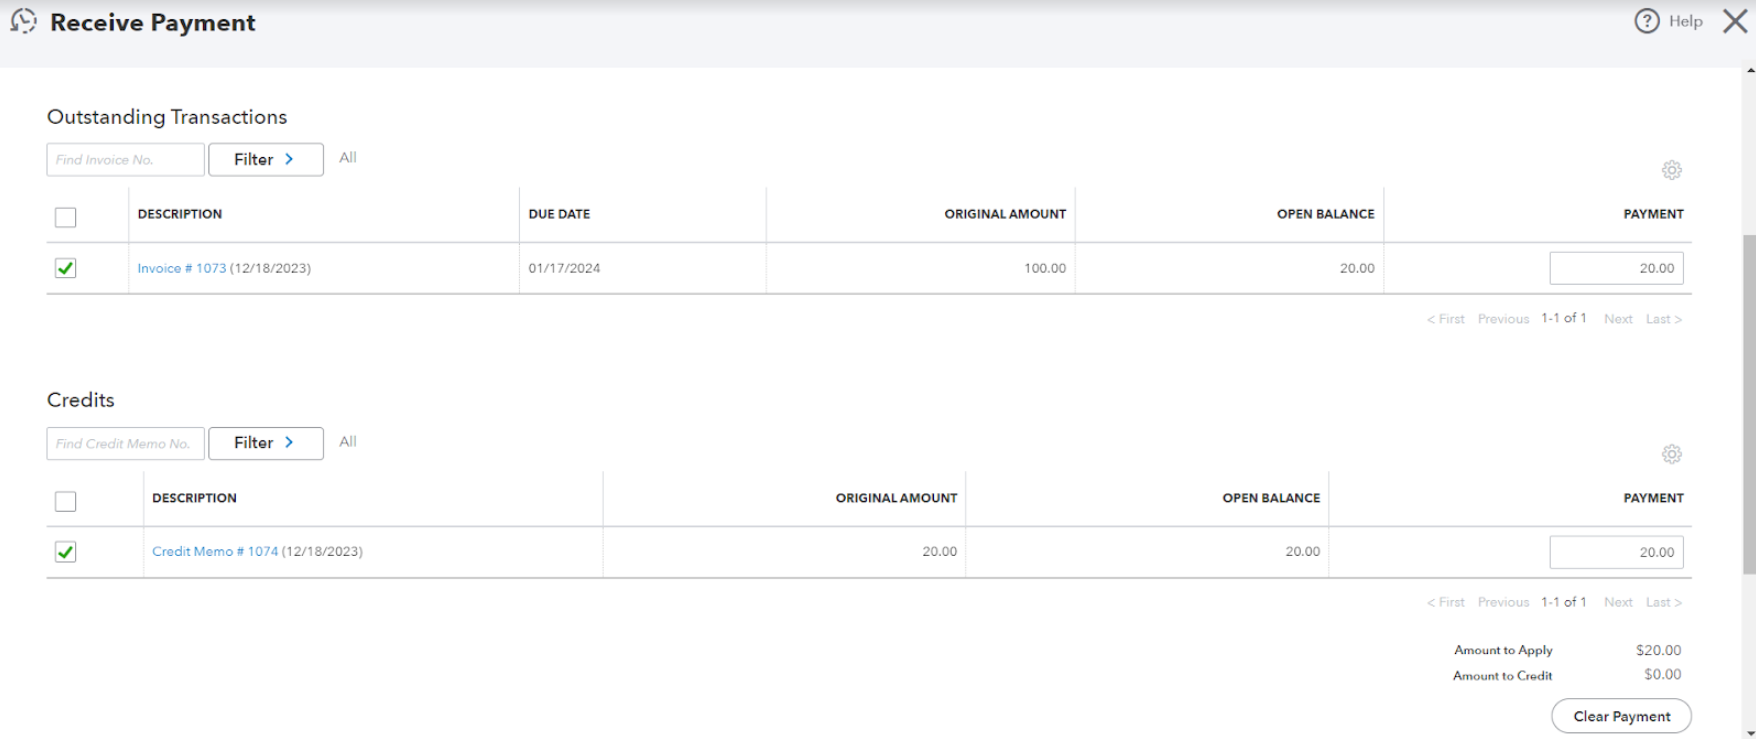
Step 2: Apply the Credit Memo to the invoice
The final step is to apply the Credit Memo against the customer’s invoice to close out the balance owed. This will reduce the customer’s outstanding balance and write off the bad debt. To apply the Credit Memo, follow these steps:
- Select + New.
- Select Receive payment.
- In the Customer dropdown, select the customer.
- In the Outstanding Transactions section, select the open invoice to which you want to apply the Credit Memo.
- In the Credits section, select the Credit Memos you want to apply.
- Make sure that the balance is zero.
- When you’re done, select Save and Close.
Note: If you turn on the auto-apply credits setting in your accounting company, QuickBooks will apply the credit for you. If you turn it off, here’s how to manually apply a Credit Memo to an invoice.
Finally, you’re done, the customer balance has been written off to zero, and you can move on.
In conclusion, adeptly managing partially paid invoices is an important aspect of maintaining accurate financial records and ensuring a comprehensive understanding of your business’s fiscal health. The proper classification of outstanding balances, such as utilizing the ‘Bad Debt’ categorization in QuickBooks, plays a key role in maintaining financial transparency. The two-step method explained here provides a systematic approach to handling discrepancies in payments. By following the steps outlined in this guide, you can navigate through the process of handling partially paid invoices to streamline your accounting processes, write off bad debts in QuickBooks and maintain accurate financial records.
Pro tips and tricks for seamless invoice management with Synder
Tip 1. In QuickBooks, you can produce financial reports to confirm the bad debts that have been written off. Simply go to the “Reports” section, and choose financial reports like the “Profit and Loss” Statement or the “Balance Sheet”. Adjust the report settings as required, and then run the report to examine the updated financial statements that now include the written-off bad debts.
Tip 2. Remember to consult with a professional accountant or financial advisor for guidance tailored to your unique situation.
Tip 3. In QuickBooks, you have the option to recover bad debts that were previously written off. If a customer pays a debt that was previously considered unrecoverable, you can log the payment as income and allocate it to the relevant accounts receivable.
Reach out to the Synder team via online support chat, phone, or email with any questions you have – we’re always happy to help you!