

- Set up Smart Rules for your Journal Entries
- Step 1: Open Smart Rules
- Step 2: Select Journal Entry as a trigger
- Step 3: Add Condition (Trigger)
- Step 4: Set Action
- Step 5: Save and Test
- Troubleshooting
- If the rule does not apply
- If you are on the Pro plan, rules might be locked off
- Useful Material
- What it looks like in QuickBooks Online
This guide shows how to automatically apply Class, Location, or change Accounts on Journal Entries created by Revenue Recognition in per-transaction (PT) mode using Smart Rules.
Use this when recognized revenue must appear correctly on your Profit & Loss by Class or Location report.
This article applies only to QuickBooks Online users using Per-Transaction mode
If you use Summary mode, use Mapping Groups instead.
Use this guide if:
- You use Revenue Recognition in Per-Transaction (PT) mode
- Synder creates Journal Entries (JEs) in QuickBooks Online
- You need revenue split by Class or Location
- You want this applied automatically
Important:
- Smart Rules apply to all synced Journal Entries that meet the rule condition
- Rules work at the line level only
After successfully running this setup:
- Each Revenue Recognition Journal Entry line will automatically:
- Apply the correct Class
- Apply the correct Location
- Or change the Account
- Revenue will appear correctly on Profit & Loss by Class/Location
Set up Smart Rules for your Journal Entries
Step 1: Open Smart Rules
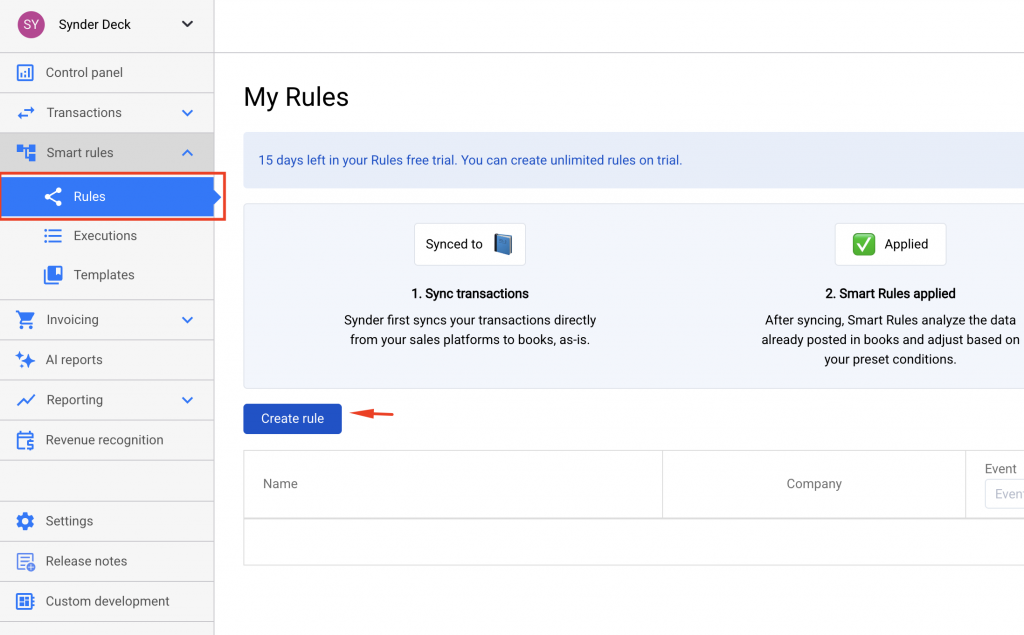
Go to Smart Rules and click Create rule
Step 2: Select Journal Entry as a trigger
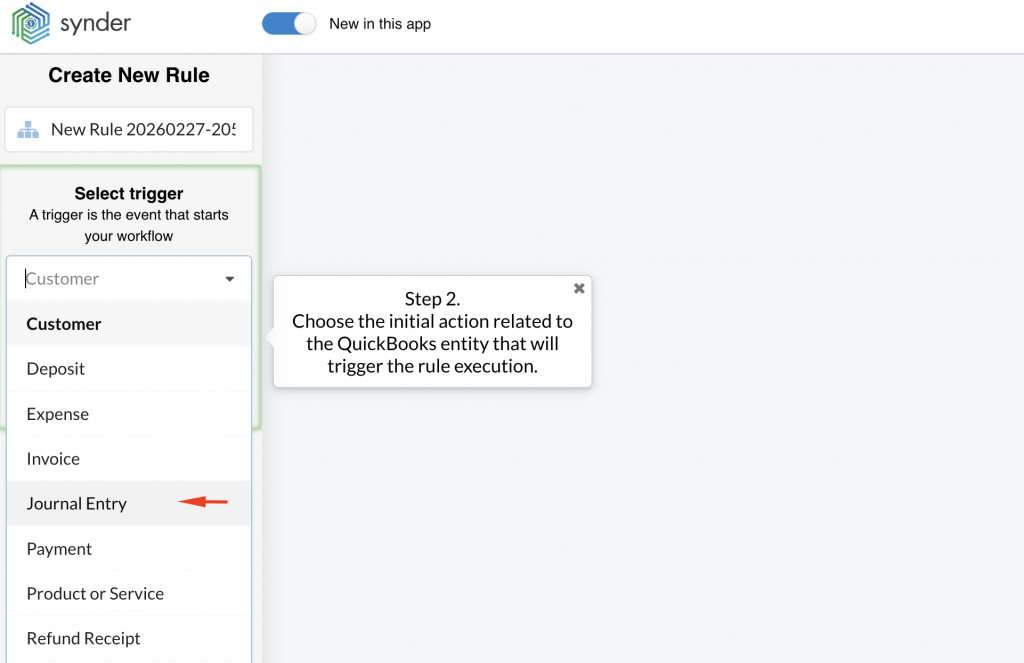
Choose Journal Entry as the transaction type for the trigger
Step 3: Add Condition (Trigger)
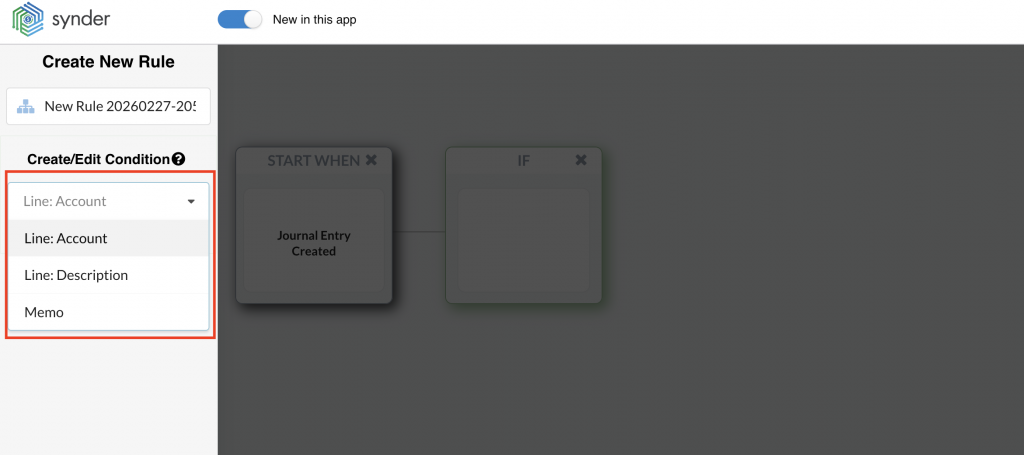
You can use these line-level fields:
- Line Account
- Line Description
- Memo field (field name may vary in QuickBooks Online)
Example conditions:
- Line Description contains “Subscription A”
- Line Account equals “Subscription Income”
- The memo contains “product name”
Step 4: Set Action
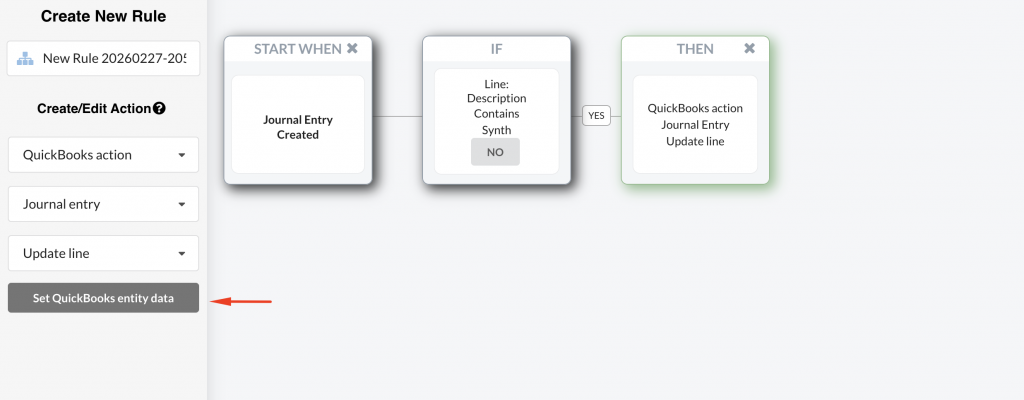
Choose what should happen when the condition matches:
- Apply Class
- Apply Location
- Change Account
Select the correct value.
You can set multiple condition and action combinations in the same rule for different lines in the Journal Entry
Step 5: Save and Test
- Save the rule.
- Run Revenue Recognition in PT mode.
- Open the created Journal Entry in QuickBooks Online.
- Confirm the correct Class/Location appears on the relevant line.
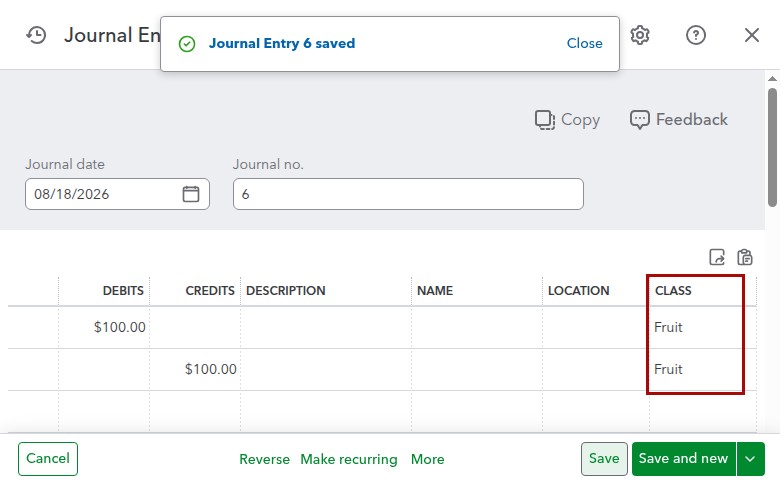
What it looks like in QuickBooks Online
Once the rule runs, each Revenue Recognition journal entry line carries the class automatically. Here, both lines of the entry show the Fruit class in the Class column, so recognized revenue lands correctly on your Profit & Loss by Class.
Troubleshooting
If the rule does not apply
- Go to Smart Rules → Executions
- Find the Journal Entry
- Confirm:
- The condition matches the actual JE line
- The correct transaction type (Journal Entry) was selected
- The rule is active
If the execution shows “Not matched,” review the exact wording in:
- Line Description
- Line Account
- Memo field
Conditions must match the JE exactly.
If you are on the Pro plan, rules might be locked off
You cannot edit Smart Rules directly.
Send a request to:
Include:
- Example Journal Entry (screenshot or details)
- Exact condition (e.g., product name in description)
- What Class/Location should apply
Useful Material
- Synder RevRec – Per Transactions Sync
- How to use Mapping Groups in Summary mode
- How Smart Rules work in Synder
Reach out to Synder Team via online support chat or email with any questions you have – we are always happy to help you!
