

Have you ever wondered which area of your business brings in most of your income? To find out, you first need to categorize your sales and expenses properly. QuickBooks settings allow in-depth categorization — for example, with the help of classes and locations. With Synder, you can apply locations to transactions automatically. As a result, you categorize more efficiently and make important business decisions more easily. So let’s find out how to apply locations, and help your business grow!
Overview:
- What’s a location and how it can be used
- How to apply a location for a connected platform
- How to apply several locations for one connected platform with the help of Smart Rules
New to sync modes? See How Smart Rules Work in Synder.
What’s a location and how can it be used?
QuickBooks locations are best for tracking large categories of your business, helping to clearly see which area of the business is thriving, and which isn’t. You use location tracking to categorize data from different locations, offices, regions, outlets, or departments of the same company. This feature lets you see all the payments for one location and deposit them as a group. To start using locations in Synder, you need to enable locations in QuickBooks Online first.
Note: Please double-check if locations are available on your QuickBooks plan.
How to apply a location for a connected platform
Once you’ve enabled location tracking in QuickBooks and created desired locations there, you need to enable locations tracking in Synder:
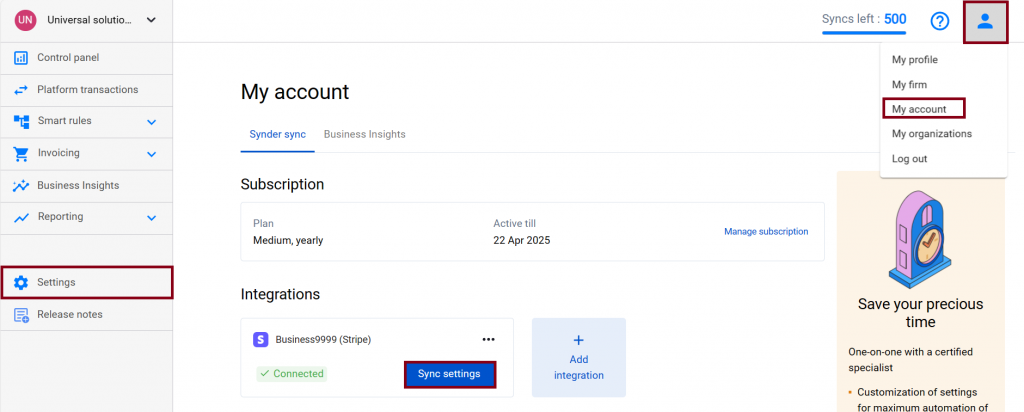
1. Navigate to the “Settings” tab on the left-side menu and select the integration to which you want to apply a location. Alternatively, click on the Person icon in the upper-right corner, choose “Organization settings,” and then click on “Sync settings” under the desired integration.
2. In the General tab of the settings, set the “Apply location” ON and select a location in the dropdown.
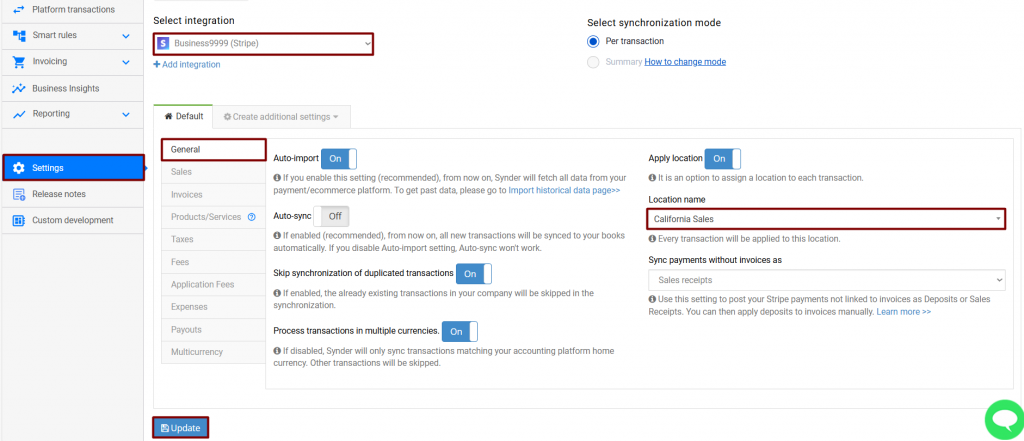
3. Hit the Update button to save the settings.
How to apply different locations for one connected platform with the help of Smart Rules
If you need to use different locations for one sales channel or payment platform, you can achieve that with the help of the Smart Rules feature. First, you’ll need to find a way to differentiate between your various locations. For example, you can build a rule to assign a location to a transaction depending on the shipping address of that transaction.
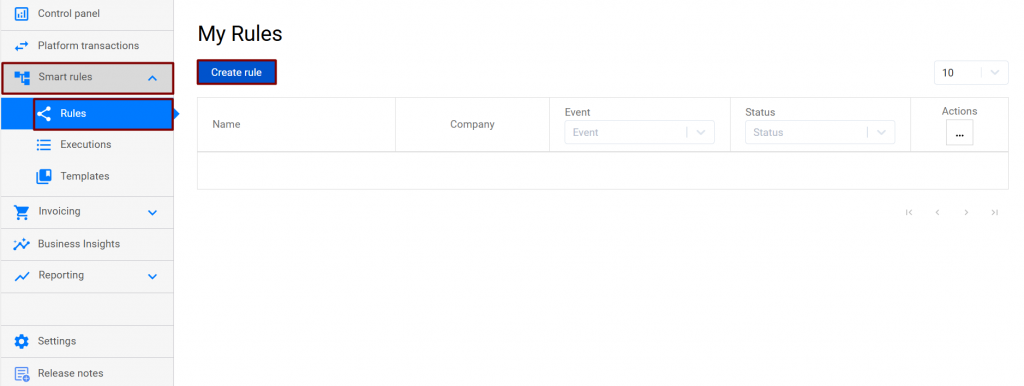
1. Go to Smart Rules → Rules → Create rule.
2. Choose the trigger that starts your rule. For example: Sales Receipt → Created. It means that each time Synder creates a Sales Receipt in your QuickBooks, this Rule will fire.
3. Choose the condition to differentiate the transactions: if Shipping Address → a suitable option from the dropdown → Contains → Yes. In this way, you tell Synder to check if this condition is met and apply the rule accordingly.
4. Finally, choose the action: QuickBooks action → Sales Receipt→ Update current → Set QuickBooks entity data. This will tell Synder that it should update the exact sales receipt which has triggered the rule.
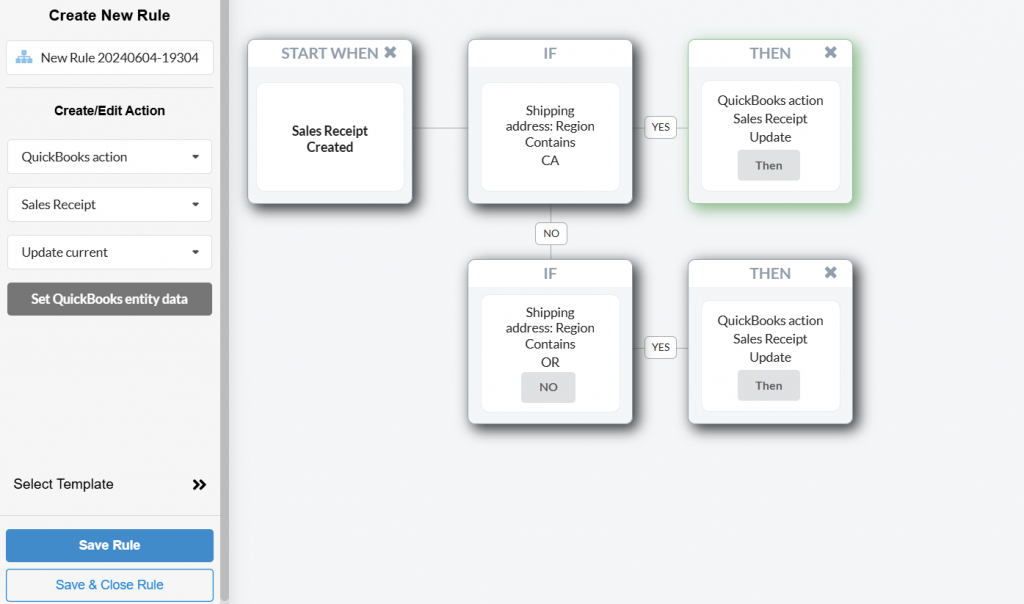
5. Choose the location in the dropdown, click → Submit.
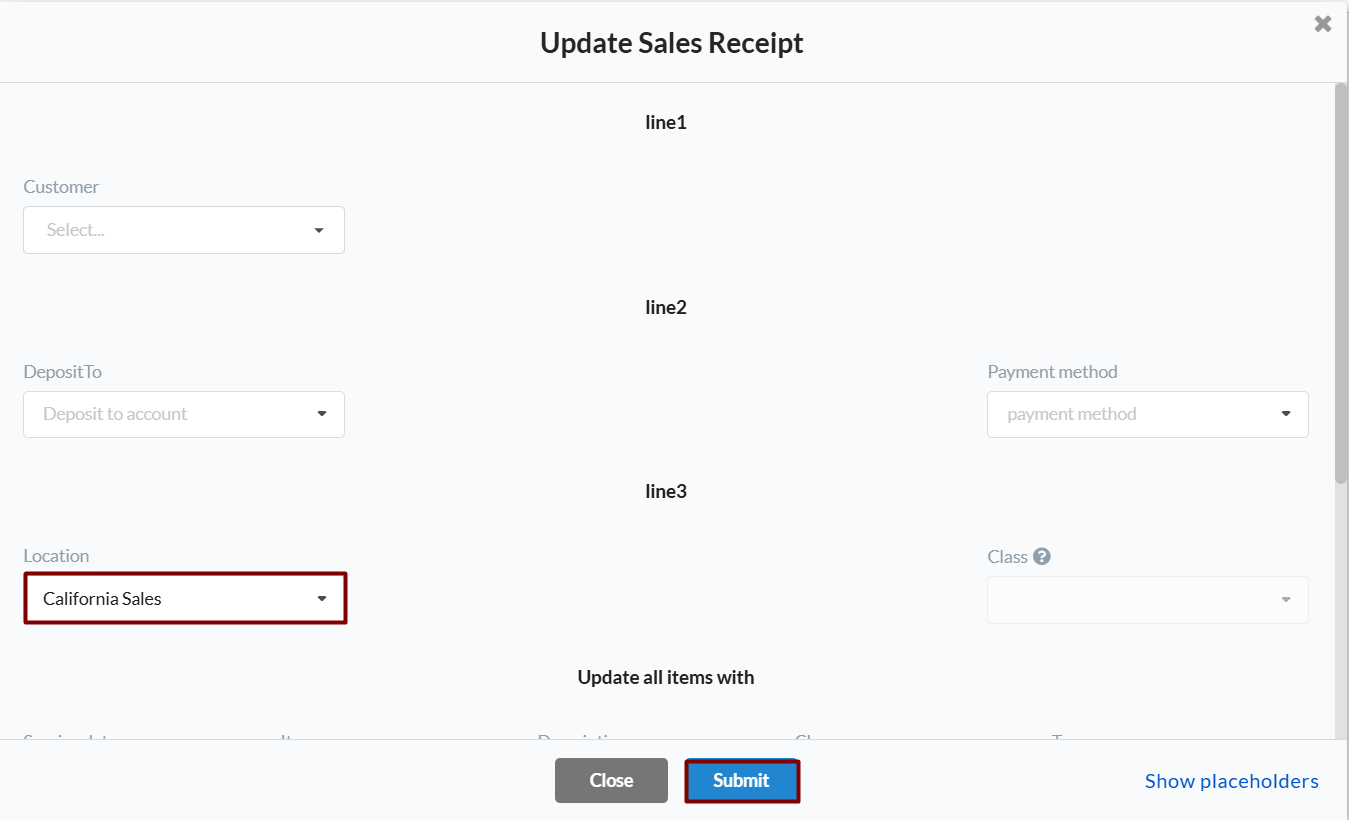
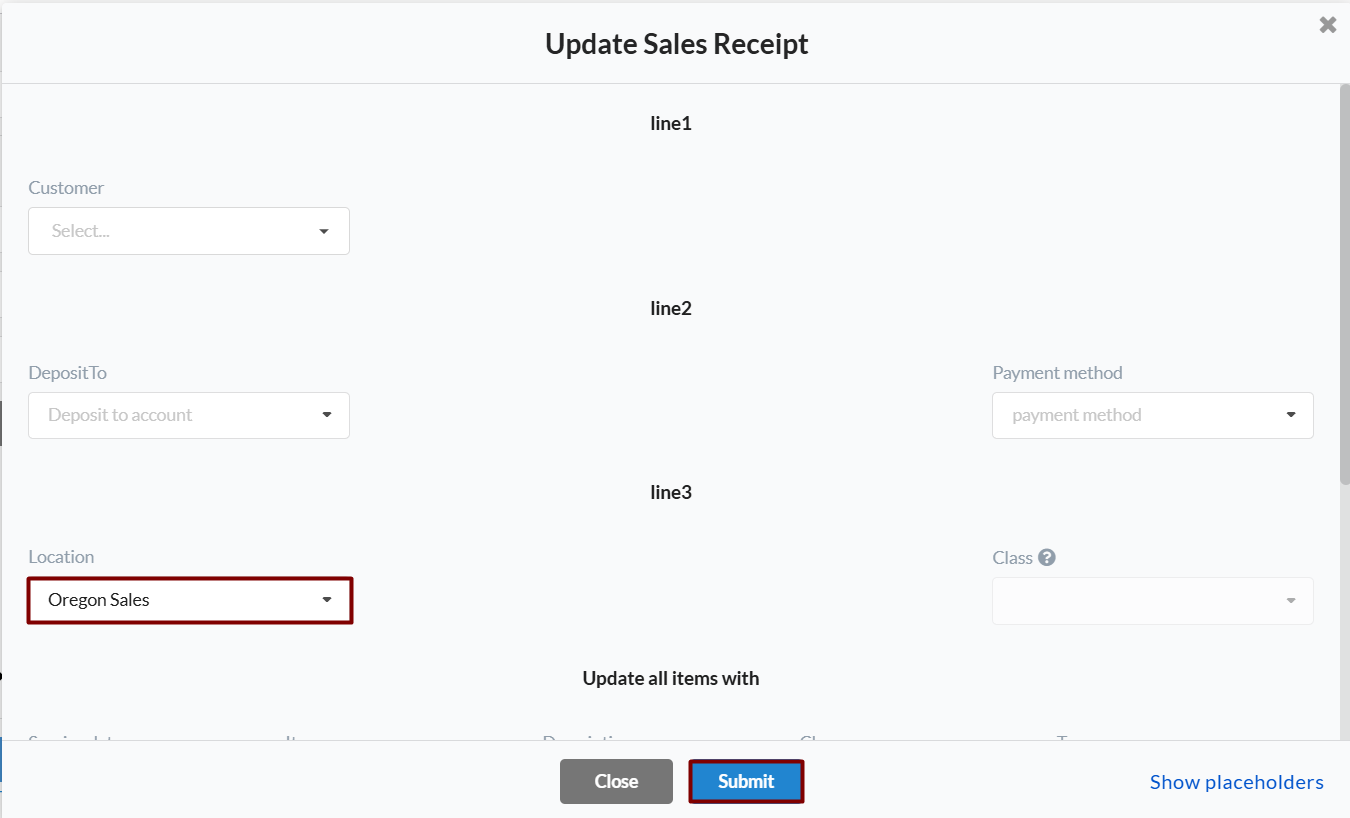
6. Hit the Save & Close Rule button.
Note: you can create several conditions within one rule by tapping the No button.
Check the results
Now, that’s it — you can check the results:
-Go to the Platform transactions tab.
-Sync a few Ready to Sync transactions.
-Hit the Explain button → scroll down to the Sync Log → hit the Show in QB button.
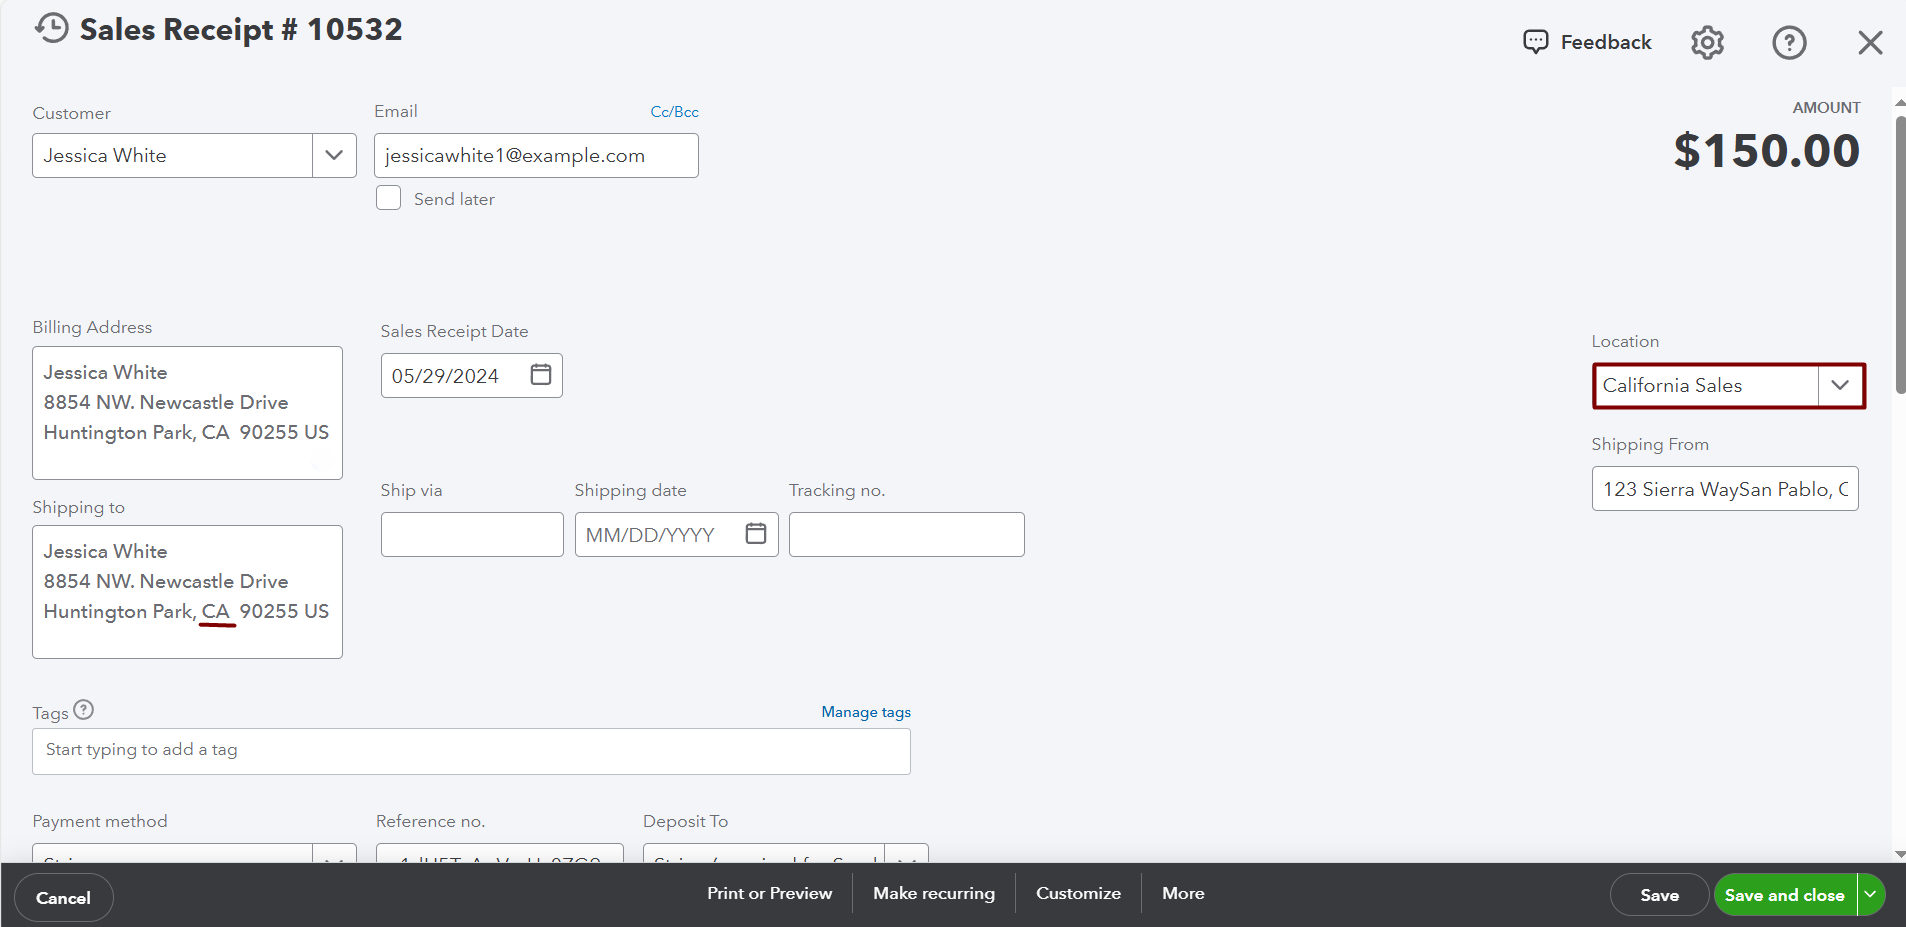
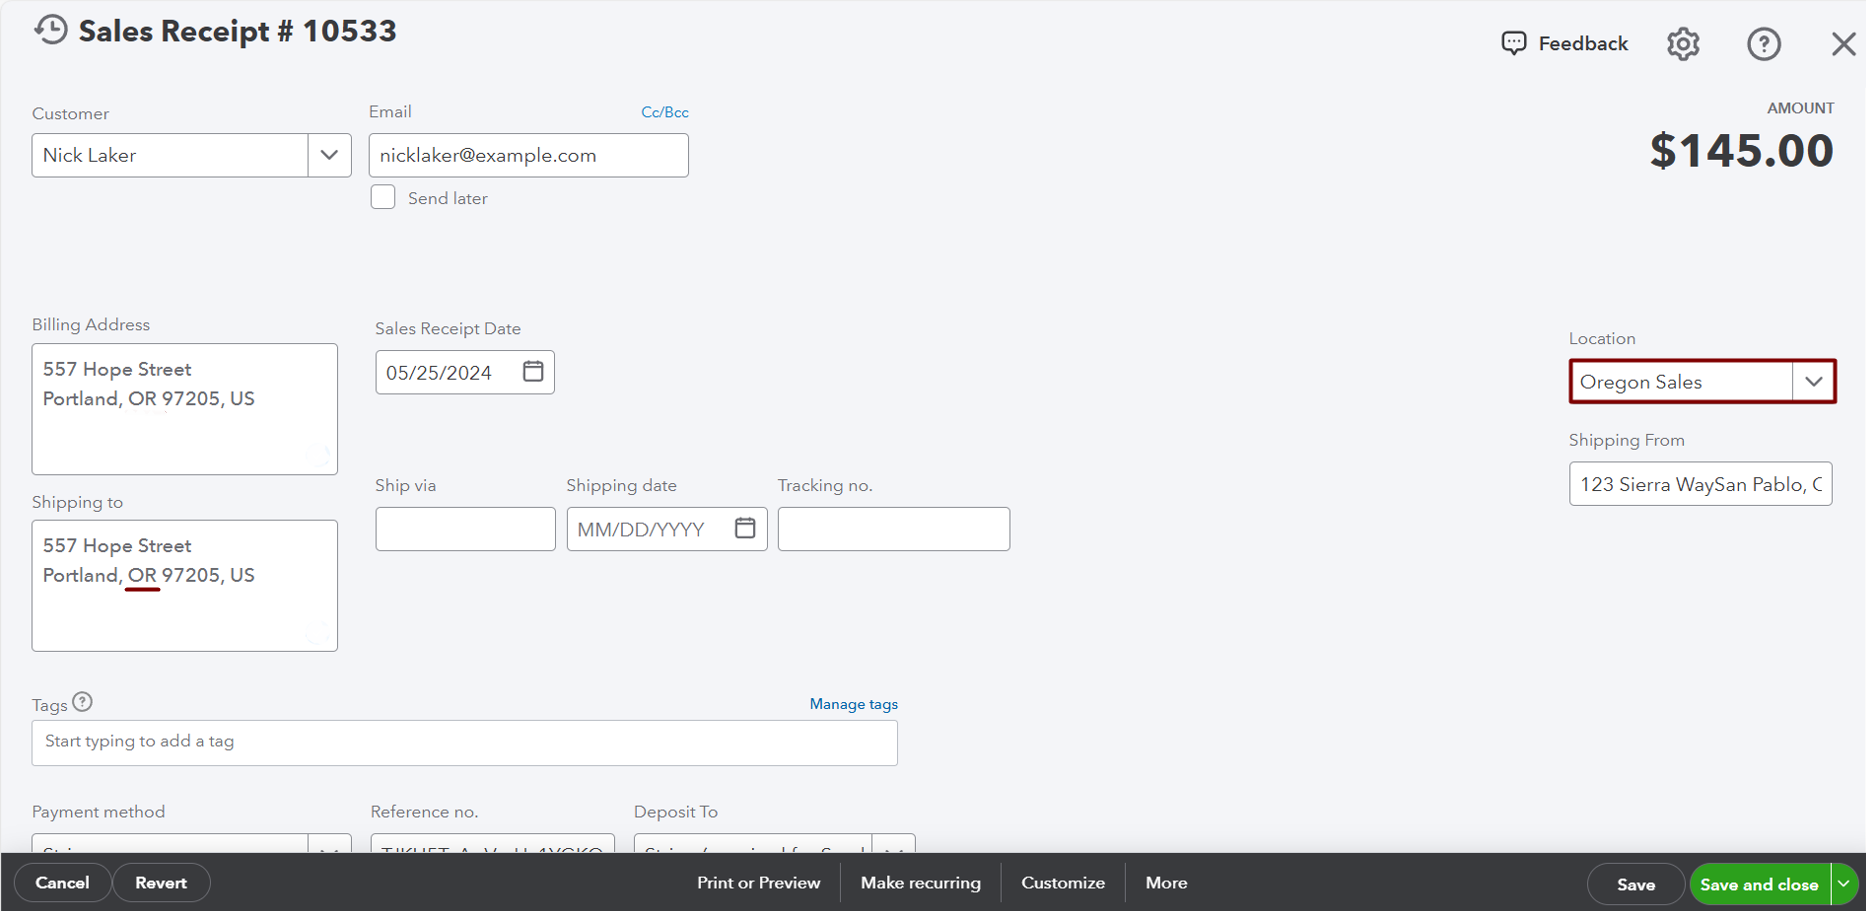
Now that you know the most important things regarding location tracking with Synder, it’s time to see it in action!
Reach out to the Synder Team via online support chat, phone, or email with any questions you have – we’re always happy to help you!
