
- Working with Summary Sync
- How to check Summary Sync is working
- Applying changes to synced summaries
- Important details to know
- I need to change a summary that was already synced
- Frequently asked questions
This guide explains how Summary Sync works in Synder and what data it posts to your accounting platform.
This is a reference guide, not a setup walkthrough. It explains how to interpret and work with Summary Sync after your platforms are connected.
Use this guide if:
- You selected Summary Sync when creating your Synder organization.
- You want accounting data posted in an aggregated format rather than transaction by transaction.
This guide does not cover detailed integration or connection steps. If you use Per Transaction Sync, see: [Per Transaction Sync Guide].
Working with Summary Sync
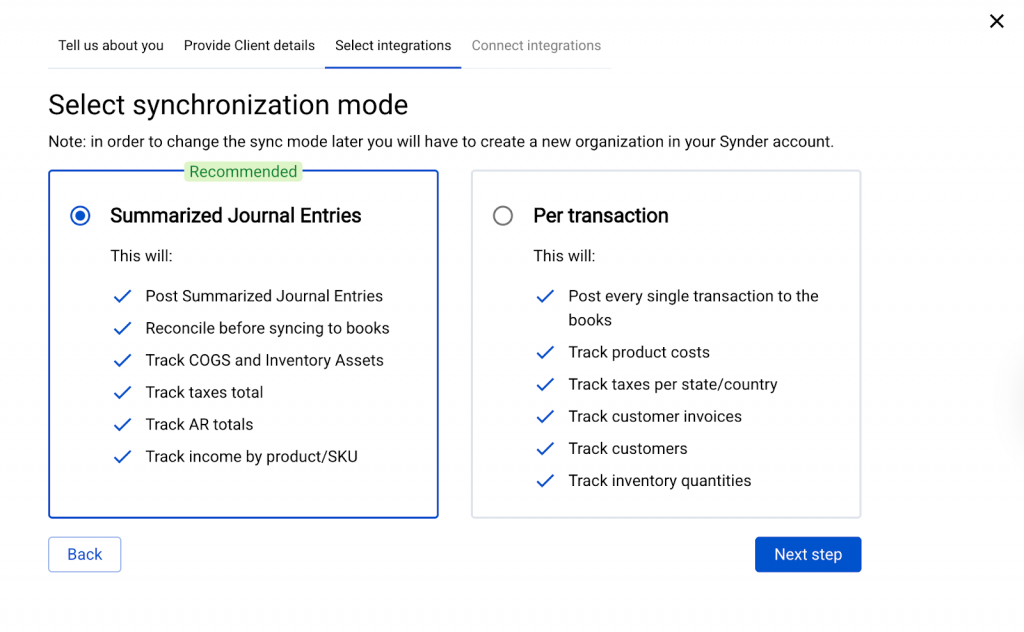
Summary Sync groups transactions from your connected platforms into summaries for a selected period and syncs each summary to your accounting platform as one aggregated record.
How to sync Daily Summaries from Shopify and Stripe into QuickBooks Online with Synder
Connect your platforms
Synder generates summaries after your sales platforms and accounting platform are connected to your Synder organization.
- Open your Synder organization.
- Connect your sales and payment platforms.
- Connect your accounting platform.
- Select a synchronization mode.
Import transactions into Synder and review them
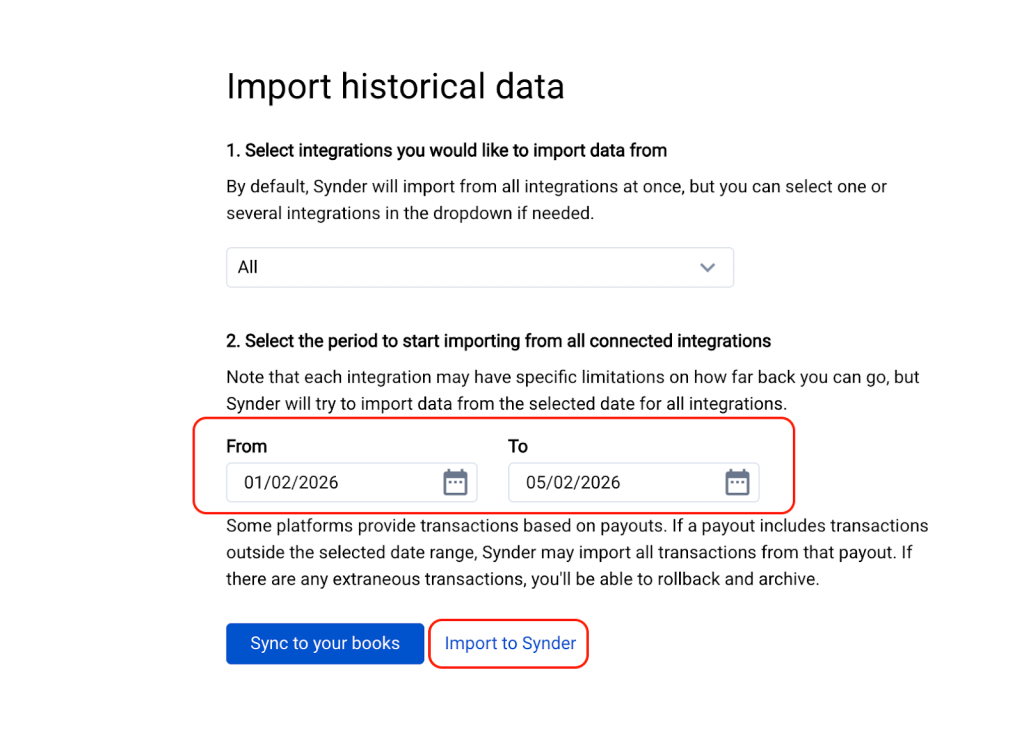
After all platforms are connected, Synder prompts you to select the start date for importing data for each connected platform.
During the trial period, you can import up to two months of data to test Synder. After the trial period, you can subscribe and import more historical data.
Summaries appear once the import is complete.
Review and complete mapping
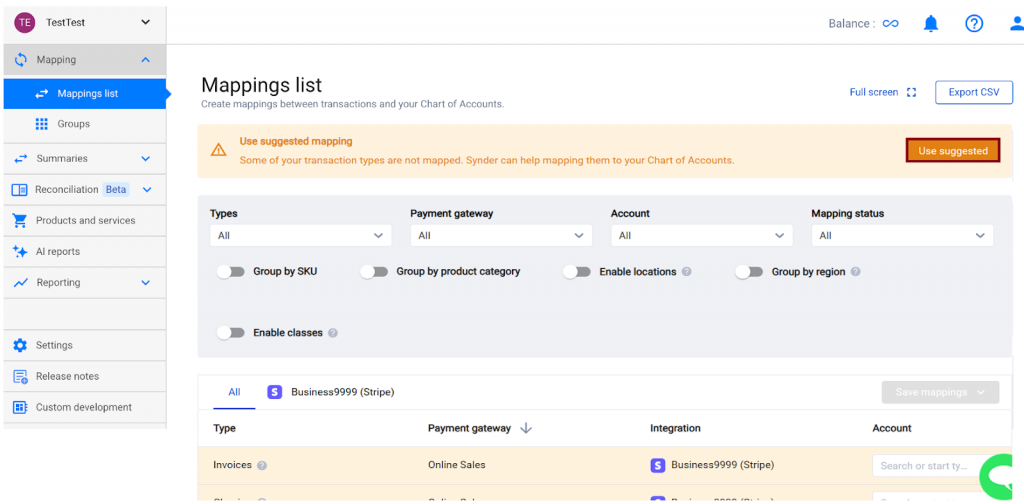
Mapping defines which accounts each part of a summary is posted to, such as revenue, fees, and taxes.
In Mapping, review the default account assignments suggested for each transaction type and update them as needed.
In addition to standard mapping options (for example, mapping by SKU, region, or class), you can create manual groups using special rules to define conditions that control how specific summary amounts are posted.
Each mapping rule:
- Specifies the destination account in your accounting platform.
- Controls how summary amounts are grouped and recorded in your books.
After you save the mapping, Synder applies these rules to new summary syncs.
To learn more about manual groups, see: [Mapping Groups in Synder].
Test syncing one summary
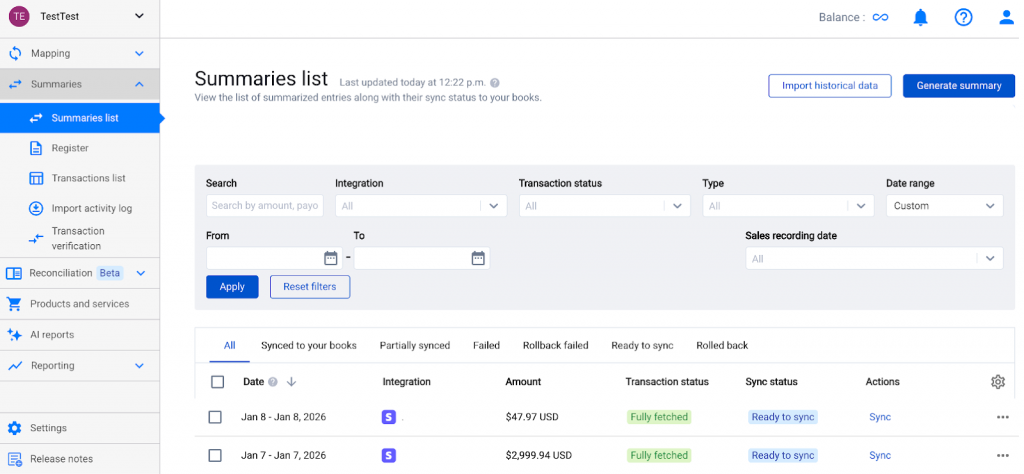
- Return to the Summaries section.
- Select a summary that shows as ready to sync.
- Click Sync.
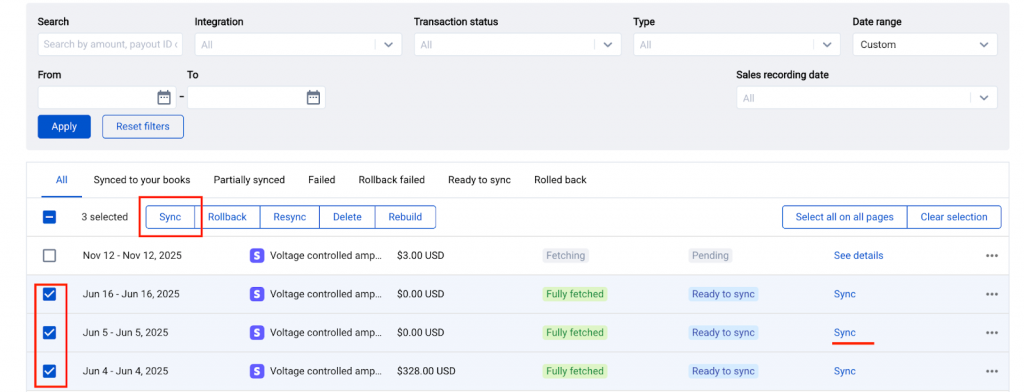
- Check your accounting platform to confirm the summary was posted correctly..
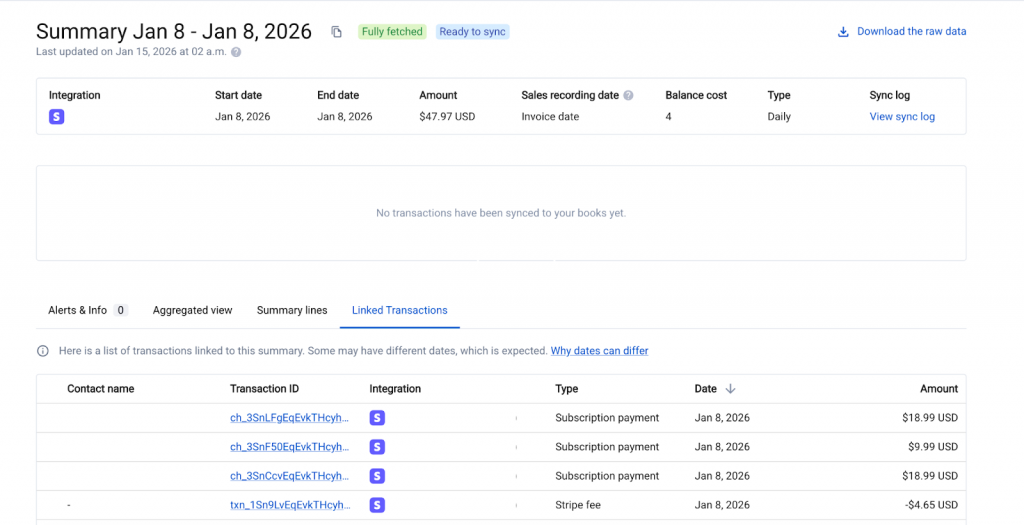
- In Synder, open the summary menu (three dots) and select See details to review the included transactions.
Adjust settings and enable auto-sync (optional)
If needed, review or adjust your Summary Sync settings in the Settings section. If needed, update Summary Sync settings in Settings.
- In General, select the Synchronization frequency and Summary period.
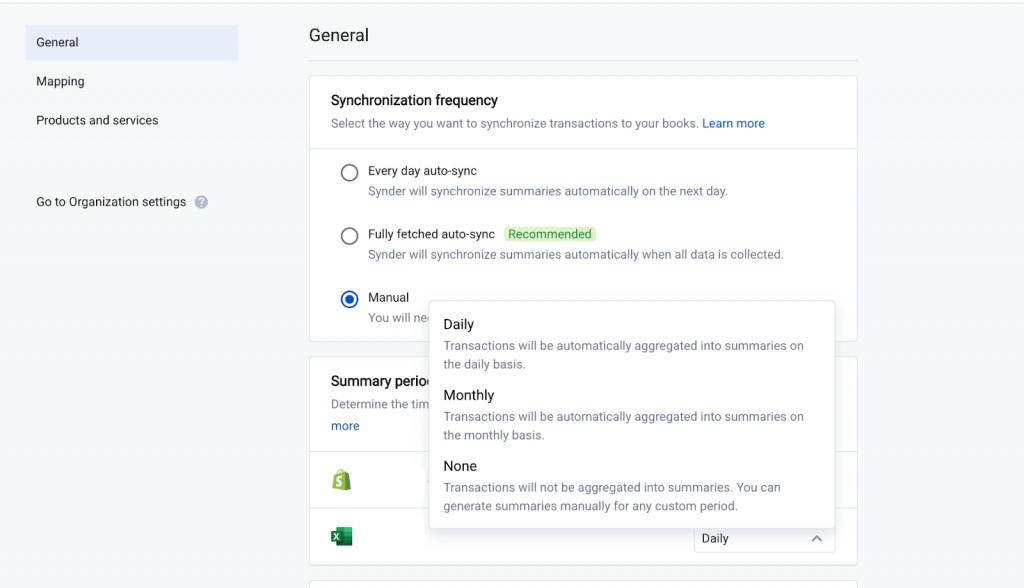
- To track Cost of Goods Sold, enable it in the Products and Services tab.
How to check Summary Sync is working
In Mapping, confirm:
- Synder detected transaction types from imported data.
- Accounts from your Chart of Accounts are available in the account dropdowns.
After syncing:
- Summaries move to the Synced status in Synder.
- Corresponding documents appear in your accounting platform.
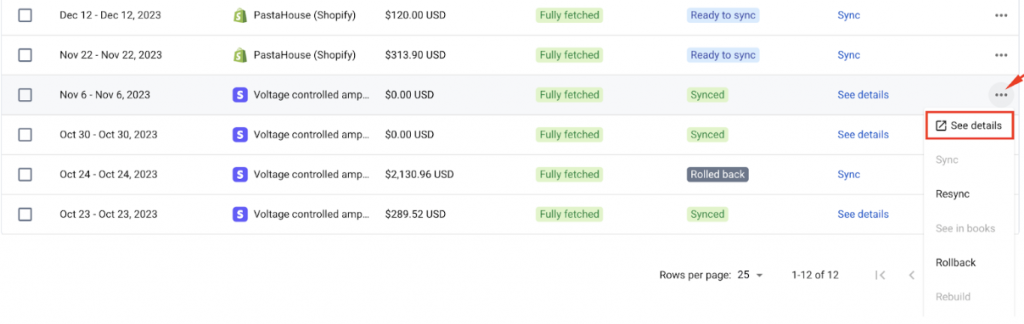
Applying changes to synced summaries
Changes to mapping or summary settings apply only to newly built summaries. To update a summary that was already synced, roll it back, rebuild it, and sync it again.
- In Summaries, select the summary menu (three dots).
- Select Rollback.
- Select Rebuild.
- Sync the summary again.
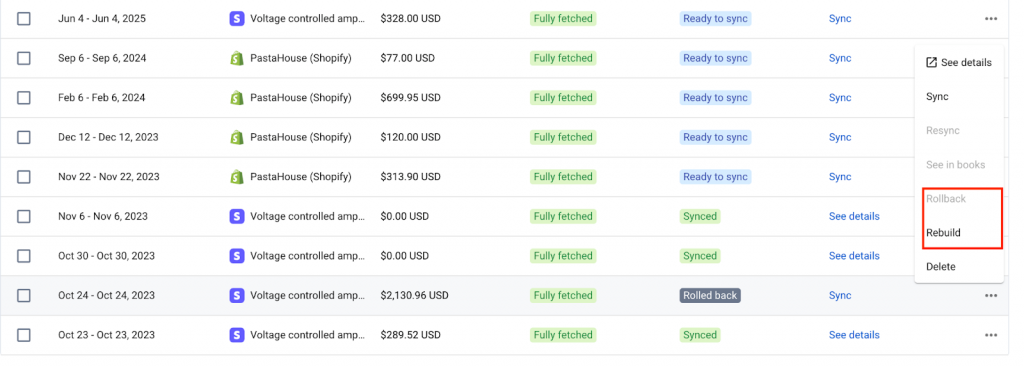
Rebuilding recreates the summary using updated mapping and settings.
Important details to know
This section highlights key behaviors and limitations of Summary Sync that affect how data is posted, configured, and maintained over time.
- Summary Sync posts one aggregated record per summary period, not individual transactions.
- Mapping is required before syncing summaries.
- Synder pricing is based on the subscription plan, not on the sync mode.
- You can rollback, rebuild, and re-sync summaries as needed.
Common issues
Below are the most frequent issues users encounter when working with summaries, along with the steps required to resolve them safely.
Problem: A summary failed to sync.
If a summary fails to sync:
- Open the summary details.
- Review the error message in Synder.
- Check Mapping and confirm all required accounts are selected. A common cause is missing mapping for a newly detected data type.
- Save mapping changes.
- Rebuild the summary and sync again.
I need to change a summary that was already synced
To change a synced summary:
- Roll back the synced summary.
- Update mapping or settings.
- Rebuild the summary.
- Sync the summary again.
Frequently asked questions
Why don’t I see individual transactions in my accounting platform?
Summary Sync posts aggregated summaries, not individual transactions.
What does the Fetching status mean?
Fetching means Synder is still importing transactions for that summary period from your connected platforms.
Can I change the summary period (for example, daily or per payout)?
Yes. You can choose or change the summary period in the Settings section of your organization.
Reach out to Synder Team via online support chat or email with any questions you have – we are always happy to help you!
How to deal with partially synced????
Hello, Heather! To address partially synced summaries, import historical data for the relevant summary dates, then resync the summary. This status takes place when not all transactions are included in the summary initially. Resyncing should help if all transactions are now processed in the background.