
This guide explains how to group Synder summaries by individual products (SKUs) and map each product to the correct income account in your accounting platform.
It helps ensure product-level sales are posted accurately for detailed reporting and audits.
Use this guide if:
- You want sales grouped and posted by individual product/SKU.
- You need product-level detail for reporting or audits
- You want each product mapped to a specific income account
- You are syncing sales from a platform that sends product/SKU data
Don’t use this guide if:
- You only need category-level tracking, not individual products
→ Use the guide on grouping summaries by product category instead (How to map your summaries by product categories).
After completing the following steps, you will have summaries grouped by items/SKUs, and each product-related summary line will affect the chosen income accounts from your mappings list.
How to set up grouping by products
Step 1: enable “Group by product name/SKU”
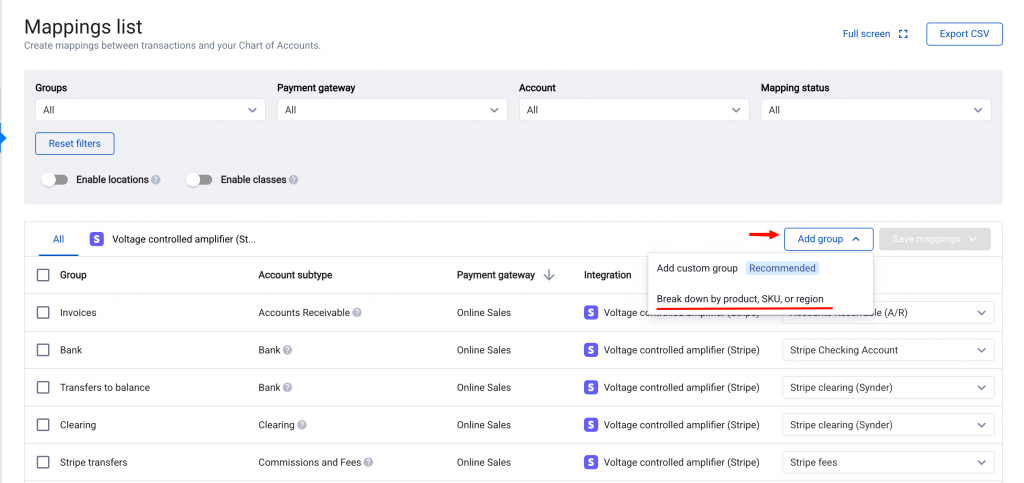
- Click on the Mapping tab dropdown on the left-side menu and click Mappings list.
- Click the Add group button, then select “Break down by product, SKU, or region” from the dropdown.
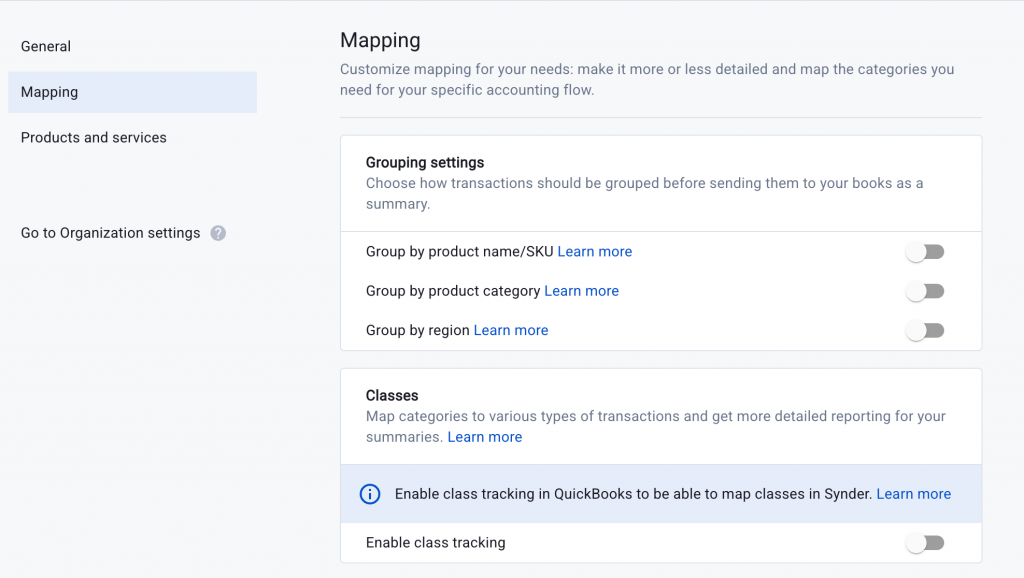
- You’ll be taken to Settings → Mapping. Under Grouping settings, enable Group by product name/SKU.
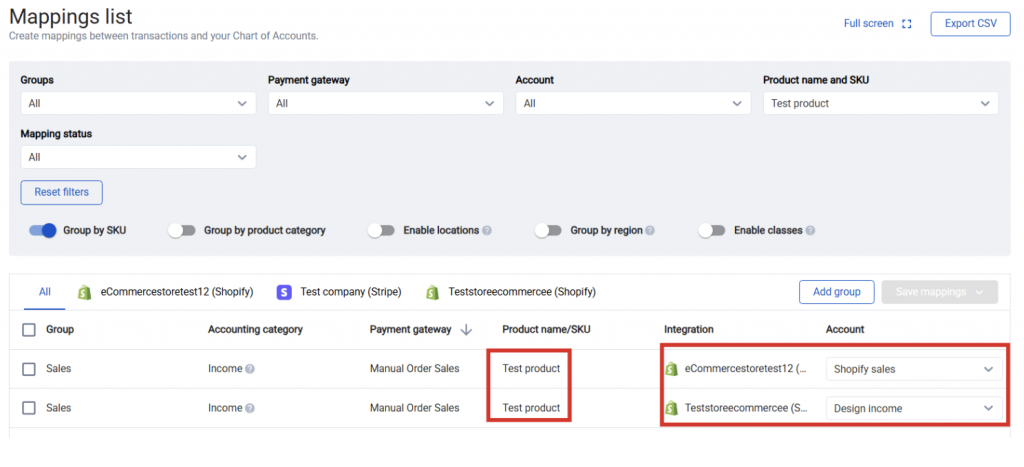
Step 2: Map products with income accounts
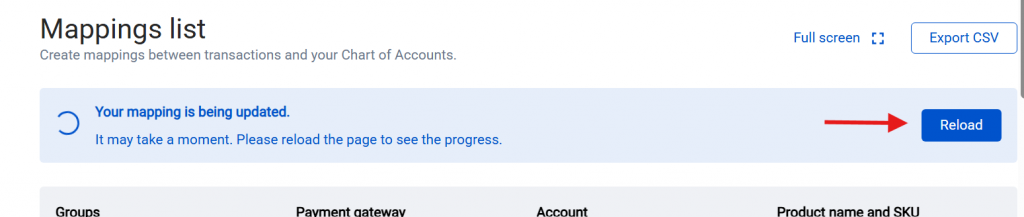
- If you’ve used the default mapping grouping or grouping by product category before, reload the page to apply new grouping settings.
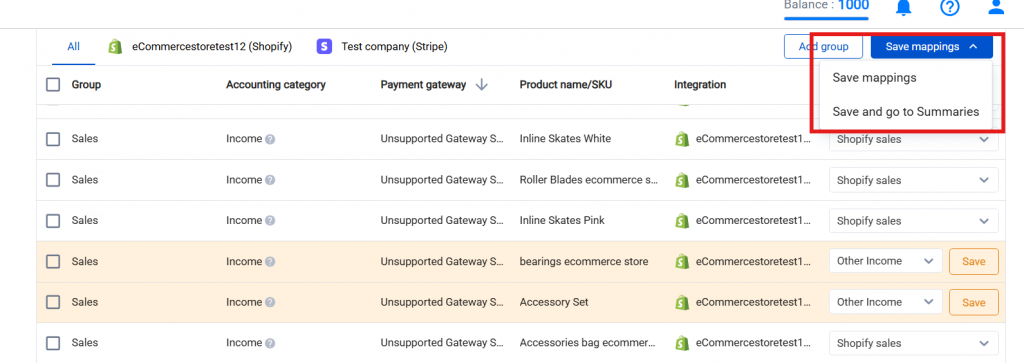
- Map each of the products to the desired income accounts.
- Click on either “Save mappings” or “Save mappings and go to Summaries”.
That’s it! Your product-level mapping is now ready.
Important notes and tips
- Synder displays separate mappings for each integration and unit (e.g., Shopify1 sales, Shopify2 Sales). The same product may appear twice – once per store – and can be mapped to different accounts for each integration. Transactions will post according to the mapping set for that specific store.
- Once you switch to “Group by SKU” and map the products to income accounts, the mapping will affect only new summaries and entries with pending or ready to sync statuses.
- If you need to update old summaries so that they contain products, resync these entries. Alternatively, you can rollback, rebuild the summaries and sync again.
- If there’s a new product in your sales platform that hasn’t been matched to the income in Synder yet, the synchronization of a summary fails. To sync the summary successfully, map the product from a summary to the necessary account and initiate synchronization.
FAQ
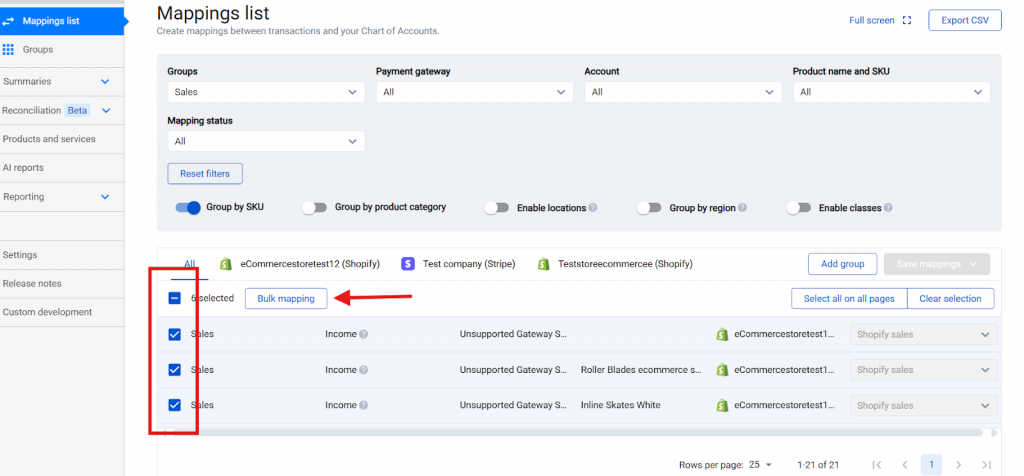
Is there any way we can map several lines together rather than mapping the product lines one by one?
Sure! In case you have to assign several products to the same account, you can use bulk mapping feature to update the accounts in one go. To do so, select the needed product lines in your mappings list -> bulk mapping.
I would prefer to track the products according to the larger item groups rather than the individual SKUs. How can this be achieved?
“Group by SKU” differentiates the sales according to individual products. If more generalized product groups are needed, you need to enable “Group by product category” instead. Refer to this guide to enable categories.
Can I track both individual products and product categories?
Synder allows grouping either by “Product category” or by “SKUs” – both of the mapping grouping options can not be enabled simultaneously.
Reach out to the Synder Team via online support chat or email with any questions you have – we are always happy to help you!