
Using classes in Synder Daily Summary can help you track your sales more efficiently and gain more insight into your business performance. In Synder, you can assign classes to Daily Summary lines to provide a detailed breakdown of your sales results.
Overview:
- How to enable classes in Daily Summary sync
- Best practices of using classes for multichannel businesses
How to enable classes in Daily Summary sync
Here’s how to use classes in Synder Daily Summary:
1. First, you’ll need to set up the classes in your accounting company, unless you have already done it.
For QuickBooks Online:
Click on the Gear icon in the top right corner of the screen, then select “All Lists” under the “Lists” section. From there, select “Classes,” and then click the “New” button to create a new class. You can create classes based on different categories, such as products/services, payment processors, warehouses or regions of sales.
Note: To be able to create classes, enable them in QuickBooks first by going to “Settings” → “Account and Settings” → “Advanced” → “Check Track classes”. Learn more here.
For Xero:
Click on the “Accounting” menu at the top, then hit “Advanced” and select “Tracking categories”. From there, click on “Add tracking category” and specify the Tracking category name. You can name it based on products/services, payment processors, warehouses, regions, etc. Under “Category options”, enter the necessary names of products, warehouses, regions or other variations and click “Save”.
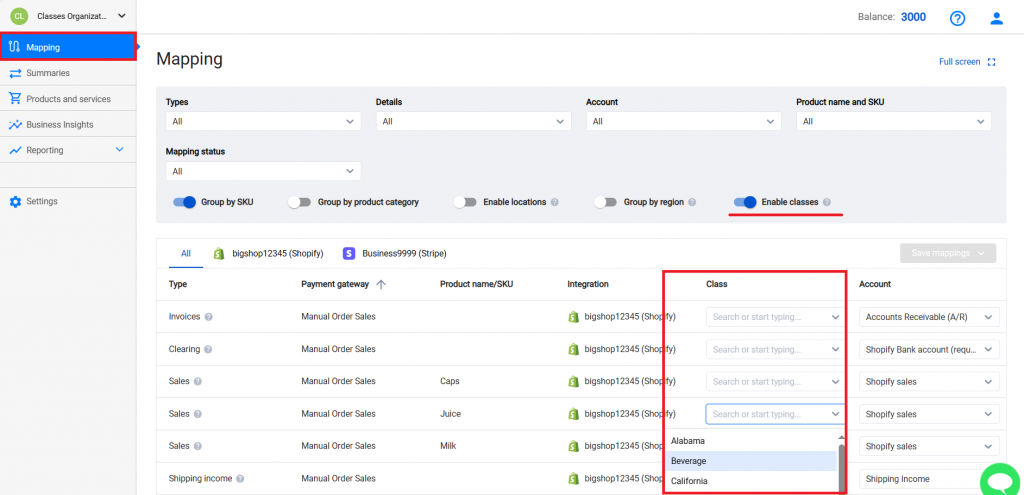
2. Map your classes in Synder.
Once you have set up the classes in your accounting company, you can map them in Synder. To do this, go to “Mapping” → “Enable classes” (alternatively, click “Settings” on the left-side menu → go to the “Mapping” tab → scroll down the page and switch on “Enable class tracking”). Once the mapping is refreshed, you will see the column labeled “Class.” Here, you can select the appropriate class for each type (the future Daily Summary line).
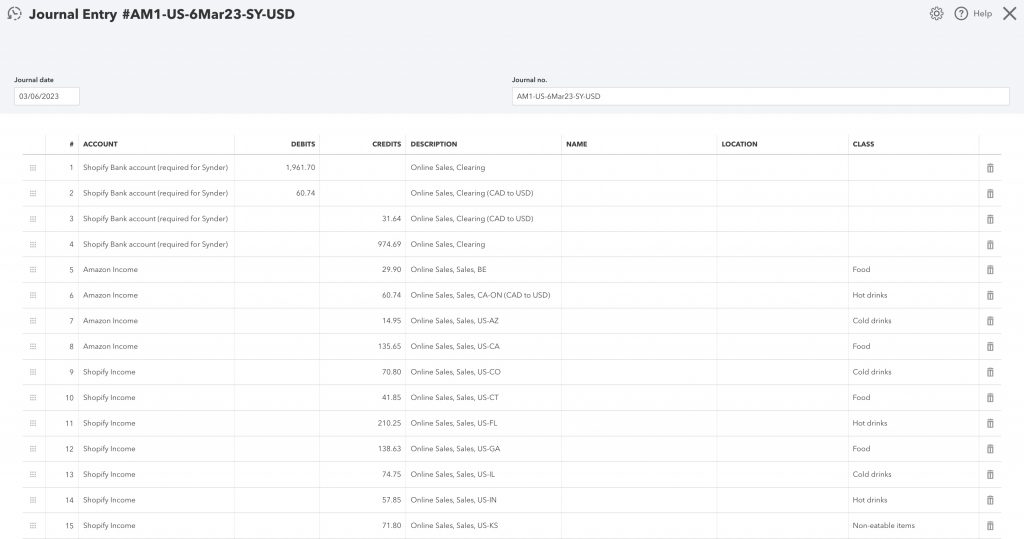
3. Review your results: After mapping your classes in Synder, you will get classes assigned to all the mapped Daily Summary lines.
The screenshot below is based on the example with QuickBooks Online. Though, the pattern will be the same for other accounting integrations.
Best practices of using classes for multichannel businesses
Using classes in Synder Daily Summary can provide valuable insights into your business performance and help you or your client make more informed decisions.
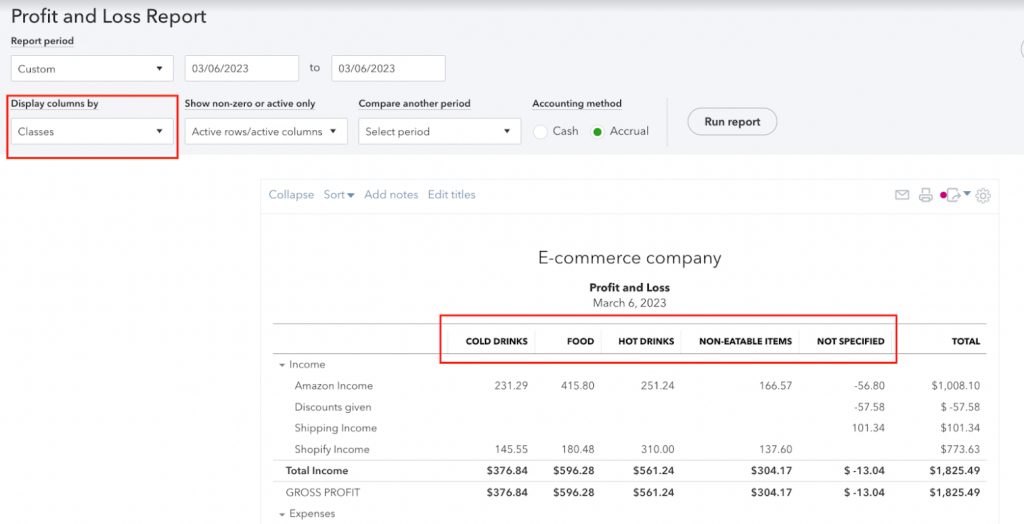
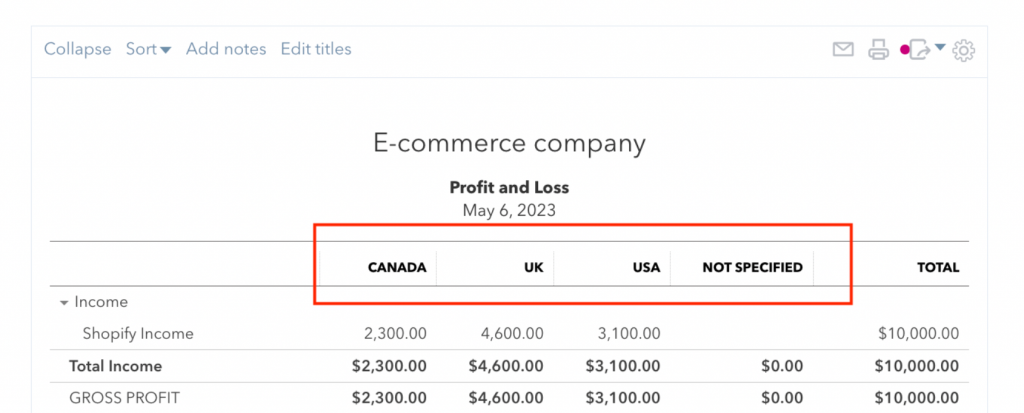
You can review the detailed Profit and Loss in your accounting company.
For example, for QuickBooks Online, go to the “Reports” tab and select “Profit and Loss” → display columns by “Classes”. This report will provide a detailed breakdown of your sales results by classes, allowing you to see how each category is contributing to your overall revenue.
Here are the most common ways to use classes, but you can always use something more specific to your needs:
1) Profit and loss by product groups (display columns by classes).
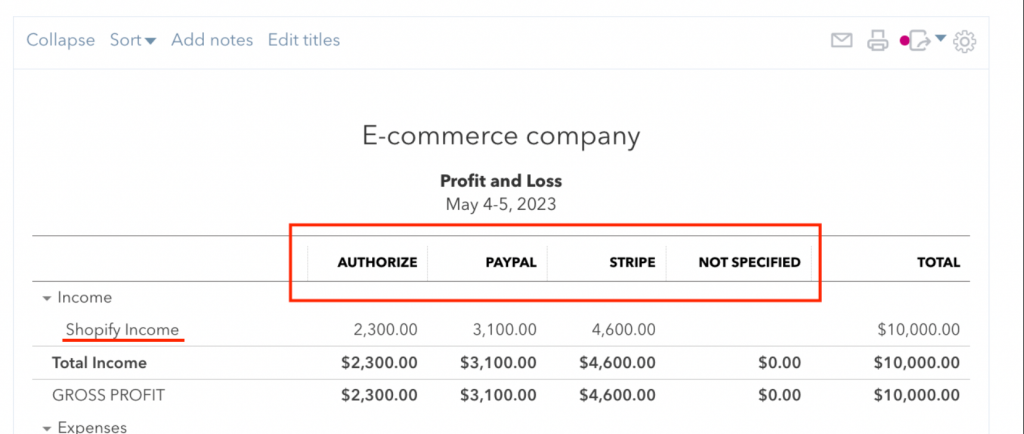
2) Profit and loss by payment processor (display columns by classes).
3) Profit and loss by country (display columns by classes).
By setting up your classes and mapping them in Synder, you can gain a better understanding of where your revenue is coming from and which areas of your business are performing well.
Reach out to the Synder team via online support chat, phone, or email with any questions you have – we’re always happy to help you!