
Cases it may cover: a Product name is specified in a field other than the Product field in your sales platform.
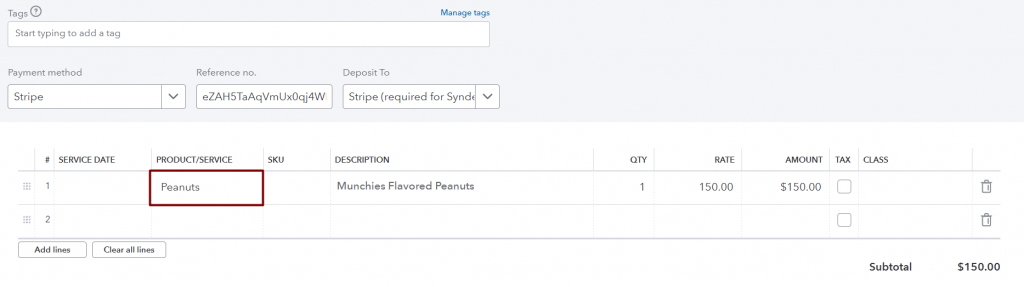
Here is an example of a transaction synced with the Stripe product instead of the original one.

How to fix it: Create a smart rule to map a product from the needed field to the existing product in your accounting company, rollback and re-sync the transaction(s) needed.
Note: Smart rules work only for QuickBooks Online and QuickBooks Desktop users.
Important note: If you have the actual product name recorded in the Description field in Stripe and you want to see this exact product with the same name in the Product field in QuickBooks Online, enable the Get product name from the description of transaction or order setting:
- Go to the Settings tab on the left-side menu.
- Choose Stripe from the Integrations dropdown.
- Navigate to the Products/Services tab and enable Get product name from the description of transaction or order.
- Click on Update to save the settings.
However, if that’s not the case, i.e., you want to update the actual product name based on another field, or if the product name is displayed differently in the Description field than how you want it to appear in your accounting software, follow the steps described in this guide.
Overview:
Rollback and re-sync one transaction to check the result in your books
Rollback and re-sync other transactions applied with the Stripe product
Create a smart rule
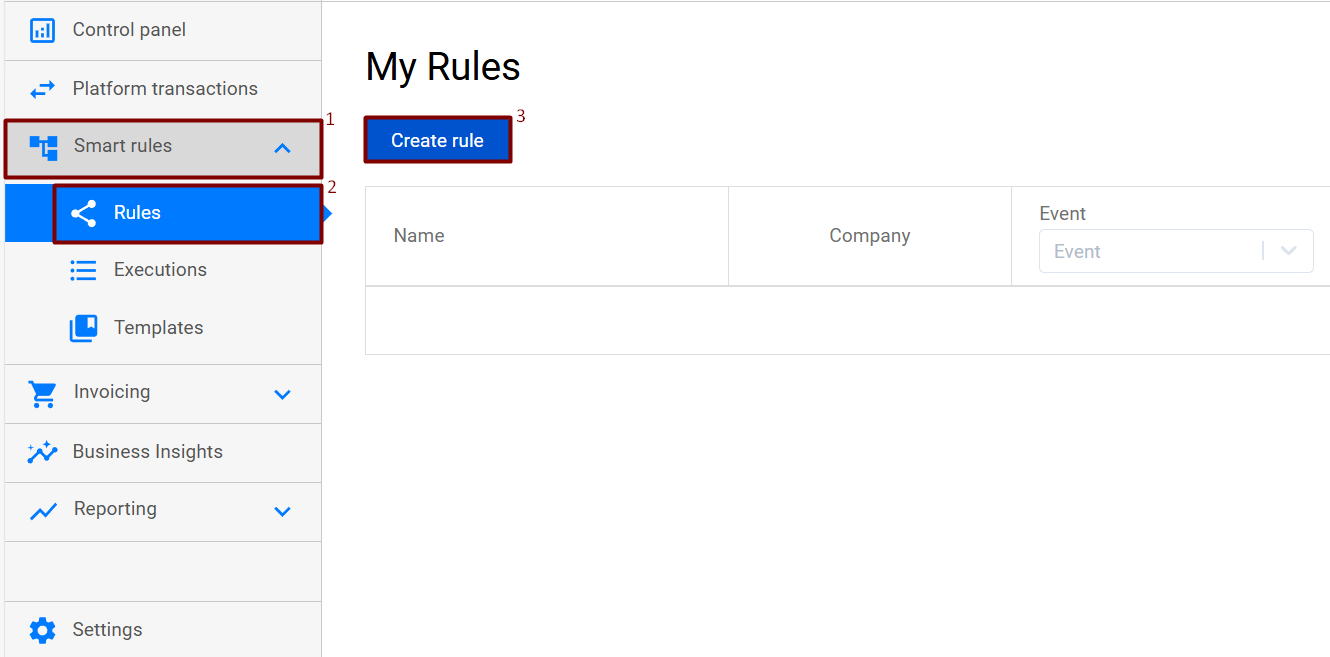
1. Go to your Synder company → click on the Smart rules tab on the left-side menu → hit Create rule;
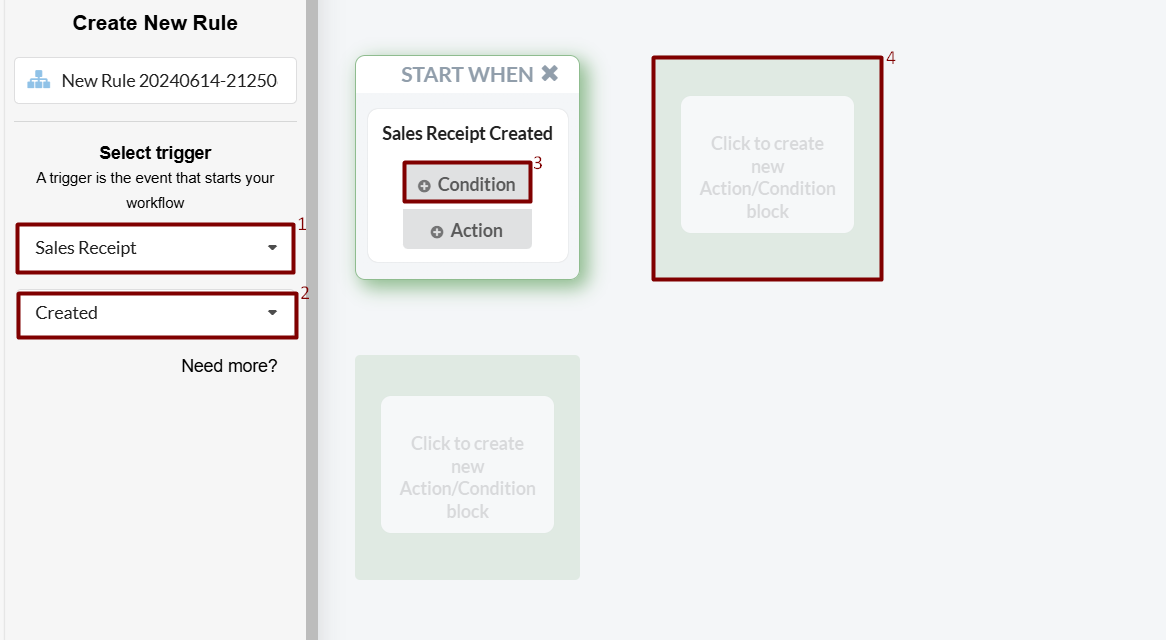
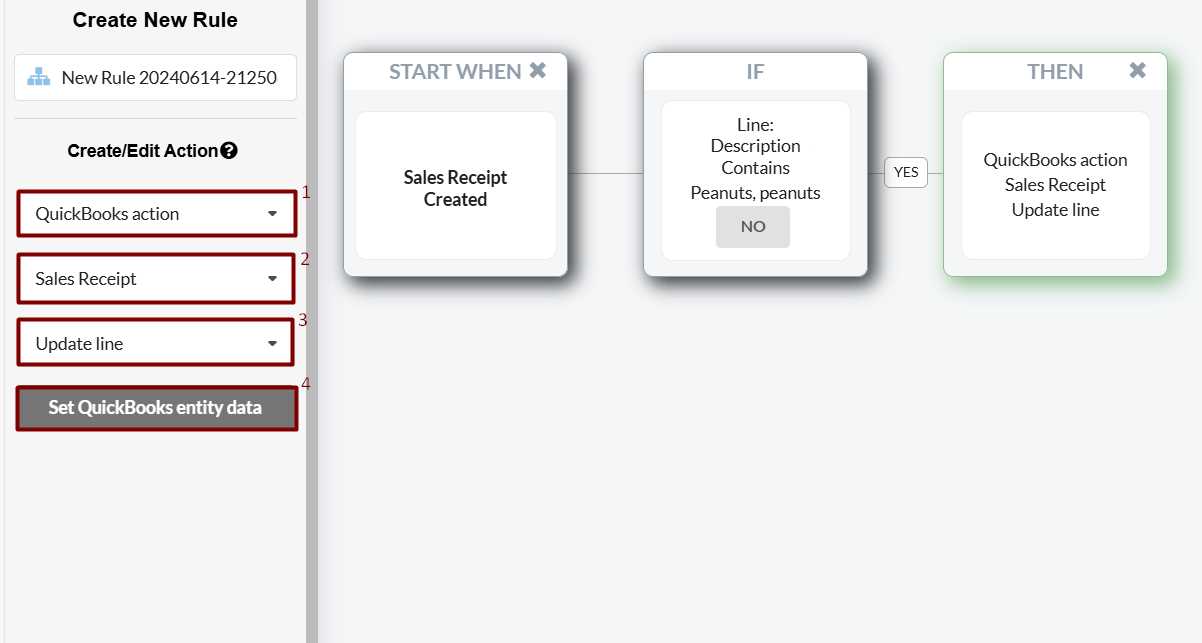
2. Select a trigger, i.e. a transaction type you want to update products for (Sales Receipt as an example) → select Created → click on Condition → select the nearest block;
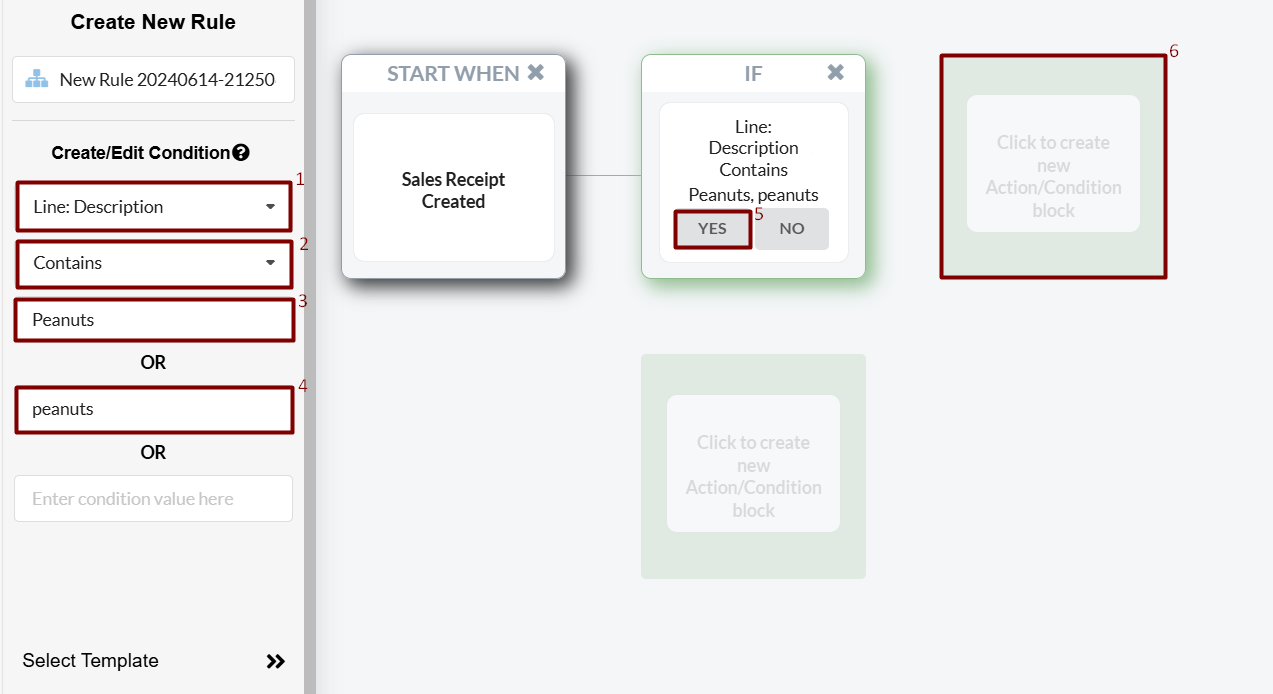
3. Choose the field, a product name is specified at (Line:Description, memo, etc.) → click Contains → specify a product name/part of the product name you have in the field → click Yes and click the nearest block;
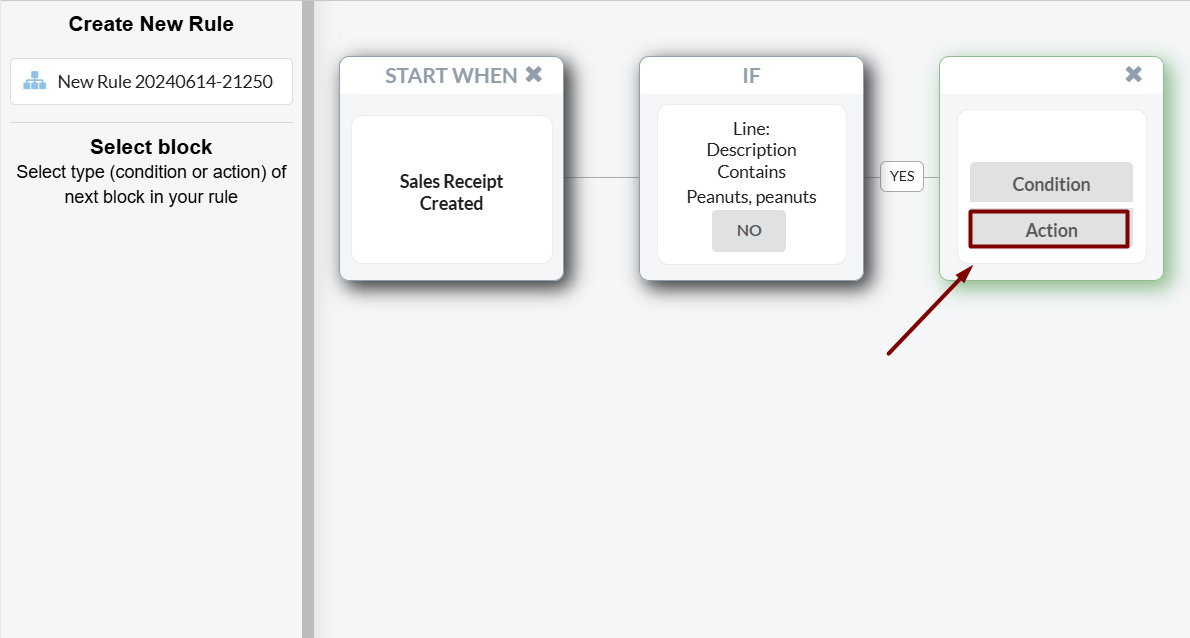
4. Select Action;
5. Under the Create/Edit section, select QuickBooks action → select the entity type to update (Sales Receipt, Invoice, etc.) → Update line → hit Set QuickBooks entity data;
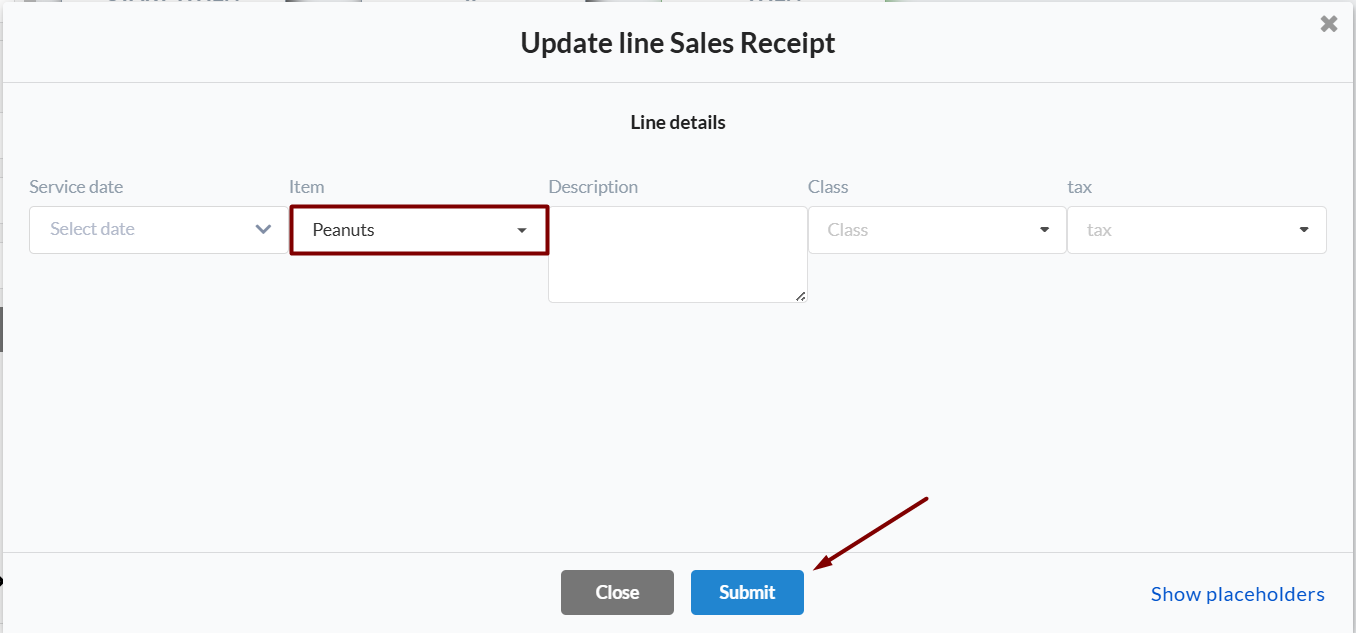
6. In the pop-up window, select the Product you want to see in this transaction (it will give you a list of products from your accounting company) → click on Submit.
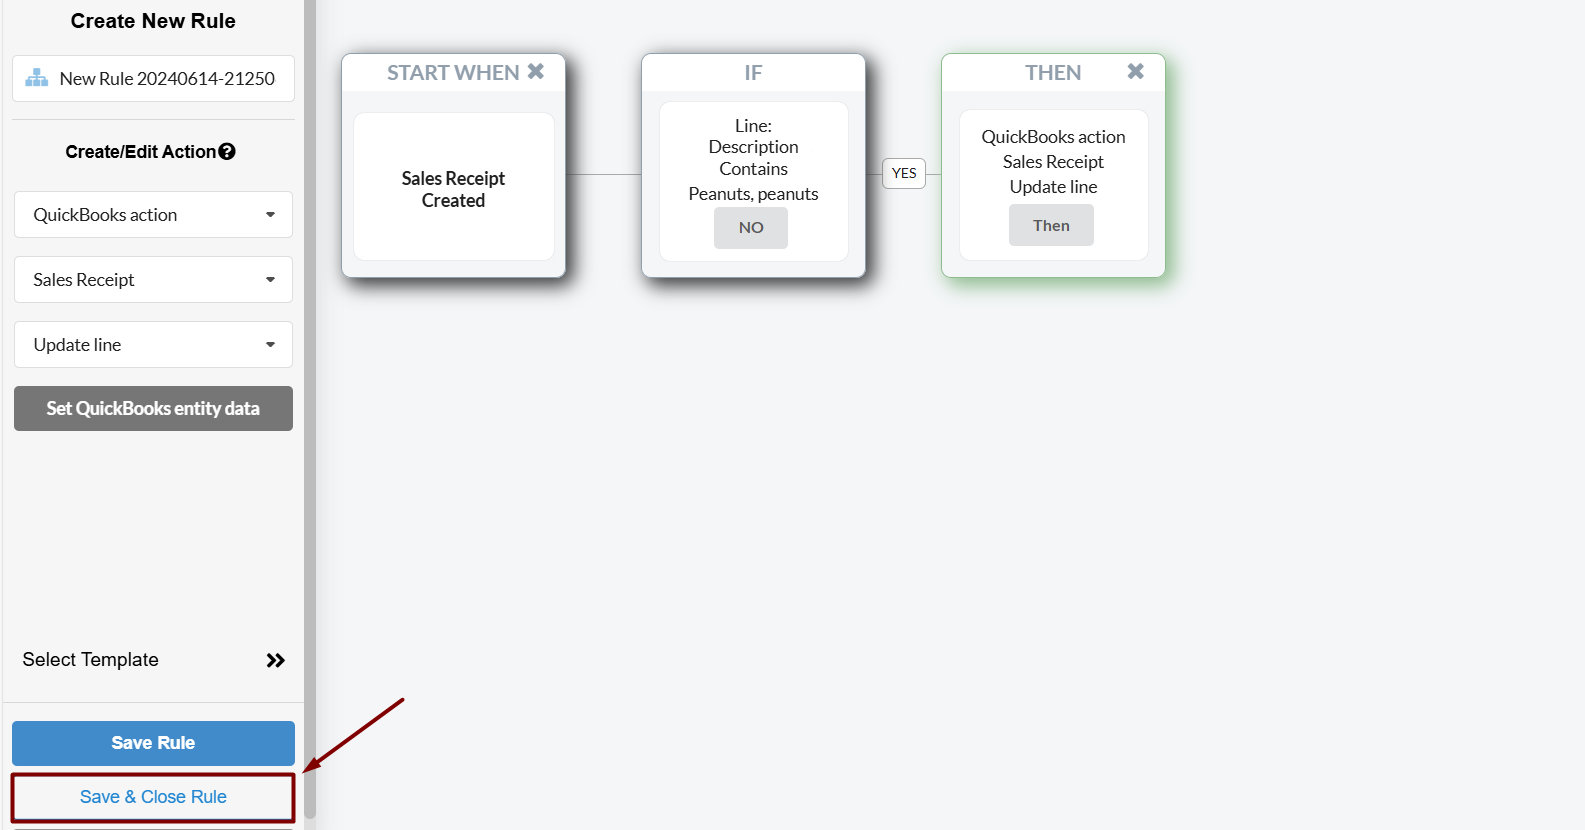
7. Click on Save and Close Rule.
Rollback and re-sync one transaction to check the result in your books
Once the rule is created, roll back and re-sync one transaction to check the result:
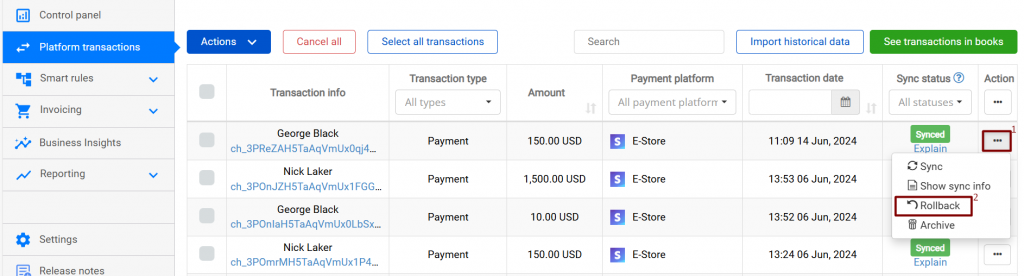
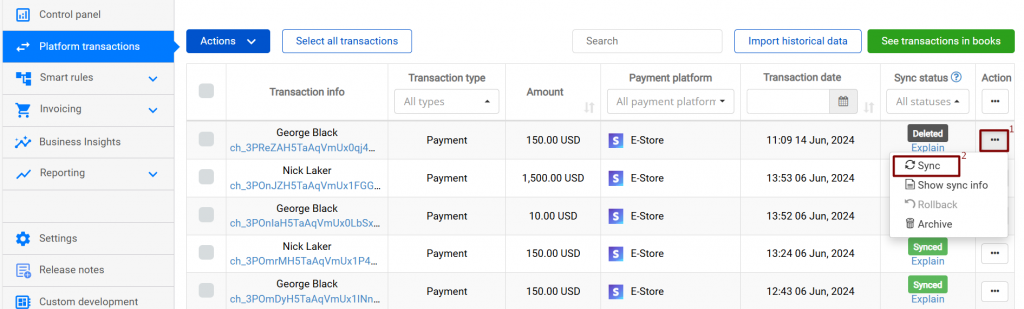
1. Go to Platform Transactions on the left-side menu → click on the three dots next to the transaction that was synced with a Stripe product → hit Rollback.
2. Once the transaction has a deleted status, sync it again.
And here you go:
Rollback and re-sync other transactions applied with the Stripe product
Then re-sync other transactions that were applied with the Stripe product:
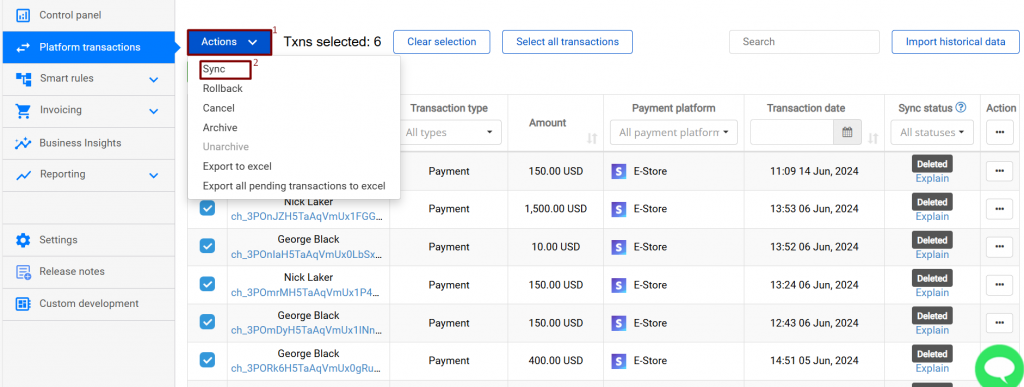
1. Go to Platform transactions on the left-side menu → select transactions synced with the Stripe product → click on the blue Actions button → select Rollback and click on Rollback sync to delete transactions from your accounting company.

2. Once transactions have deleted statuses, click on the blue Action button → select Sync and hit Sync to transactions again.
And there you go, the product has successfully been applied.

Reach out to the Synder Team via online support chat, phone, or email with any questions you have – we’re always happy to help you!
In the meantime, learn more about Amazon Tax Applying for UK Users.