In this guide, you will learn how to sync all of your online transactions showing the Ready to sync status to QuickBooks or Xero. In the same way, you may use filters to sync all the failed, canceled, or any other type of transactions for any time range needed for any connected payment gateway.
Overview:
Steps on how to filter and sync Ready to sync transactions to your accounting
Useful tips on data synchronization to your QuickBooks or Xero
What does Ready to sync mean?
Ready to sync status means that a certain transaction has not yet been recorded to your books, and in order for it to be synchronized, you need to press a few buttons in Synder.
You will see transactions with the Ready to sync status when/if:
- You are a new user and launch Synder for the first time. Once your QuickBooks/Xero and payment platform(s) are connected, you will see some random latest transactions from the first connected payment gateway. Some transactions will be automatically synced, and the other transactions will have the Ready to sync status so that you can sync them and test the functionality of Synder on a free trial.
- You can import historical transactions for synchronization into Synder. As the system gives you full control of what historical data needs to be synced to your books, Synder will import those transactions with the Ready to sync status (see how to sync historical data).
Steps on how to synchronize Ready to sync transactions to your accounting
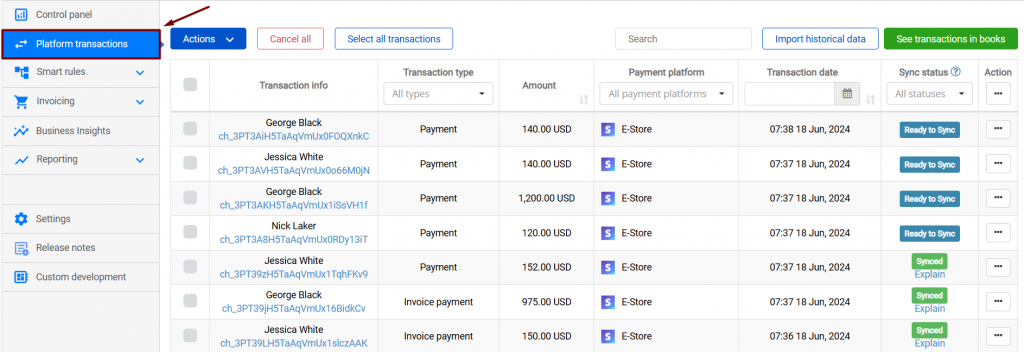
- Go to Synder → Platform transactions tab. Make sure you selected the correct organization in the top-left corner if you have several.
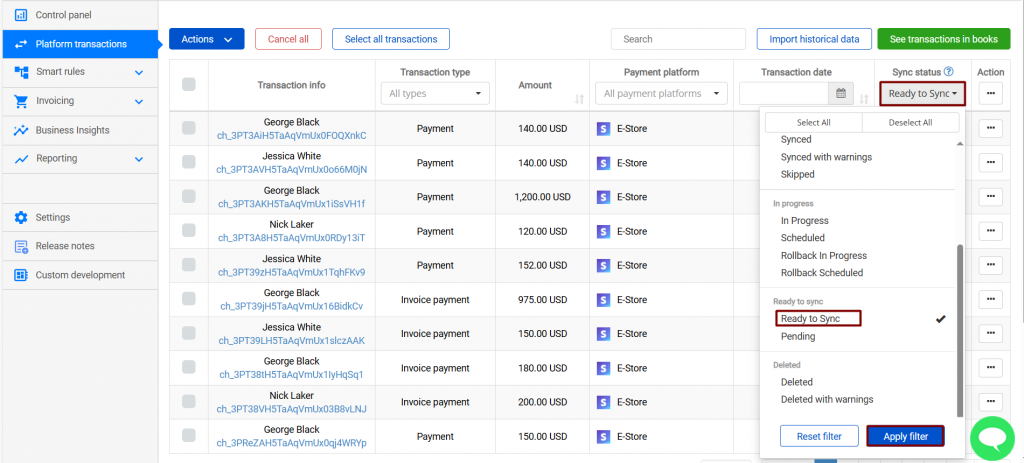
- Filter transactions by status – select Ready to sync.
Note: make sure to click on the “Apply filter” button at the bottom of statuses.
Note 2: the same way, you may filter out transactions for a specific time range or from a specific payment processor.
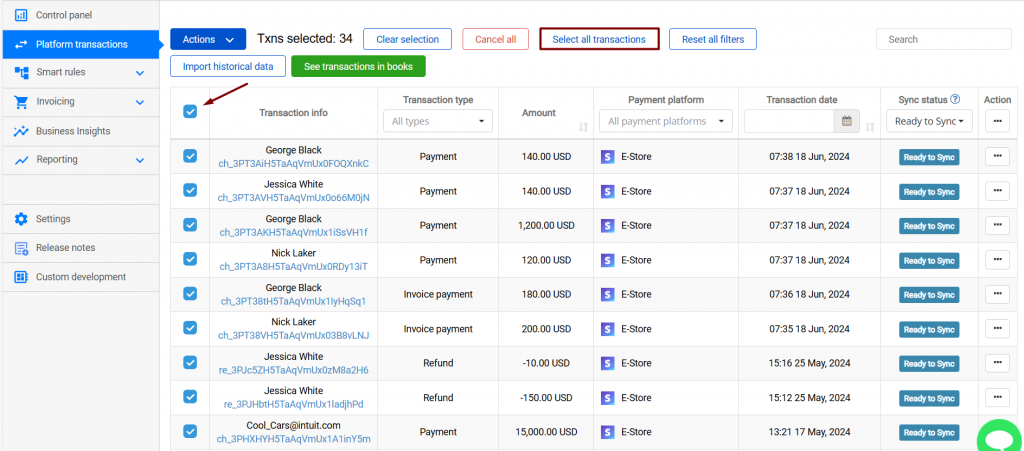
- Check the top-most box to select all transactions on the current page.
- Click Select all transactions option above the table.
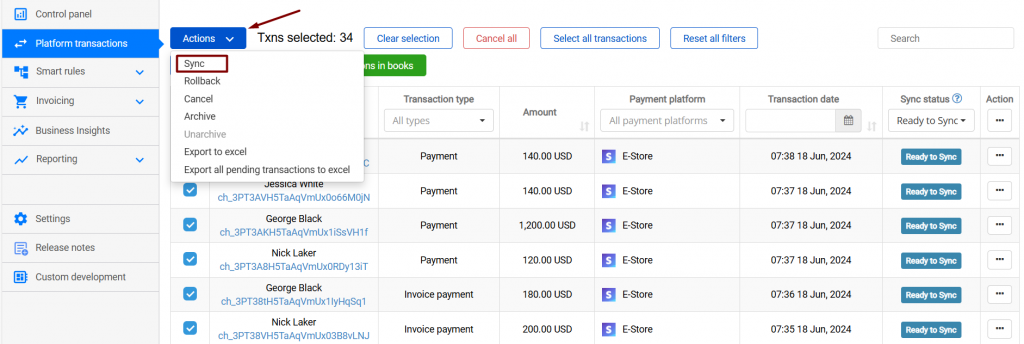
- Click the blue Actions button and select Sync from the list of options.
Wait until all the transactions are showing with the green Synced status – and that’s it, all of them are now recorded in your accounting system!
Useful tips on data synchronization to your QuickBooks or Xero
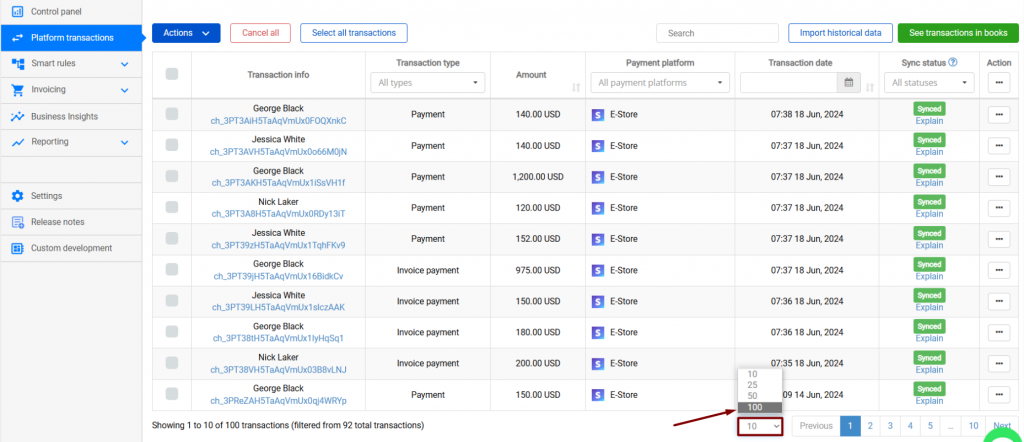
- Change the view to 25, 50, or 100 transactions per page for convenience.
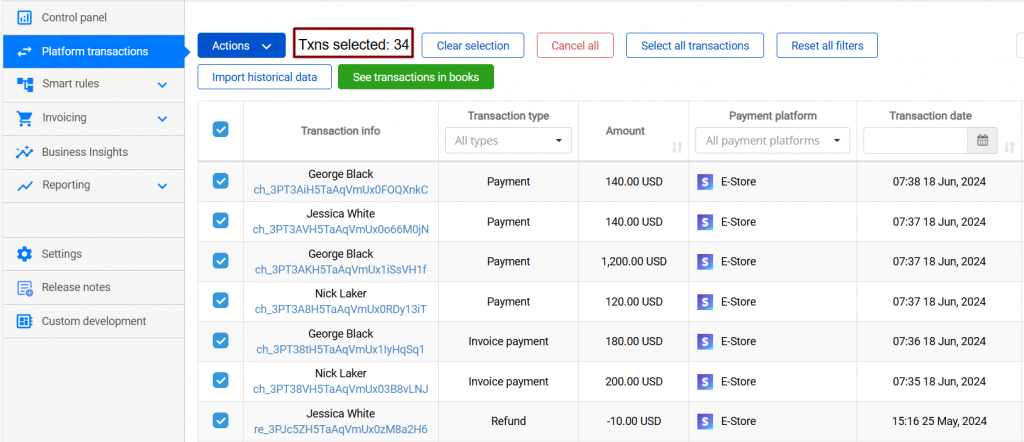
- Once you’ve selected all filtered transactions on all pages, the total number will be showing near the Actions button. This way, you can double-check whether you have selected all the transactions needed.
That’s it! Now you know how to sync transactions with the “Ready to Sync” status.
Reach out to the Synder Team via online support chat, phone, or email with any questions you have – we’re always happy to help you!
