
Smart rules for QuickBooks Desktop is a powerful tool that can help you streamline your transaction processing and keep your data up to date. In this guide, we will explain what you can do with the rules, how they work, and provide some important notes to keep in mind. Follow the steps below to learn how to create and use Smart rules effectively.
💡 Add-on required
Smart Rules is a paid add-on for QuickBooks Desktop (Desktop Sync plan) users. It is not included in the base plan.
| Tier | Monthly price |
|---|---|
| Up to 3 rules | $29.99/mo |
| Up to 5 rules | $39.99/mo |
| Up to 10 rules | $59.99/mo |
| Up to 30 rules | $119.99/mo |
| Up to 100 rules | $239.99/mo |
To activate Smart Rules, go to Settings → Billing in Synder.
Overview:
What you can do with Rules
Smart rules enable you to fill out missing information in your transactions and update important data such as classes, products, taxes and customers based on specific fields. The following fields can be used to trigger rule actions:
- Shipping address
- Product name
- Description
- Memo
- Currency
- Customer
How Rules work
Rules operate based on the if-then conditions, allowing you to update specific details automatically. The process involves two main steps:
a. Synchronization: Transactions are synchronized from the payment processor or e-commerce platform to your QuickBooks Desktop accounting system.
b. Update: The created QuickBooks Desktop transaction is automatically updated based on the information contained there, triggered by the conditions specified in the rule.
Below is an example of how to create a rule to apply a class to invoices. The same pattern applies to other transaction types.
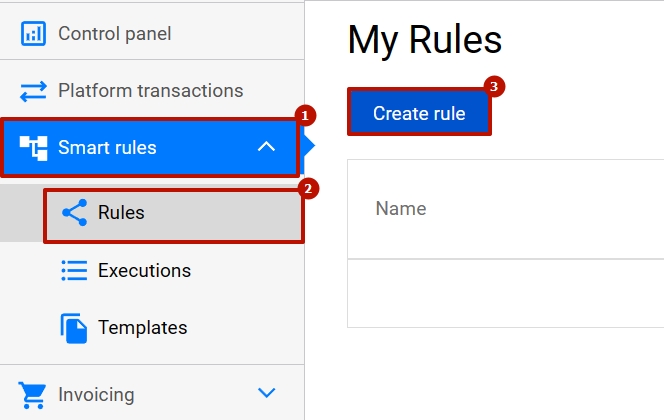
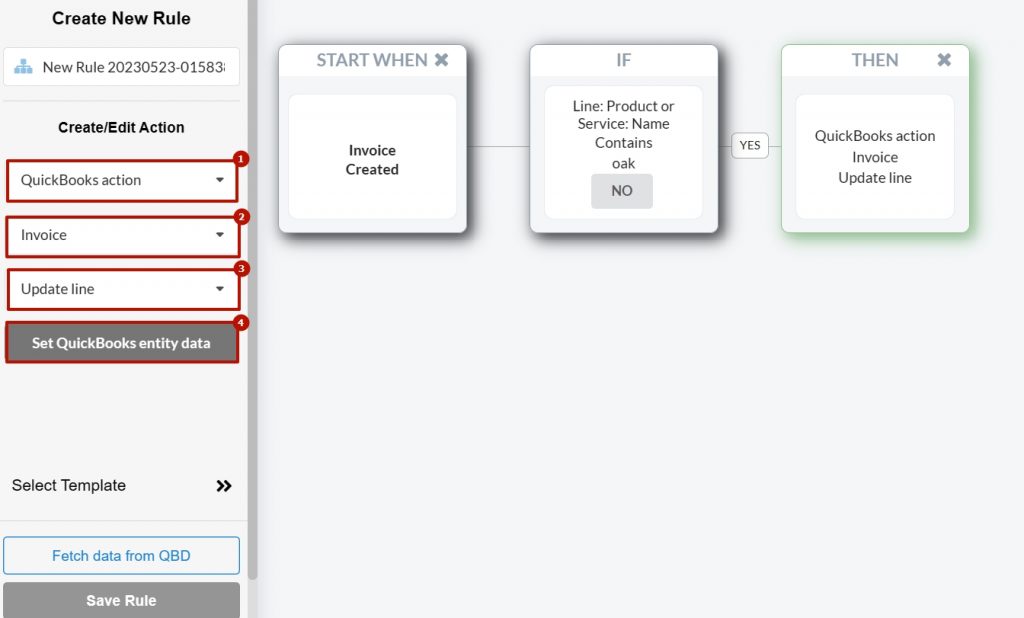
1. Go to the Smart rules tab on the left-side menu → Rules → click on “Create rule”.
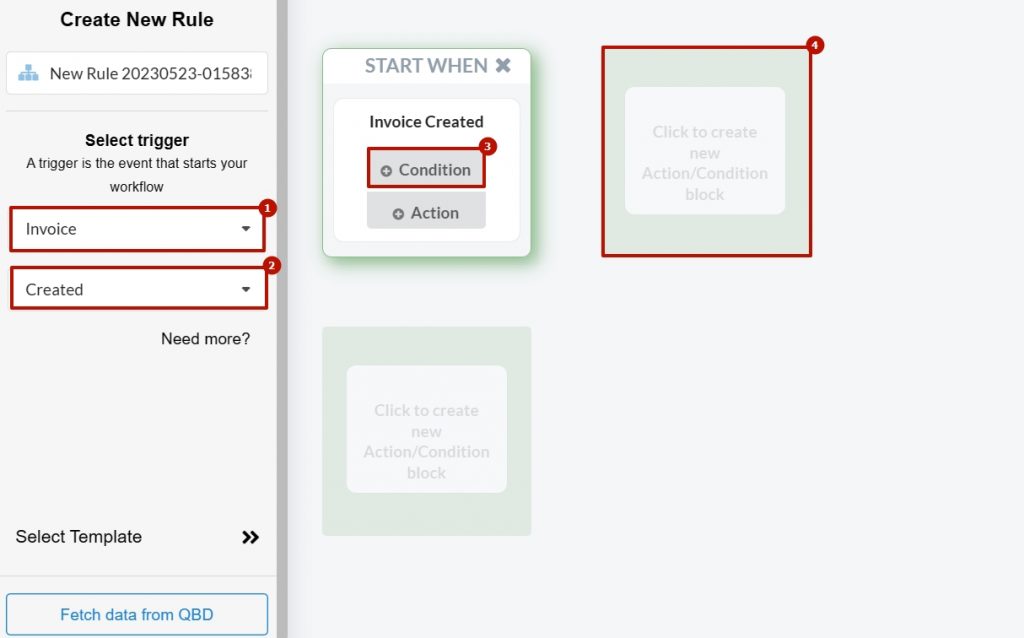
2. Select “Invoice” as the trigger for the rule. Choose “Created” and click on “Condition”. Create a condition that the system will use to update transactions.
Note: The trigger is the transaction type that will be created after synchronization and updated by the rule.
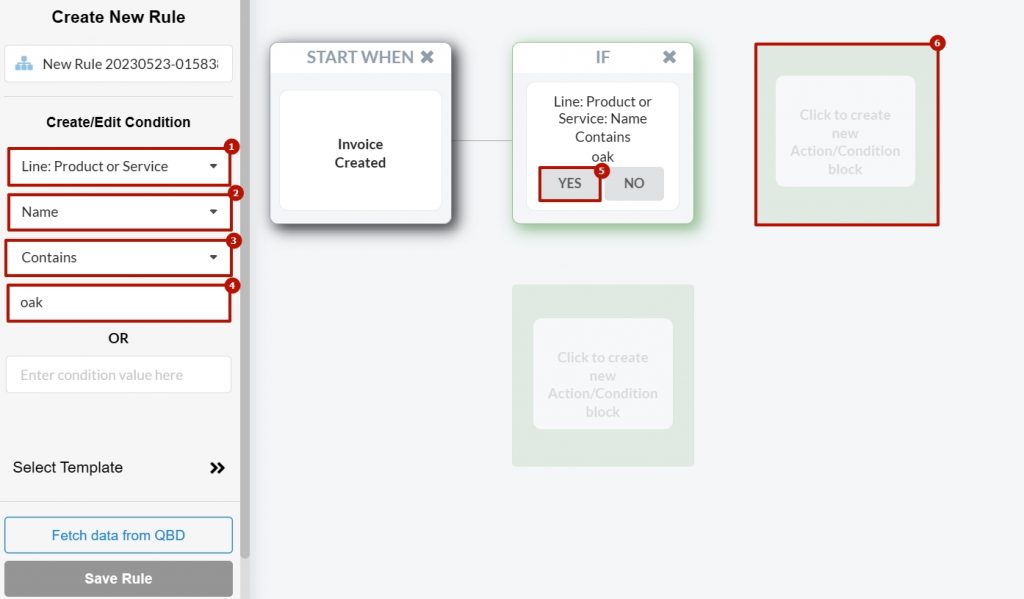
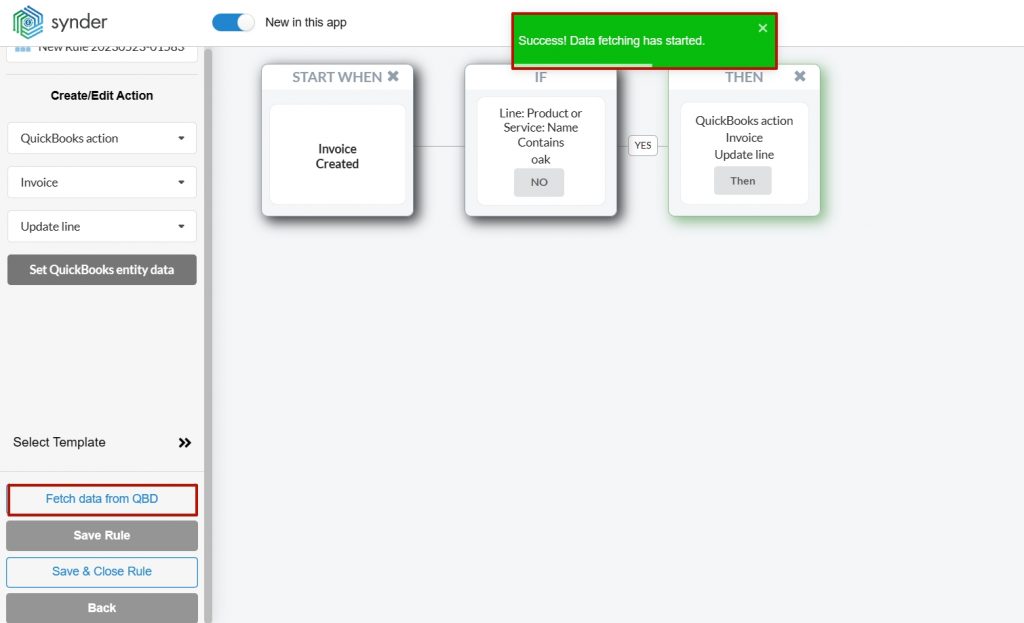
3. Select a condition. To give an example, let’s update a class based on a product name specified in the transaction. Select “Line: Product or Service”, then choose “Name”, and click on “Contains”. Enter the relevant keyword, such as “oak”, and click “Yes”.
This condition allows the rule to update a transaction based on a specific part of the product name. For instance, if the original product is “Red oak”, you can set “oak” as the keyword.
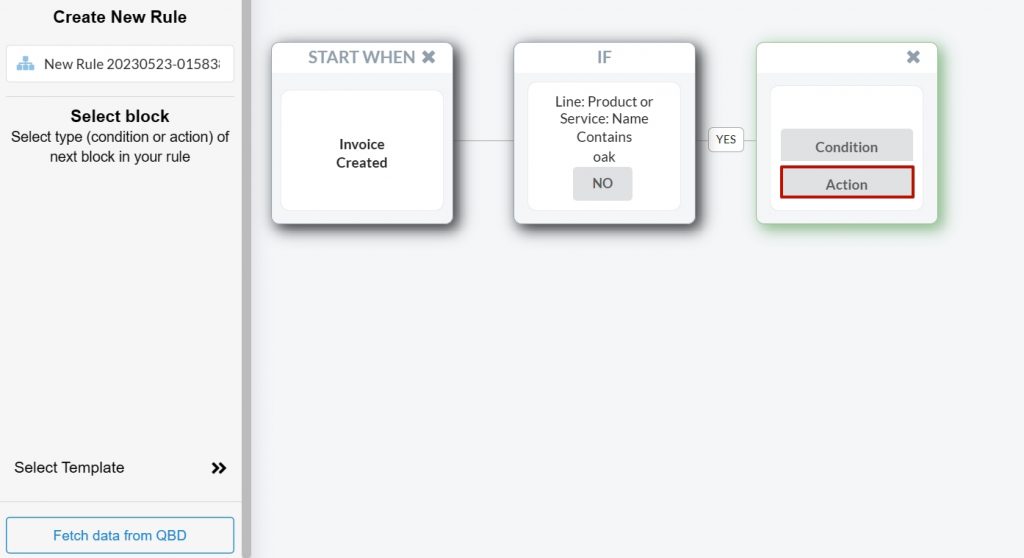
4. Add more conditions, but for the current flow, click on the “Action” button.
5. Select the QuickBooks action as “Invoice”, and then choose “Update Line” followed by “Set QuickBooks Entity Data”.
Note: “Update Current” updates the entire transaction after synchronization, while “Update Line” is more suitable for multiline transactions, as it updates details for each line item.
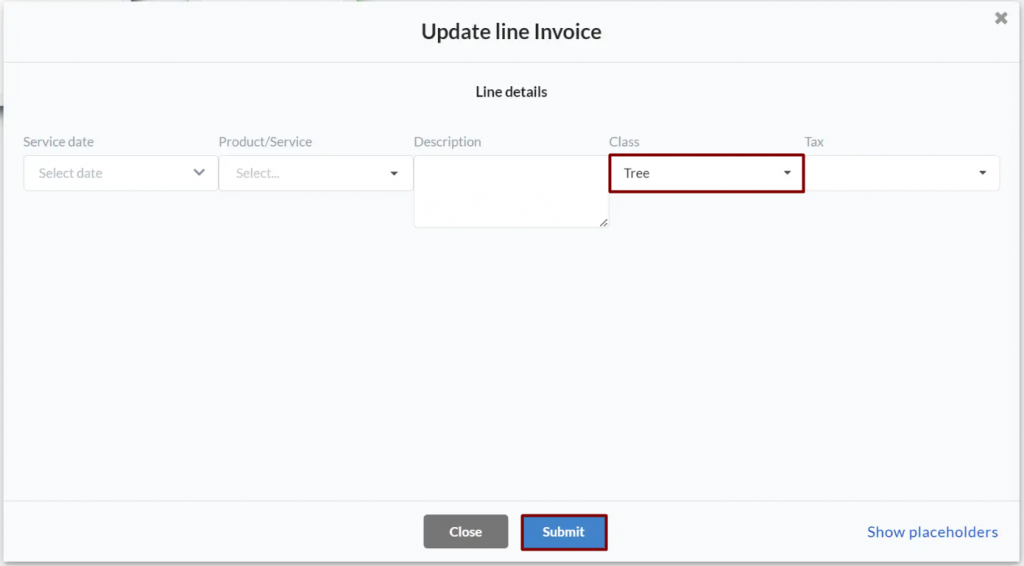
6. Select the details you want to update. In this case, we’ll update the “Class” to “Tree”. Click on “Submit”.
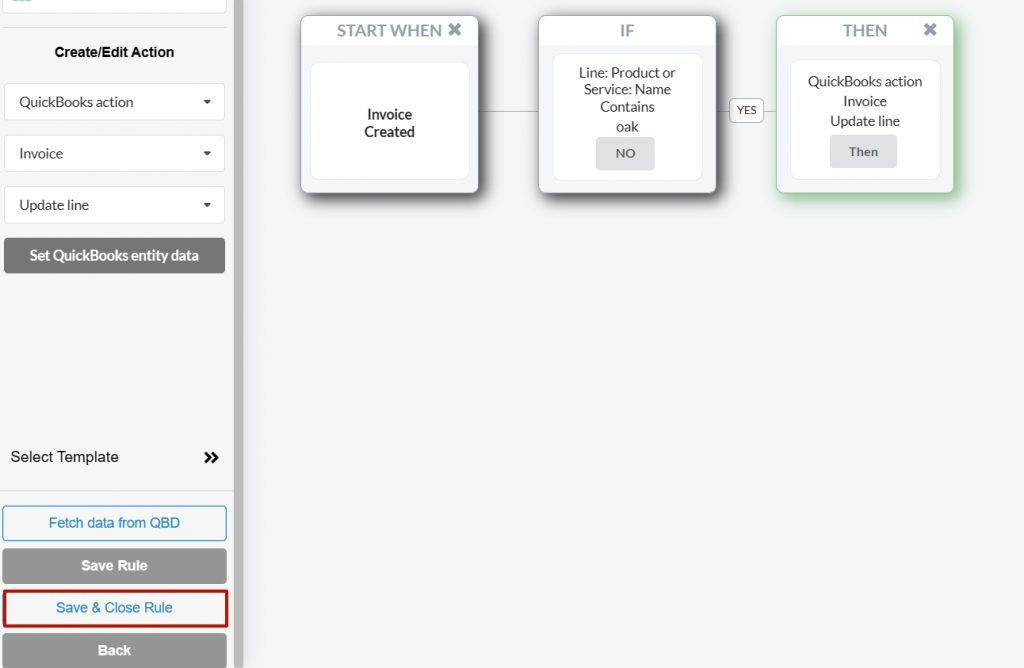
7. Click on “Save & Close rule”.
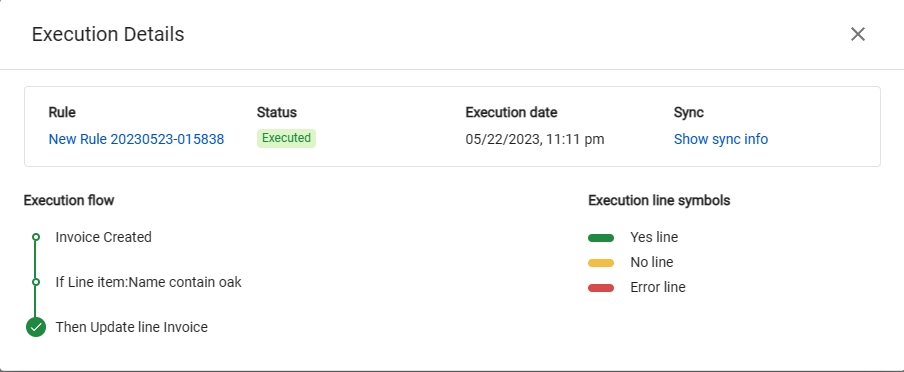
8. Sync one of the transactions to verify the result.

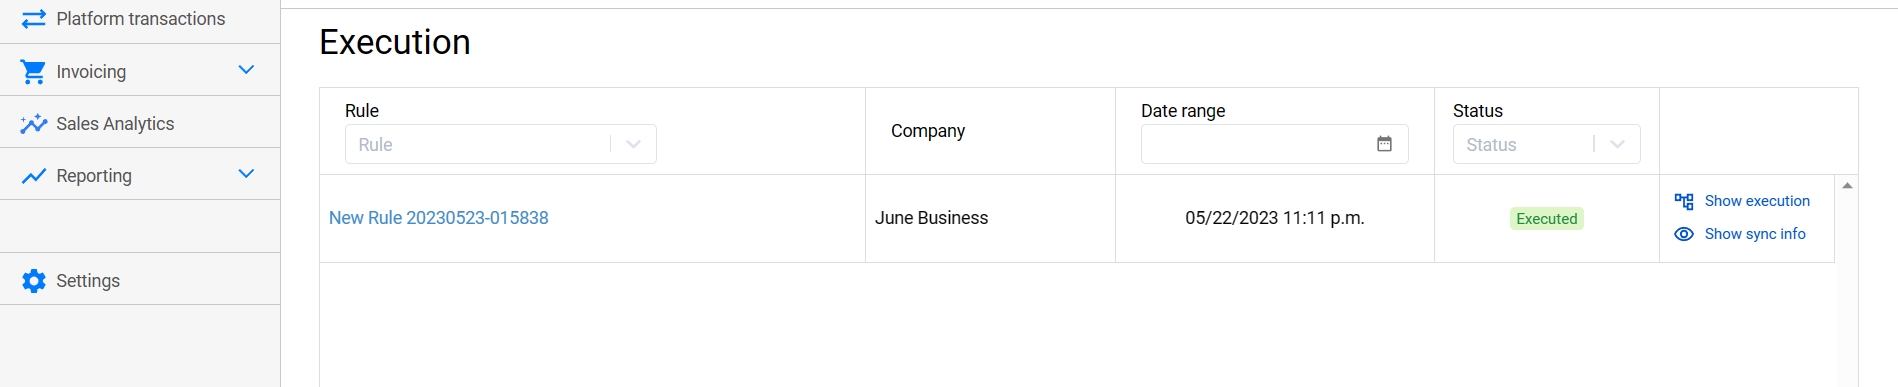
9. If the transaction is synced according to the rule, you will see the message “Executed” in the logs. Click on “See Execution Details” to check the result.

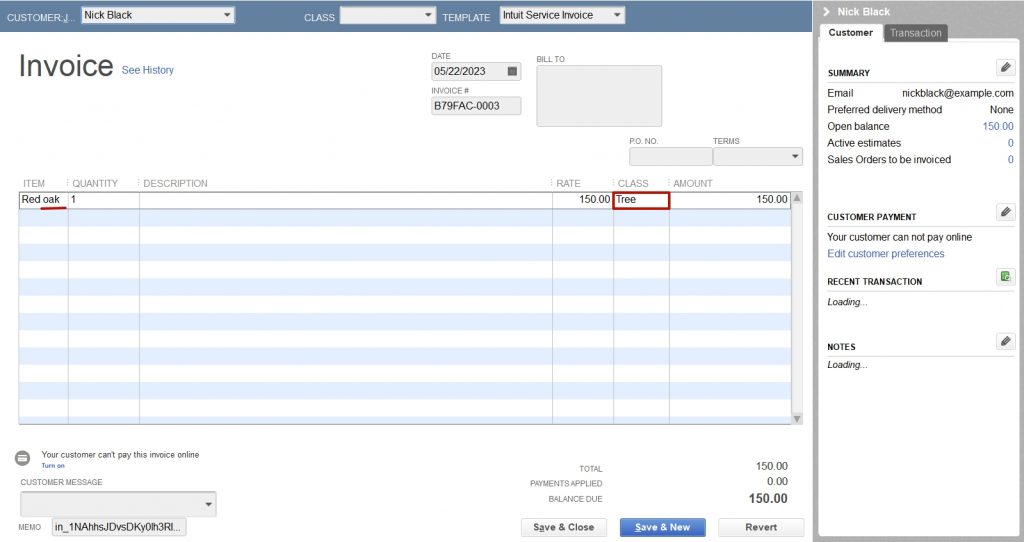
10. Finally, check the result in QuickBooks Desktop.
Important notes
1. Smart rules require the Synder connector version 1.9.0 or higher.
2. If you add new details in QuickBooks Desktop that you want to use in a rule for future updates (e.g., Classes, Products, Customers, Taxes), make sure to click on “Fetch data from QuickBooks Desktop”. This ensures that these details are displayed in the rule for selection.
Desktop Sync plan users: Support is available via email only. Please contact [email protected]. Live chat and phone support are not available on the Desktop Sync plan.
As a QuickBooks Desktop user, your support channel is email only. Reach out to the Synder Team at [email protected] with any questions – we are always happy to help you!