
What this guide is for
This guide explains how to send transaction data into Synder using Zapier and the Transactions API.
Use this setup when:
- Synder does not directly support your platform
- You need to send custom data to Synder
- You want to automate data flow from tools like Google Sheets or similar sources
This setup requires the Transactions API integration, available on Pro or Premium plans.
Make sure you have:
- An active Synder organization with Pro or Premium plan
- Transactions API integration connected to Synder
- A Zapier account
- A prepared data source (e.g., Google Sheets)
Setting up the Trigger
Step 1. Get your Synder API key
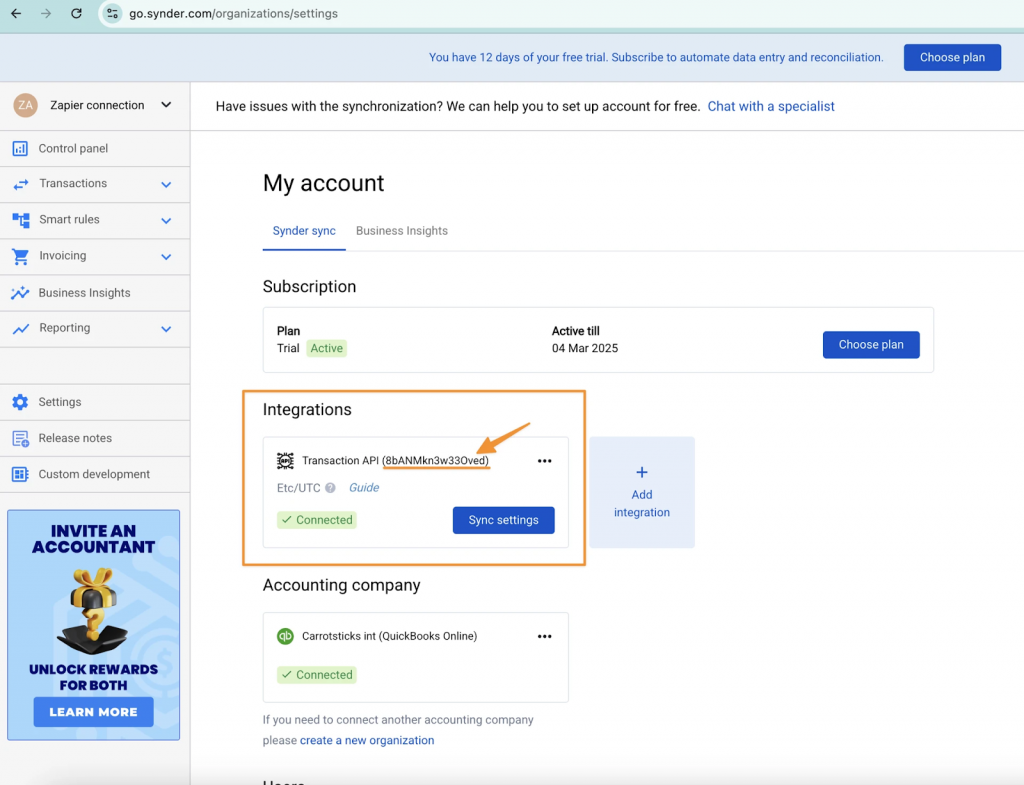
Open Synder and go to: My account → Integrations
Find the Transactions API integration and click Connect
Synder will instantly add a new connection.
Copy the API key from the connection. You will need this key later when connecting Zapier to Synder.

Step 2. Create a Zap in Zapier
In Zapier, navigate to Create and select Zap.
A Zap is an automated workflow that consists of two components:
- Trigger – the event or source where the data originates
- Action – the step that sends that data to another app
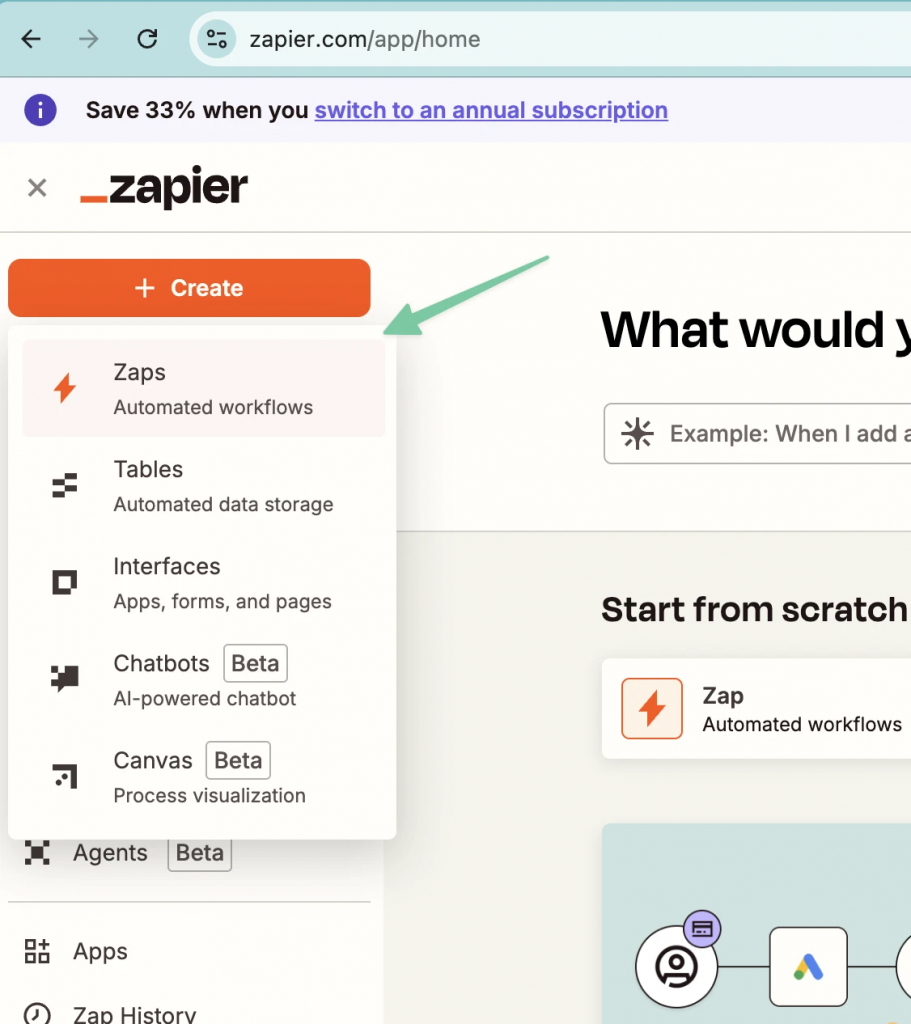
After creating a Zap, you’ll be taken to the Zap editor, where you can build your workflow step by step.

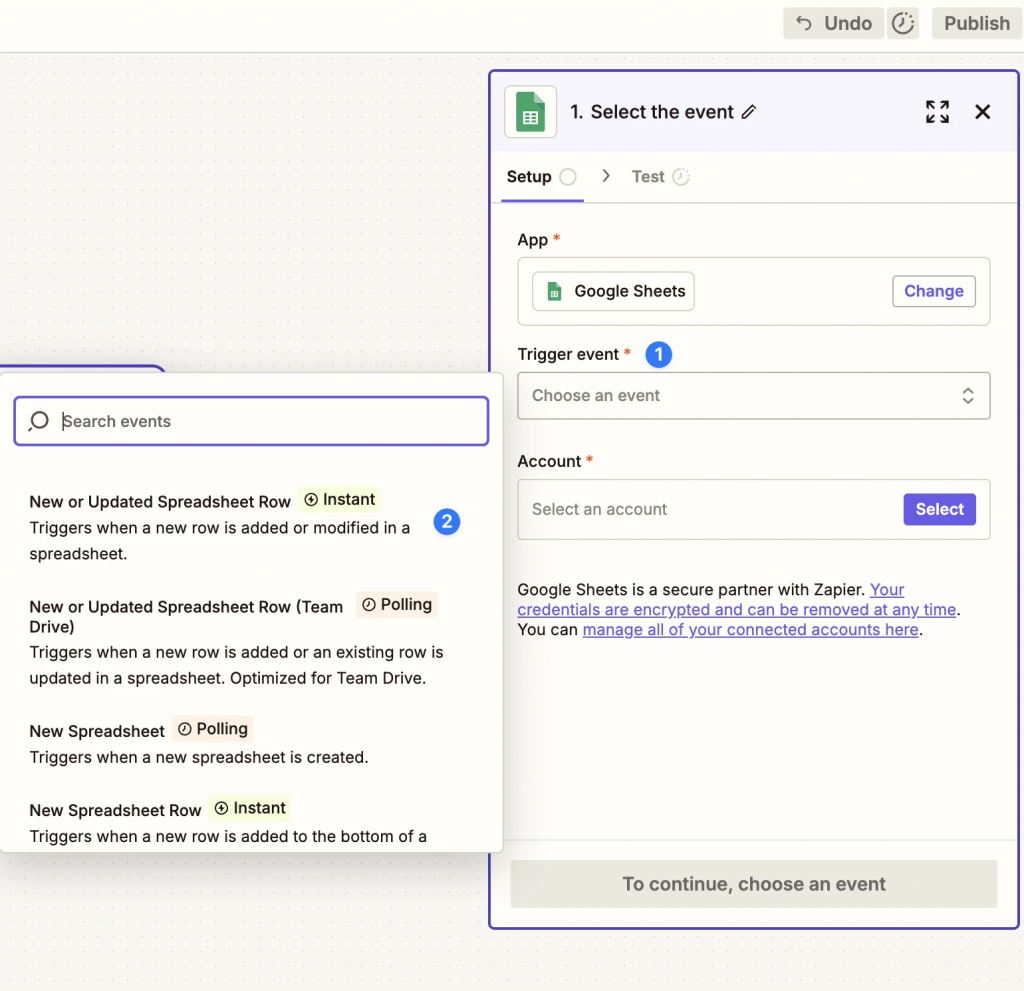
Step 3. Choose your trigger (data source)
Next, specify the source of your data in Zapier.
For example, you can select Google Sheets as the data source.
Choose a trigger event such as New or Updated Row.
With this configuration, the Zap runs automatically whenever you add new data or update existing data in your source.
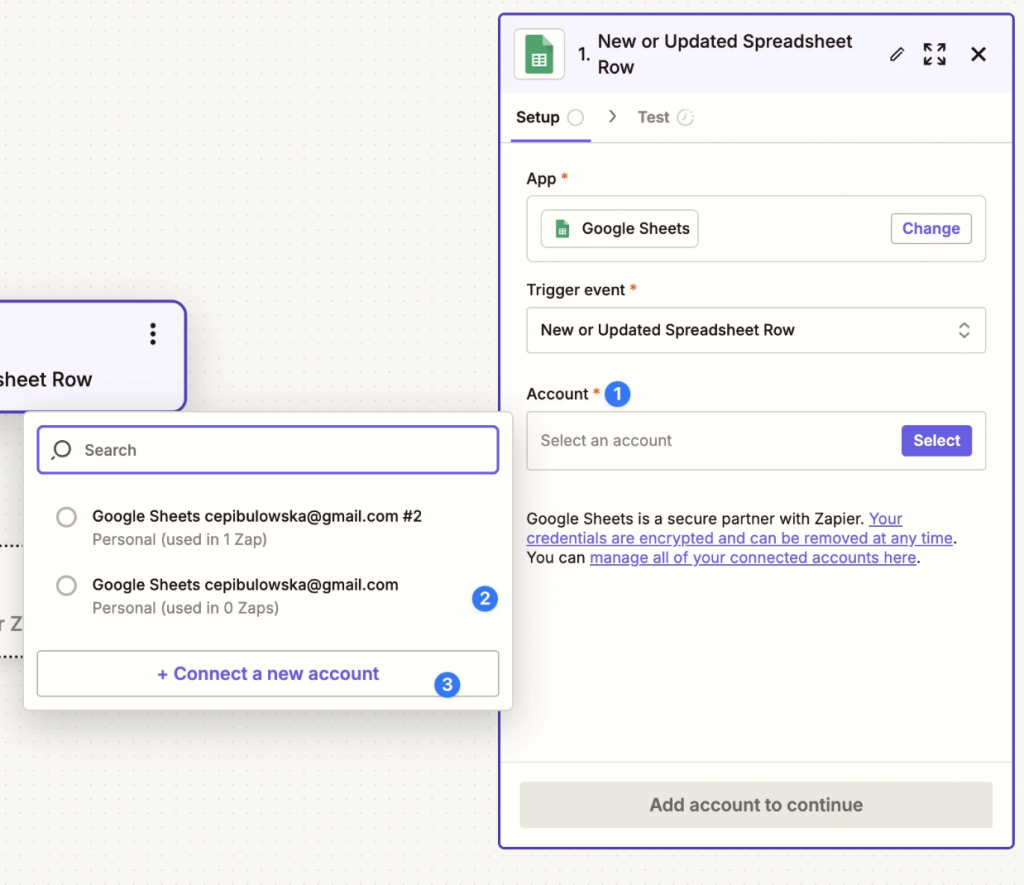
Step 4. Connect your account
Zapier will ask you to connect your account (for example, your Google account).
- Click Account.
- Choose an existing account
- Or connect a new one.
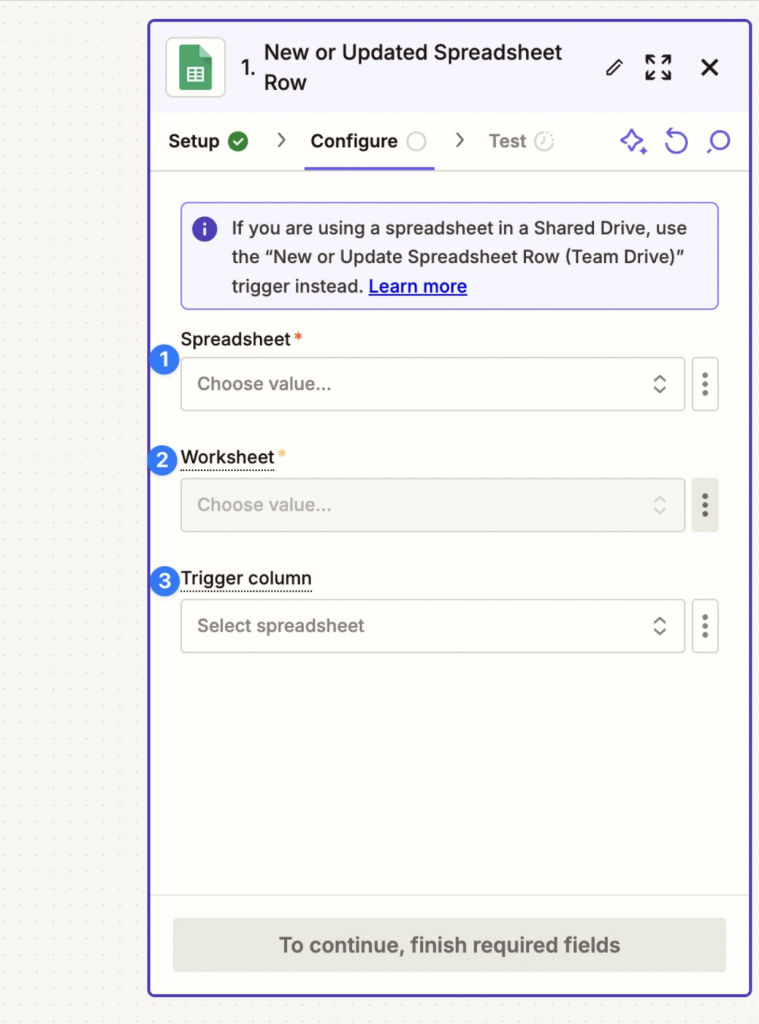
Step 5. Select your data
Choose exactly where Zapier should look for data:
- Select the spreadsheet
- Select the worksheet
- Choose the trigger column (this tells Zapier what counts as a new record)
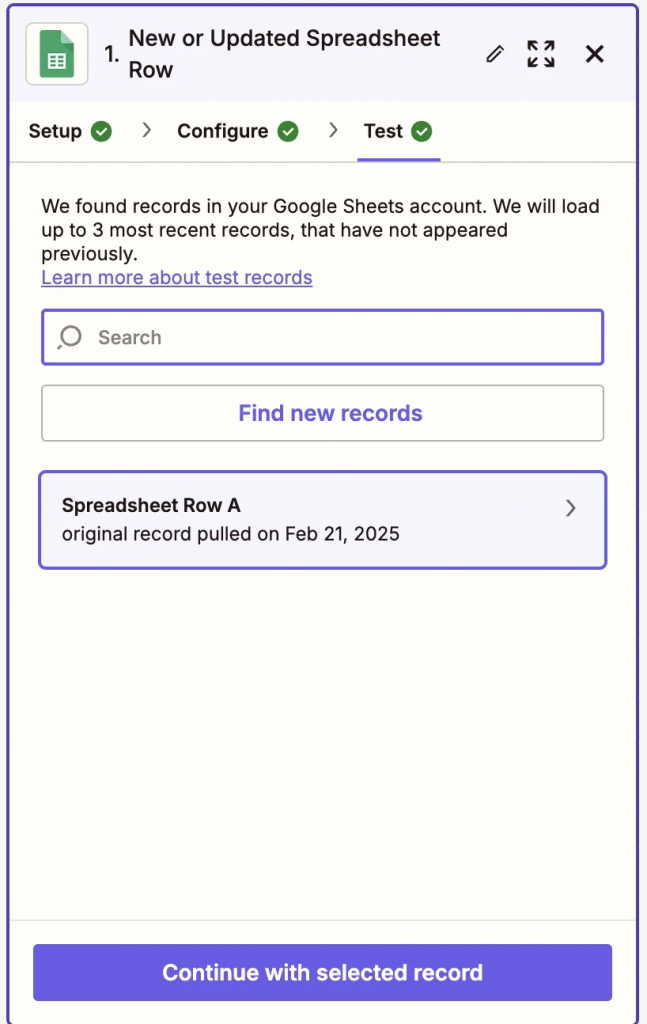
Step 6. Test the trigger
Click Test trigger.
Zapier will pull a sample row from your data.
This sample is important — you will use it in the next step to map fields to Synder.
Defining the Action
Step 1. Add Synder as the action
Now define what should happen with the data.
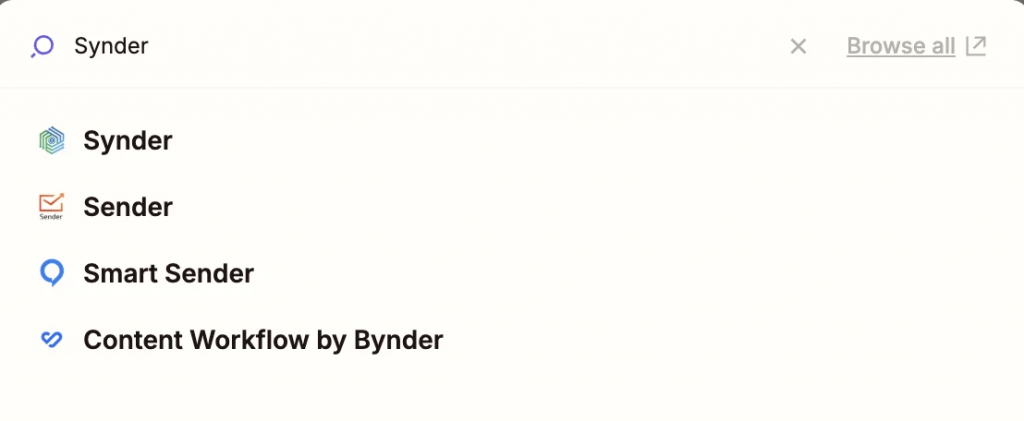
- Click Add action.

- Search for Synder and select it.
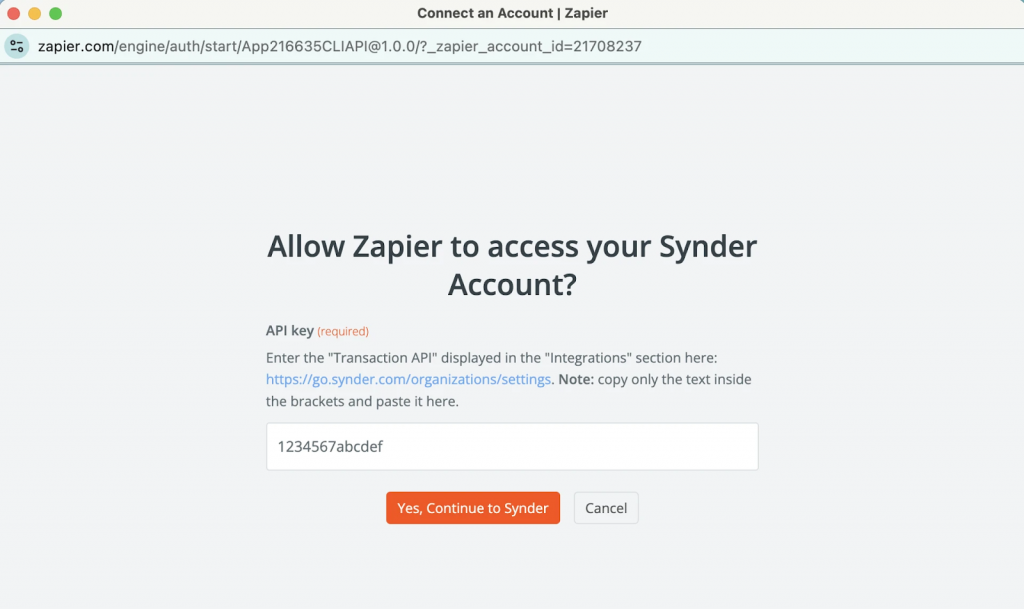
Step 2. Connect Synder
Zapier will ask you for the API key you copied earlier in the trigger setup.
Open Synder and go to: My account → Integrations
Find the Transaction API integration and connect
This will instantly add a new connection on Synder.
Copy the API key of the connection
Zapier is now connected to your Synder account.
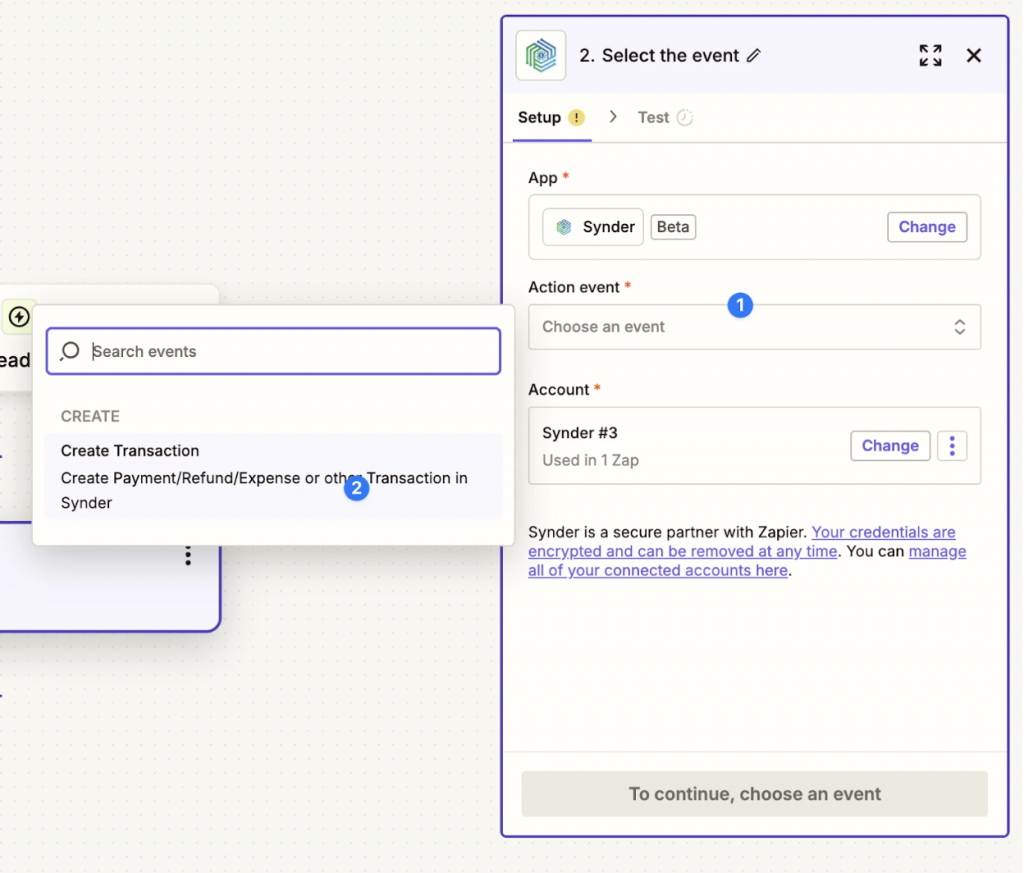
Step 3. Choose action: Create Transaction
Select Create Transaction.
This tells Zapier to create a new transaction in Synder every time the trigger fires.
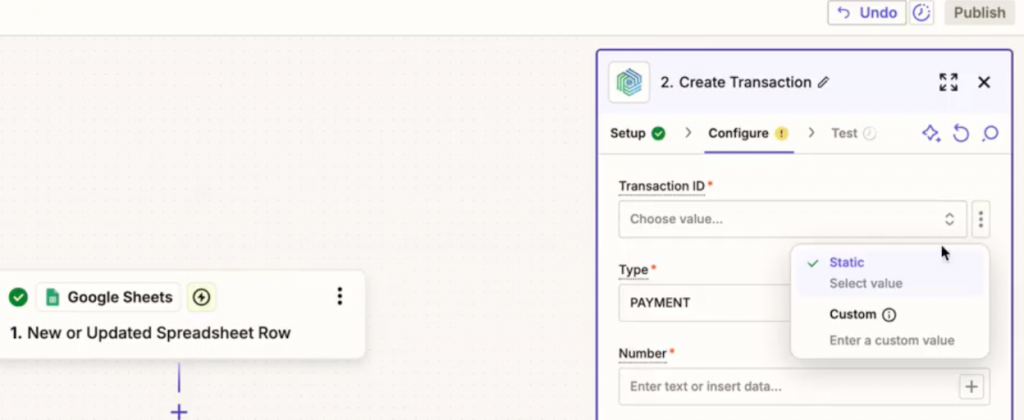
Step 4. Map your data
This is the most important step. You need to match your source data (for example, columns in your spreadsheet) to the corresponding Synder fields.
Firstly, we need to make sure that your Zap’s action fields are set to Custom. It should not be set to Static, otherwise the newly added columns on your file will not be read.
Then, map each field to the corresponding column from your spreadsheet. Zapier displays values from your test record so you can verify the correct mapping.
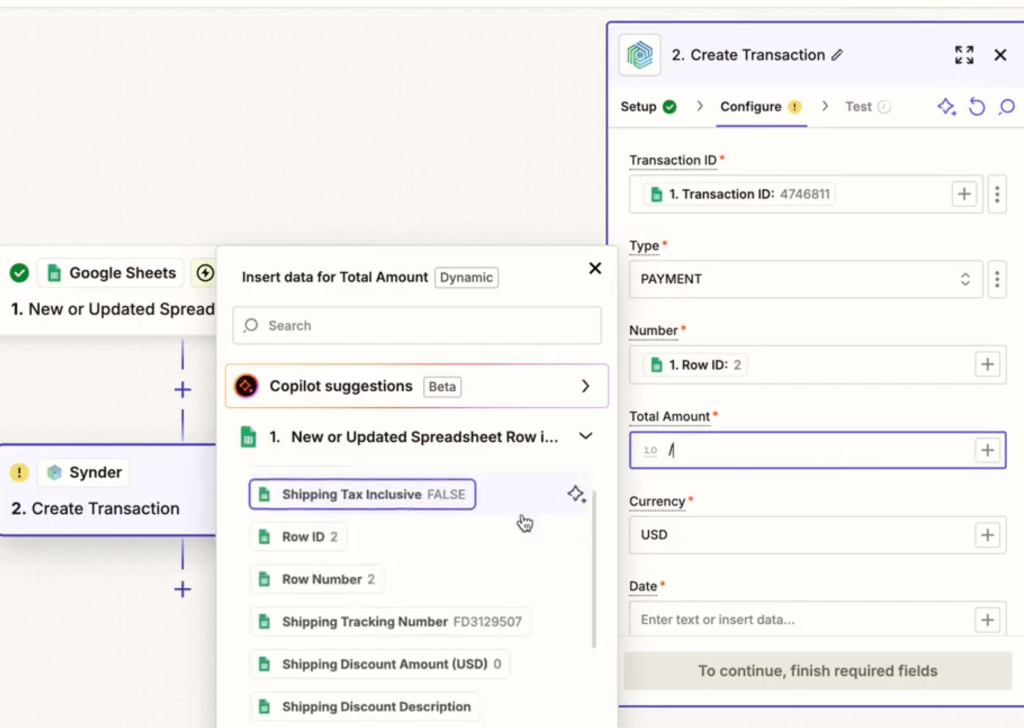
For example:
- Amount – your amount column
- Date – your date column
- Customer → your email or name column
Step 5. Test the action and review the result
Click Test. Make sure:
- The amount is correct.
- The customer is correct.
- All data looks as expected.
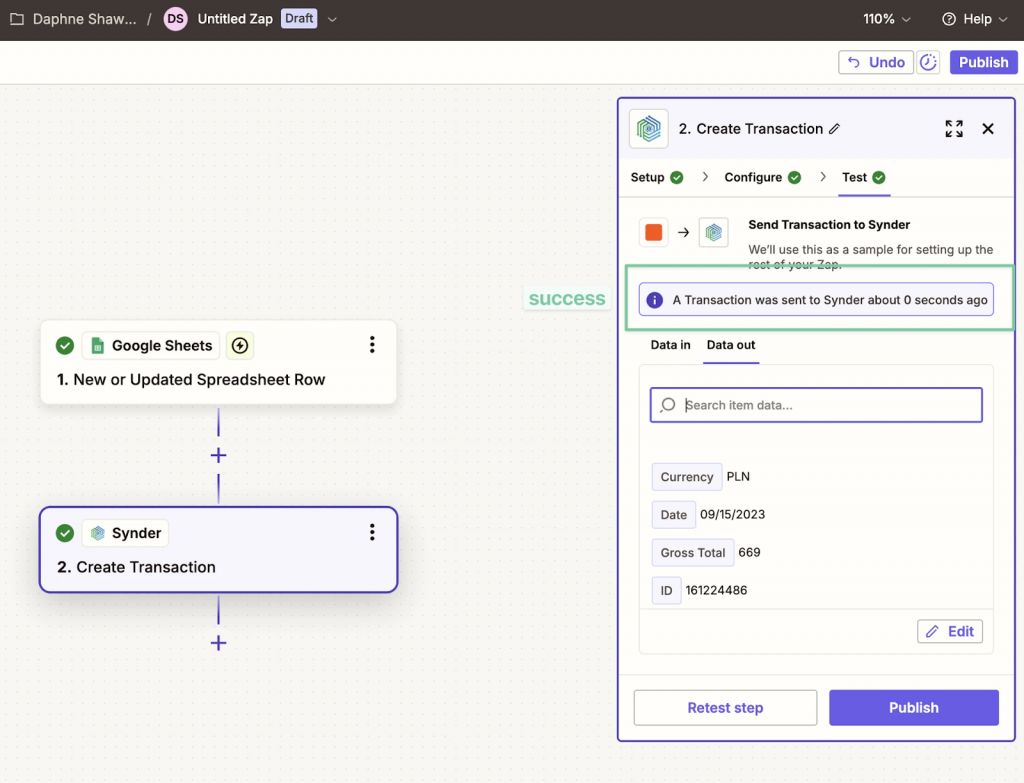
If everything is correct click “Publish”
Step 6. Check the final result
After you publish, any new data in your source will trigger the Zap and the transactions will appear in Synder automatically.
How to confirm it works
- Your Zap is active.
- New data triggers the Zap.
- Transactions appear in Synder.
- The source shows as Transaction API.
Important
- This setup is designed for unsupported integrations or custom workflows.
- Zapier only processes new data added after you publish the Zap.
- The transaction fields in Synder depend on your Zapier mapping — make sure it matches your source file for maximum accuracy.
Troubleshooting
- Check that your Zap is active and review Zapier’s Task History for errors.
- Verify the trigger configuration is correct and make sure you added new data after publishing the Zap.
- Review the transaction field mapping if the data is coming in incorrectly on Synder
- Use Formatter by Zapier to adjust the date format before sending.
Frequently asked questions
Do I need a special plan?
Yes, the Transactions API requires a Pro or Premium subscription to Synder.
Can I use Zapier instead of direct integration?
Technically, yes, but it’s not recommended for integration that we natively support. Use this option only when a direct integration is not available.
Can I send historical data?
Yes, you can add transactions dated in the past. However, remember that the Zap only triggers when you add new rows. To import historical transactions, add them as new rows in your spreadsheet.
Reach out to Synder Team via online support chat or email with any questions you have – we are always happy to help you!