
Overview:
Cases it may cover: you might want to use a Service date on specific transactions to track the date a service was performed separately from the invoice date. This is especially useful if you use the revenue recognition feature from QuickBooks.
Important note: the Service date field has to be enabled in QuickBooks Online first. You’ll be able to see it on a rule no matter if the setting is on or off. However, it won’t be applied if this field is disabled in QuickBooks Online.
Enable Service date in QuickBooks Online
To enable the field, follow these steps:
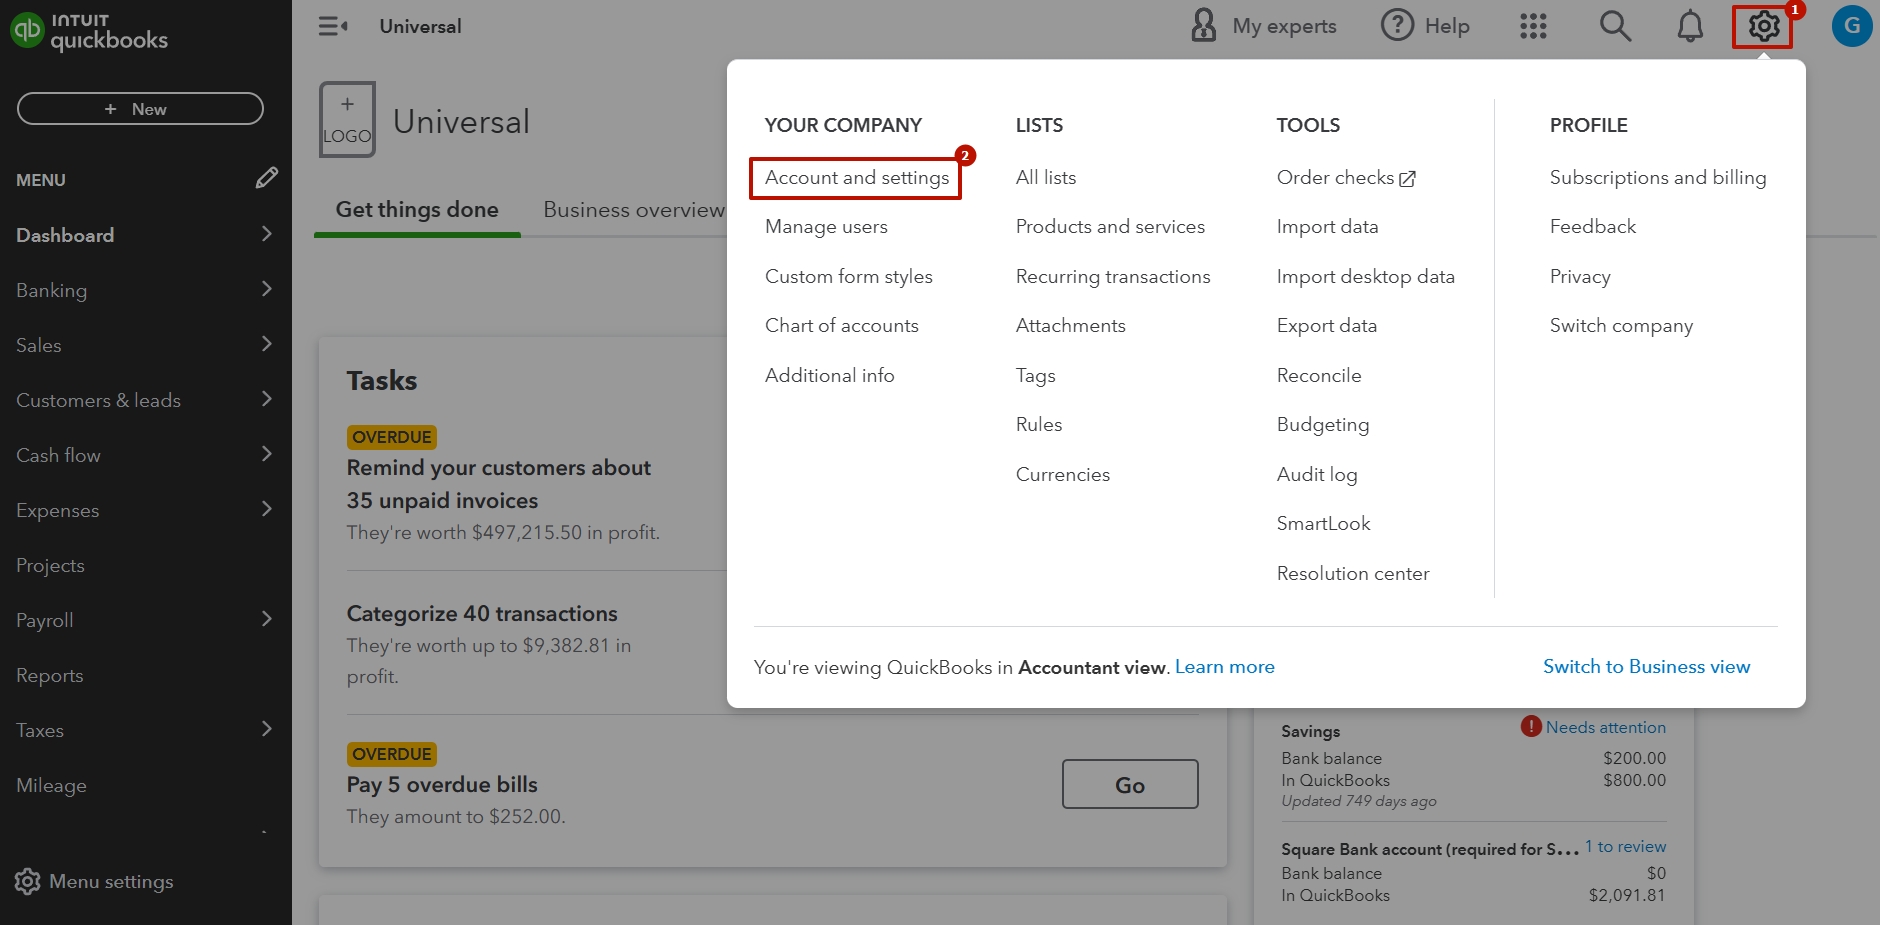
- Log into QuickBooks Online→ click on the Gear icon in the upper-right corner → select Account and settings;
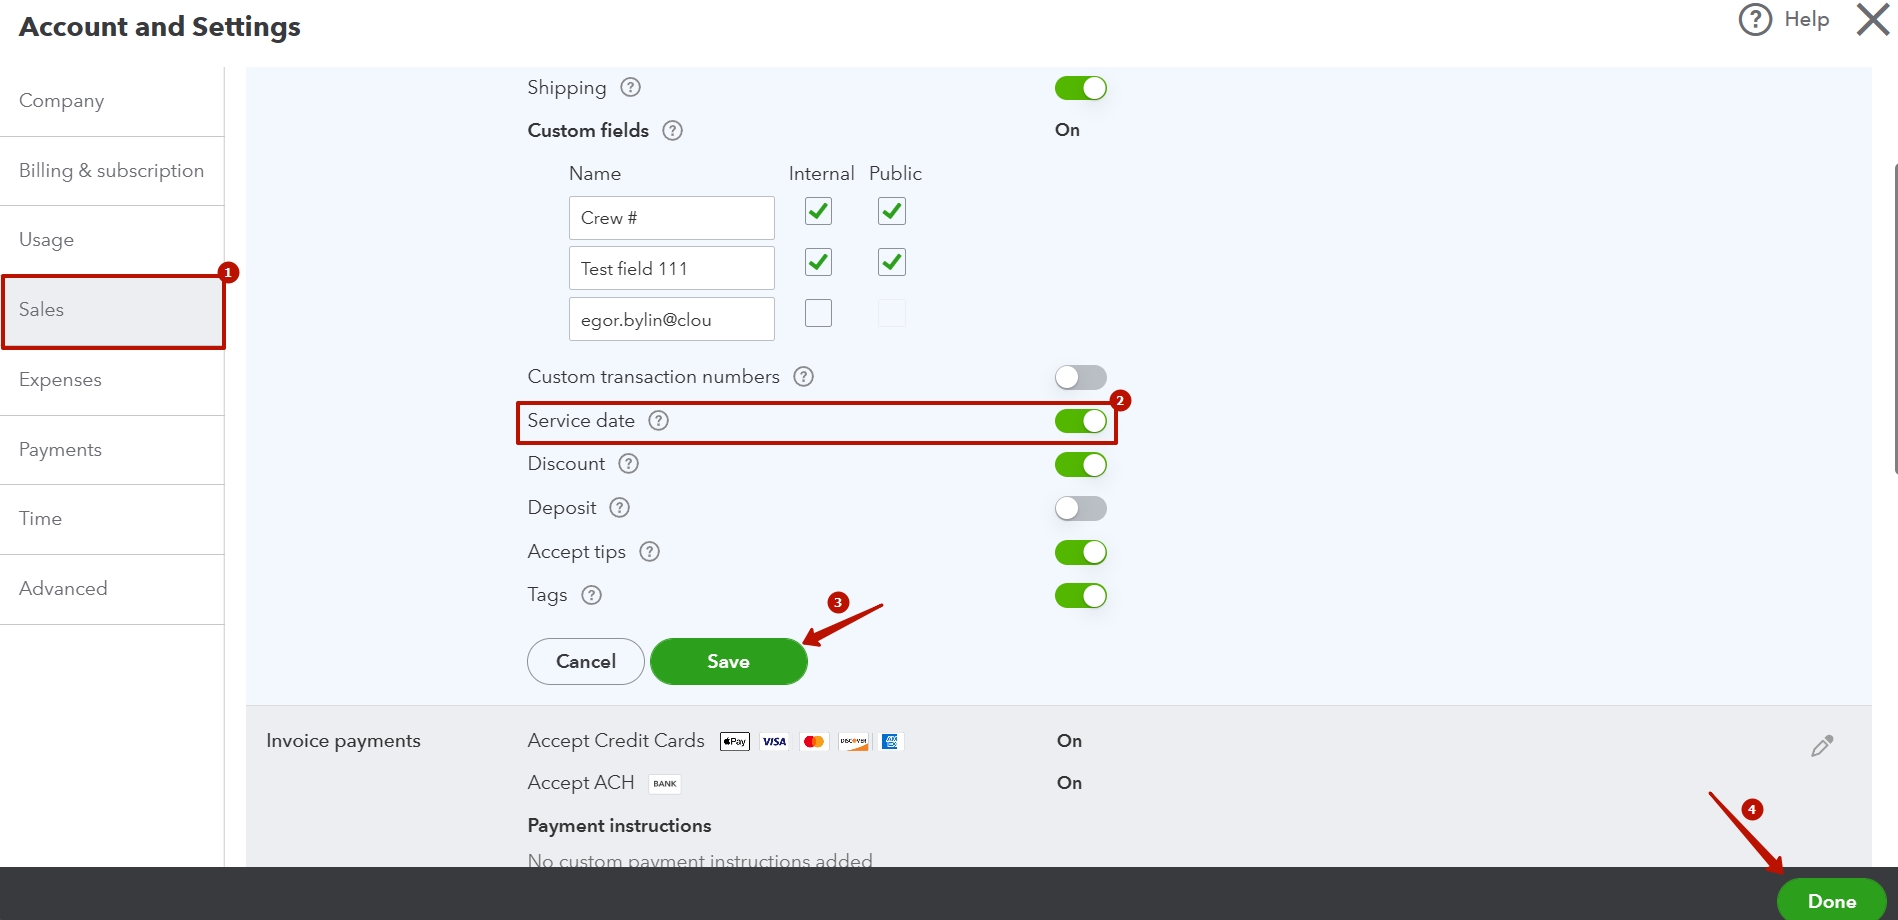
- Go to the Sales tab → enable Service date → click on Save → hit Done.
Create a rule
To create a rule, follow the steps below:
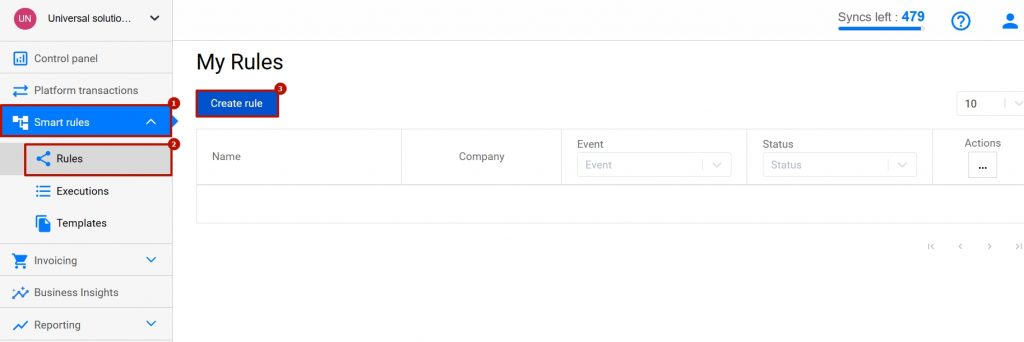
1. Log into your Synder account → go to the Smart rules tab on the left-side menu → click on Rules → hit Create rule;
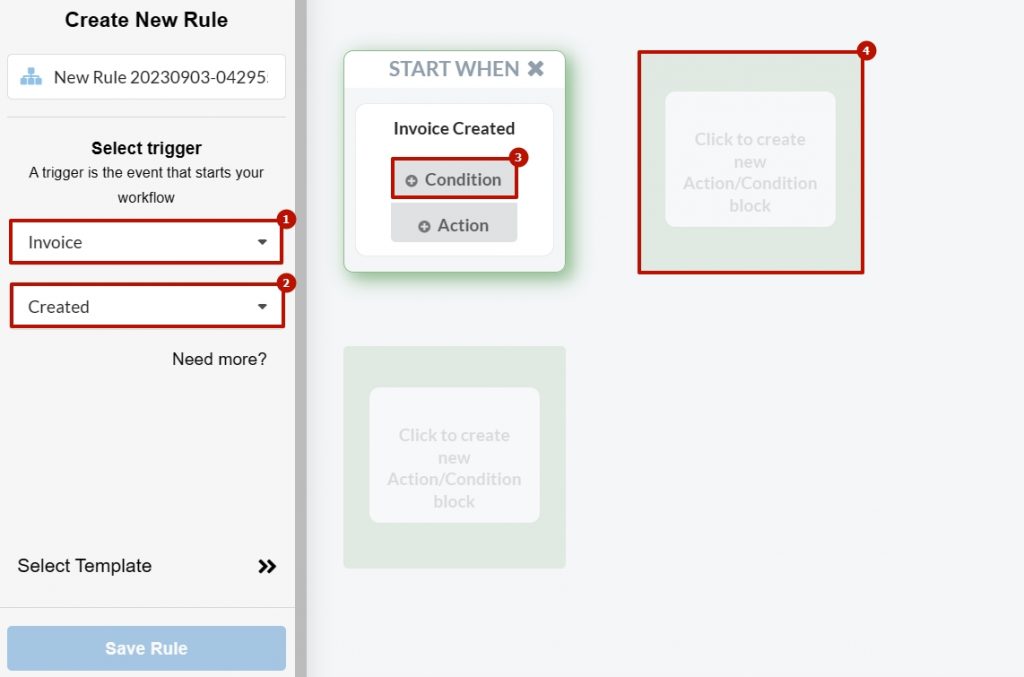
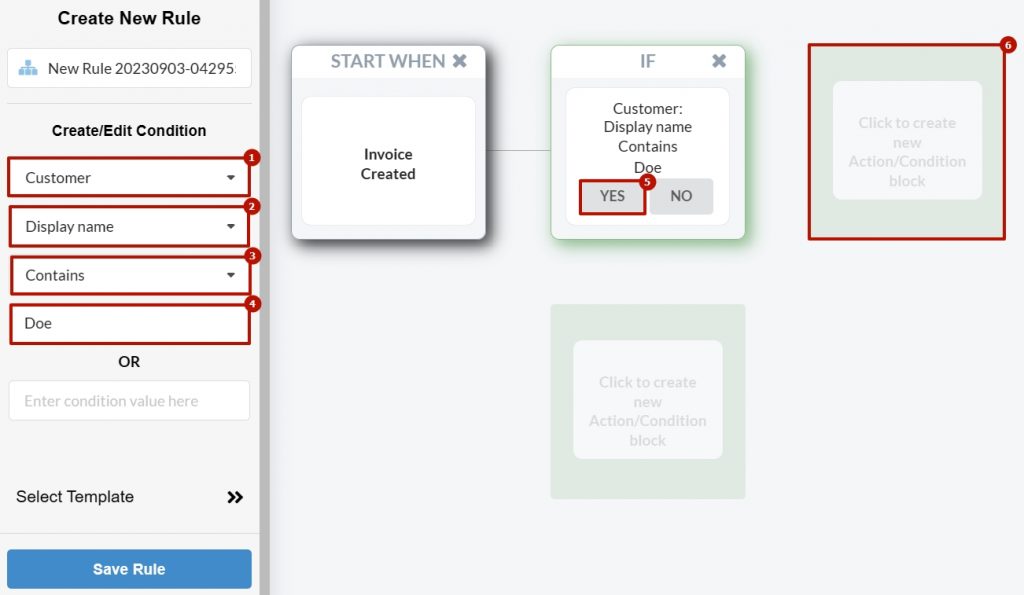
2. Select Invoice as a trigger (a transaction type the service date will be applied to) → Created → Click on Condition → click on the nearest box;
3. Now you need to tell Synder when the system should apply a service date. For example, you can apply a service date for all transactions containing a specific customer last name (e.g., Doe):
-select Customer;
–Display name (or any other field related to a customer);
–Contains (it’ll allow you to apply a service date based on a part of the customer, not the whole name);
-type in part of the whole customer name (you can specify different variations in separate fields) – e.g., you can use a surname – Doe.
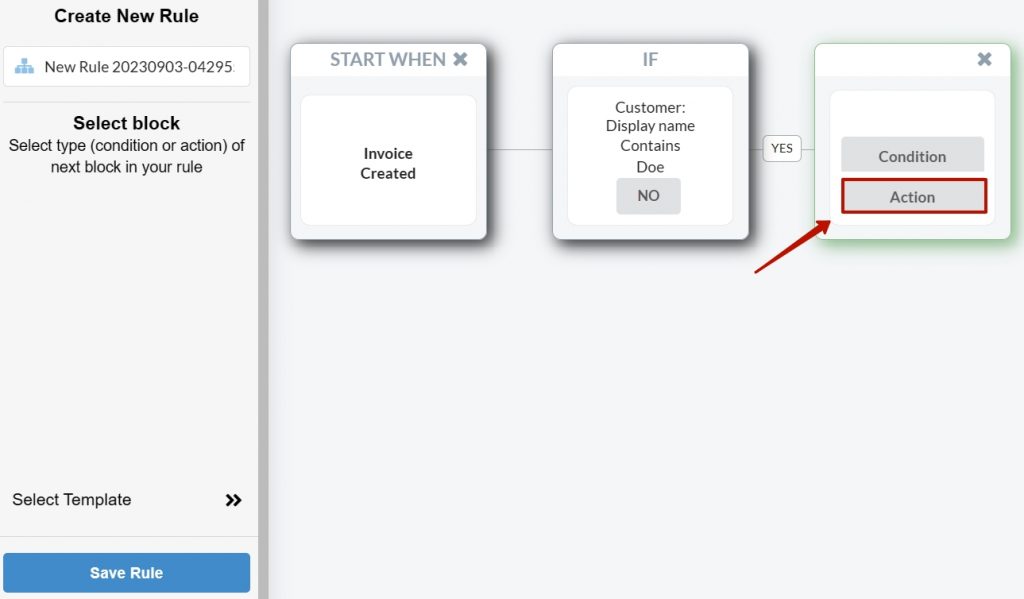
Click YES under the condition box → click on the nearest box.
4. Select Action;
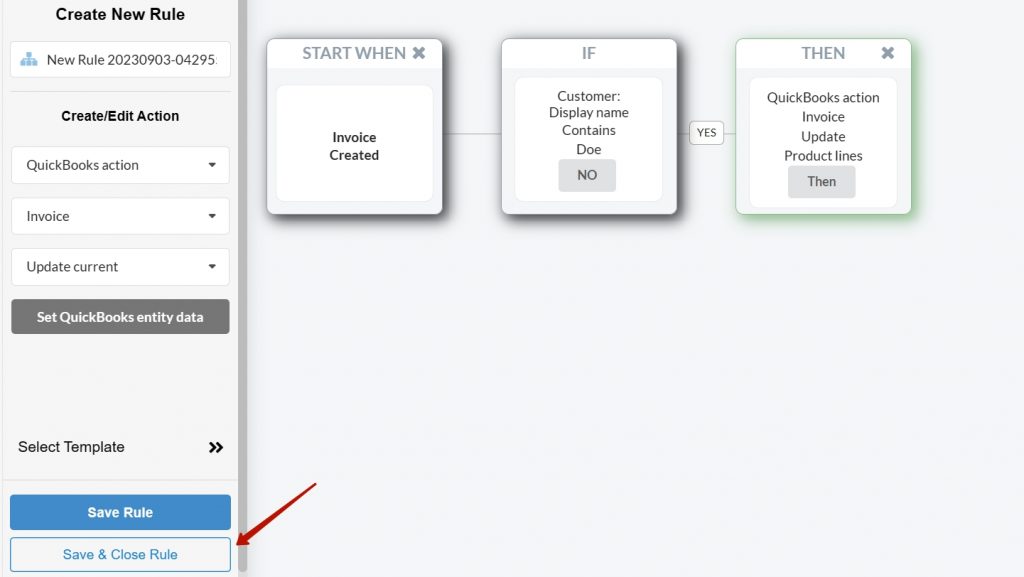
5. Under Create/Edit Action, select QuickBooks action → Invoice → Update current → Set QuickBooks entity data;

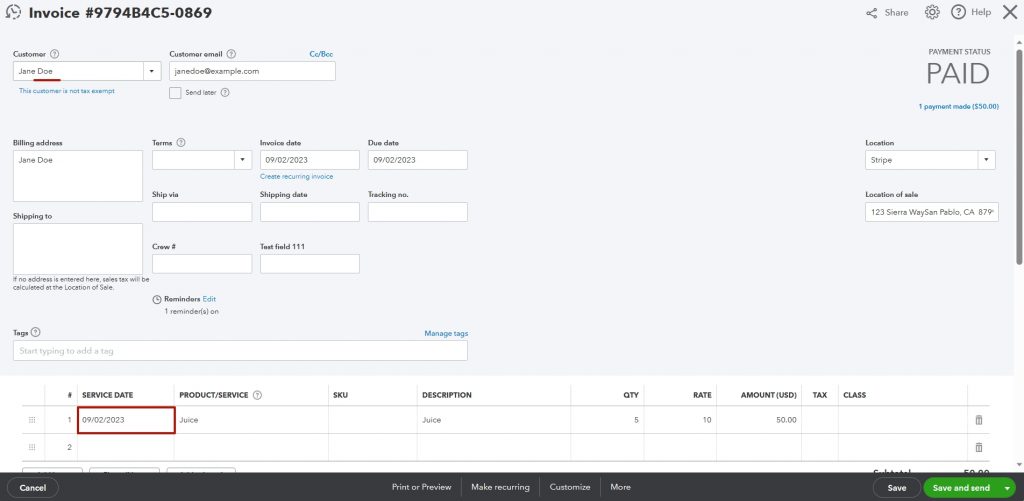
6. Navigate to the Service date field → select the needed parameter. You can put it as an invoice due date, transaction date or choose a custom date → click on Submit;
Note: Placeholders are variables that take the original values from QuickBooks;
7. Click on Save & Close Rule;
Check the result
1. Go to the Platform transactions tab → click on Ready to sync.
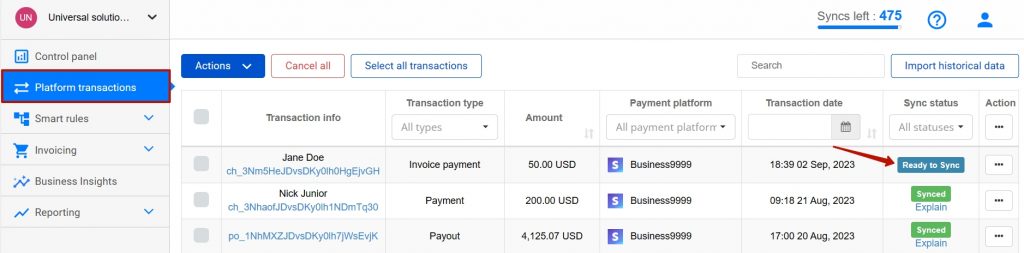
2. Click on Show in QB after the transaction has been synced.
Note: To ensure that the rule was applied, you can check the execution below.
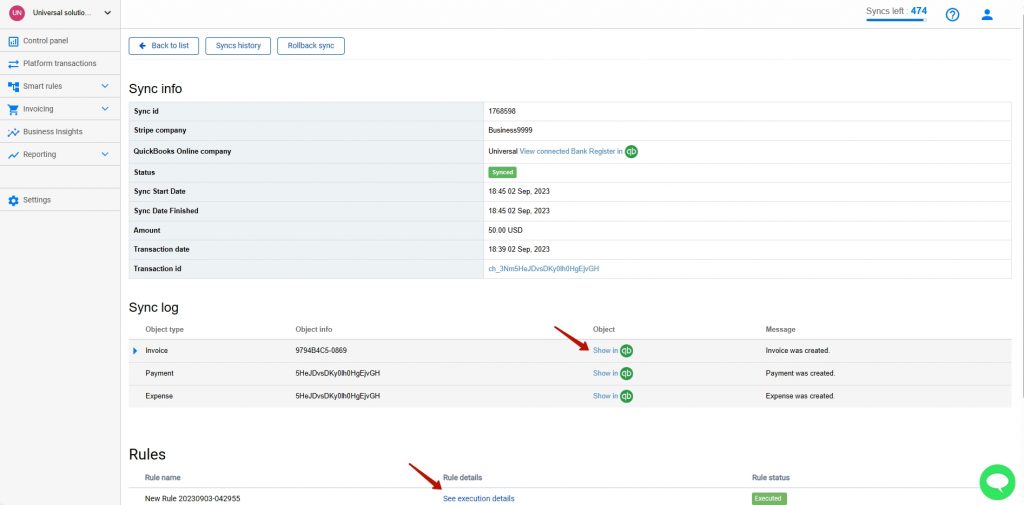
3. Check the result in QuickBooks Online.
4. As well, you can check the smart rule execution in the Smart rules tab → Executions.

Reach out to the Synder team via online support chat, phone, or email with any questions you have – we’re always happy to help you!