
Have you ever wondered which area of your business brings in the greatest part of your income? To see where most of your money is coming from, you must properly categorize your data.
In this guide, we’ll walk you through the process of enabling and utilizing QuickBooks locations within the Synder Summary Sync. Locations provide a powerful tool for multichannel businesses to enhance their financial tracking and reporting.
Whether you’re new to utilizing locations or seeking to optimize your current setup, this guide will equip you with step-by-step instructions and best practices to effectively manage and categorize your summaries based on different locations. It’s aimed to give you a solid understanding of how to leverage locations in Synder’s Summary Sync for improved business insights and decision-making. Let’s find out how to assign locations, so we can help your business!
Overview:
- Map your locations in Synder
- Important notes and tips for location mapping
- Reviewing mapped Summary locations in Synder for accurate assignment
- Best practices of using locations
Map your locations in Synder
Important: In order to map locations in Synder, first, you have to enable and create locations in QuickBooks online. Explore this guide to learn more “How to Enable Locations in QuickBooks Online”
Once you’ve established your locations within your accounting company, it’s time to chart their course in Synder.
Here are some possible options for enabling the function:
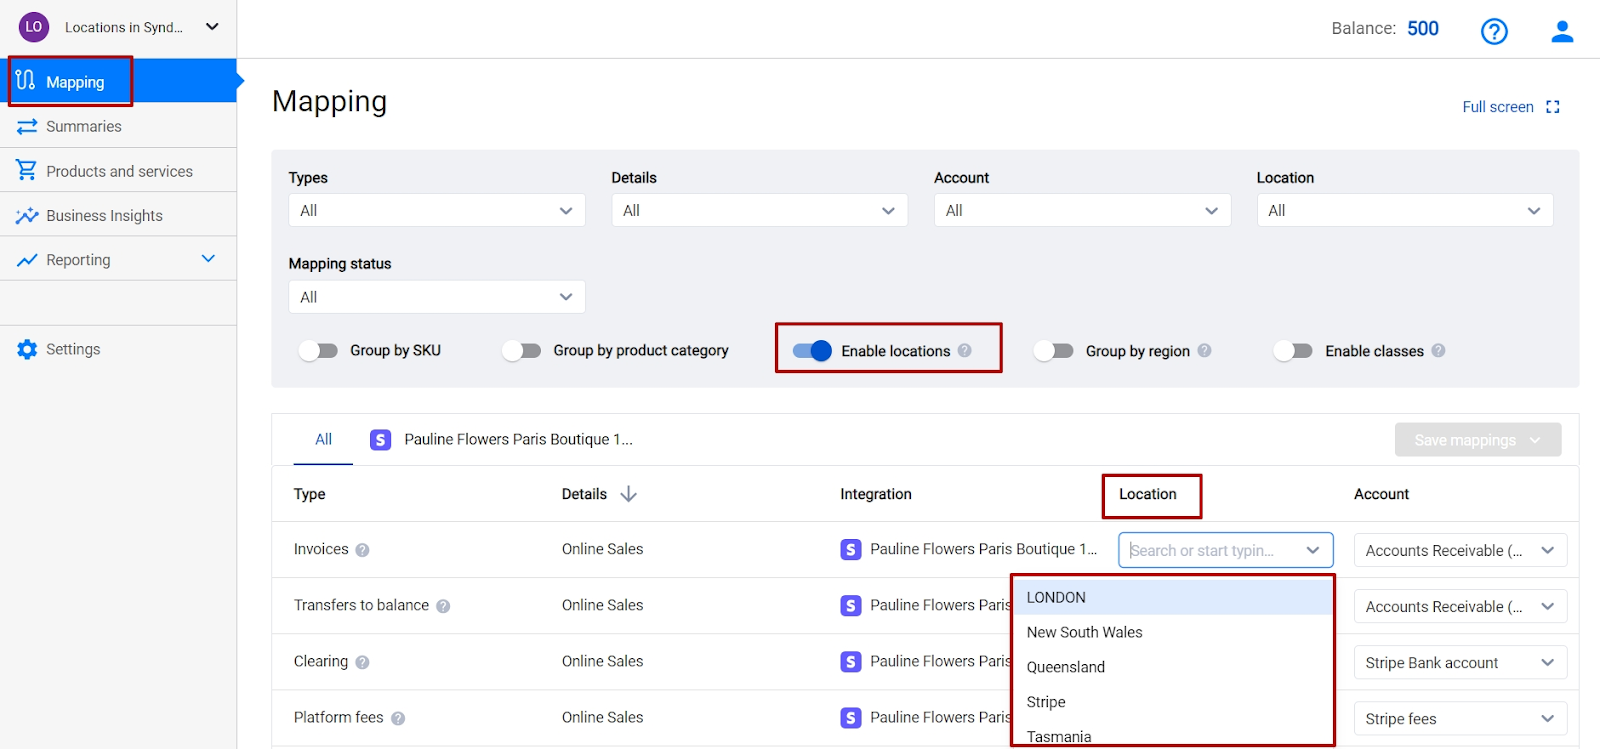
Step 1: Go to the left-side menu.
Step 2: Click on “Mapping” from the menu options.
Step 3: Select “Enable locations.” If locations are already enabled in QuickBooks Online, there will appear an additional column, allowing you to choose locations from QuickBooks Online.
Note: alternatively, you can enable locations in Synder Settings:
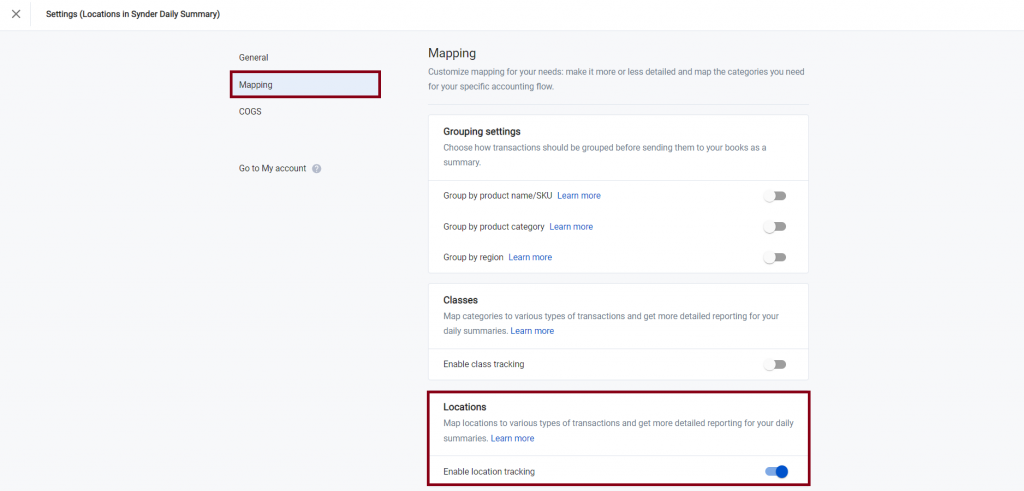
Step 1: Go to the left-side menu and click on “Settings” from the menu options.
Step 2: Choose “Mapping” from the Settings menu.
Step 3: Scroll down the page and toggle on the “Enable locations tracking” switch to activate this feature; the Locations column will appear on the Mapping page.
Important notes and tips for location mapping
Below are important notes and tips related to location mapping and usage in Synder, along with additional insights to enhance your experience.
Note 1: Locations won’t appear in the suggested mapping.
Note 2: Feel free to explore our comprehensive guide on “How to Use Classes in Synder Summary Sync.” This resource provides valuable insights and step-by-step instructions for a smoother experience. Check it out – you’ll likely find it extremely useful!
Reviewing mapped Summary locations in Synder for accurate assignment
Review your results by checking the locations assigned to all the mapped Summary lines in Synder after mapping.
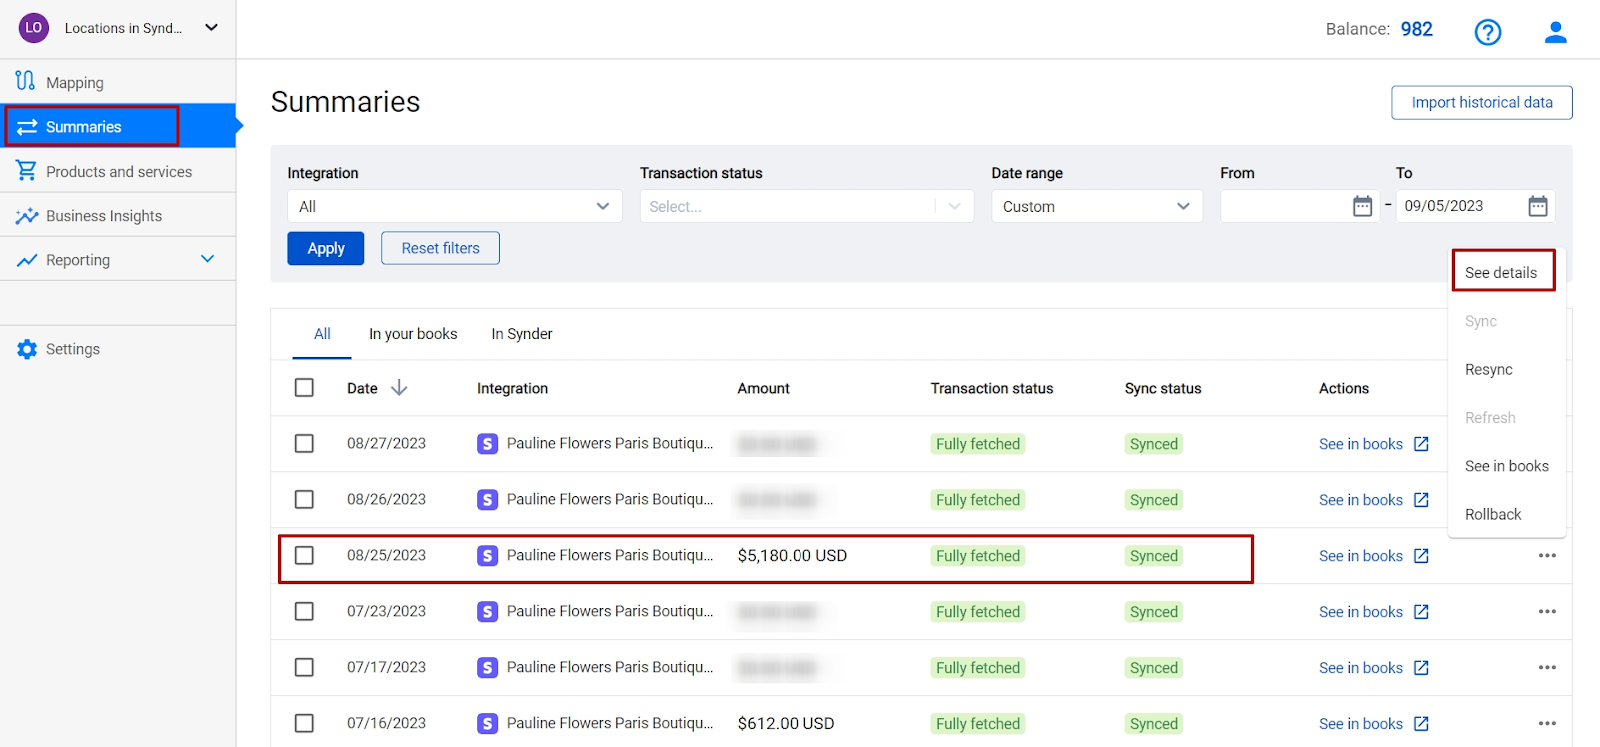
Step 1: Click on the three dots located next to “See in books.”
Step 2: From the dropdown menu, select “See details.”
Step 3: Within the details, review the “Sync log” to examine the Summary lines preview.
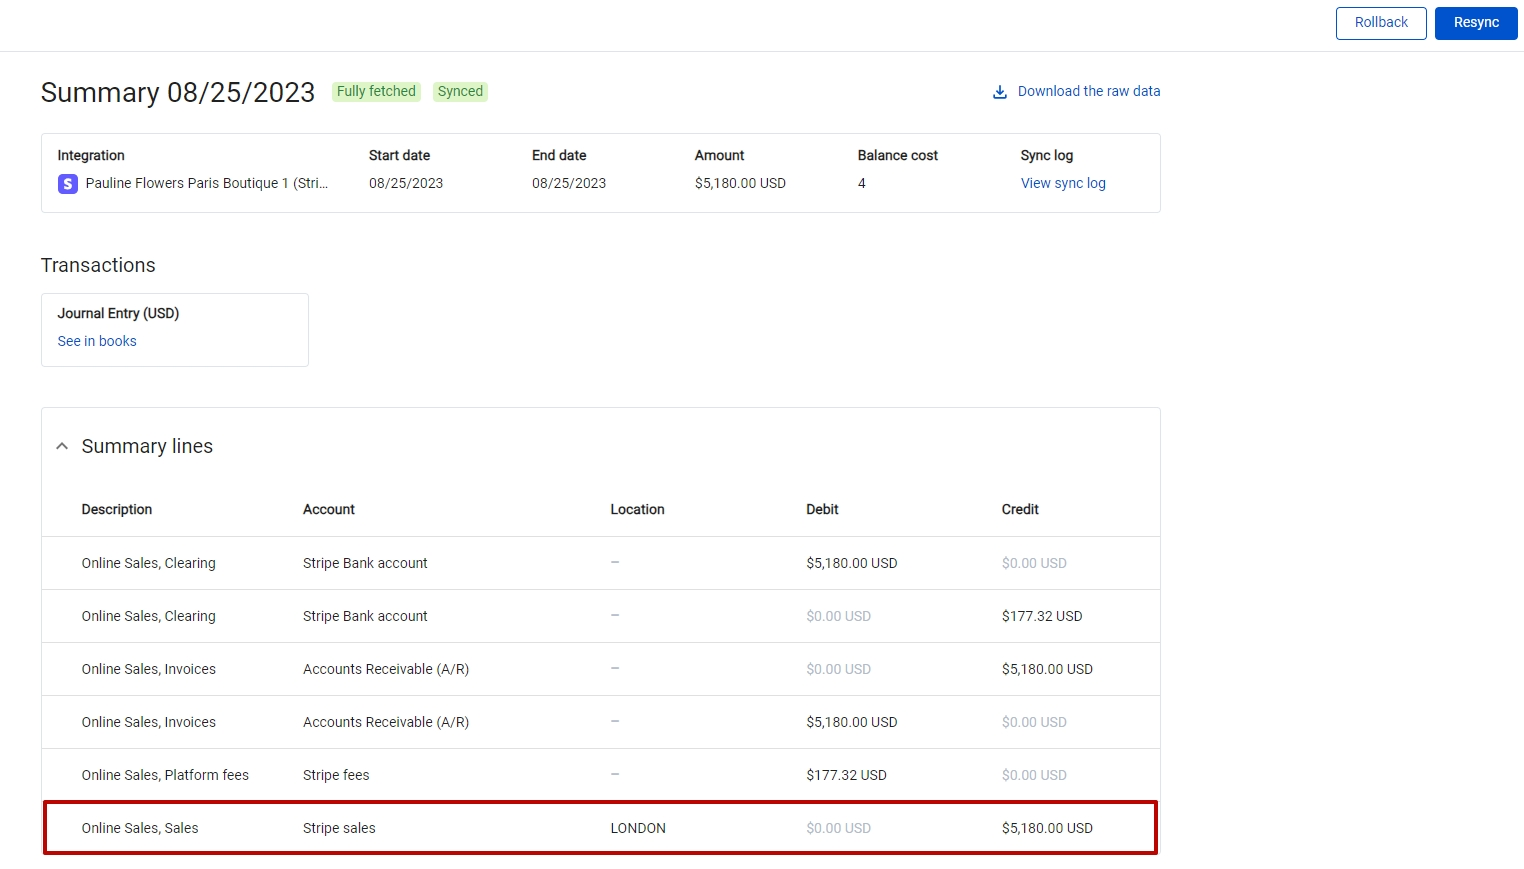
Clicking on the “See in books”, you’ll open a summary in your accounting company. The screenshot provided below demonstrates a sync result in QuickBooks Online.
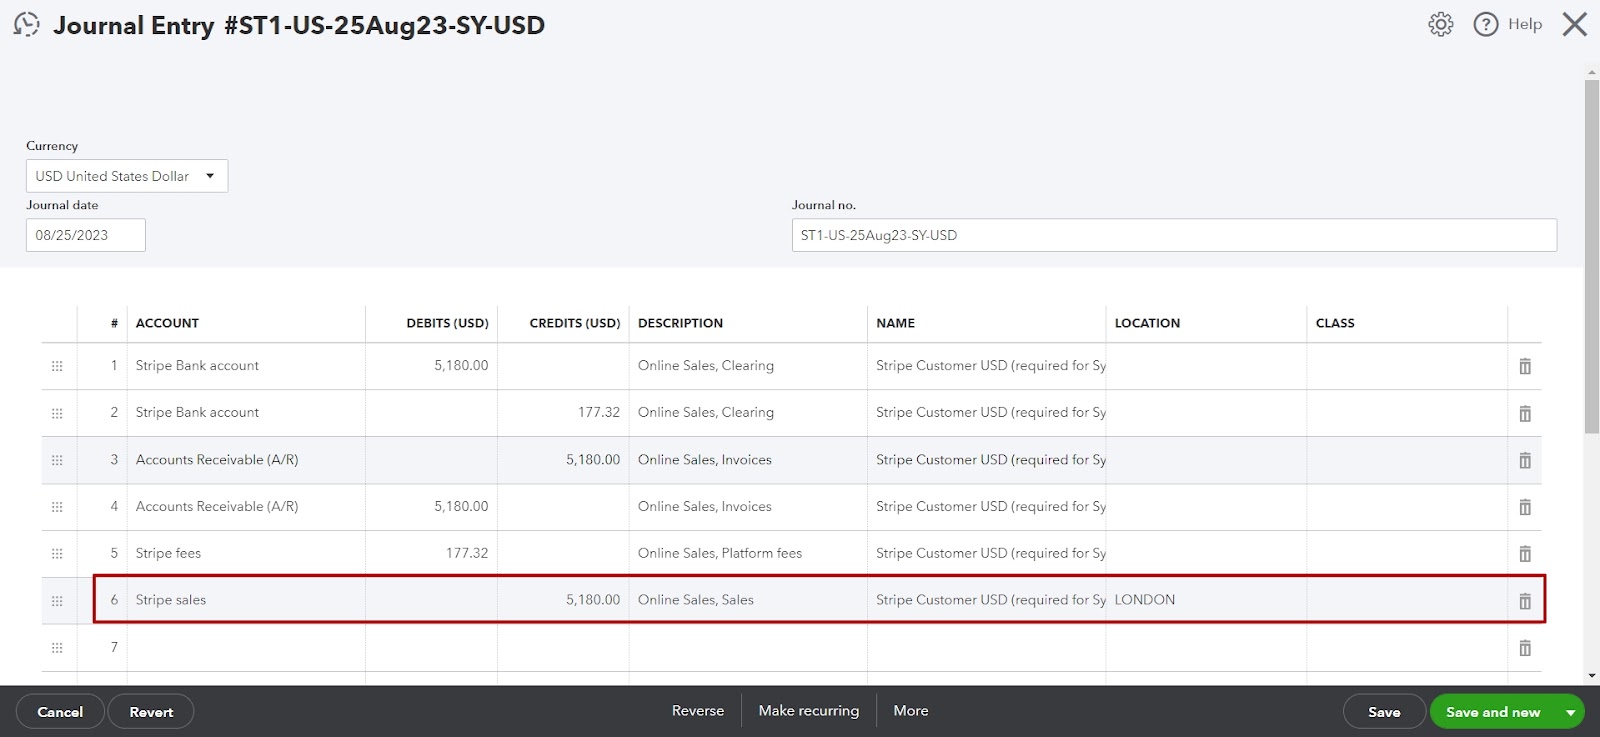
We recommend taking a closer look at the “How a Summary Sync Works” guide. This resource will help you understand how to sync your Summary data in Synder more effectively.
Best practices of using locations
Using Synder’s Locations feature in Summary Sync mode provides a great chance to discover important insights into your business performance.
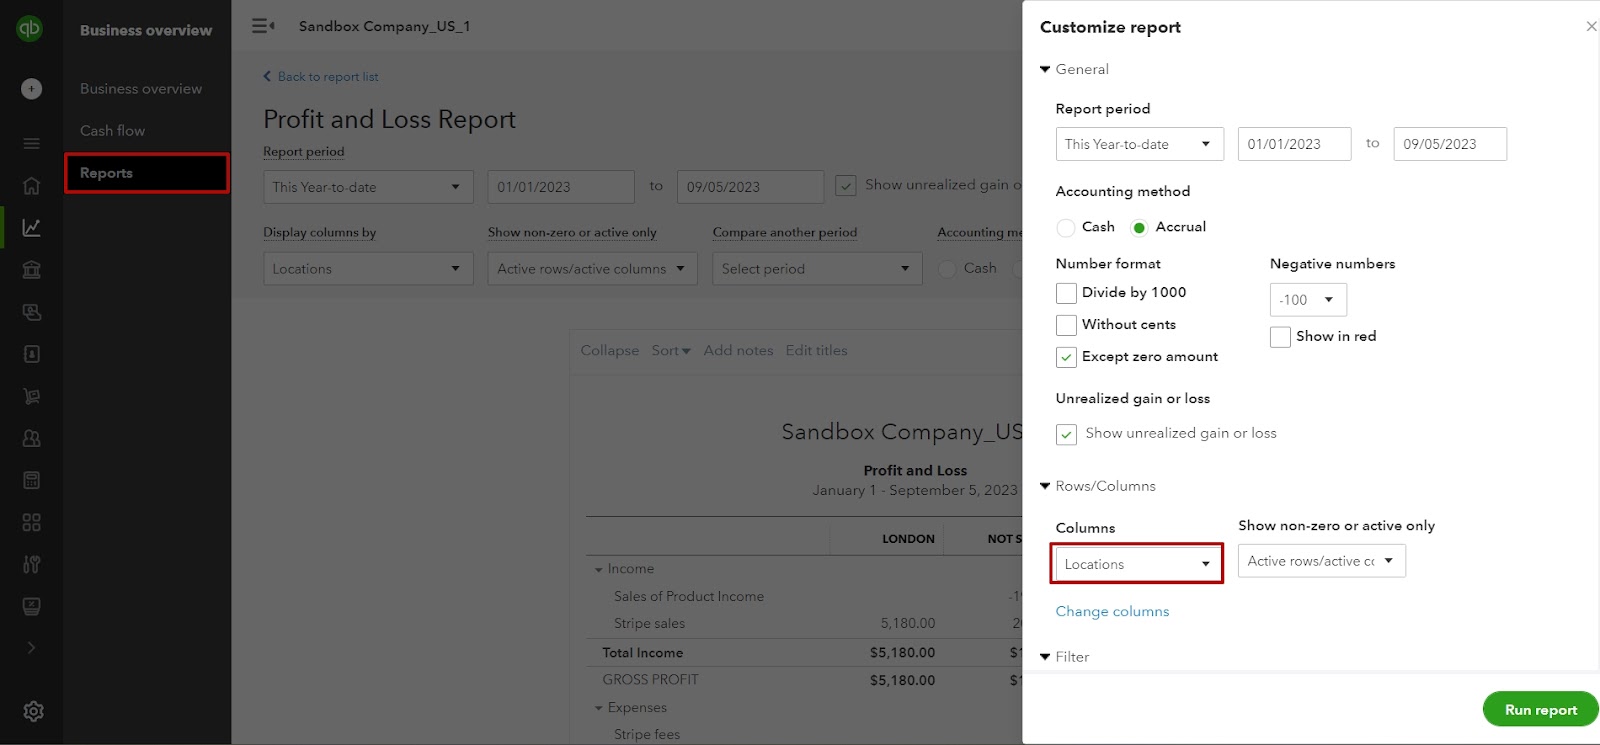
Here are some detailed steps for running a Profit and Loss report by locations in QuickBooks Online:
Step 1. Sign in to your QuickBooks Online account using your credentials.
Step 2. Click on the “Reports” tab located on the left-hand side of the screen.
Step 3. Use the search bar there to look for the “Profit and Loss” report. As you start typing, the relevant report options will appear in the dropdown list. Click on “Profit and Loss” to proceed.
Step 4. Adjust the report period, columns, and location tracking as needed.
Step 5. Click “Run report” to generate the customized Profit and Loss report.
Step 6. Examine income, expenses, and net profit/loss for the chosen location(s) over the specified time.
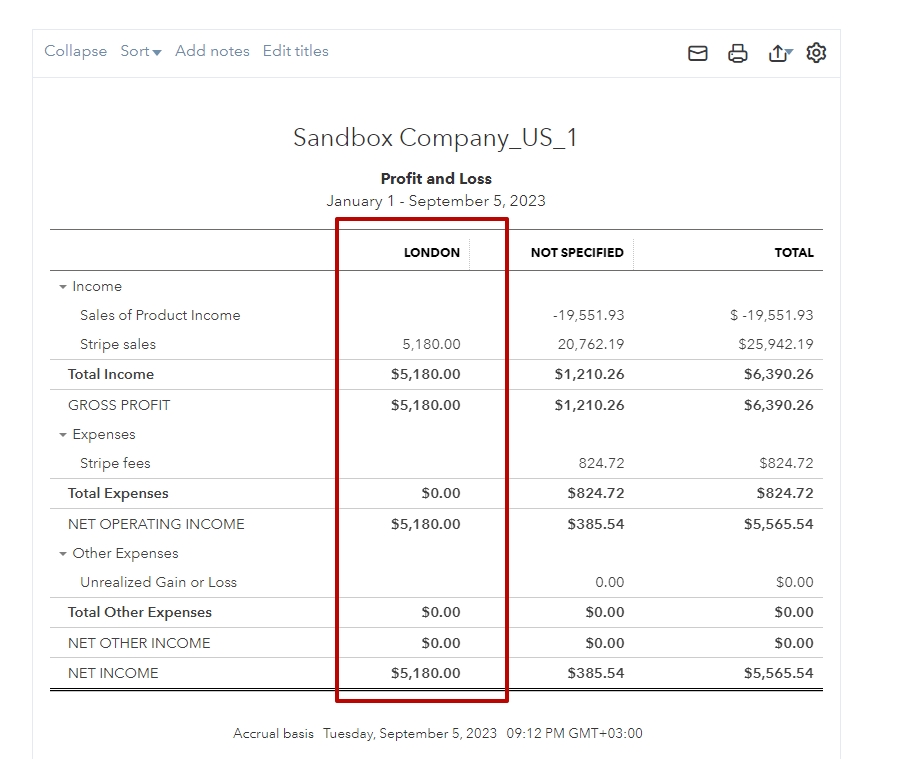
That’s it! You’ve successfully run a Profit and Loss report by locations in QuickBooks Online. Make sure to review the report thoroughly to gain insights into the financial performance of your chosen location(s).
Reach out to the Synder team via online support chat, phone, or email with any questions you have – we’re always happy to help you!