
Sage Intacct is an enterprise-grade accounting platform, so don’t expect a ‘one-click’ setup like in some consumer-grade accounting platforms. Nevertheless, configuring it to use Synder is also quite straightforward. Just follow the steps outlined in the guide below, and you will connect your Sage Intacct company to Synder successfully.
Part A: Configuring your Sage Intacct company
Step 1: Enable Web Services
1. In your Sage Intacct, navigate to: Company → Admin → Subscriptions:
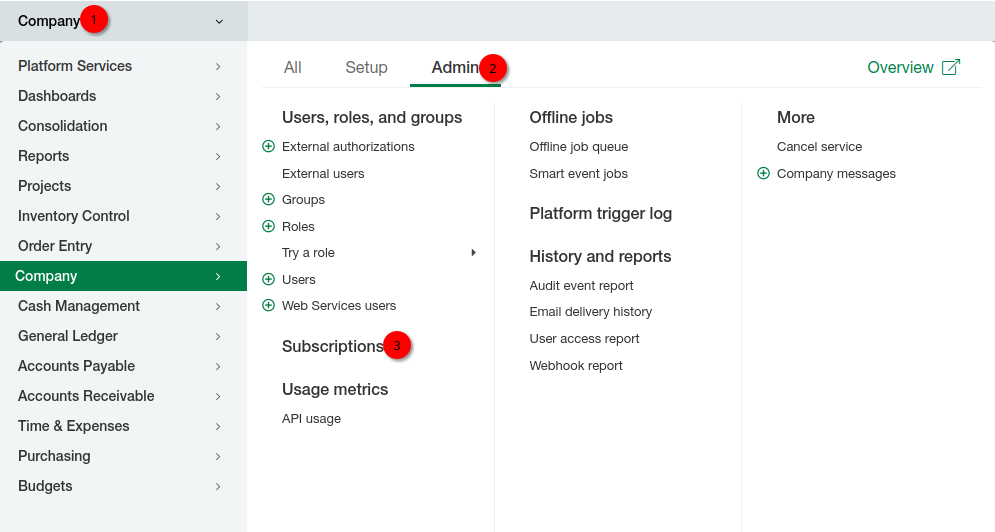
2. Scroll to the Web Services module and enable it. This module will let external applications, such as Synder, communicate with your Sage Intacct company.
Step 2: Authorize Synder to access your company as a Web Services user
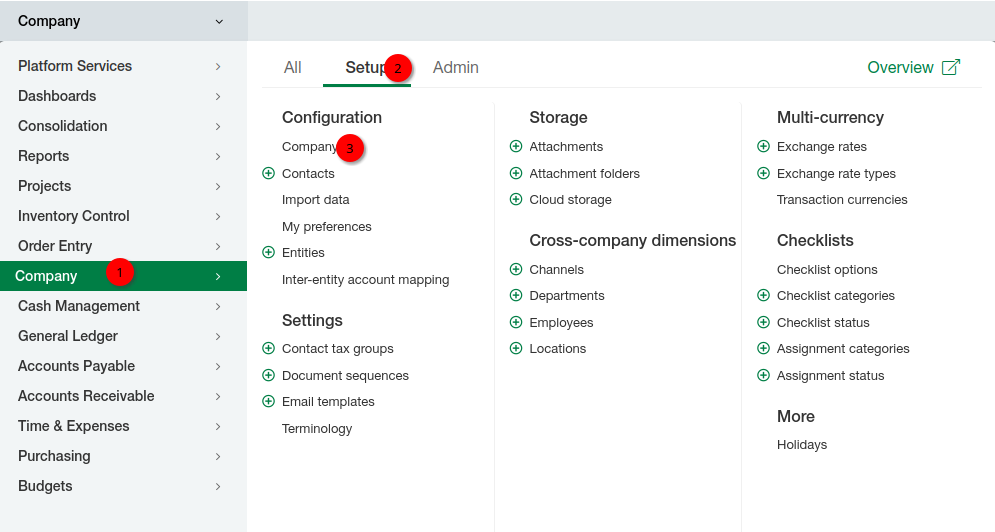
1. Navigate to: Company → Setup → Company:
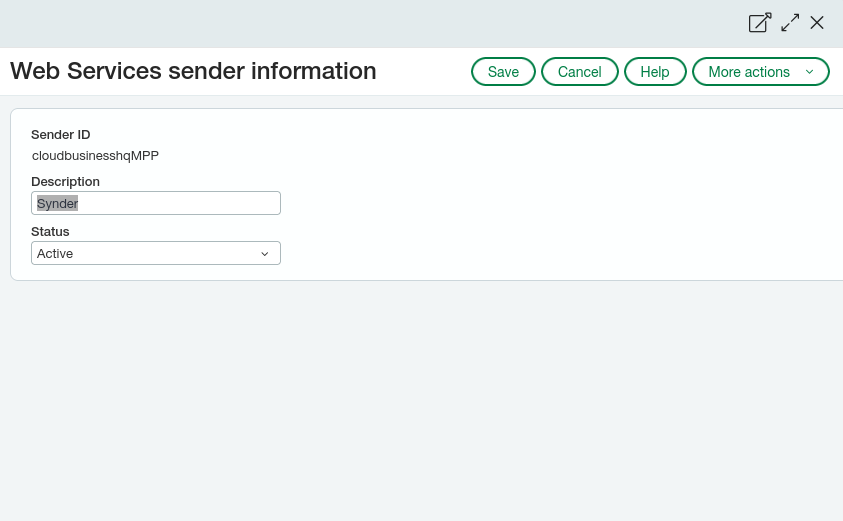
2. Go to the Security tab, click Edit and scroll to Web Services authorizations:

3. In the Web Services authorizations, add the following and hit Save:
- Sender ID:
cloudbusinesshqMPP - Description:
Synder - Status:
Active
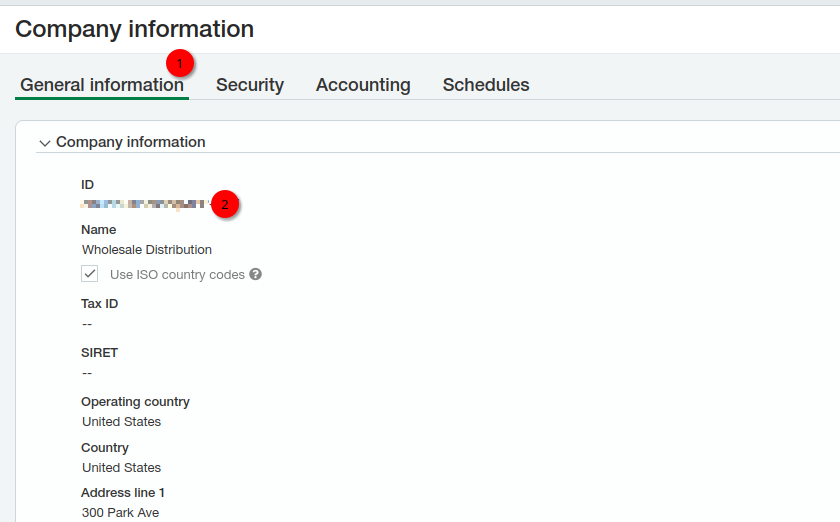
4. While you are still there, go to the General information tab and note your Company ID. You will need to submit it to Synder during the connection:
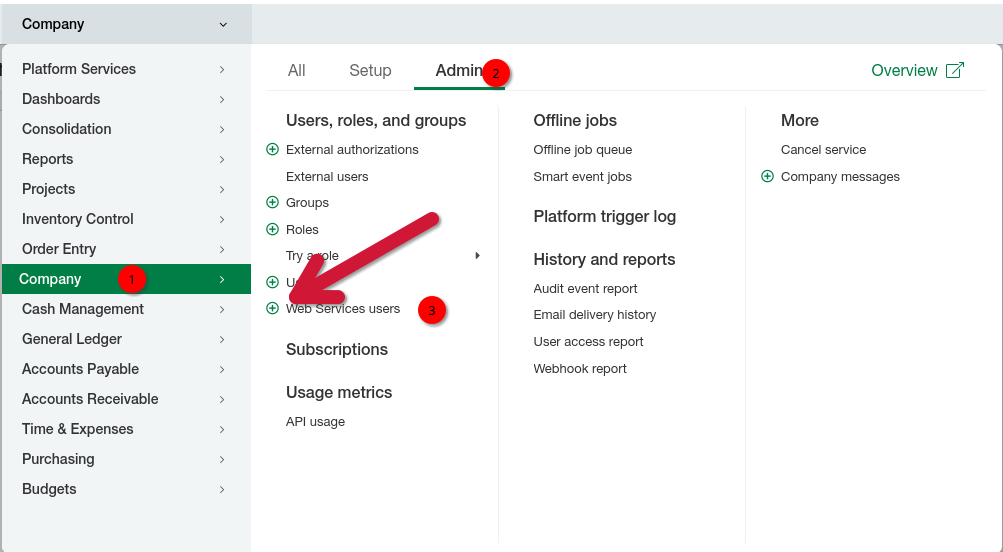
Step 3: Create a Web Services user
1. Navigate to: Company → Admin, and click on the Plus icon next to Web Services users:
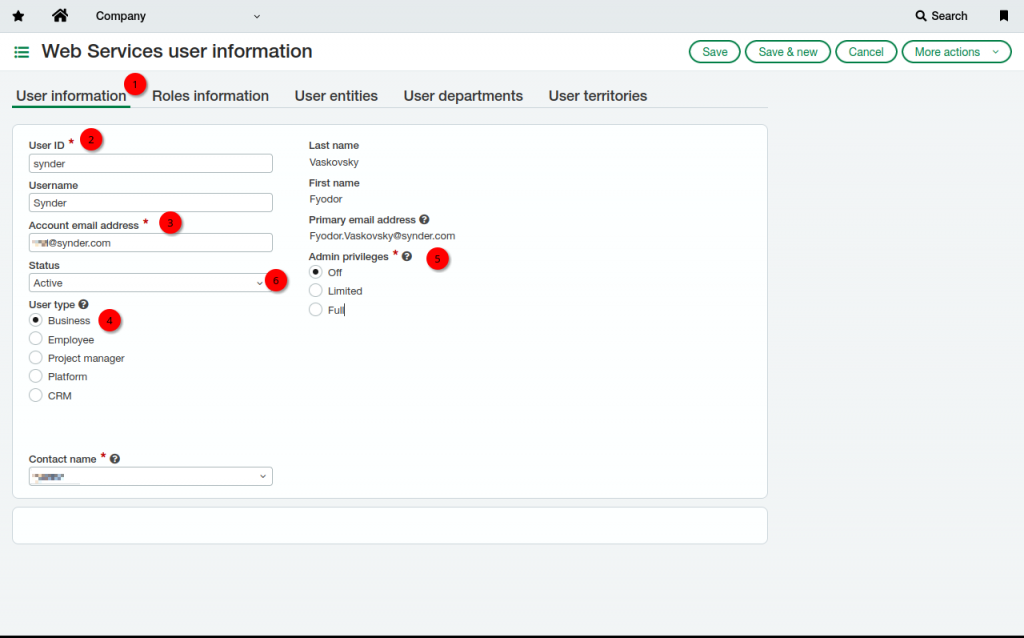
2. Enter information in the required fields.
3. Please provide a valid email address for the Web Services user: Sage Intacct will send you that Web Services user’s password to that mailbox!
4. User type: Business
5. Admin privileges: Off
6. Status: Active
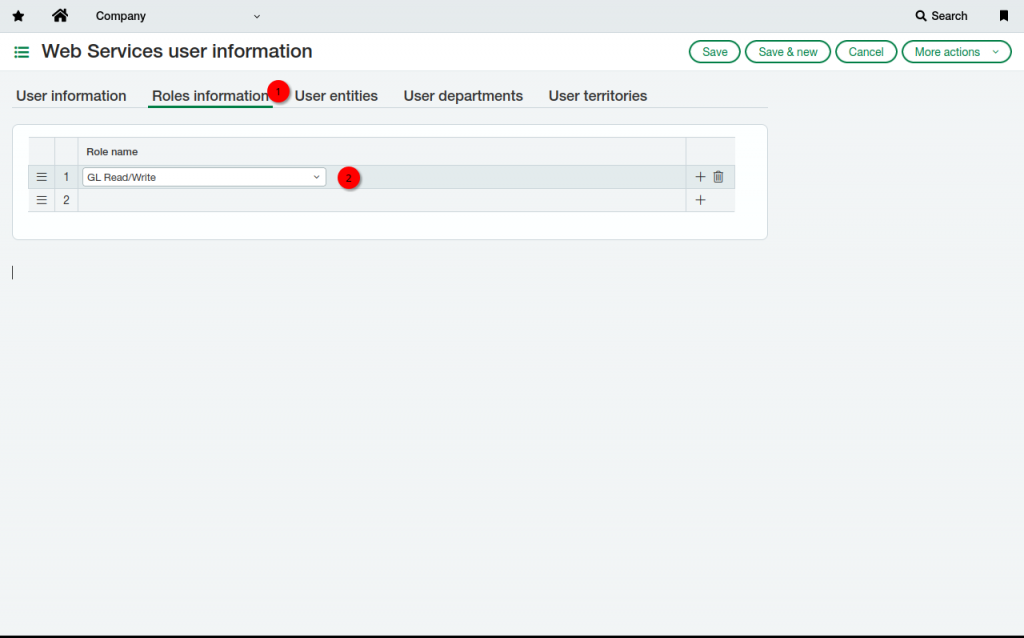
7. Go to the Roles information tab and grant your Web Services users the GL Read/Write role. If it does not exist, you will first need to create one (read how to do that in this guide), and then return to this step:
8. (Optional) Lastly, go to the User entities tab and grant the Web Services user access to the top level:
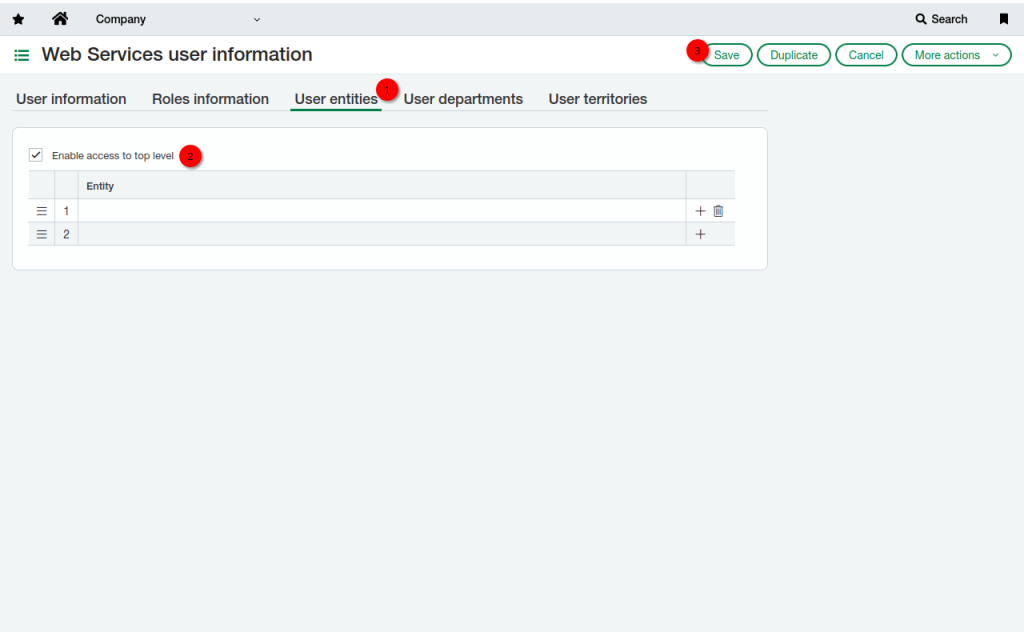
9. Hit Save, and you’re done with preliminary configurations of your Sage Intacct! Time to connect it to Synder!
Part B: Synder onboarding flow
We will omit the first several steps of the onboarding flow, which are:
- Sign up.
- Verify your email.
- Tell us about you.
- Select Synder product: Synder Sync or Business Insights or both.
- Providing some business details like the name of your company, your timezone, etc.
- Selecting ecommerce and payment providers you would like to integrate with Sage Intacct using Synder.
and we will fast-forward to the step of selecting Sage Intacct as your accounting platform and connecting it.
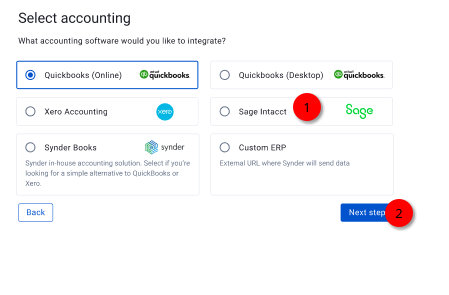
Step 1: Select Sage Intacct
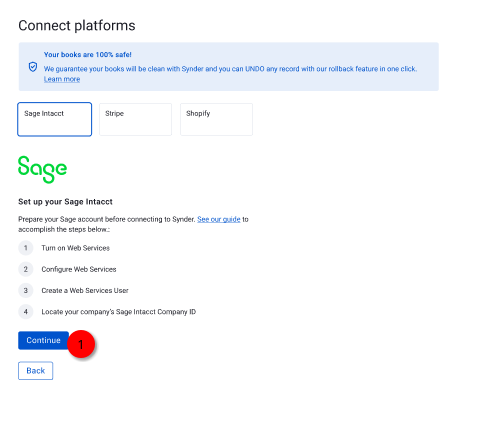
Step 2: Confirm that you have all necessary information and configurations for Sage Intacct at hand
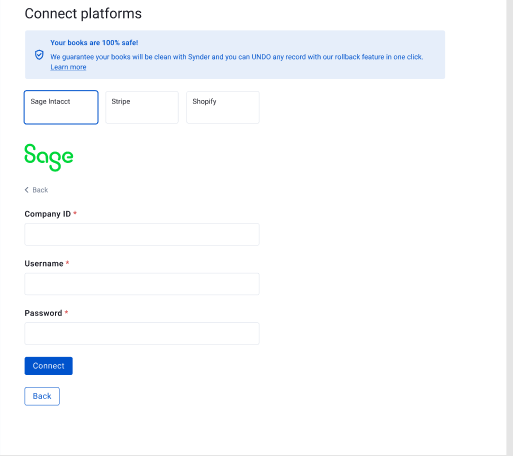
Step 3: Fill in your Company ID, Webservices User ID, and password
That’s it! Now you can proceed with connecting your payment and ecommerce gateways, and enjoy automating data entry into Sage Intacct using Synder!
Reach out to the Synder team via online support chat, phone, or email with any questions you have – we’re always happy to help you!