
Implementing class-based expense tracking in your accounting system can be an effective way to track fees associated with various products at a granular level. This strategy involves not only tagging the sales part of a transaction but also the associated expenses. By doing so, you can track the charges incurred by your payment processor or ecommerce platform for each product category. This technique provides greater transparency over your business’s cash flow and better equips you to optimize your operations and financial strategy.
Let’s now unpack a method to achieve this by using Synder.
Overview:
Adding product names to the processing fees description
When you create a rule within Synder, you need to specify conditions that will prompt Synder to apply a specific class to an expense. However, the product name might not initially be part of the expense section of a transaction, but it can be found in the sales receipt/invoice.
To fix this, please get in touch with our Support team at [email protected]. They can assist you in modifying the Expense transaction to include the product name in the ‘Description’ field. This can be done on our end solely.
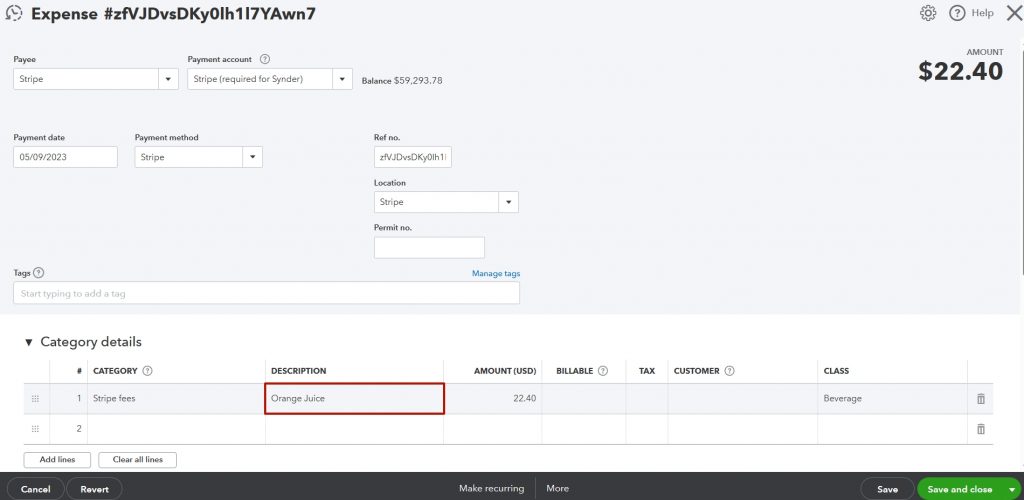
This is the end result that you will get in QuickBooks:
Create a rule to assign classes to processing fees
Having modified your expenses to include product information, it’s now time to create a rule that utilizes this data:
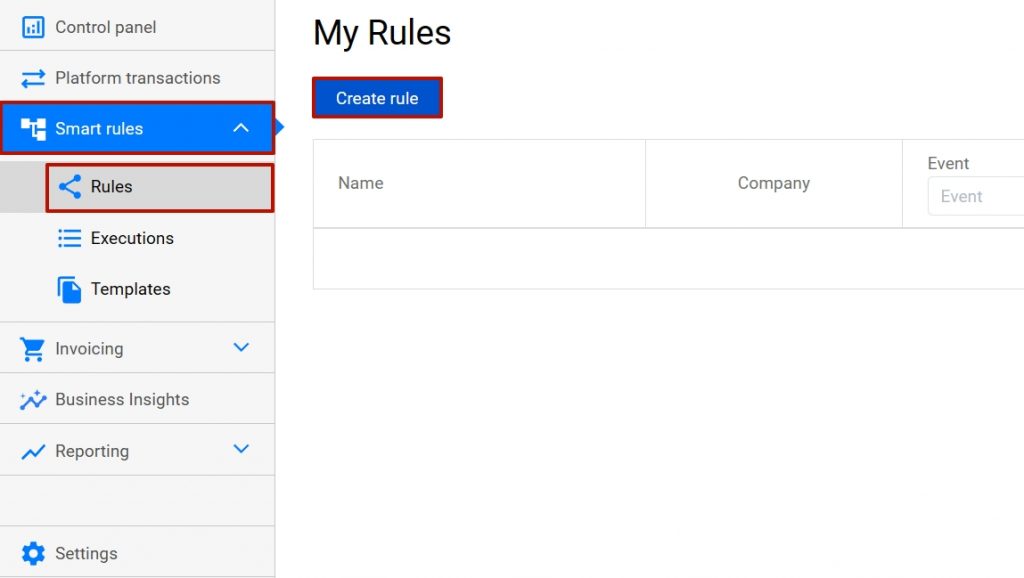
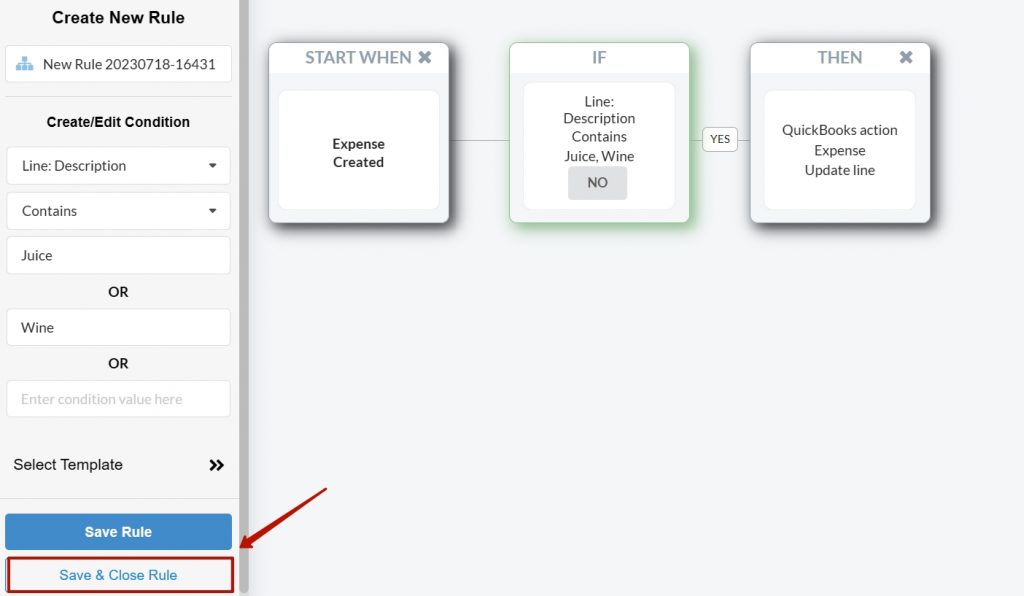
a. Go to ‘Smart Rules’ → ‘Rules’ → ‘Create Rule’.
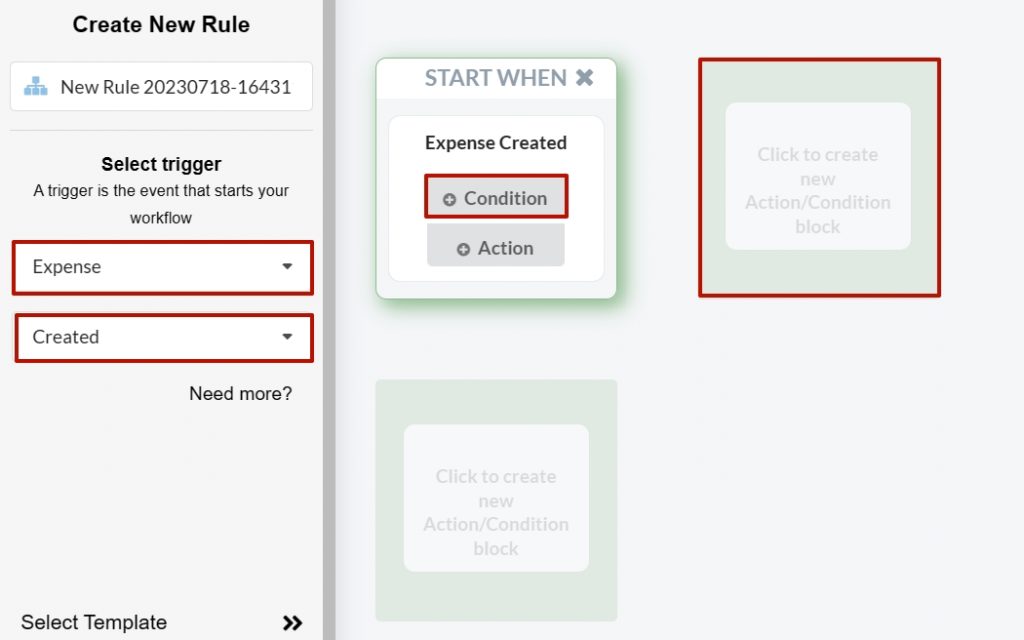
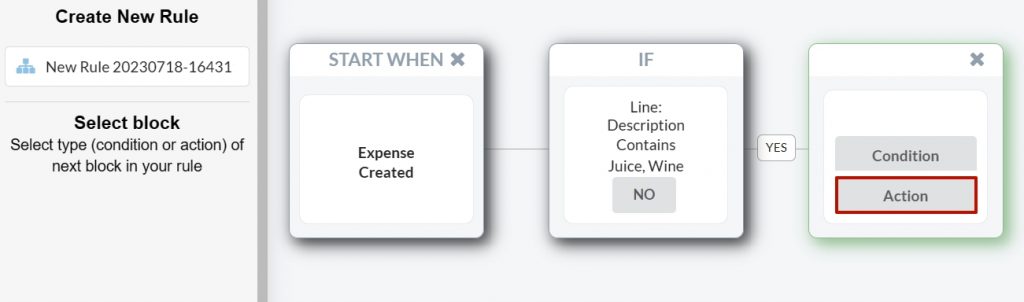
b. Select the trigger for your rule: ‘Expense → Created’. This means the rule will be activated each time Synder creates an expense in your QuickBooks. Click on ‘Condition’ in the START WHEN box and hit the nearest Box.
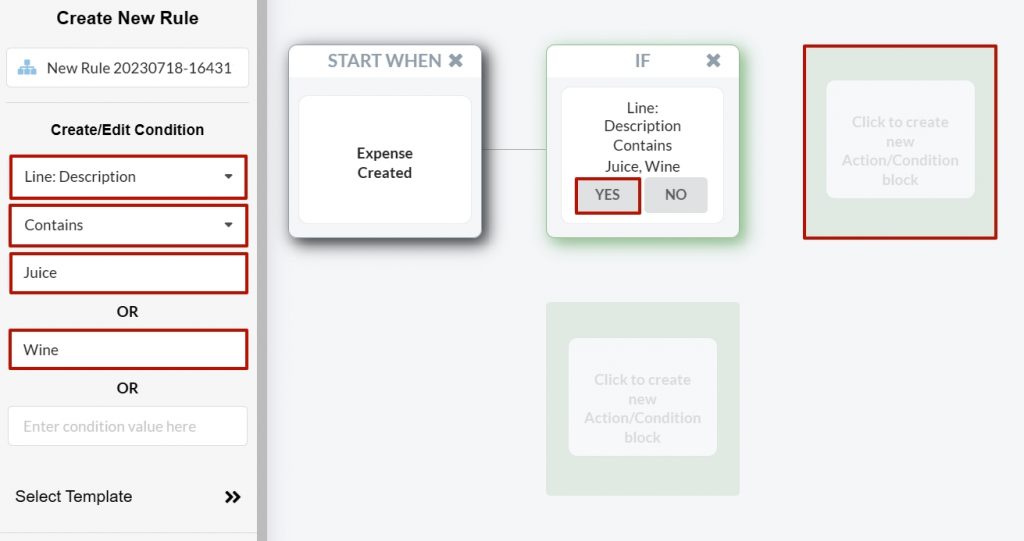
c. Define the condition that differentiates your expenses. For instance, if ‘Line: Description → Contains → Juice OR Wine’, this instruction tells Synder to apply the rule when the condition is met. Click on ‘Yes’ in the IF box and click on the nearest box.
Note: Depending on your needs, you can define other conditions.
d. Click on ‘Action’
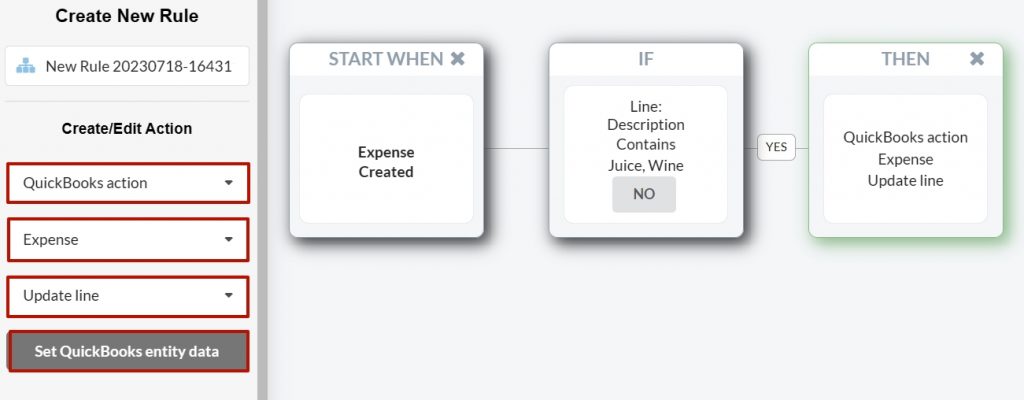
e. Next, select the action to be performed: ‘QuickBooks action → Expense → Update line → Set QuickBooks Entity data’. This instructs Synder to update the relevant expense line, which includes the specified product name.
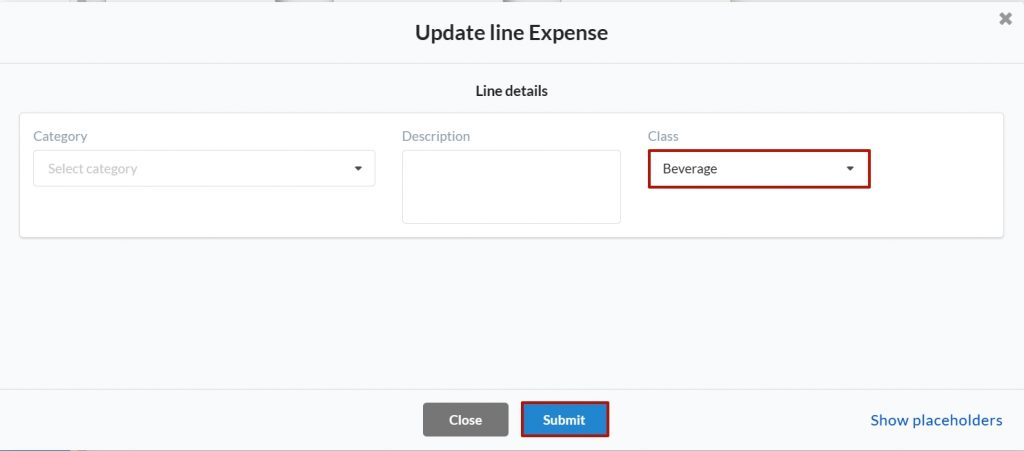
e. A pop-up window will appear, allowing you to select the necessary class. After selecting the necessary option, click on ‘Submit’.
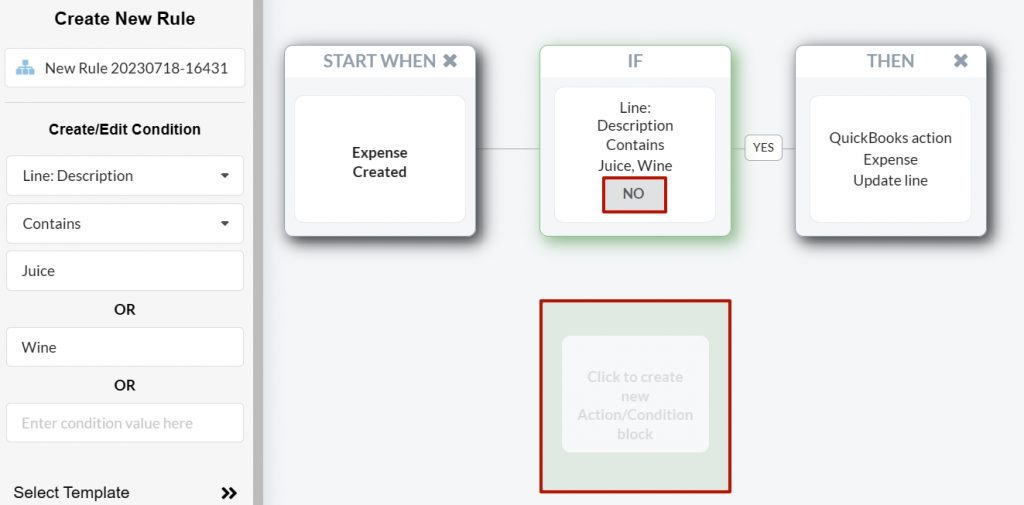
f. Repeat the action for cases when the condition is not met if you wish Synder to update expenses that do not align with the condition.
g. Finally, click on ‘Save & Close rule’.
Enjoy payment processing fees with classes based on products
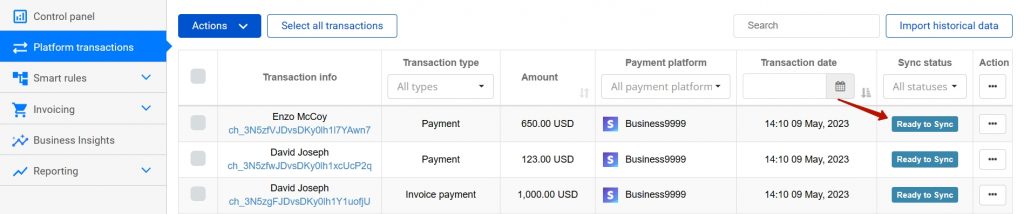
After creating and applying your rule, it’s important to verify if it’s functioning:
a. Navigate to the ‘Platform transactions’ tab → find a transaction that should be classified under the rule and sync it.
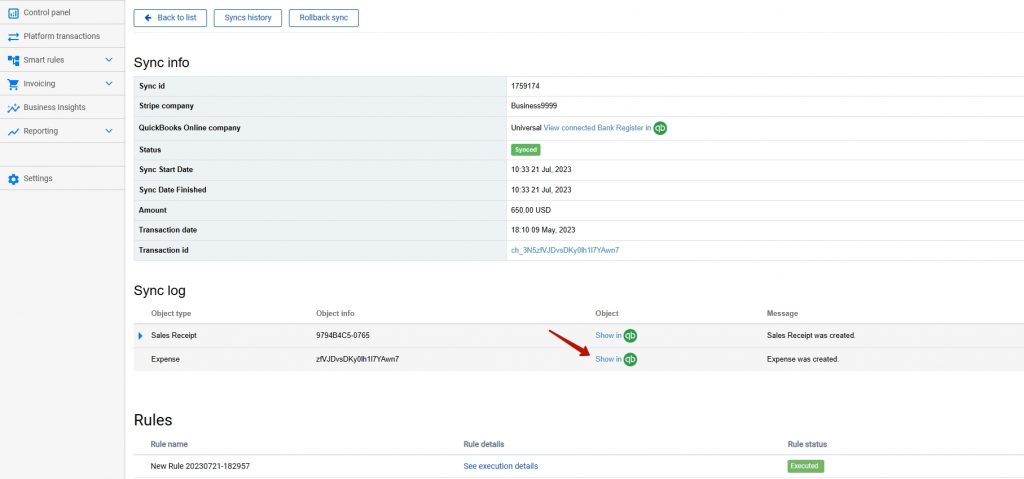
b. Click on ‘Show in QB’ to review the results.
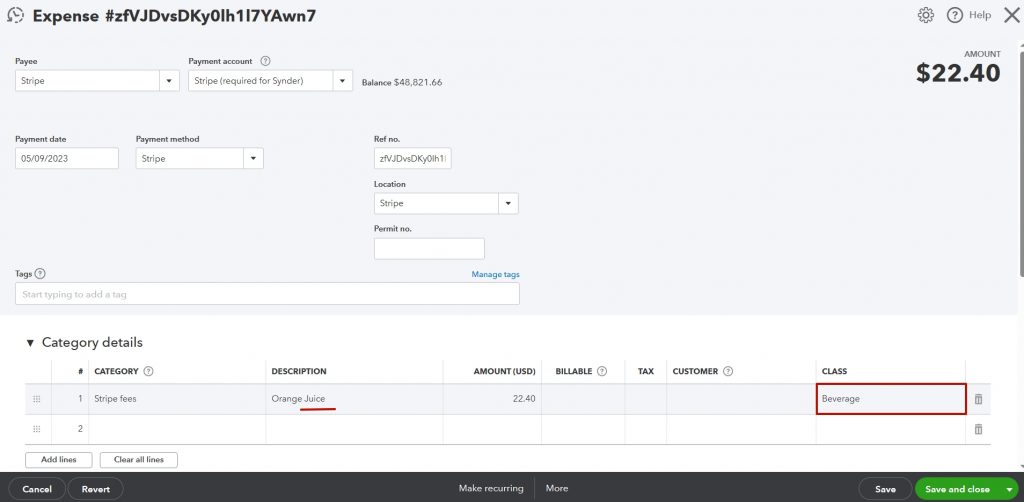
c. Verify the class that has been applied.
Reach out to the Synder team via online support chat, phone, or email with any questions you have – we’re always happy to help you!