
Everyone needs proper categorization of expenses, right? The categorization used to be a lonely and cumbersome manual task that was still prone to human error. With Synder Smart Rules, categorizing your expenses can be a breeze: just set up a rule, turn on auto-synchronization, and boom – the smart and tireless machine does the job for you! How do we get there?
Overview:
How Do You Tell Them Apart?
First, you’ll need to find a way to distinguish between your various expenses. Say, you sell two products: one is $20 and the other is $400 – and you want the fees that you pay for the first one to go to the Commissions & Fees category, and the fees that you pay for the second one to Legal & Professional Fees. It could be assumed that the fee amount for the first product will hardly be more than $10 and that the fee amount for the second product will hardly be less than $10. So let’s try using the amount as the rule condition. Naturally, you can use any of the other conditions that are included in the Expense in QuickBooks, e.g., Payee, Payment method – it depends on what you have in the payment platform transaction for the most part.
Creating Your Smart Rule
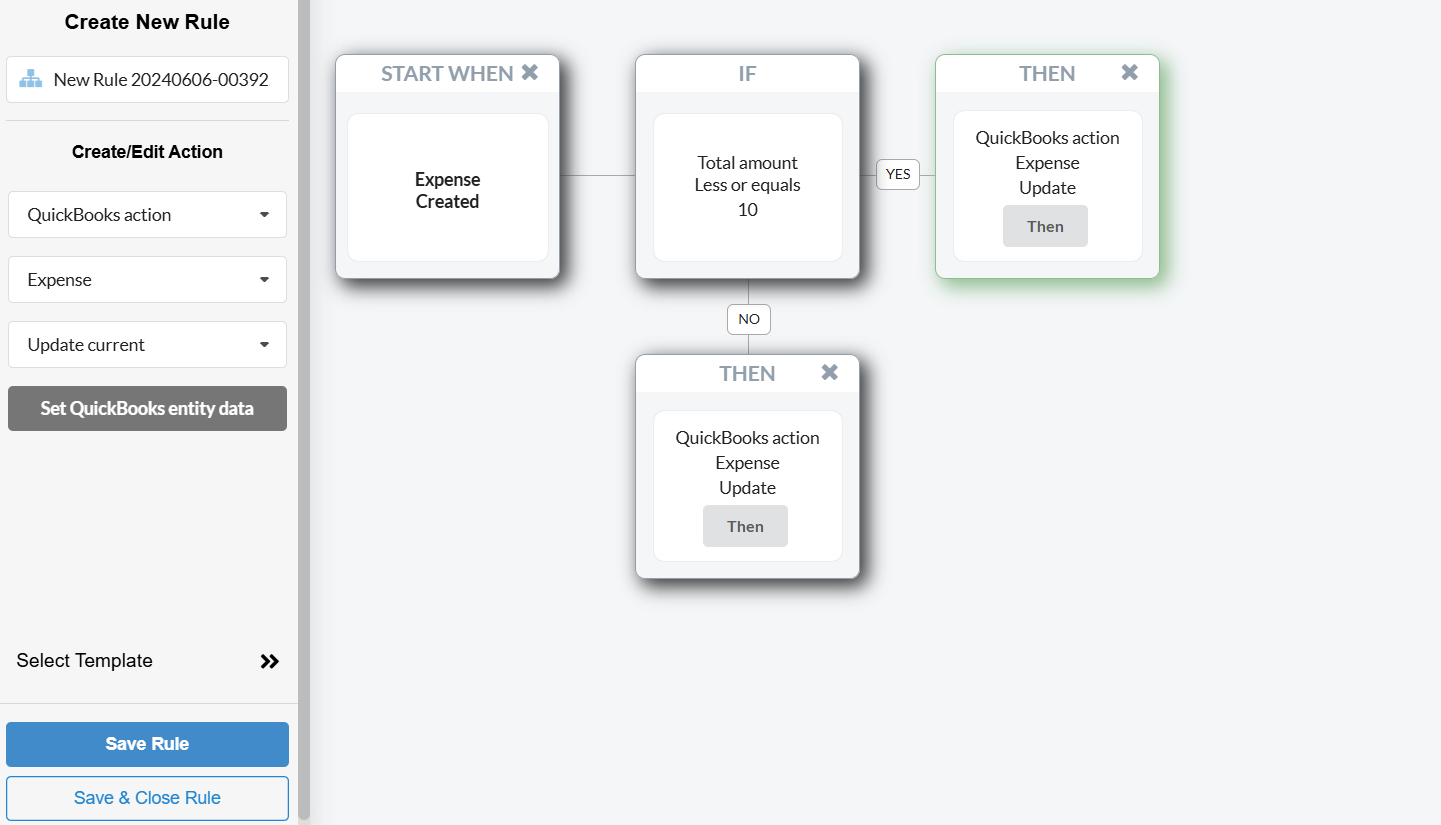
Now that we have established a reliable way to distinguish between our expenses, let’s create the rule:
- Go to Smart Rules → Rules → Create Rule
- Choose the trigger that starts your rule: Expense → Created. It means that each time Synder creates an expense in your QuickBooks, this Rule will fire.
- Choose the condition to differentiate between the expenses: if Total amount → Less or equals → 10. In this way, you tell Synder to check if this condition is met and apply the rule according to it. Note: for your case, you can use any other condition that makes sense to your business flow.
- Finally, choose the action: QuickBooks action → Expense → Update current → Set QuickBooks entity data. This will tell Synder that it should update the exact expense which has triggered the rule.
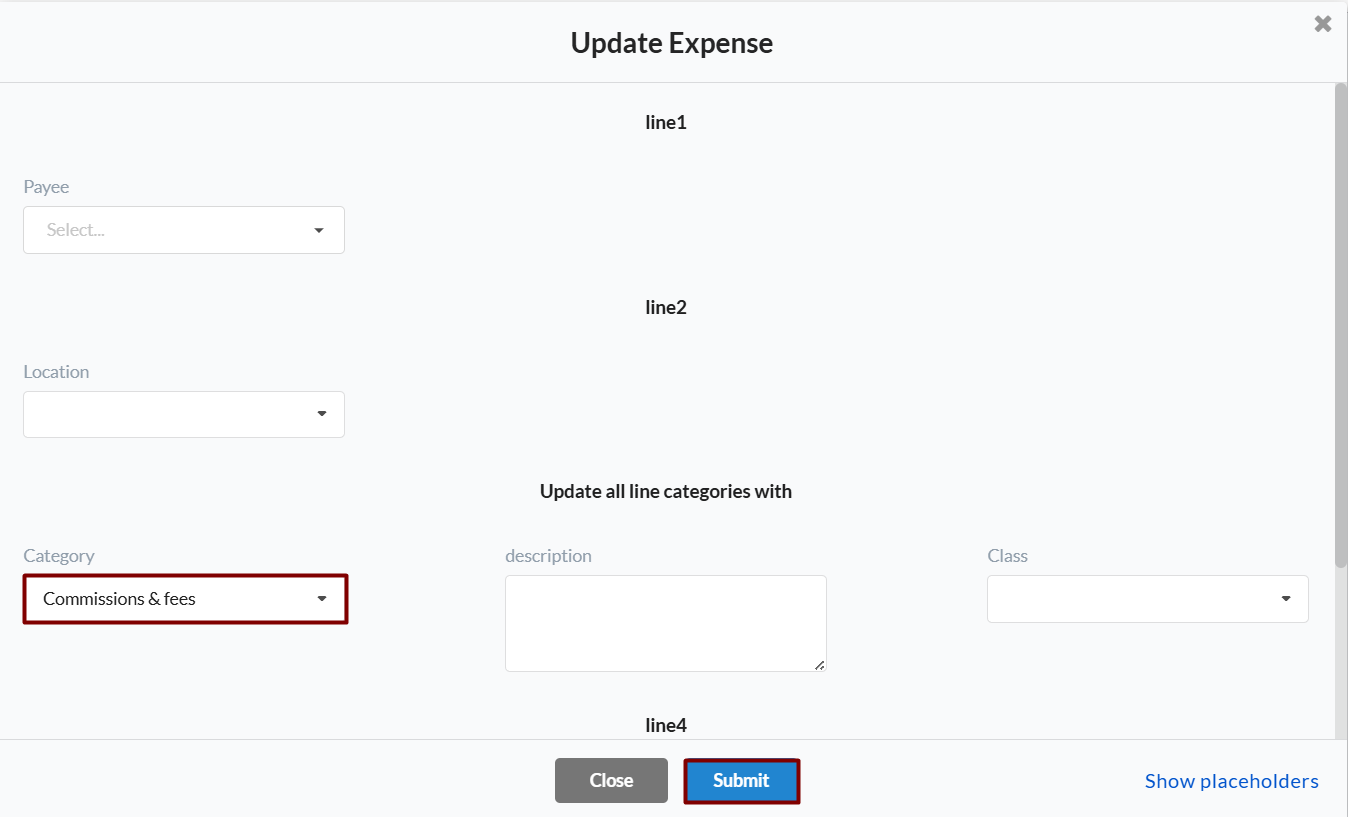
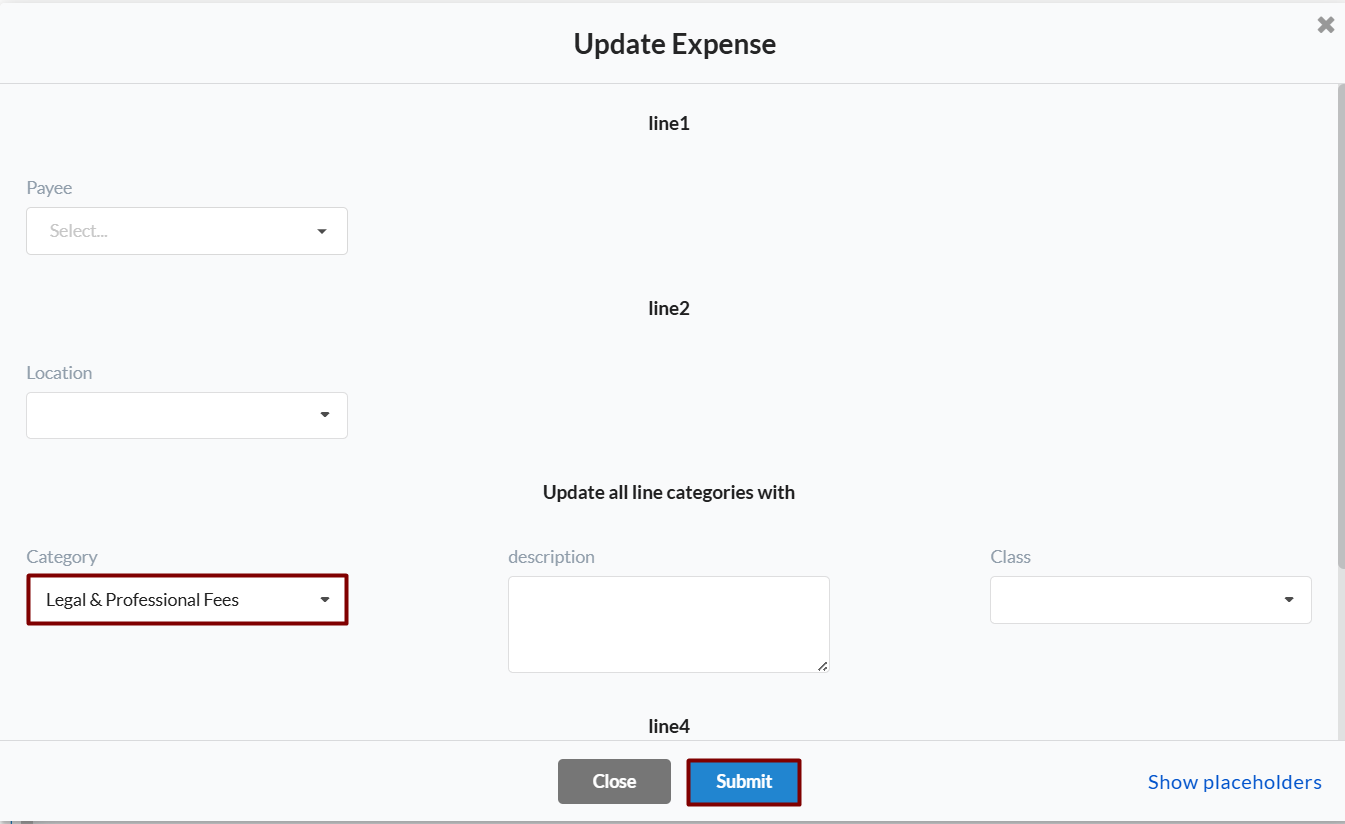
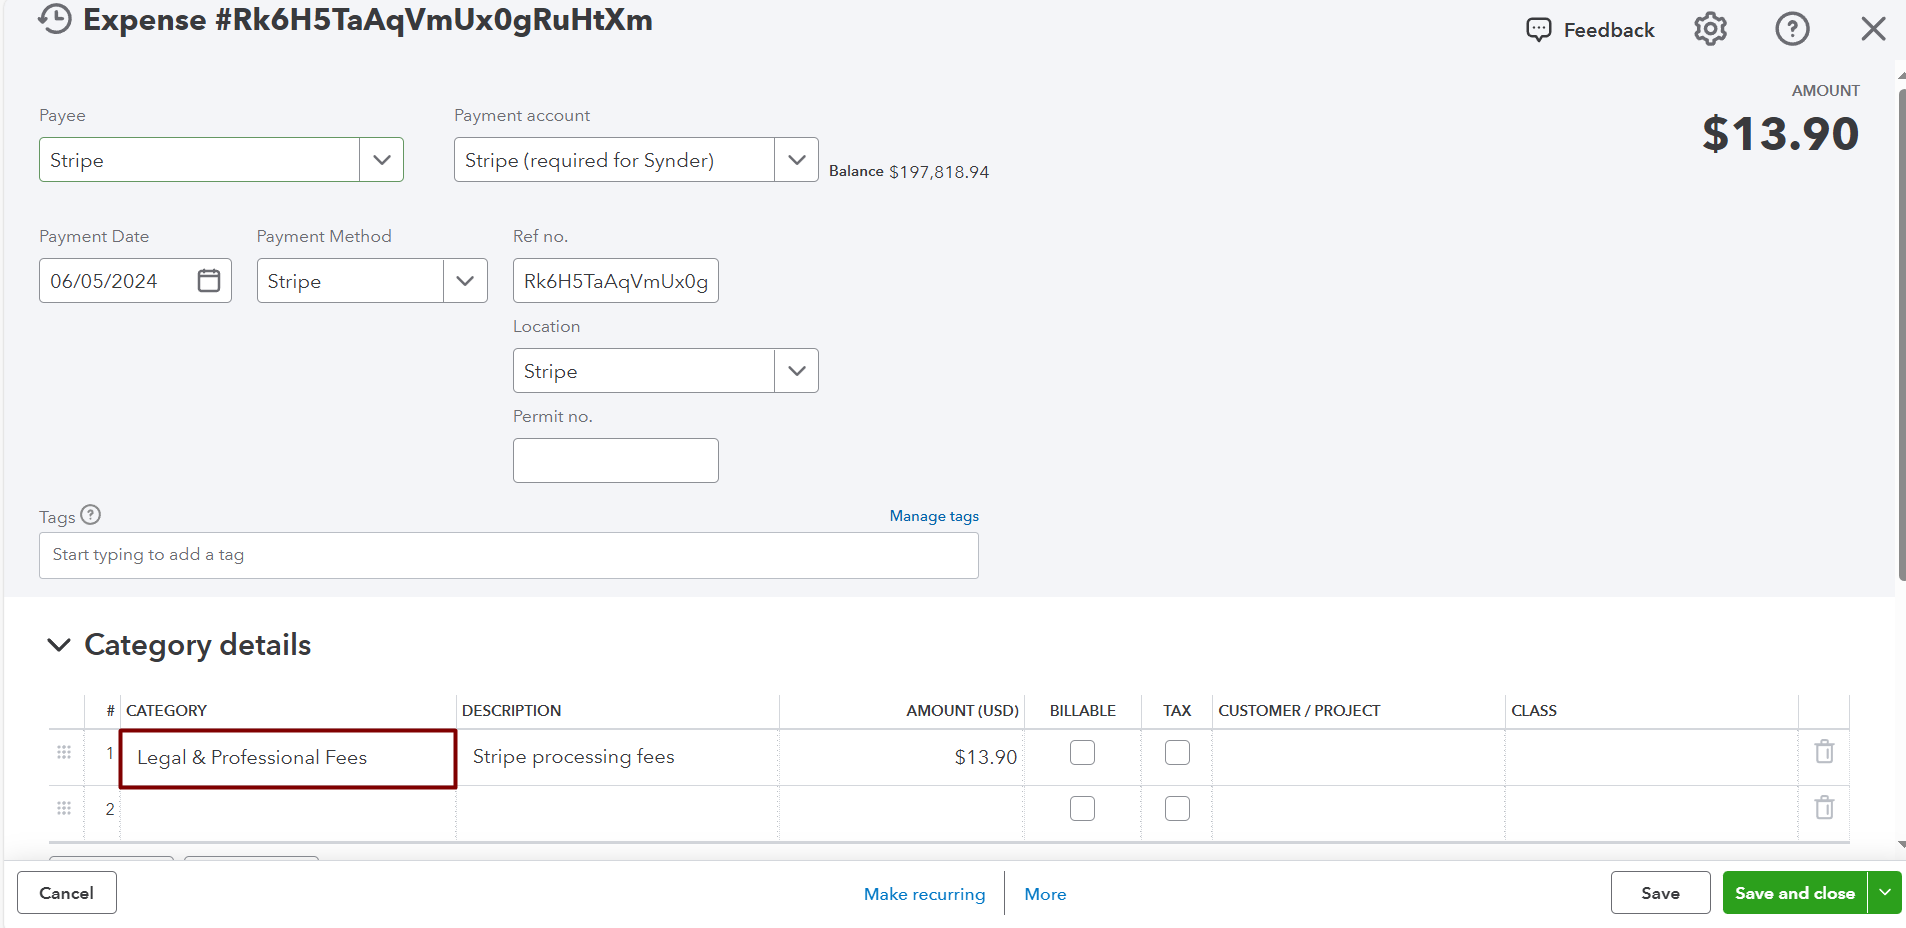
- You will be presented with an expense template where you’ll be able to select the category. After selecting it, click on Submit.
- Repeat the action for the cases when the condition is not met if you need Synder update expense if it doesn’t tally with the condition.
Checking How It Works
Go to the Platform transactions tab and sync a few transactions to check the result.
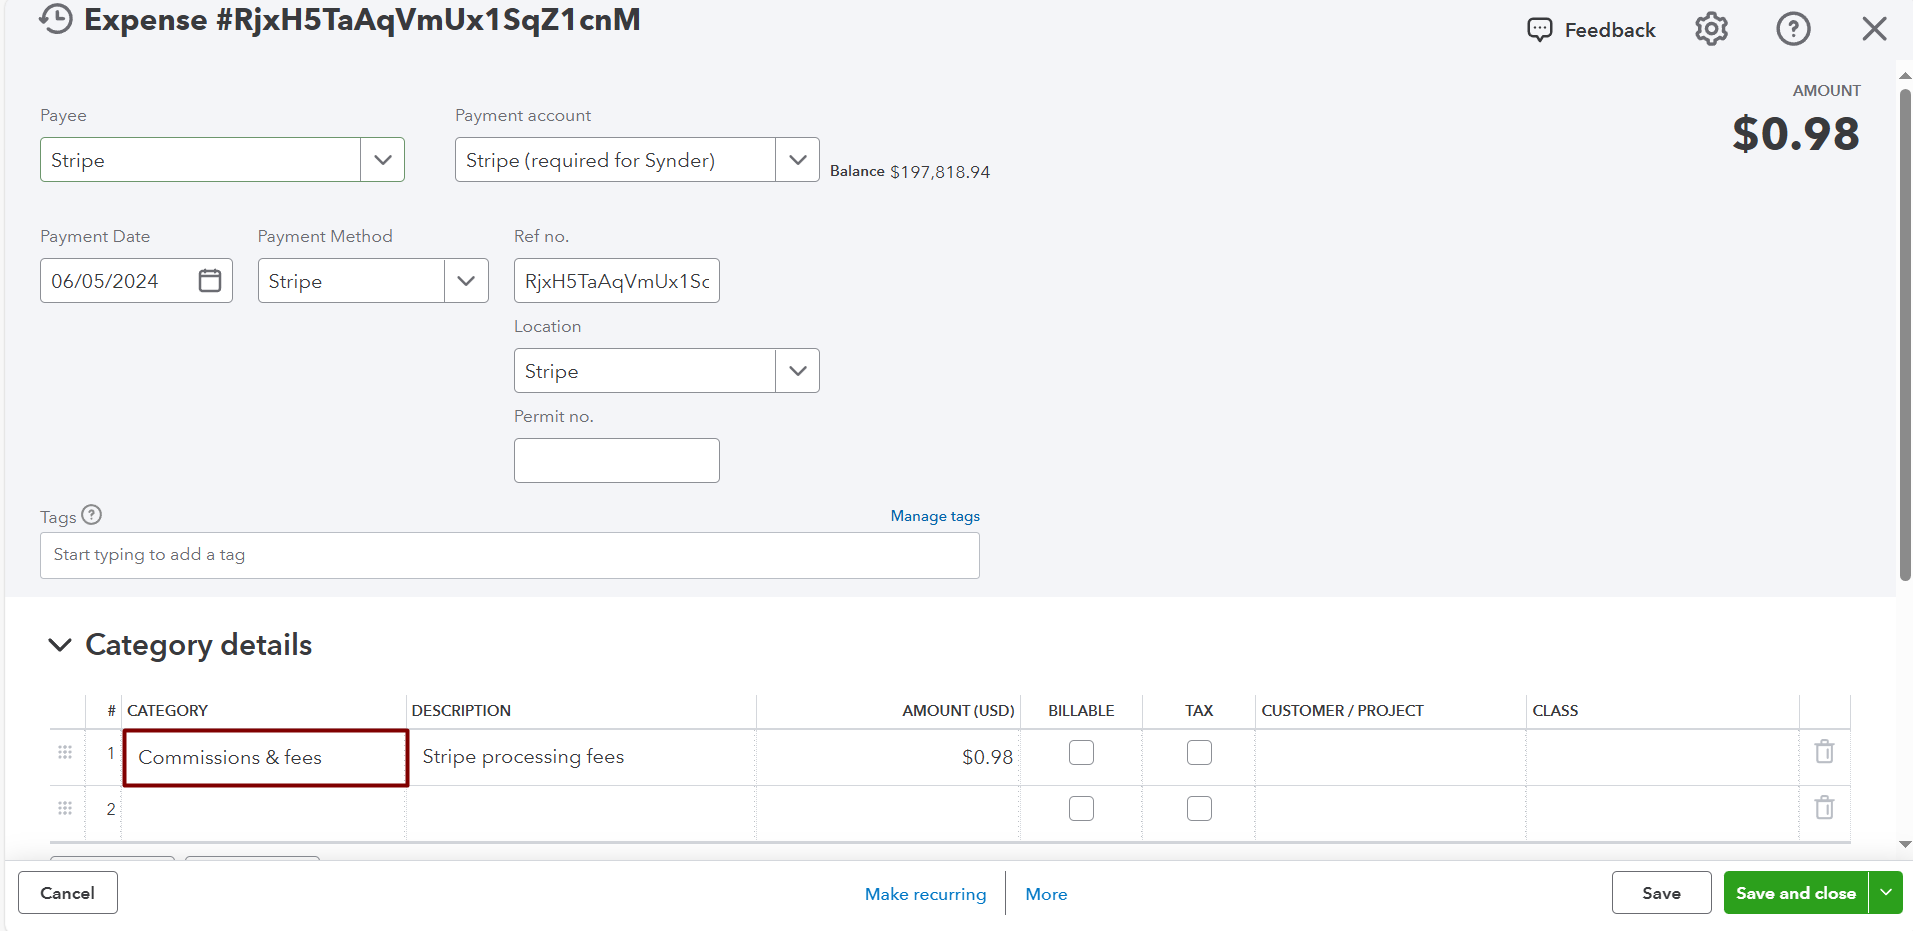
Perfect, isn’t it?
Reach out to the Synder team via online support chat, phone, or email with any questions you have – we’re always happy to help you!