
Synder Revenue Recognition module integrates directly with Stripe, however, what if your business or your client’s subscription management does not use Stripe?
Businesses may use PayPal or other subscription management tools, or simply enter invoices in QuickBooks manually, but still need a revenue recognition solution. If this is your case, Synder revenue recognition module could be the perfect fit. Learn more about how to import invoices with Excel spreadsheet for revenue recognition with Synder.
Overview:
How to upload an Excel sheet with invoices and refunds?
In order to import your list of invoices or refunds to revenue recognition module in Synder, follow the steps below:
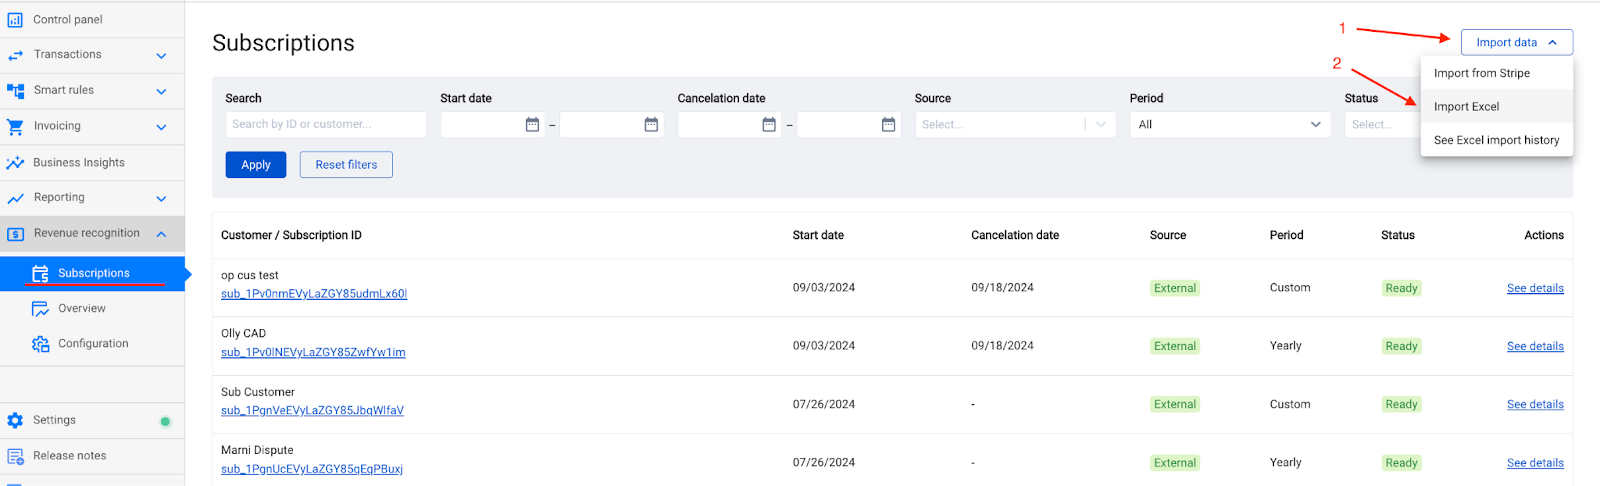
- Go to Revenue Recognition → Subscriptions, click Import data.
- In the dropdown, select Import Excel.
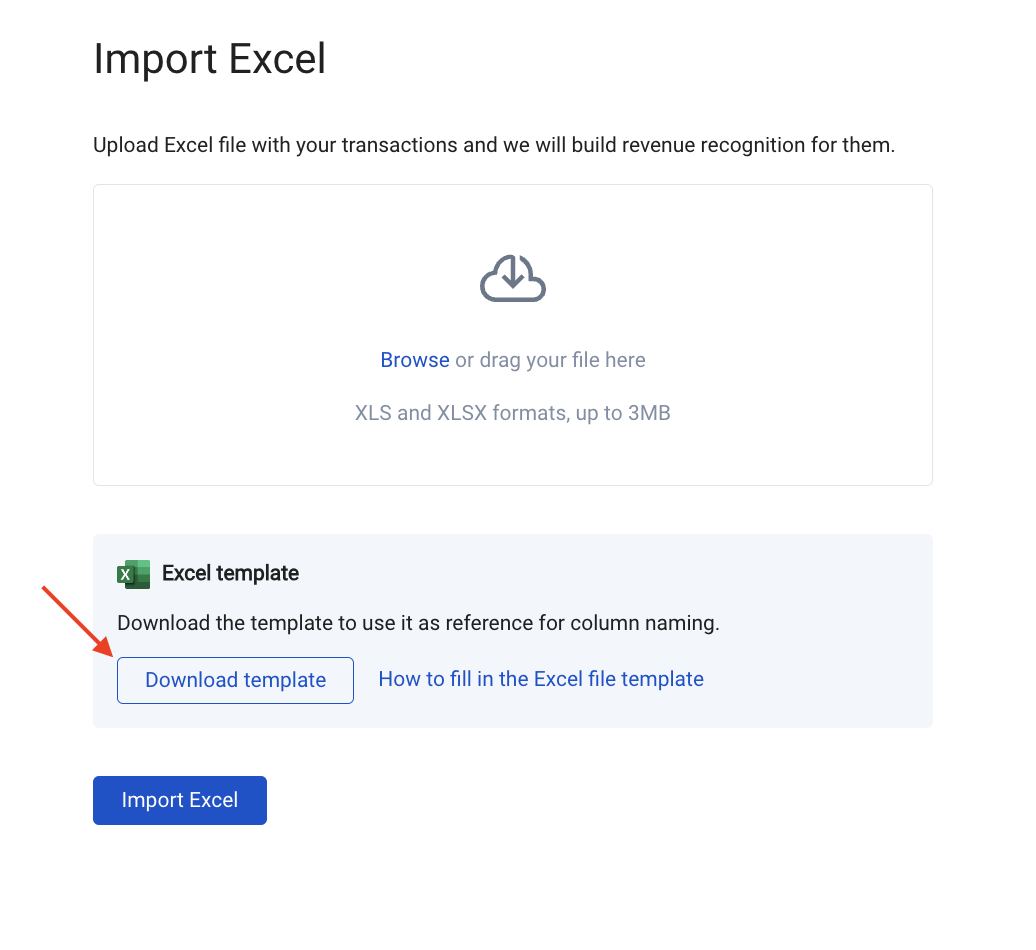
- Download the Excel template file and fill it out. Afterward, upload it using the Browse option shown in the screenshot below, and click Import Excel to start the process and wait for the import to complete.
Filling up the template file
The columns marked with asterisks are required to be filled out.
| Transaction type* | Specify what kind of transaction you import. Supported values: Invoice, Refund. |
| Transaction Id* | Specify the unique ID of the transaction. If the transaction with the same ID is found, it will be updated according to the information in the imported Excel file. |
| Subscription Id | Specify the subscription ID. Use the same ID for multiple transactions if you want to link them to a single subscription. Note: If left blank, the Transaction ID will be used as a subscription ID. |
| Customer name* | Specify the customer name. |
| Line item name* | Specify the line item (product) name. |
| Line subtotal* | Specify the amount associated with the product. |
| Discount amount | Specify any discounts associated with this item line. |
| Tax amount | Specify any taxes associated with this item line. |
| Tax inclusive | Specify the tax application mode. Possible values: True, False. |
| Source currency | Specify the currency of your transaction. |
| Exchange rate | Specify the exchange rate if the currency of your transaction is different from the home currency. |
| Transaction Date* | Specify the transaction date (e.g. invoice, refund date). Note: Make sure the date is after the revenue recognition start date set in your Revenue Recognition configurations. |
| Recognition start date* | Specify the service period start date. |
| Recognition end date* | Specify the service period end date. Note: The last day of the service period will be excluded, since for recurring invoices, the next invoice might fall on that date. The best way to specify the recognition start and end dates is: start – 1 May 2023 end – 1 May 2024 (not 30 April 2024). |
| Linked invoice ID | Specify the transaction ID of the invoice that the refund is related to. |
Your Import History
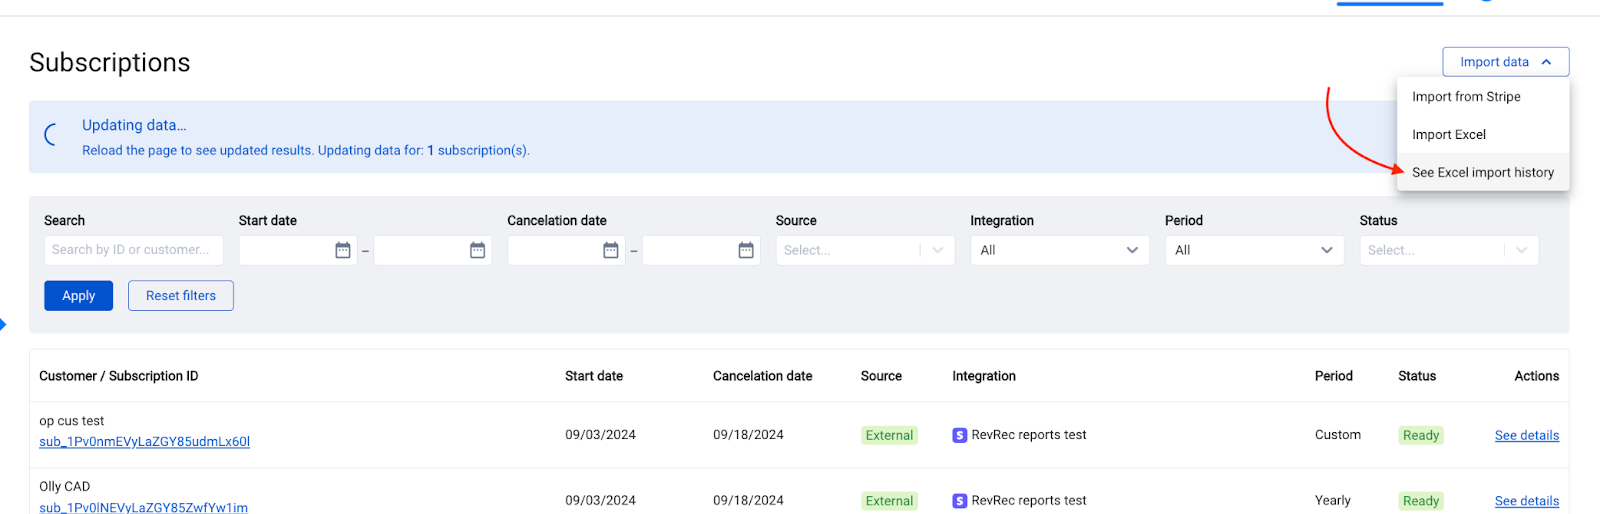
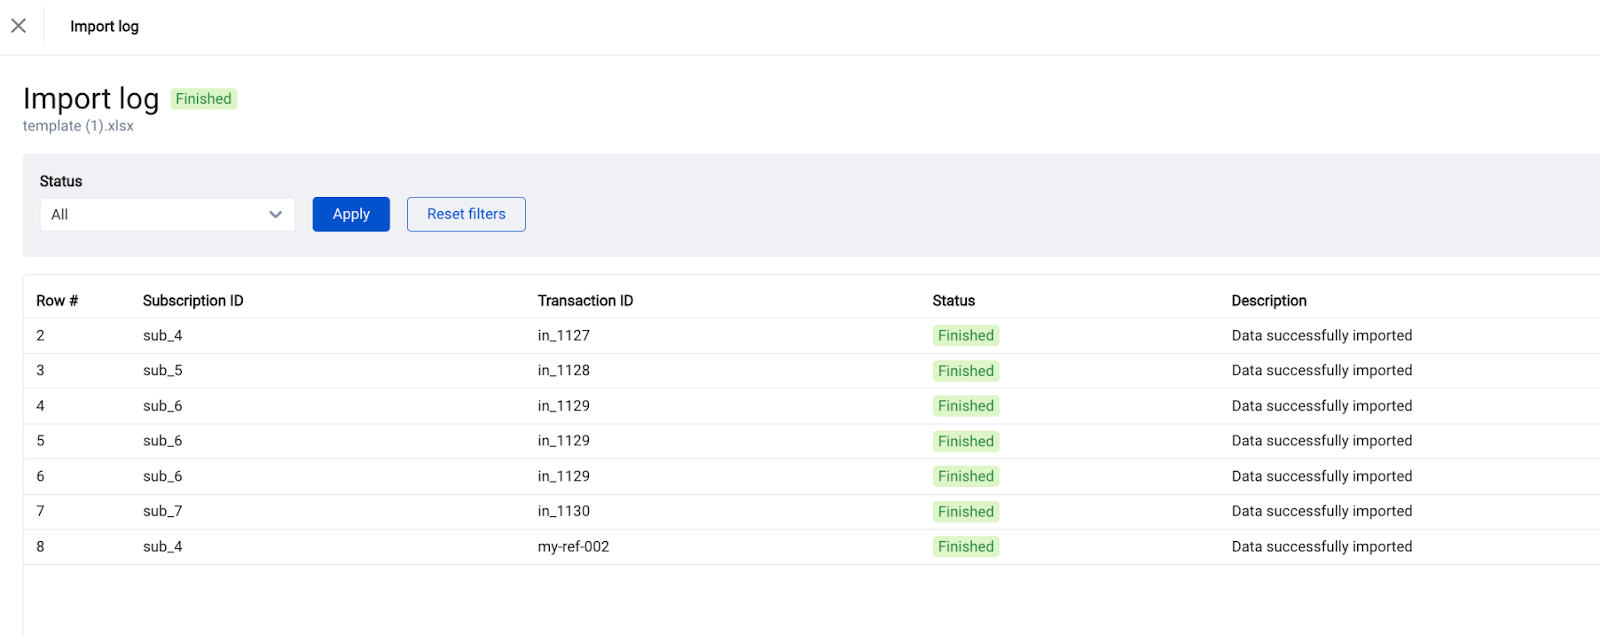
You can view your import history and check the results or any ongoing imports on the Excel import history page.
Go to Subscription → Import data → See Excel import history.
Click See details to access the log of the specific Excel file you imported.
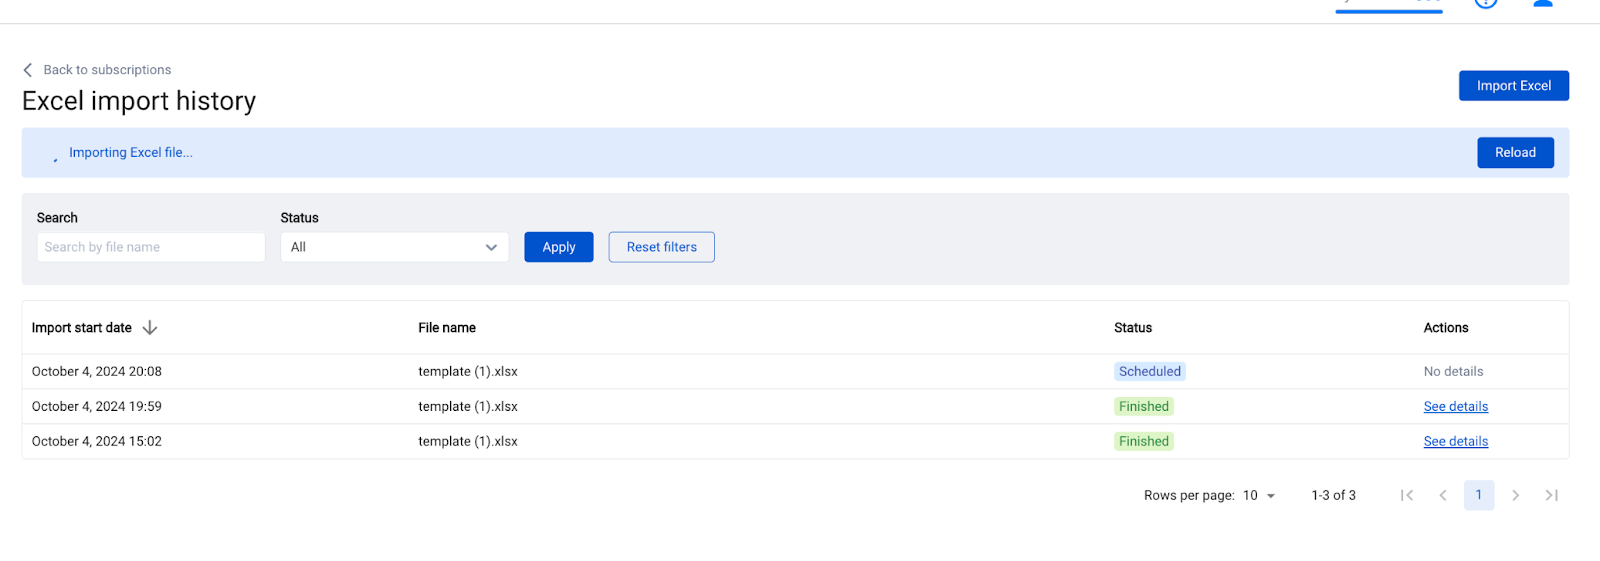
You will be able to see the log of what was imported and the status of each import line in the table.
How to edit imported data?
You can easily edit imported data by correcting it in the import file and re-uploading the Excel file.
Important: To ensure the update works correctly, specify the transaction ID of the transaction you want to edit. As soon as the transaction with the same ID is found, it will be updated.
This is how you can do that:
- Prepare your file and make sure it contains the correct data this time.
- Double-check that the transaction ID matches the transaction you want to update.
- If Synder also syncs entries to your books, be sure to roll back the synced journal entries.
- Import the file again.
Note: You cannot update the transactions or subscriptions imported from Stripe if you use Excel integration. For these subscriptions, Stripe is the source of truth.
When to Use Excel Synchronization in RevRec
Synder’s built-in Revenue Recognition works natively with Stripe only. For other platforms, uploading invoices separately to RevRec for deferred revenue handling solves this limitation
Use Case 1: Invoices Already in Books (Recognition Only)
When: Invoices reach books via regular Synder sync or third-party tool. Use RevRec only for deferred revenue recognition.
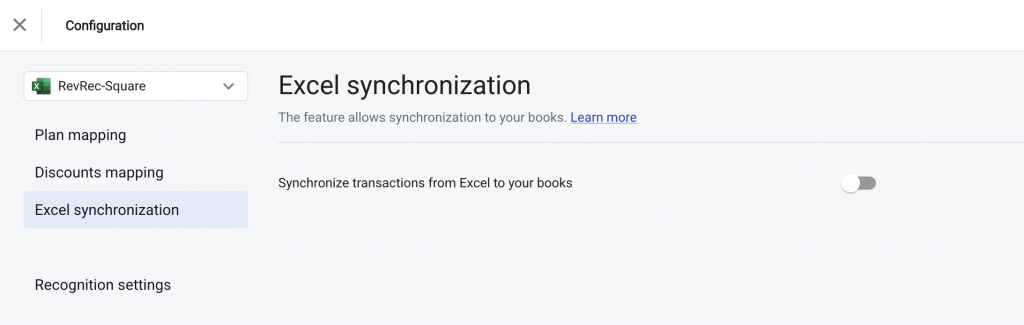
Excel sync: OFF: The Excel synchronization toggle (RevRec → Configuration → Excel synchronization) decides if uploaded RevRec invoices also post to your accounting platform or stay in RevRec for recognition only.
Example
SaaS business with subscriptions handled by Square. Regular Synder sync posts invoices to QuickBooks Online. RevRec handles multi-month deferred revenue recognition without duplicating sales data.
Setup Steps
- Route invoices to Deferred Revenue
Map your subscription products to the Deferred Revenue account (not P&L income account). [See RevRec setup guide] - Create Excel provider
Add Excel source in RevRec, connect to the same accounting platform. [Revisit the steps above] - Disable Excel sync
RevRec → Configuration → Excel synchronization → Turn OFF “Synchronize transactions from Excel to your books”. - Upload invoices to RevRec
Import the same invoices already in your books. - Map RevRec items
Link items to Deferred Revenue (liability) on your books and select the dedicated income accounts in the RevRec configuration. [See RevRec setup guide] - Recognition entries appear
RevRec posts scheduled entries to recognize month-end revenue (Platform Transactions or Summaries List).
Use Case 2: Sync Invoices + Recognize Revenue (Both via RevRec)
When: Platform has no direct accounting connection. Synder handles both invoice posting and deferred revenue recognition.
Excel sync: ON creates invoices + recognition entries (RevRec → Configuration → Excel synchronization)

Example
External billing platform (no Synder integration). Nothing reaches QuickBooks currently. Need subscription deferred revenue recognized monthly.
RevRec uploads invoices → creates them in QuickBooks (with payments applied/closed) → posts monthly recognition entries from Deferred Revenue to income accounts.
Setup Steps
- Create Excel provider
Add Excel source in RevRec → connect to accounting platform. [Revisit the steps above] - Enable Excel sync
RevRec → Configuration → Excel synchronization → Turn ON “Synchronize transactions from Excel to your books”. - Upload invoices to RevRec
Import invoices for Synder to sync and recognize. - Map RevRec items
Link items to Deferred Revenue (liability) on your books and select the dedicated income accounts in the RevRec configuration. [See RevRec setup guide] - Invoices + recognition appear
Both show in Platform Transactions (or Summaries List).
What Happens After Setup
- Invoices: Created on original dates, payments applied (closed), credit → Deferred Revenue.
- Recognition: Monthly entries debit Deferred Revenue → credit mapped income accounts.
Reach out to the Synder Team via online support chat, phone, or email with any questions you have – we’re always happy to help you!