
- How Synder treats products
- Product Mapping Flow in Synder
- Collect Items for Product Mapping
- Product Mapping: Import via file
- Tips and Best Practices
- Troubleshooting
This guide shows you how to use the product mapping feature in Synder. It applies to e-commerce businesses, accountants, and finance teams who sync transactions from payment platforms like Stripe, Shopify, or Amazon to their accounting system.
Use this guide if:
- You sell the same products across multiple platforms with different SKUs or naming conventions.
- You need consistent and accurate product records in your accounting system.
- You manage a large product catalog and want to streamline reconciliation and reporting.
This article focuses only on product mapping. It does not cover:
- Initial setup of Synder or integration connections
- Inventory management configuration in accounting platforms
- Advanced automation rules beyond product mapping
How Synder treats products
Synder recognizes existing product names in your accounting system. During sync, it looks for an exact match by product name or SKU. If it finds one, Synder applies that product to the transaction.
If a product name does not exist in your accounting system, Synder can create it during sync. You can configure this behavior in the Products/Services tab.
Sometimes product names differ between your payment platform and accounting system. In that case, you can map them in Synder. This ensures each transaction uses the correct product in your books.
Note: The product mapping feature is available on the Essential plan and higher.
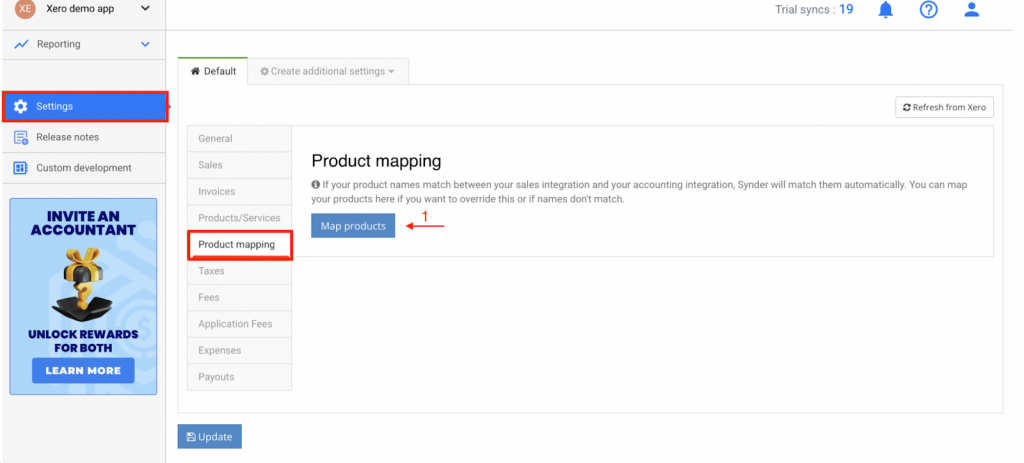
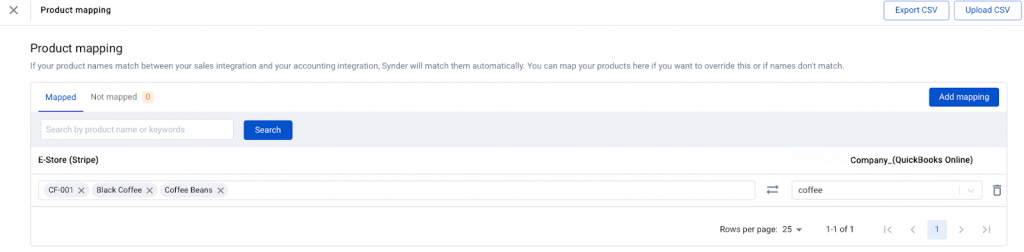
Product Mapping Flow in Synder
To map product names from your payment platform to your accounting company:
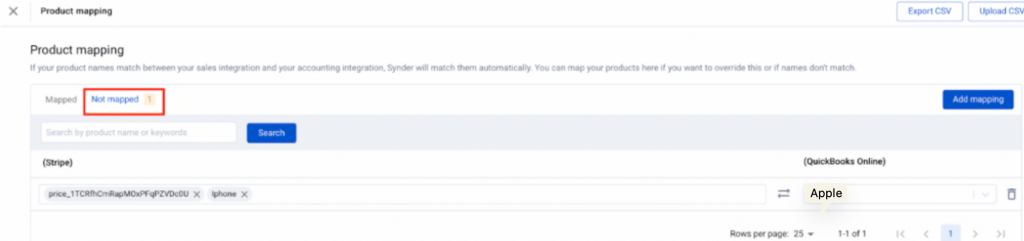
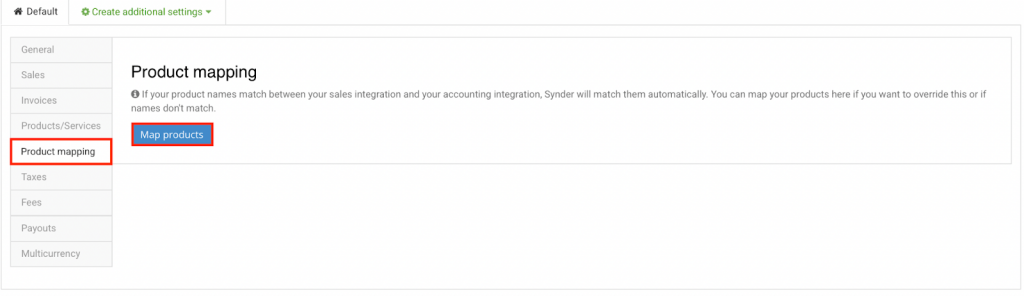
- Navigate to Synder Settings → Product Mapping → Map Products.
- Click Add Mapping to create a new product mapping line.
- Enter the product name from your integration in the Integration field. Make sure the name exactly matches what appears on your payment platform. This includes colons, underscores, and other special characters. You can map multiple platform names to a single QuickBooks Online or Xero product.
- Select the matching product from QuickBooks Online or Xero using the dropdown on the right.
- Click Create to save the mapping.
- Go to the Transactions tab and sync a transaction to verify the mapping works correctly.
Important Notes
- If a mapped product changes, gets deleted, or becomes unavailable in your accounting software, Synder asks you to review and update the mapping. You must fix it before saving any other settings.
- Product mapping does not apply to tax or shipping items. These are recorded as separate line items.
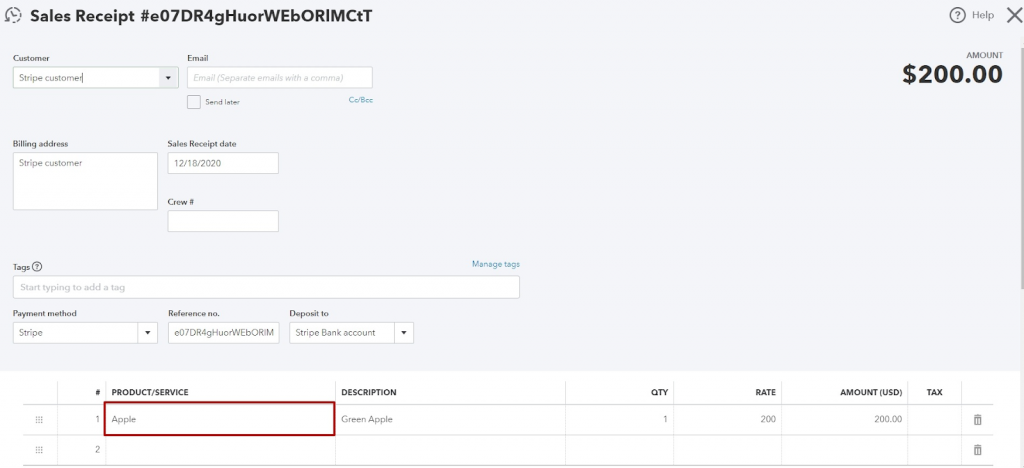
Result Overview
After mapping the products, the system will eliminate duplicate entries in your accounting system. Transactions will be recorded and categorized according to the income accounts linked to each product in QuickBooks Online.
Collect Items for Product Mapping
To control which items Synder records in your accounting, enable the Cancel Synchronization option.
When enabled, Synder automatically cancels any transaction that contains an item not present in your accounting records.
The Collect Items for Product Mapping option becomes available when “If the matching product is NOT found in accounting – Cancel synchronization” is enabled in the settings. This option is disabled by default.
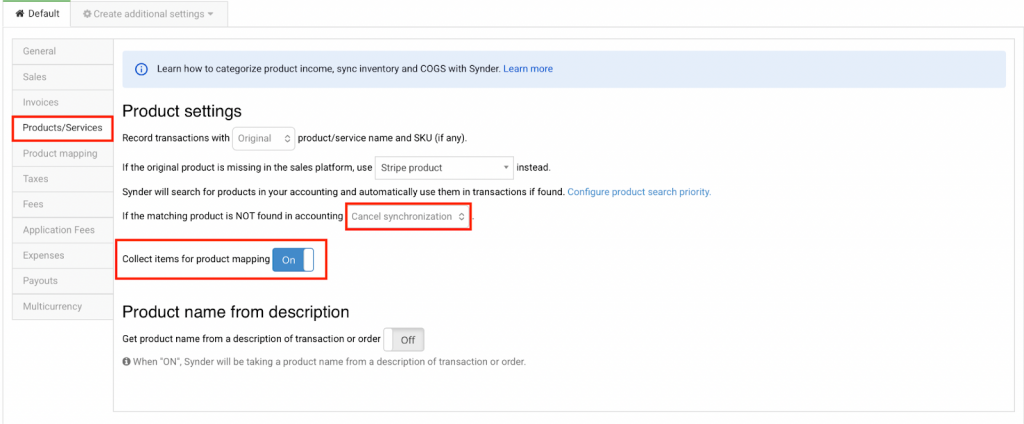
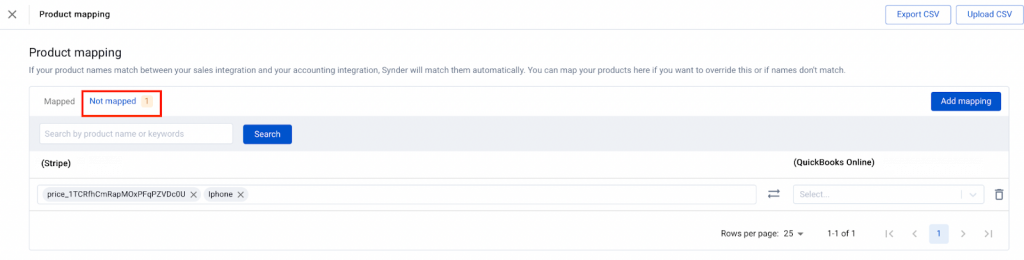
After synchronizing a transaction that contains products not yet in your accounting records, the transaction will be canceled. Products not present in Striep will appear on the Not Mapped page in the mapping settings. You can map these products to the appropriate items in the accounting system.

Product Mapping: Import via file
Managing large numbers of SKUs across multiple platforms requires efficient product mapping. Synder allows bulk uploading of product mappings using a CSV file.
Bulk product mapping enables matching integration products or SKUs (from platforms such as Amazon, Shopify, Stripe, etc.) with accounting products in QuickBooks Online, QuickBooks Desktop, or Xero through a CSV file upload. This process eliminates manual product mapping.
How to Prepare Your File
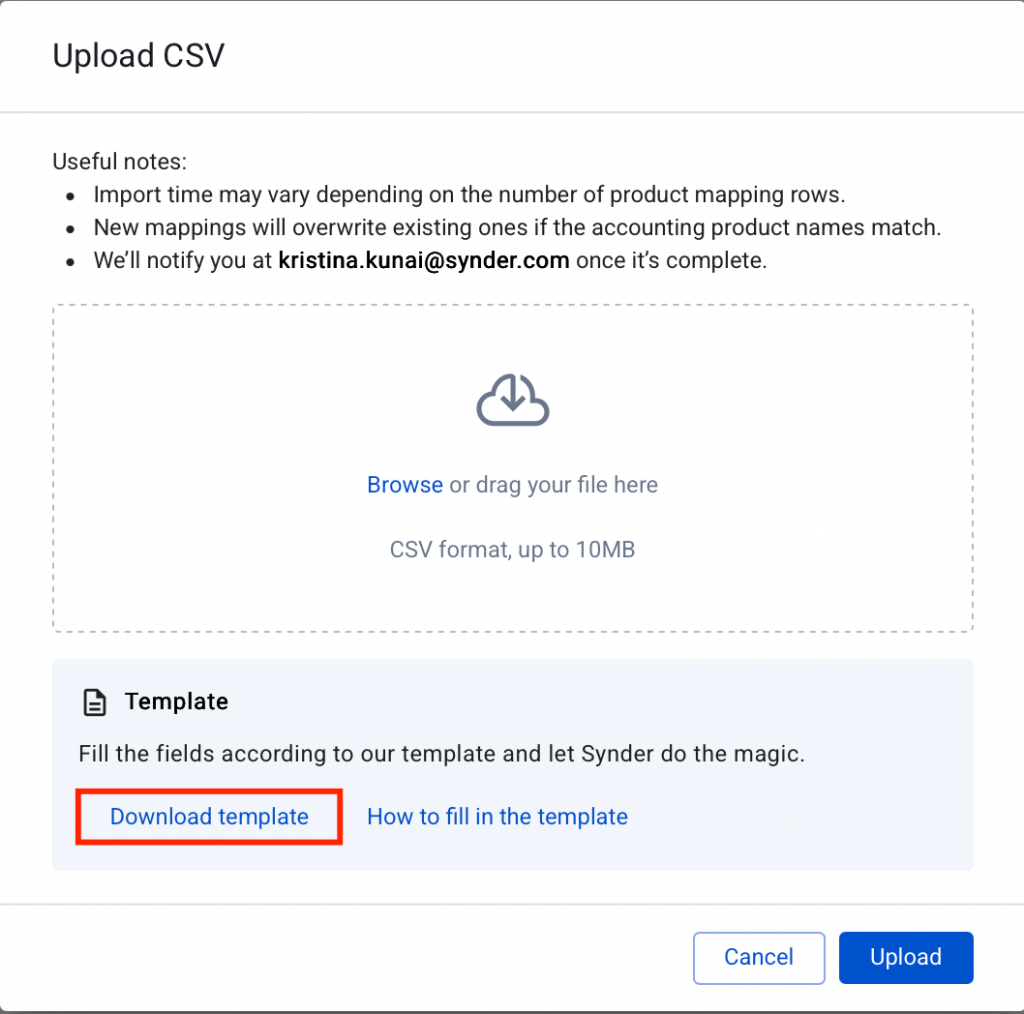
Download the Template
- Navigate to Settings → Product mapping → Map products.
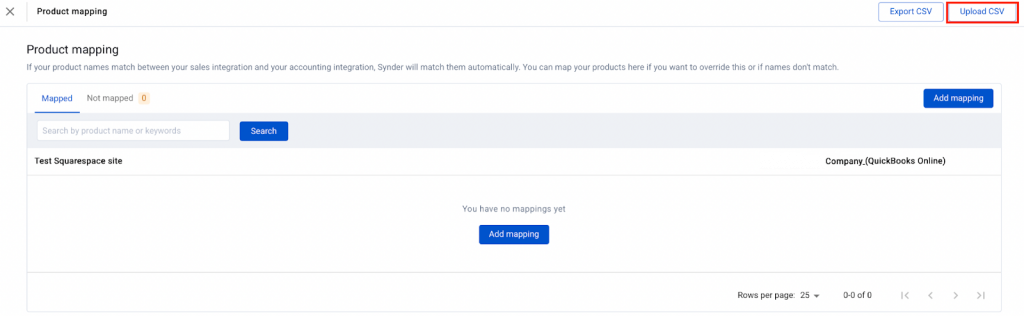
- Click Upload a CSV file.
- Download the provided CSV template.
Fill Out the Template
The file must include the following columns:
- Accounting product name – The product name exactly as it appears in your accounting platform (QuickBooks Online, QuickBooks Desktop, Xero).
- Integration product name/SKU – The product name and/or SKU as it appears in your integration.
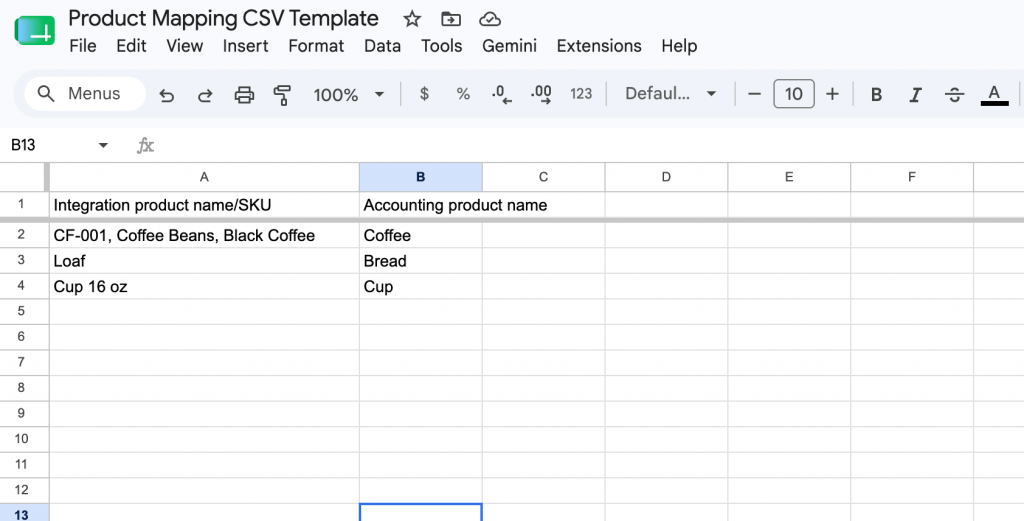
Requirements:
- Use commas to separate multiple integration product names and/or SKUs when mapping to the same accounting product.
- Only CSV (.csv) files are accepted.
- Do not include special or unsupported characters.
Save the file in CSV format.
Uploading Your Product Mapping File
- Navigate to Settings → Product mapping → Map products.
- Click Browse a CSV file.
- Select and upload your completed CSV file (maximum 10 MB).
- Products will be mapped automatically.
What Happens Next
- Processing time: Large files require more time to process.
- API call limits: The system fetches products from your accounting platform first. Very large imports may reach API limits. If a temporary failure occurs, retry later.
- Future syncs: New mappings apply to transactions synced after the product mapping import.
- Past data: Previously posted transactions remain unchanged. To update historical data, re-sync the affected period after updating mappings or contact support for assistance.
Tips and Best Practices
- Overwrite behavior: Uploading a mapping with an existing accounting product name will overwrite the previous mapping.
- Multiple SKUs to one item: Use commas to map multiple integration SKUs or names to a single accounting product.
- Large catalogs: Split very large catalogs into smaller files to avoid API limits.
- Auto-match vs. file upload: If product names already match, the system auto-matches them. Use a CSV file only to override or correct mismatches.
Troubleshooting
- “Unknown accounting product” – Ensure the Accounting product name matches your ledger exactly, including spelling, case, and spacing.
- “Invalid file/columns” – Use the provided CSV template and include both required headers.
- “Rate limit/API error” – Wait and retry; large catalogs can temporarily reach your accounting platform’s API limits.
- Duplicates in CSV – The last occurrence takes effect. Maintain one clean row per accounting product.
Reach out to the Synder Team via online support chat or email with any questions you have – we’re always happy to help you!