
In this guide, you will learn how to connect your X-Cart to online accounting for quick reconciliation, automatic data sync and detailed reporting.
Overview:
Sign up to Synder and provide business details
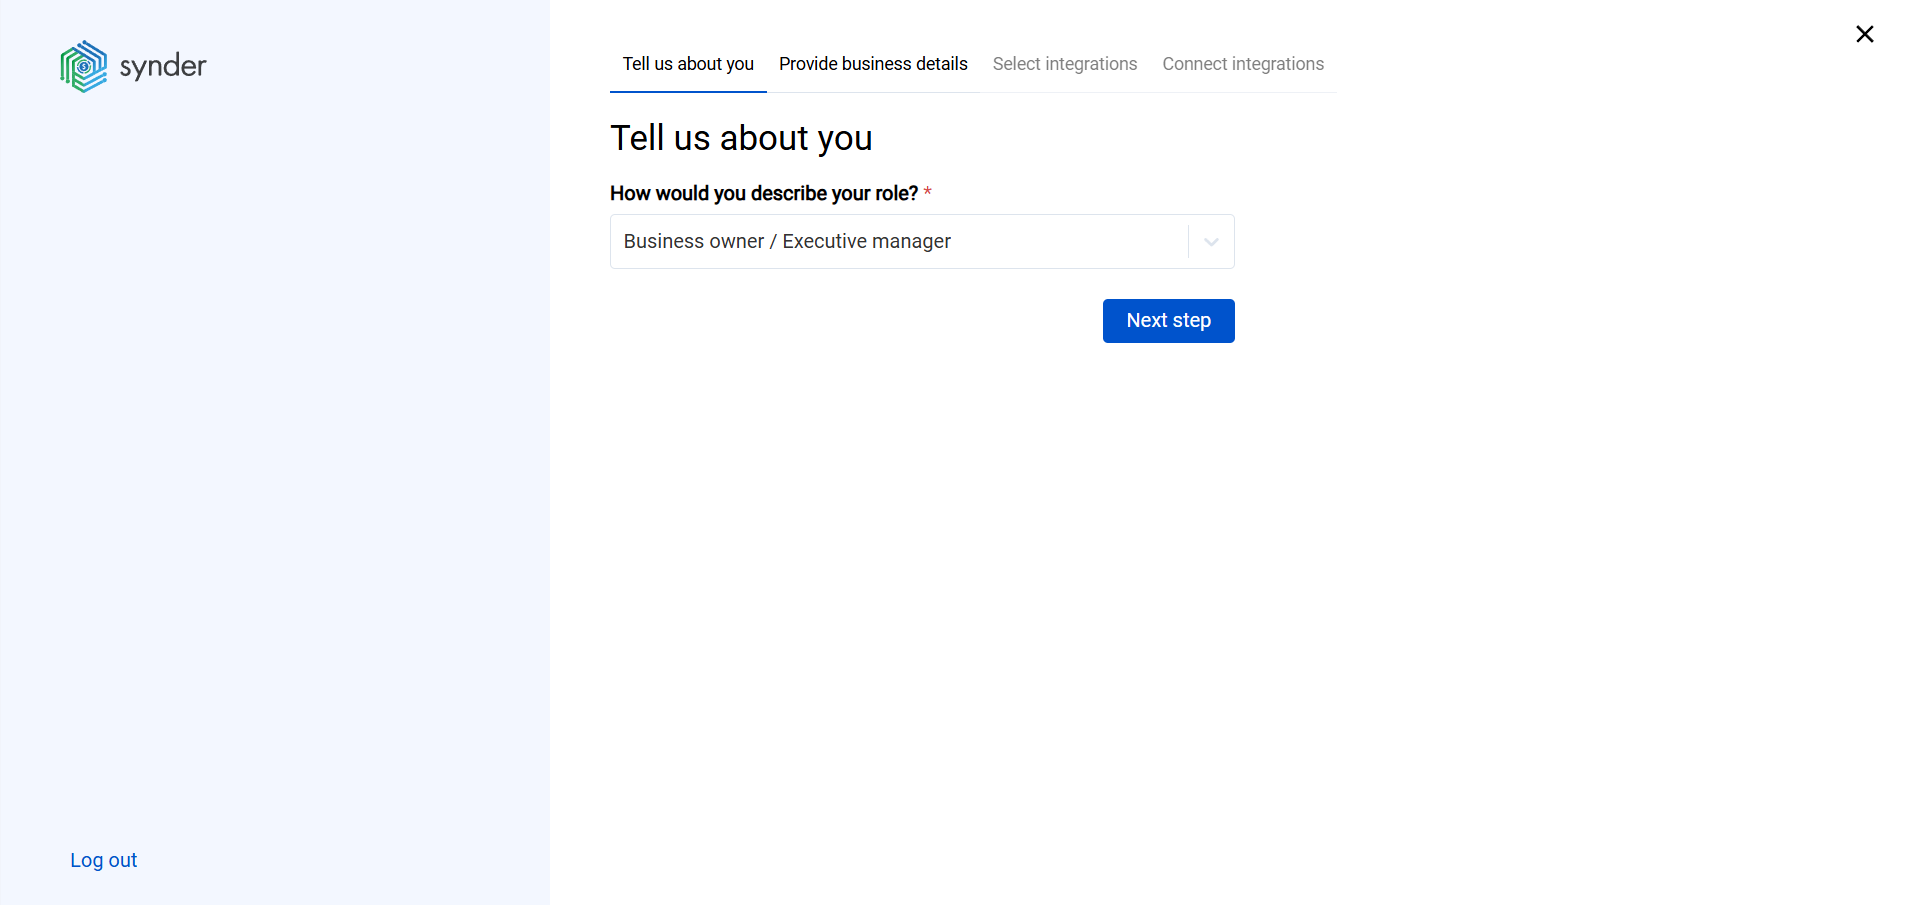
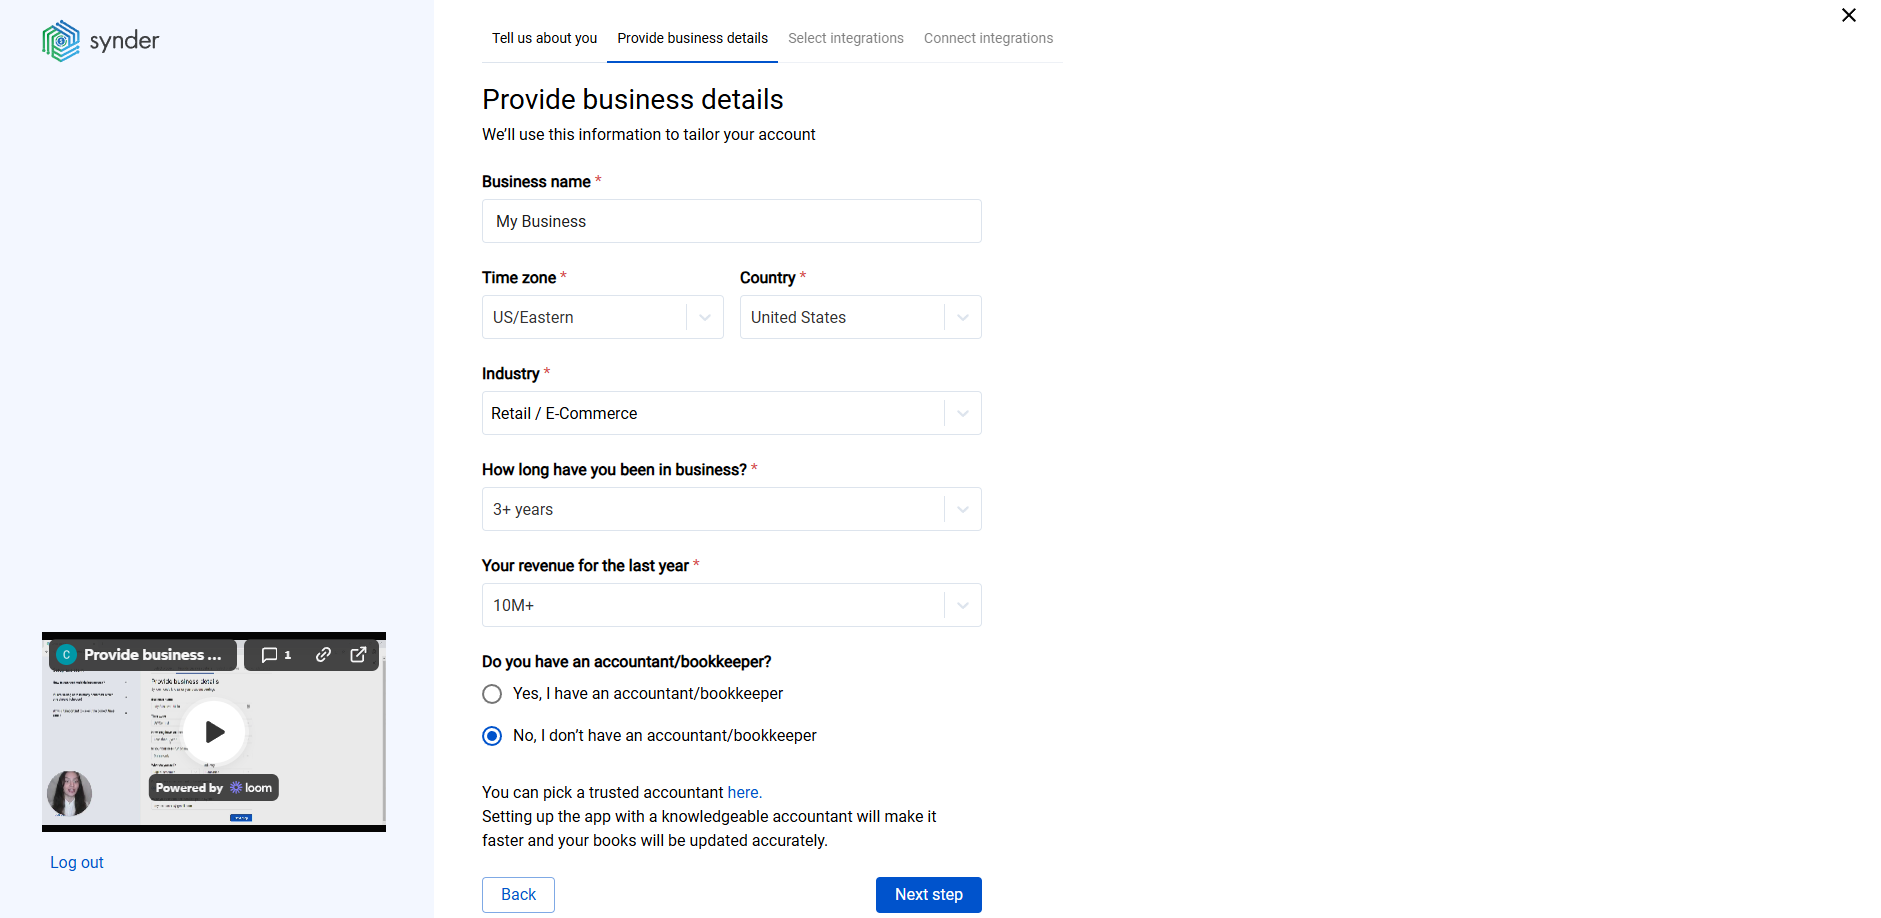
Step 1. Tell us about yourself, specify your role in the company and provide business details.
Step 2. Select payment integrations
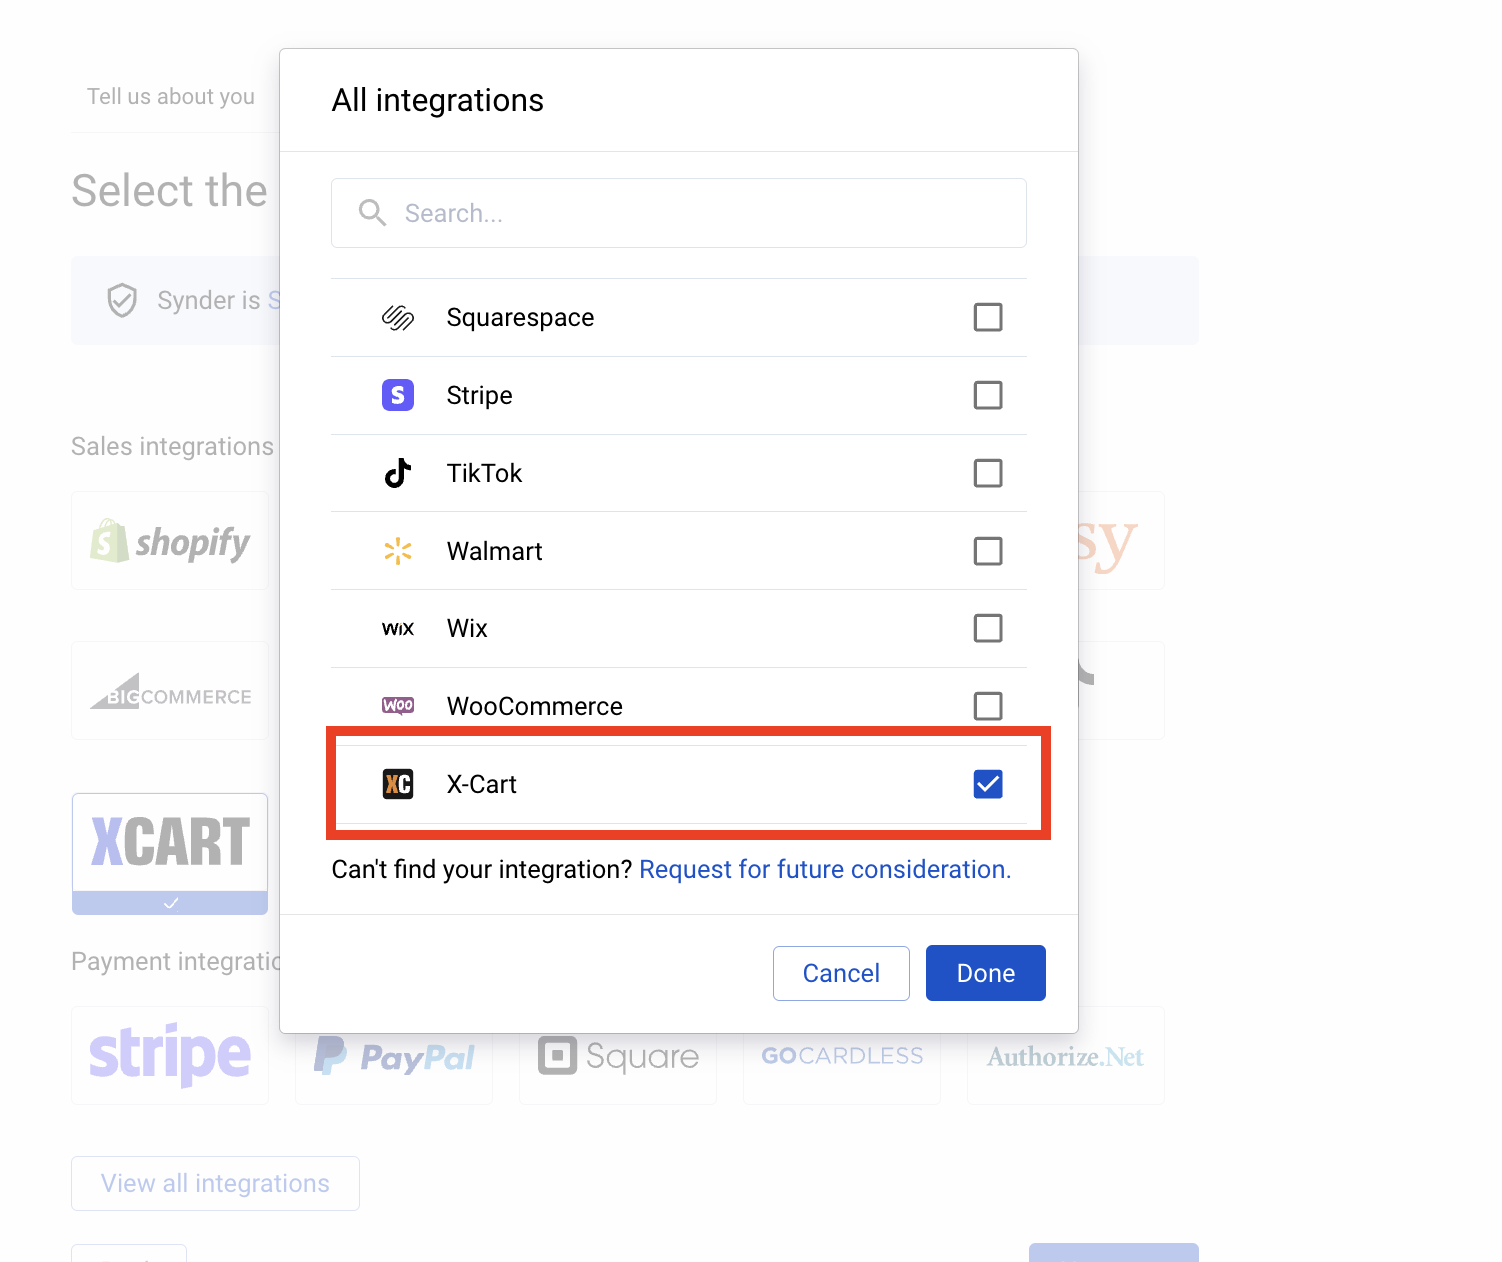
Click ‘View all integrations’ to see the full list of integrations that can be connected to Synder for synchronization.

Select X-Cart in the list.
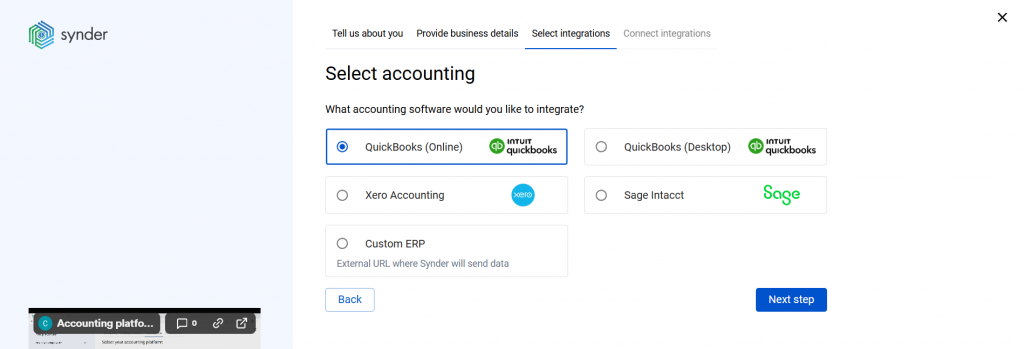
Step 3. Select your online accounting system and proceed to connections.
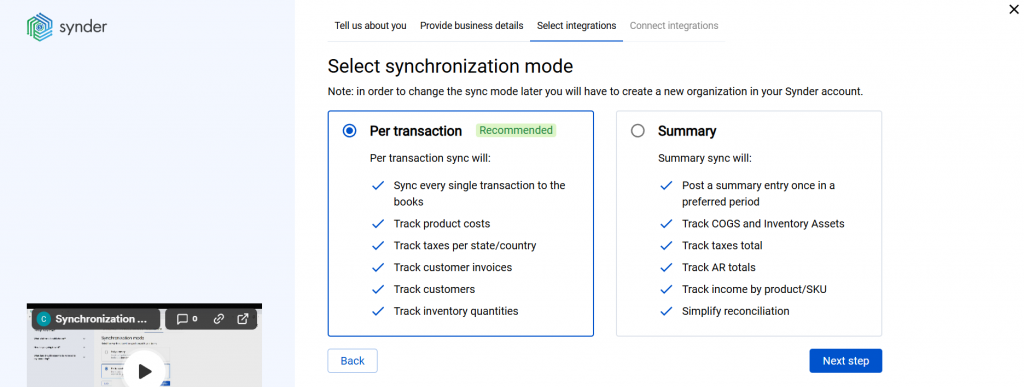
Step 4. Select the synchronization mode you prefer
Read more about Per Transaction vs Daily Summary sync modes in this guide.
Step 5. Click ‘Connect to QuickBooks’ or any other accounting company selected on the previous steps and grant all the needed permissions to Synder.
Proceed to connecting X-Cart to the selected accounting system.
Connect X-Cart to your accounting system
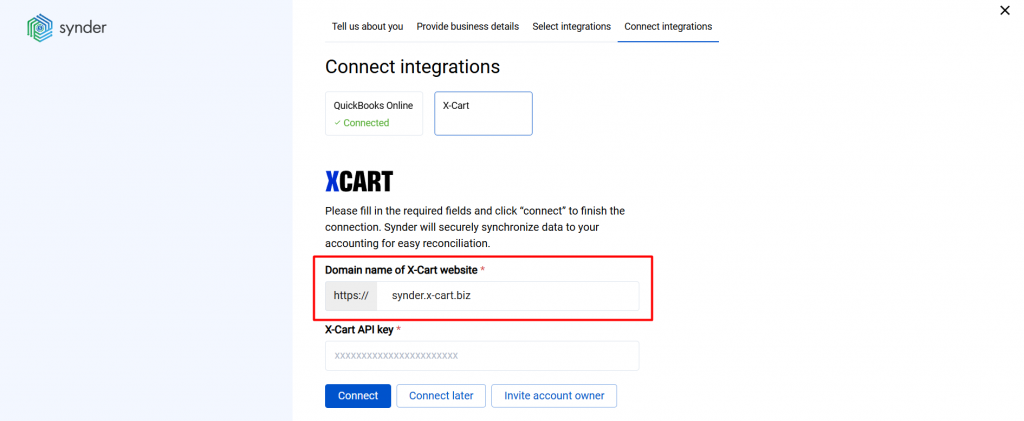
Step 1. Enter valid domain name of your X-Cart website
Go to your X-Cart account and copy the domain name from the URL.
Make sure no extra symbols (e.g. slashes) are included – copy only the part of the address that is highlighted on the screenshot below.

Insert the copied domain in the needed field in Synder.
Step 2. Provide the API Key (only read)
In X-Cart, go to Settings → API → Rest API section

Come up with a secure ‘API key and enter it in the API key (only read)’ field.
Click ‘Submit’.

If you already have a key saved there, simply copy it.
Step 3. Go back to Synder, insert this API key in the appropriate field.
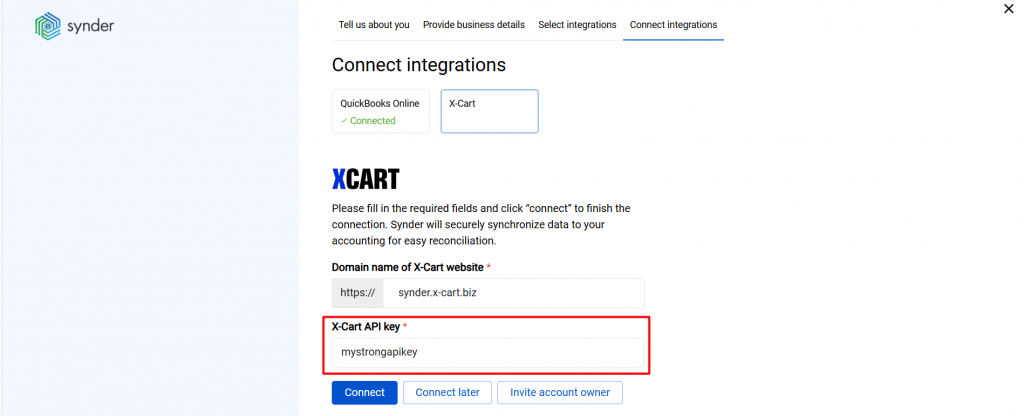
If you are not an account owner, you can request the admin to grant you permissions to connect an X-Cart account. If you have access to the payment system, simply click Connect.
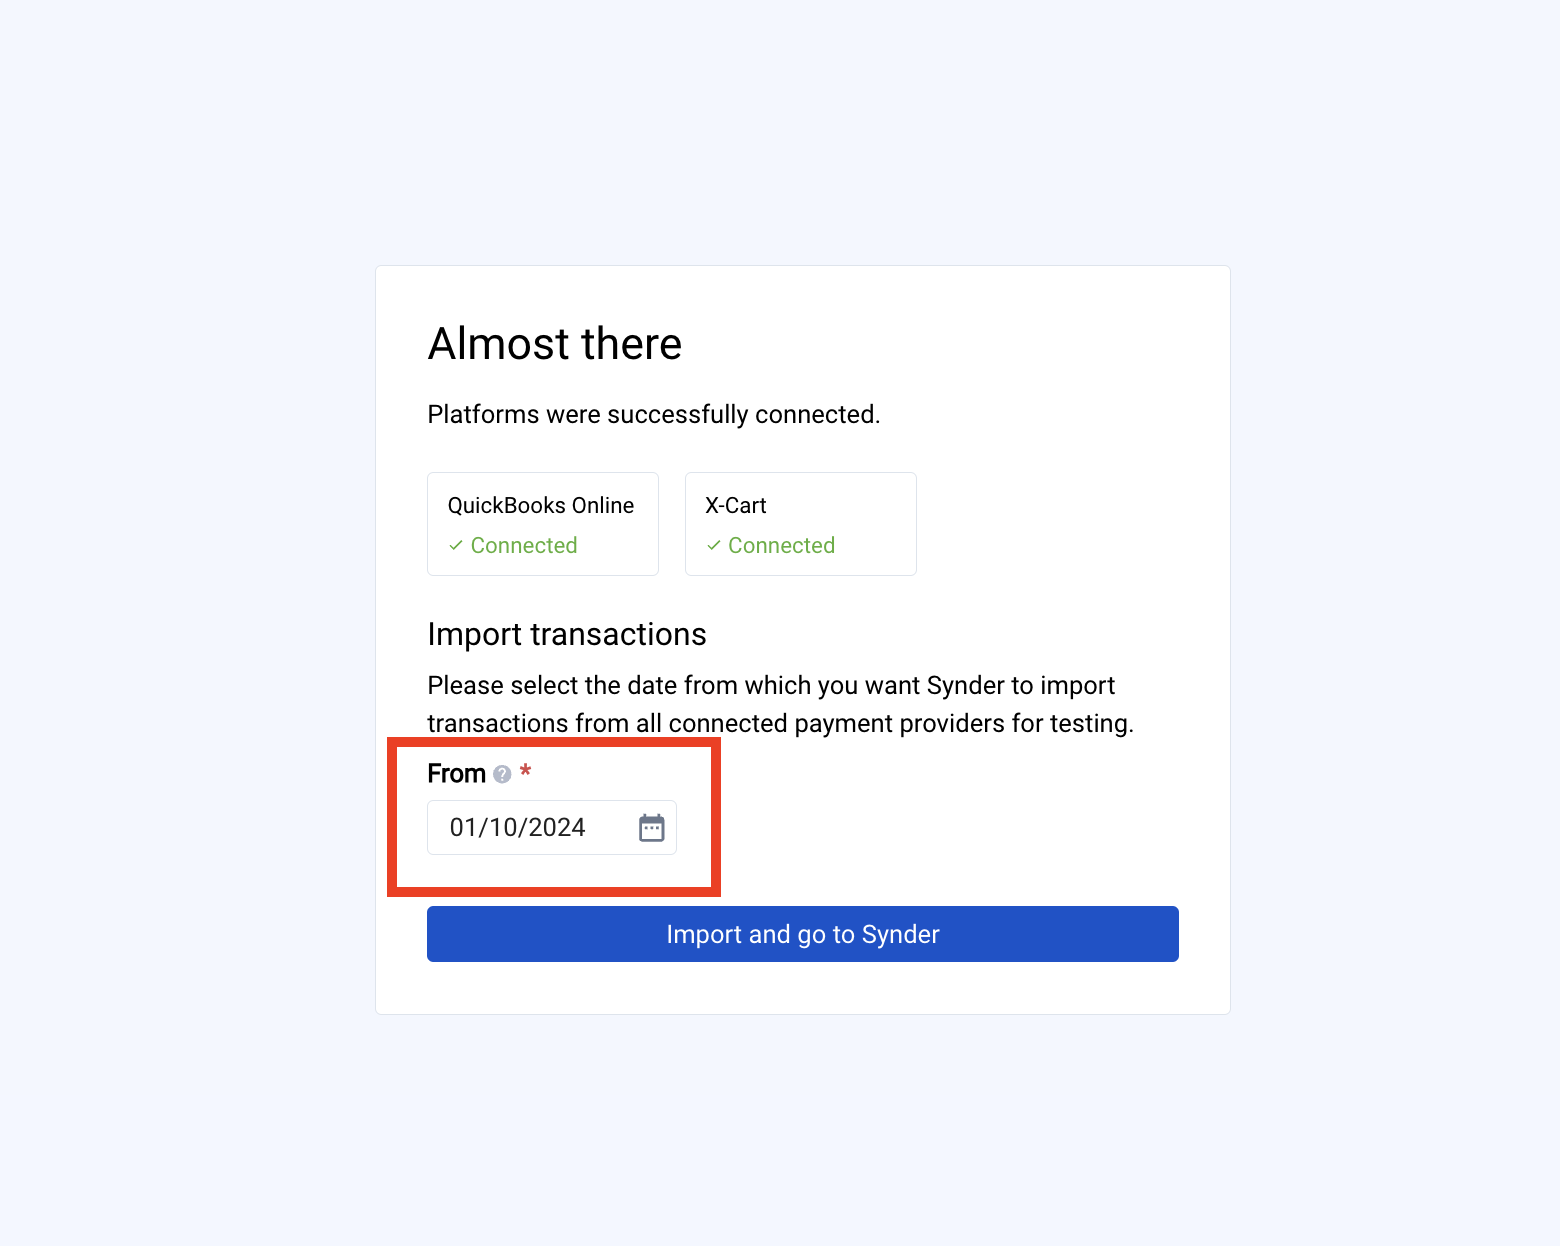
Step 4. Select the date range for data import and finish connection.
Select the date from which you want Synder to import X-Cart data and let the system create a Trial account for you.
Check X-Cart orders in Synder and online accounting
Now you should be able to see the list of orders that Synder imported from X-Cart for synchronization to your books.
You will see various Synder statuses near these orders depending on their status in your X-Cart account.
Synder will be able to synchronize only X-Cart orders with the Payment status ‘Paid’ and Fulfillment status ‘Shipped’ or ‘Delivered’. You will see such orders in Synder marked as ‘Ready to sync’ or ‘Synced’.
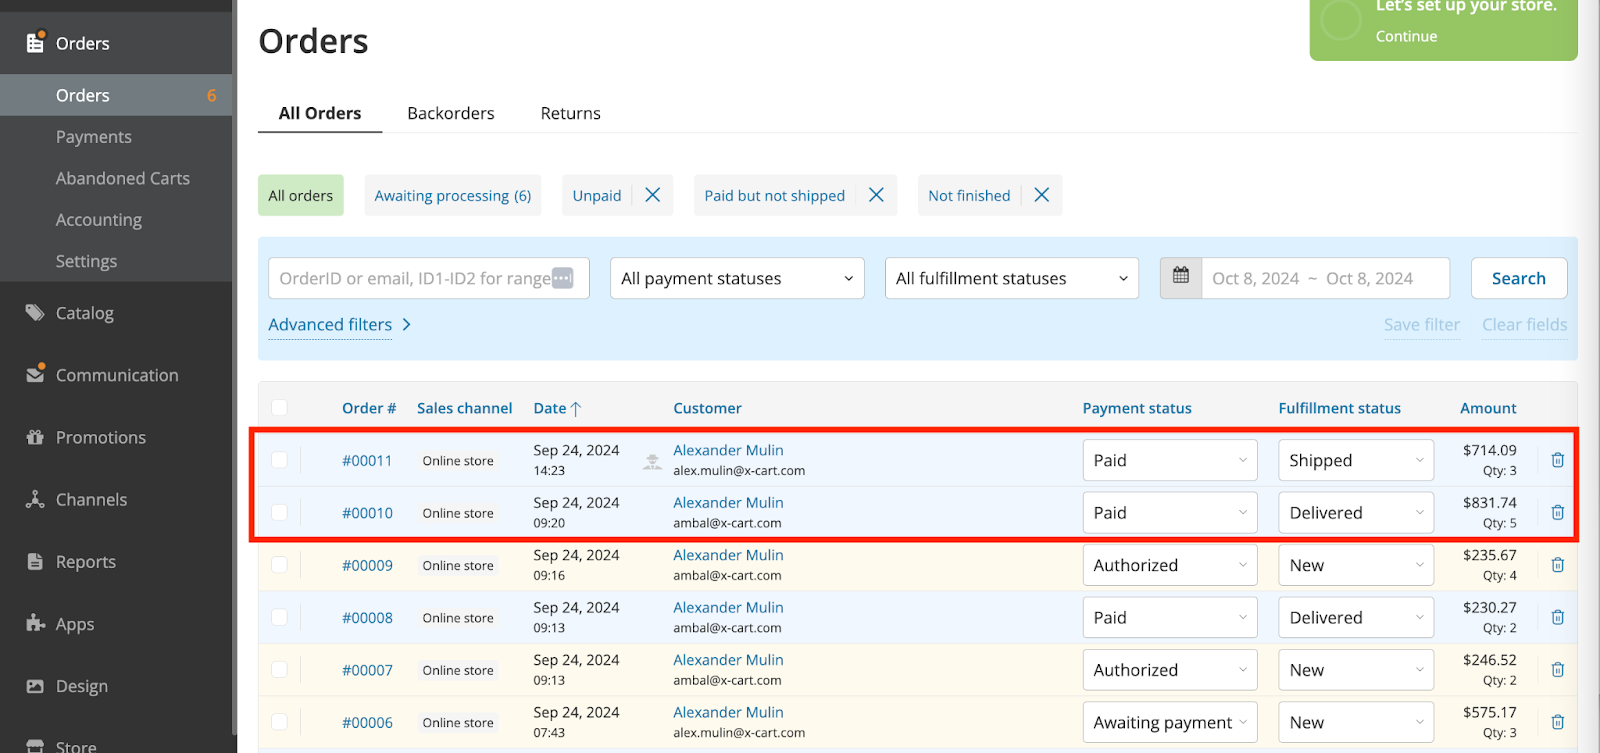
Here’s how you’ll see them in Synder.

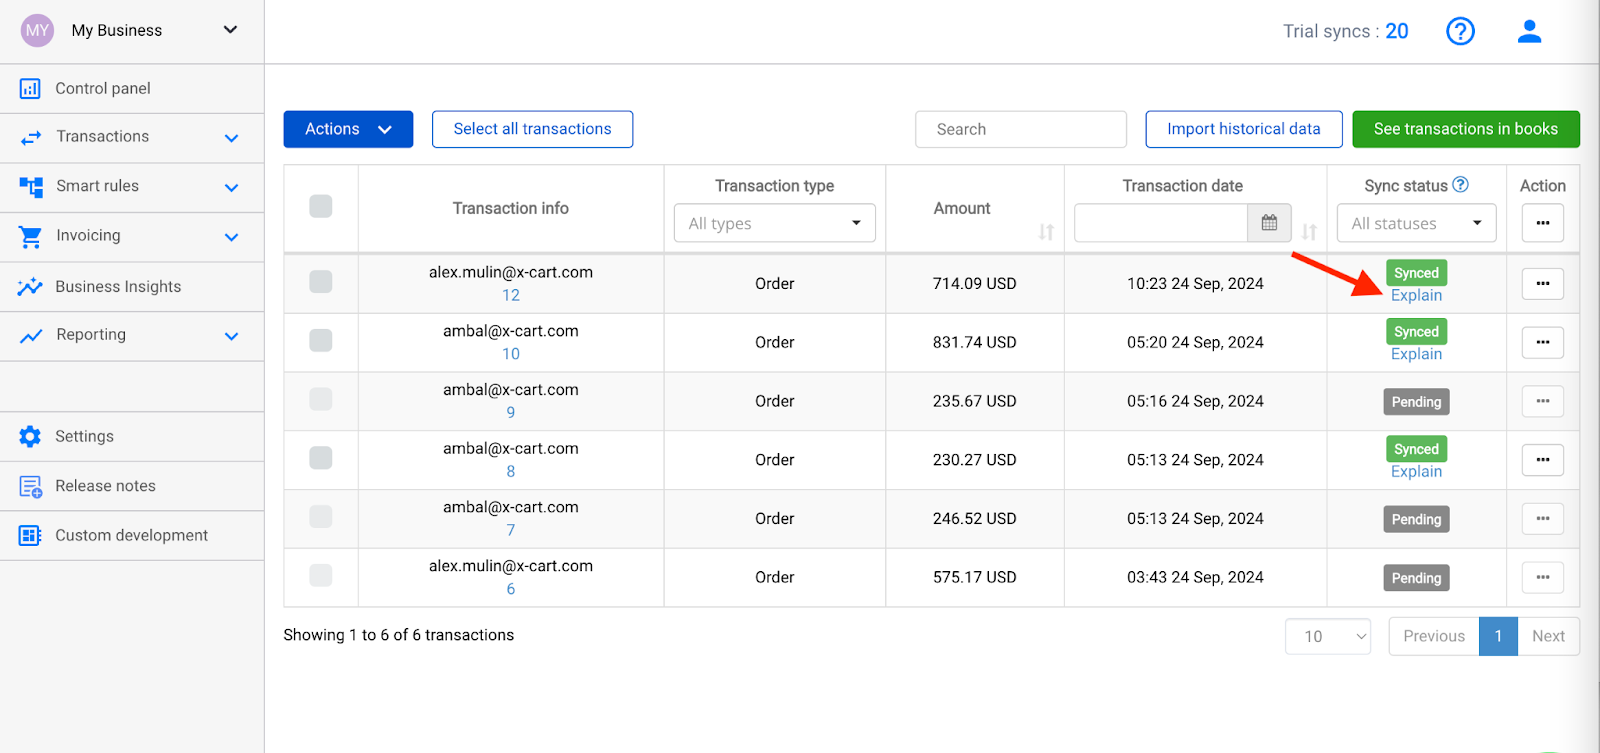
X-Cart orders with other statuses (for example ‘Authorized’ and ‘New’) will also be recognized by Synder and you will see them in the Transactions list, but they will be marked as ‘Pending’.

Here’s how you’ll see them in Synder.

Once their status changes to ‘Paid’ and ‘Shipped’ or ‘Delivered’ in X Cart, Synder will mark them as ‘Ready to sync’ and will be able to post them to your books.
The ‘Synced’ status means that Synder has already posted an order to your books for you to check the results.
Click ‘Explain’ under the ‘Synced’ status in Synder.
Then, click on ‘Show in books’ on any object created by the system during synchronization.

Now you know how to easily connect X-Cart to your accounting via Synder and seamlessly synchronize data for quick reconciliation and accurate reporting.
Reach out to the Synder team via online support chat, phone, or email with any questions you have – we’re always happy to help you!