
- Before You Start
- How to Connect Squarespace to Synder
- Step 1: Add Squarespace Integration
- Step 2: Connect Your Squarespace Account
- Step 3: Complete the Setup
- Step 4: Import and Sync Transactions
- What Data Gets Synced?
- Important Details
This guide walks you through the steps to connect your Squarespace store to Synder. Once connected, Synder will automatically import your Squarespace orders and sync them to your accounting software.
Before You Start
Before connecting Squarespace, keep the following in mind:
- Squarespace is a Premium integration, so you need a Pro plan or higher to use it.
- If you want to test this integration during the trial period, book a call with the sales team and request access.
How to Connect Squarespace to Synder
Follow these steps to add Squarespace as an integration in your Synder account.
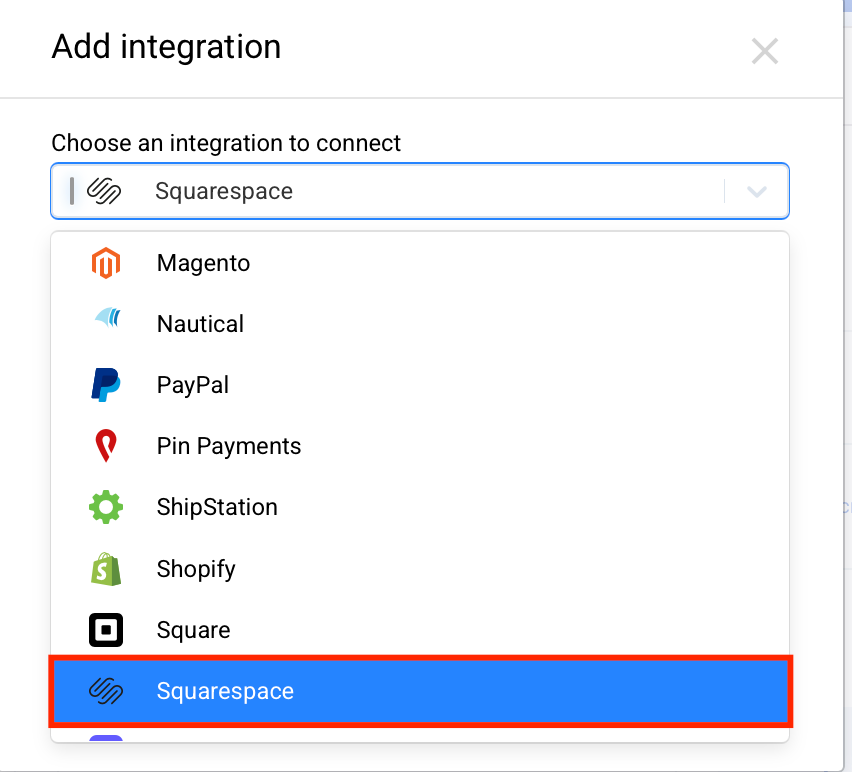
Step 1: Add Squarespace Integration
- Log in to your Synder account.
- Click on the person icon in the top-right corner to open organization settings.
- Select Add integration.
- Choose Squarespace from the dropdown list.

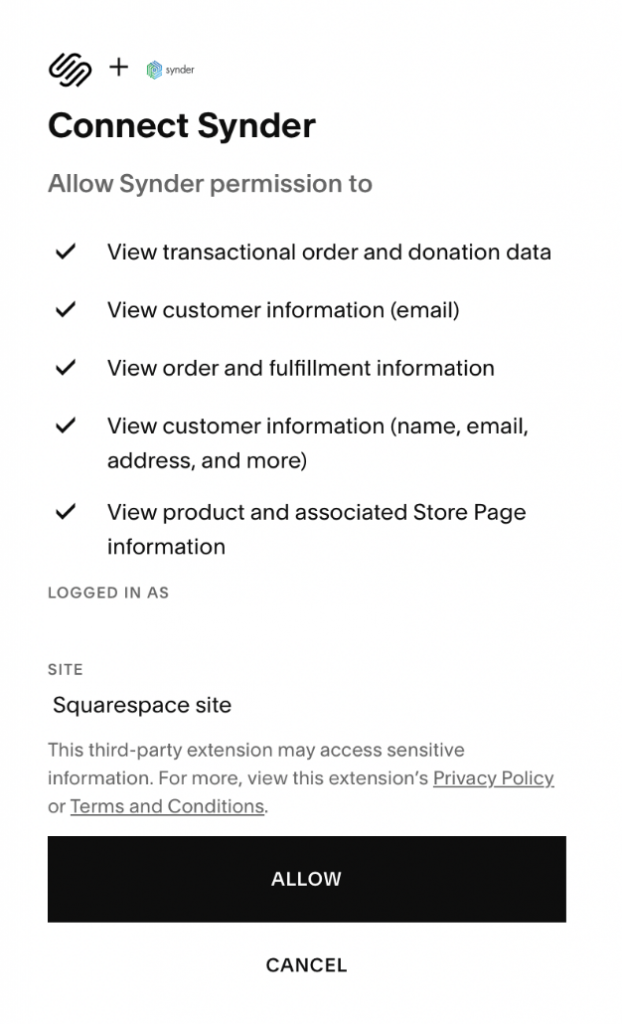
Step 2: Connect Your Squarespace Account
After selecting Squarespace, Synder will ask you to authorize access. Here is what to do:
- Review the list of permissions that Synder needs to access and sync your data.
- Tip: Open Squarespace in a separate browser tab and log in before starting the connection process. This helps avoid login interruptions.
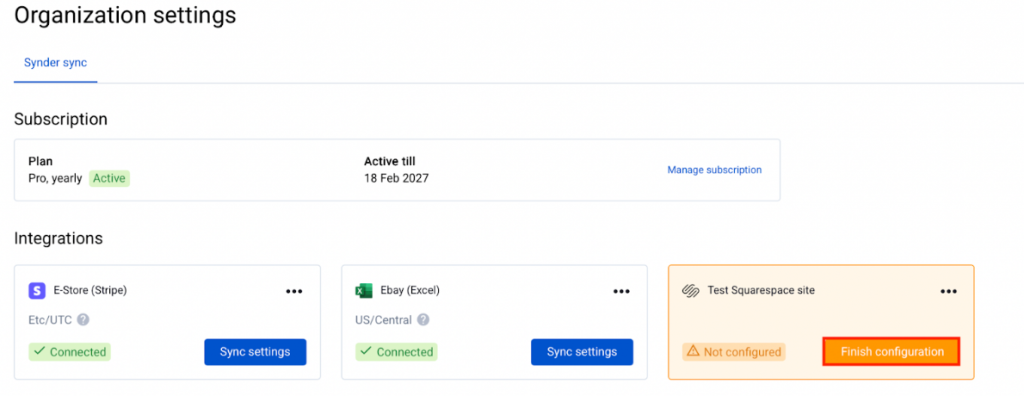
Step 3: Complete the Setup
Once you authorize Squarespace, complete the configuration in Synder:
- Go to the Organization tab in Synder.
- You will see your new Squarespace integration listed there.
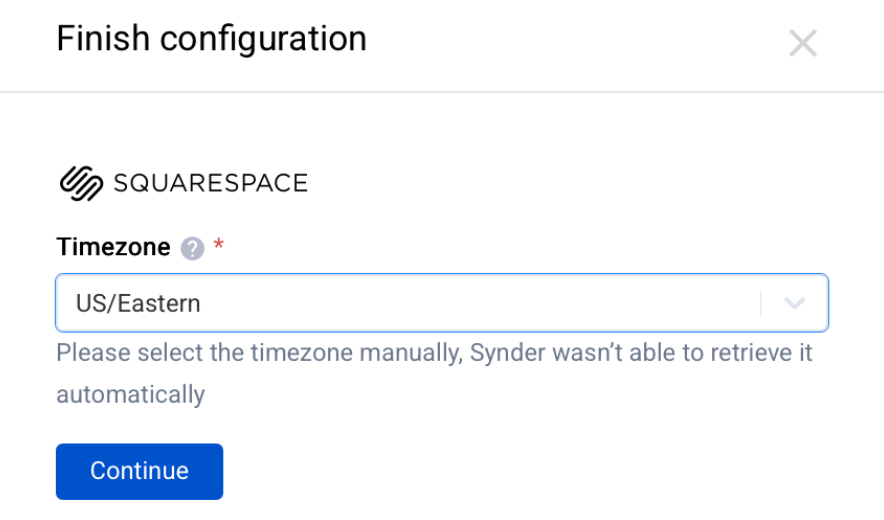
- If the status shows “Not configured”, click Finish configuration.
- Select the correct timezone for your store.
- Click Continue to finalize the setup.
Step 4: Import and Sync Transactions
Now that the connection is complete, you can start importing your Squarespace data:
- Go to Transactions → Platform transactions.
- Click Import historical data.
- Select the date range you want to import.
- Click Import.
- After the import finishes, sync the transactions to your accounting system.
What Data Gets Synced?
Synder imports the following transaction types from Squarespace:
- Orders
- Donations
- Refunds
Important Details
There are a few things to keep in mind when syncing Squarespace data:
- Synder records all Squarespace orders as Invoice + Payment in your accounting software.
- Squarespace does not provide payout data through its API. As a result, you need to record payouts manually in your accounting software. For more details, refer to the guide: How to Reconcile Integrations Without Payout Support in Synder.
- Synder supports smart reconciliation between Stripe and Squarespace. To learn more, check the guide: Smart Reconciliation Availability and Supported Platforms.
Reach out to the Synder Team via online support chat, phone, or email with any questions — we are always happy to help!