

If your business takes a Stripe Capital loan, Synder has you covered. When Stripe deducts a repayment from your payout, Synder syncs it as a multiline expense called Financing Paydown. Each synced transaction includes two line items:
- Advance amount — the principal portion being repaid
- Premium amount — the cost of capital (Stripe’s equivalent of interest)
To make sure these transactions land in the right accounts in your books, follow the steps below.
Step 1: Set up the Lending Liability account in Fees settings
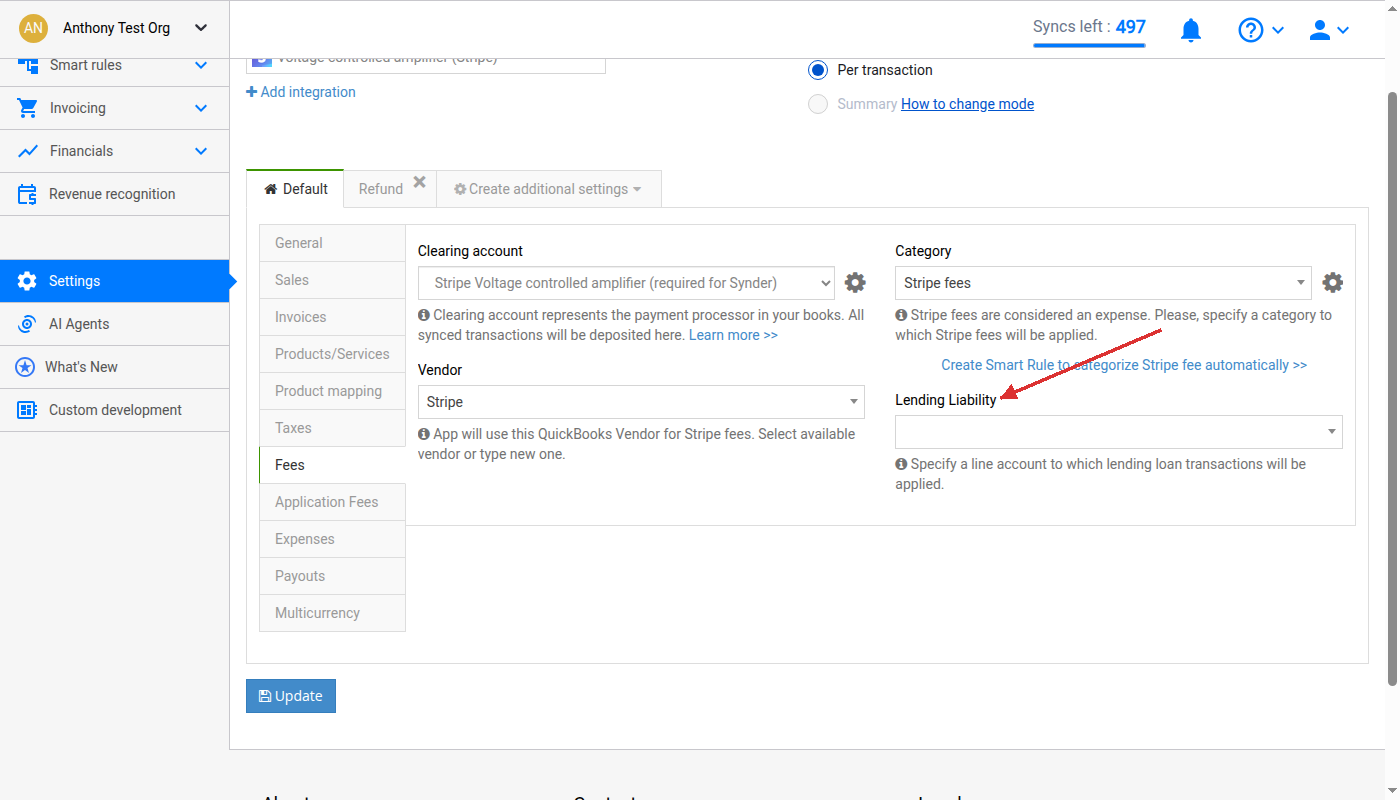
Synder has a dedicated Lending Liability field in your Stripe integration settings. Set it once, and all Financing Paydown transactions will be applied to that account automatically.
- Go to Synder → Settings → select your Stripe integration.
- In the left menu, click the Fees tab.
- Find the Lending Liability field and select the account where lending transactions should be applied — typically a Loan Payable or Long Term Liabilities account.
- Click Update.
Step 2: Record the initial loan in your books manually
When Stripe deposits the advance into your account, Synder does not create a separate transaction for it — the deposit arrives as part of your regular payout. You need to manually record the initial loan amount in your accounting platform. Make sure to record it to the same account you selected as the Lending Liability in Step 1 — this way, as Synder syncs each Financing Paydown, your outstanding loan balance decreases in that account and you can track how much is left to pay off.
Synder will account for the ongoing repayments (Financing Paydowns), but the initial loan entry must be made manually.
Please note, the initial Loan entry as well as paydown should be recorded to the same account to track your loan getting paid off.
Step 3 (Optional): Split repayment and interest using Smart Rules
If you need to post the Advance amount and Premium amount to separate accounts, you can use a Smart Rule template. This gives you full control over how each line item is categorized.
- Go to Synder → Smart Rules menu tab → Templates.
Note: Start the Rules trial if this is your first time. - Find the template for Categorizing Stripe Capital under the Categorize tab.
- Click Try it now and customize the account for expense lines using Then blocks → set QuickBooks data → Category field. It will give you access to the accounts from your Chart of Accounts.
- Save your rule and close it.

Step 4: Sync Financing Paydown transactions
Once your settings and rules are in place, sync your Financing Paydown transactions:
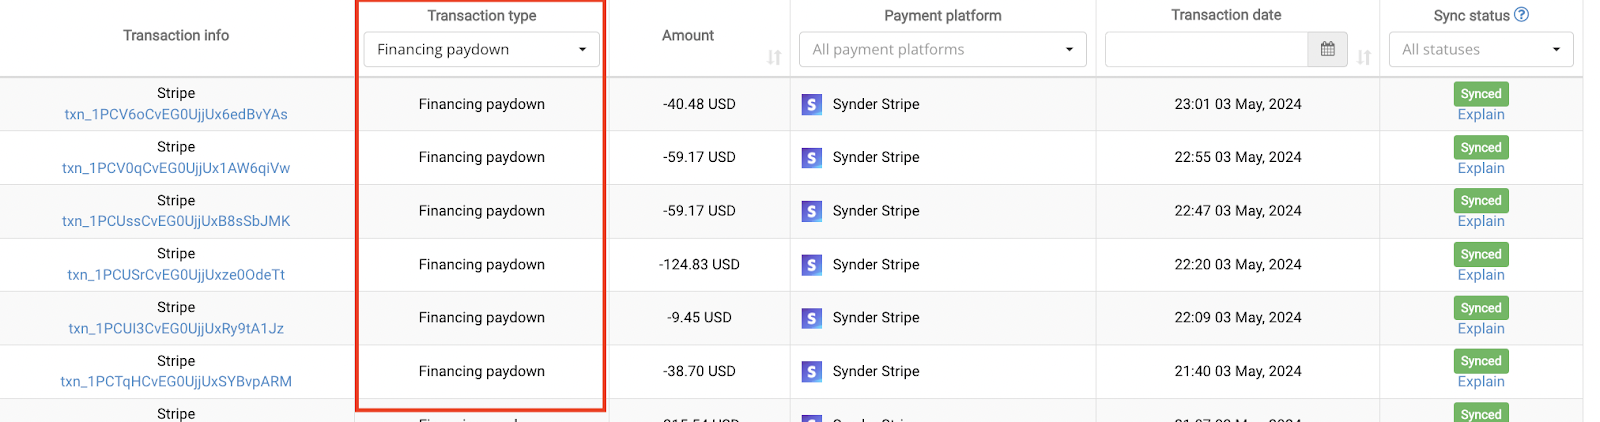
- Go to the Platform transactions and look for the Financing Paydown transaction type for Stripe.
- Select a few transactions and sync them over to the books: Actions → Sync.
Note: if transactions were already synced over, roll them back first and then sync again to apply the rule to them.
- Check the created expense properly categorized in the books.

Summary Sync users
On Summary sync, Financing Paydown transactions are included in your daily summaries and will appear as a separate Loans group in your mapping table. Map the Loans group to the appropriate liability account from there. Make sure to use the same account for the initial loan entry in Step 2 — this keeps your outstanding balance accurate as each paydown is applied.
If you need to split the repayment and interest into two separately mappable lines, you can use custom groups with a line item condition. A line item condition lets Synder identify the Advance amount and Premium amount as separate lines and map each to a different account. See Summary Sync: Understanding Mapping Groups for full instructions on setting this up.
That’s it! Now you know how to handle Stripe Capital Financing Paydowns in Synder.
Reach out to the Synder Team via online support chat, phone, or email with any questions you have – we’re always happy to help you!
