
One of the most frequent requests our customers experienced is adding classes to their transactions. We are ready to offer a solution to help you sort this out automatically. Run a report by class details in Quickbooks with the help of Stripe and QuickBooks Online integration.
Rules in Synder
Rules are created from the details in your transactions. When setting up a rule, you can assign classes to every synchronized transaction. Simply define the conditions for the rule—you can include multiple conditions in one rule and change them whenever needed.
The overall process contains 2 steps:
- Create a condition;
- Associate the condition with the particular class.
Create and apply a Rule in Synder
For example, let’s build a rule that associates all transactions under $100 with a specific subclass, such as ‘Camembert’ under the class ‘Cheese’.
Follow these steps to proceed:
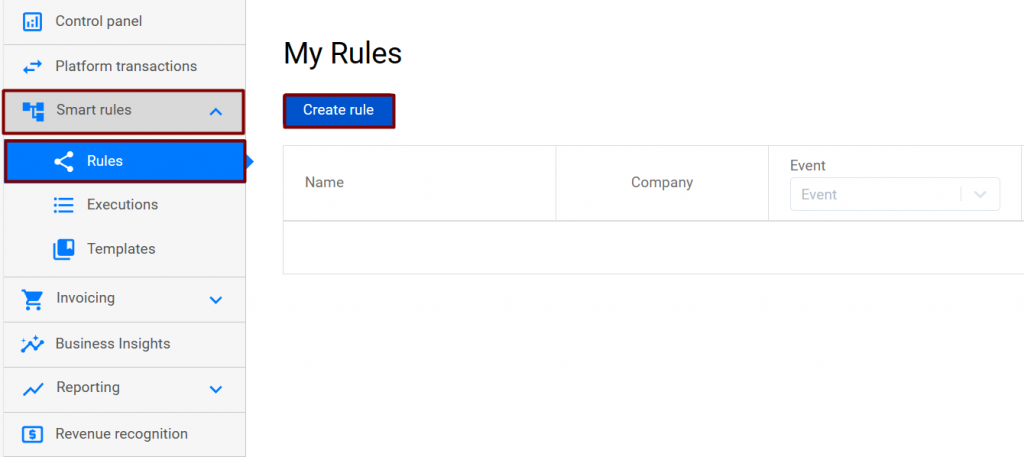
Step 1. Go to Smart rules and Choose the Rules tab.
Step 2. Click the Create rule button to start.
Step 3. Name your Rule.
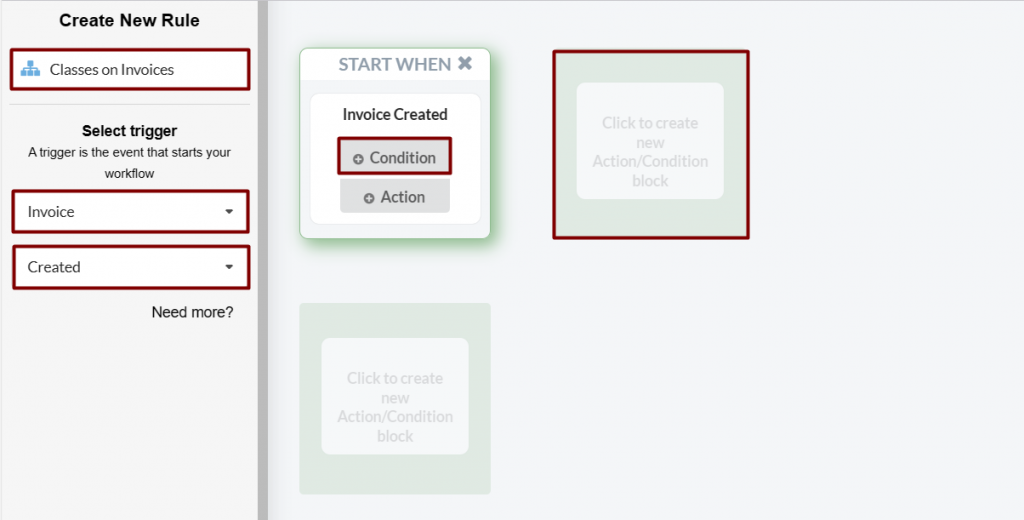
Step 4. Choose the entity type you want to update with a new class. For example, select ‘Invoice,’ then choose ‘Created‘.
Step 5. Click on ‘Condition‘ and then click on the adjacent box.
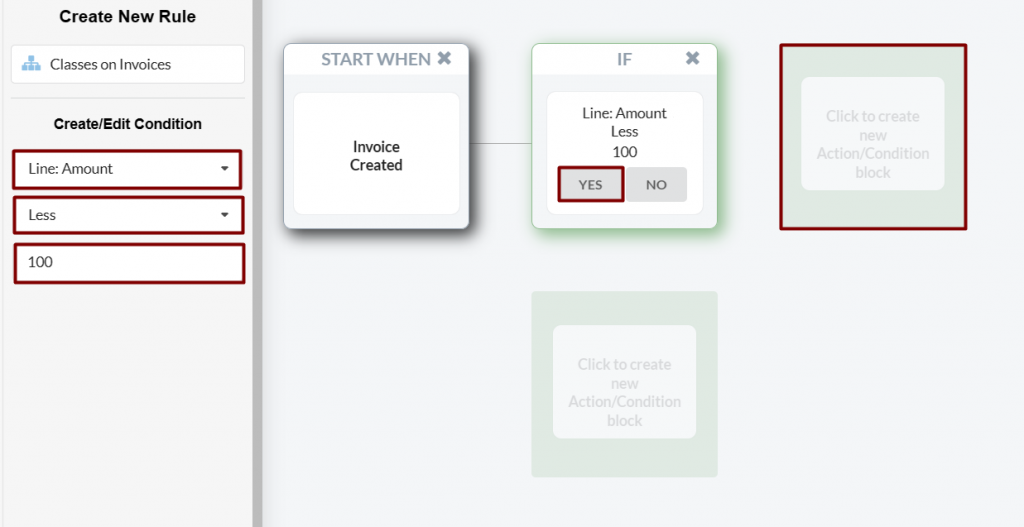
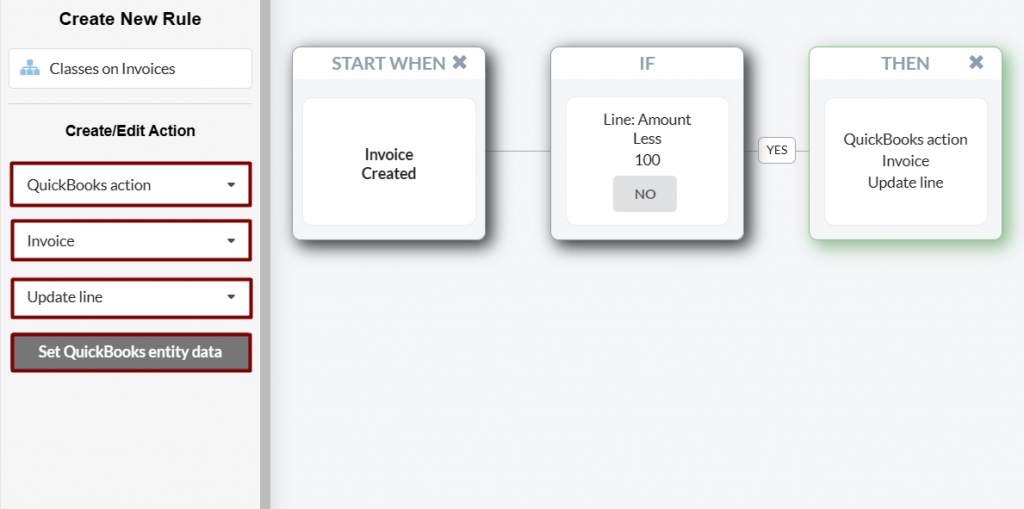
Step 6. Build the rule to meet your criteria. For example, if you want to target transactions where the product amount is less than $100, choose ‘Line: Amount’ → ‘Less’ → ‘100’.
Step 7. Click ‘Yes’ in the ‘IF’ box, then click the box next to it.
Step 8. Click on ‘Action’ in the box that appears.
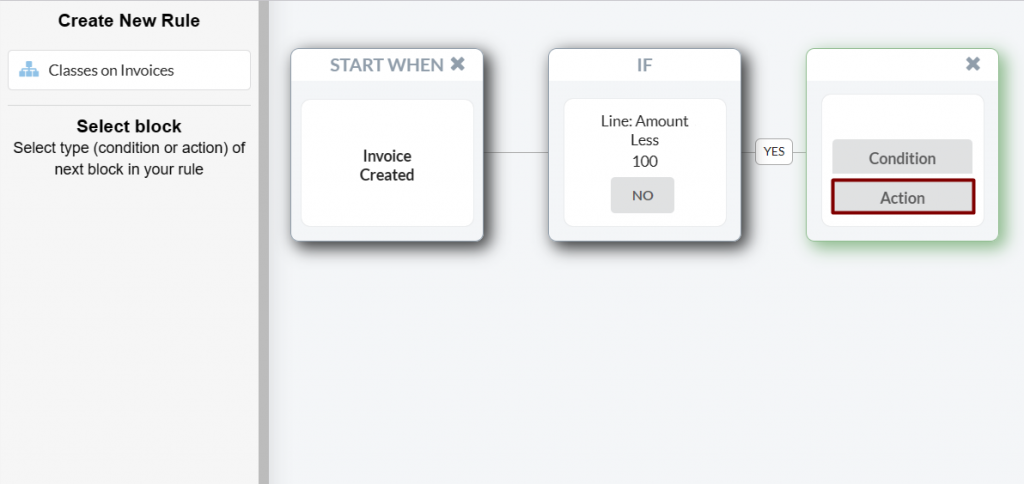
Step 9. From the left-side menu, select ‘QuickBooks action,’ then choose ‘Invoice‘ (or any other entity for which you are creating a rule). After that, choose ‘Update line’ if the condition applies to line items, or ‘Update current’ if it applies to the entire transaction, click on ‘Set QuickBooks entity data’.
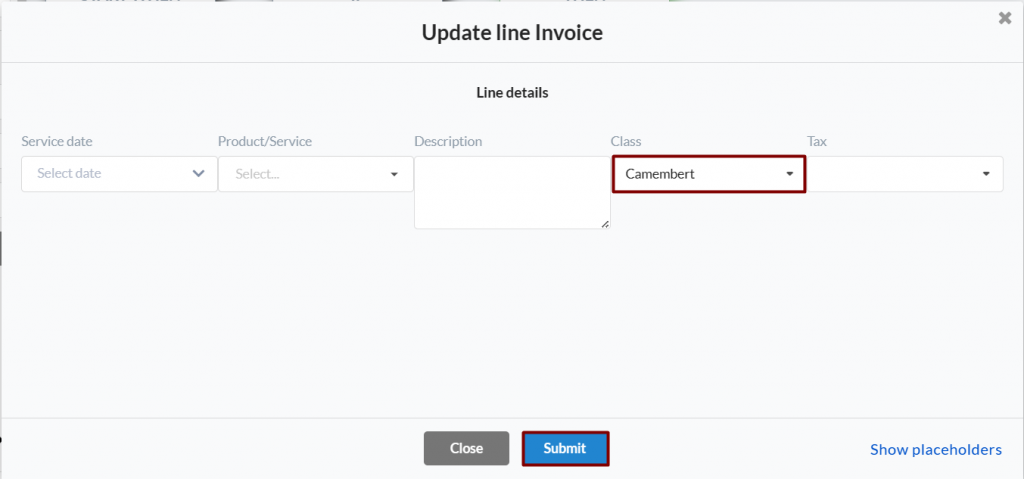
Step 10: Select the desired class or subclass from the dropdown menu and click ‘Submit’.
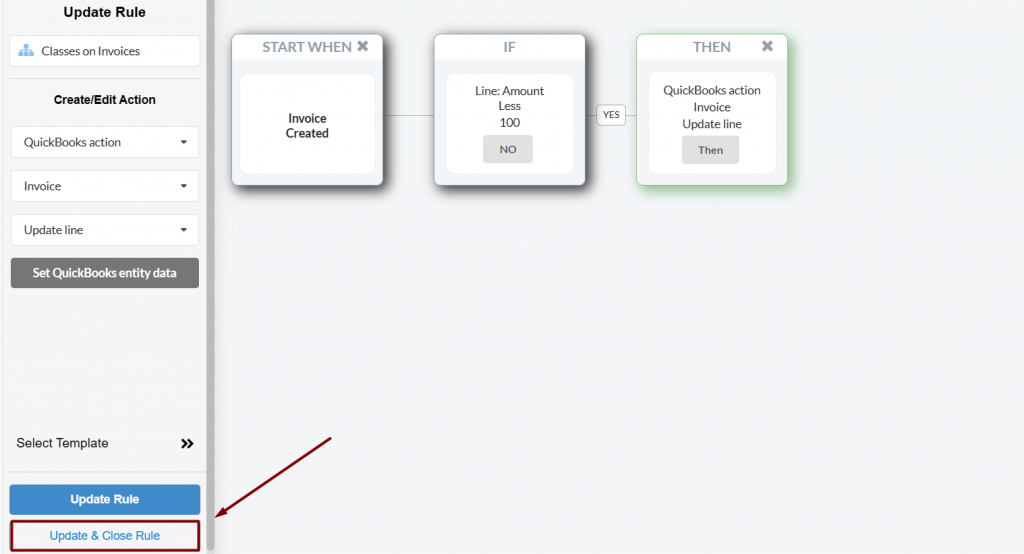
Step 11. In the lower-right corner, click ‘Save & Close’ or ‘Update & Close Rule’ to finalize the rule.
Note: You have the option to set rules based on the total amount, transaction description, customer name, transaction memo. Additionally, you can add multiple conditions to each rule by selecting ‘No’ in the ‘IF’ condition box.
Check the result
To check the result, follow these steps:
1. Navigate to the ‘Platform transactions’ tab.
2. Sync a new transaction that meets the rule’s condition.
3. Click ‘Show in QB’ to view the result.
Note: Information about the smart rule execution can be found under the ‘Sync log.’
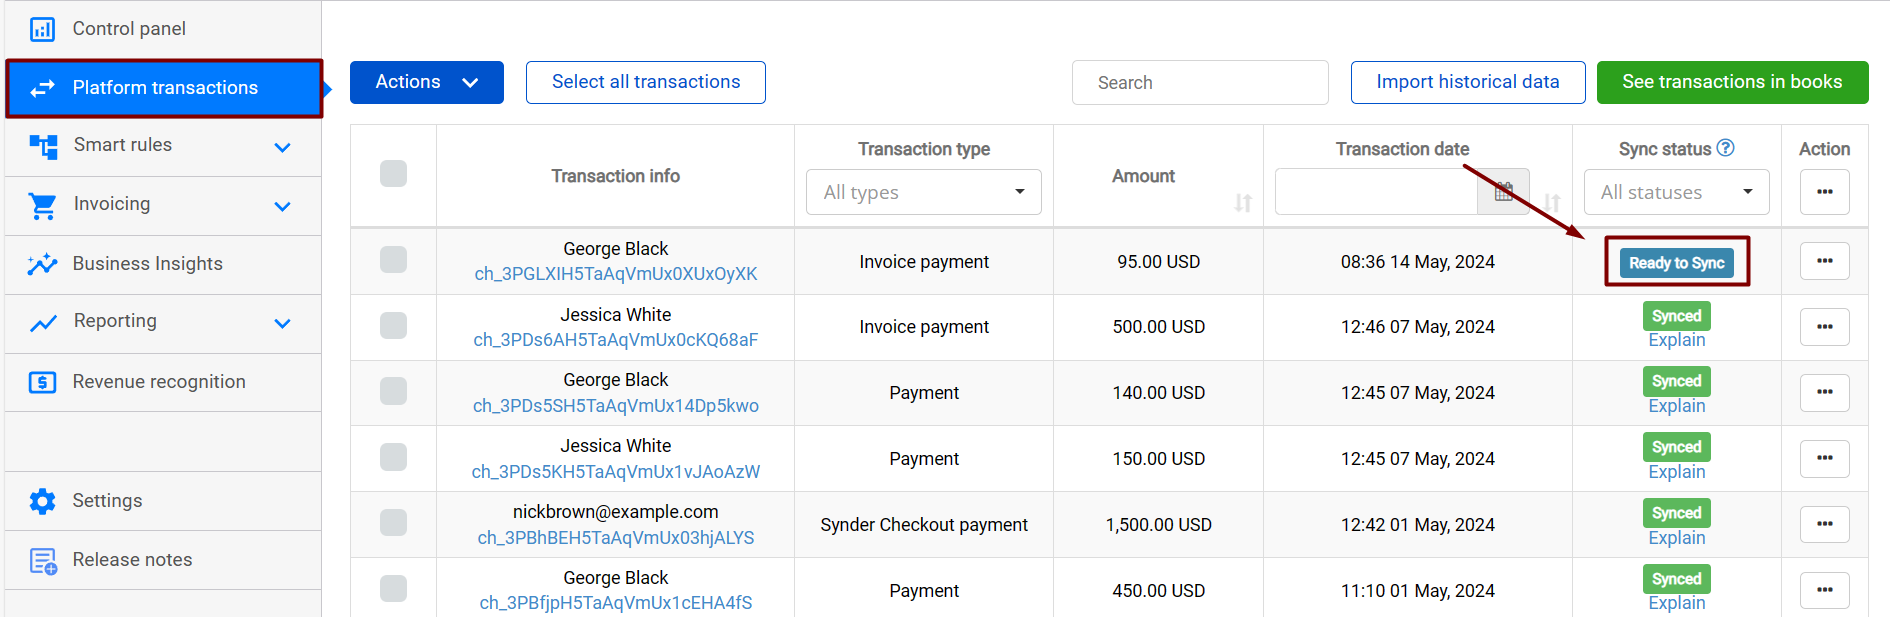
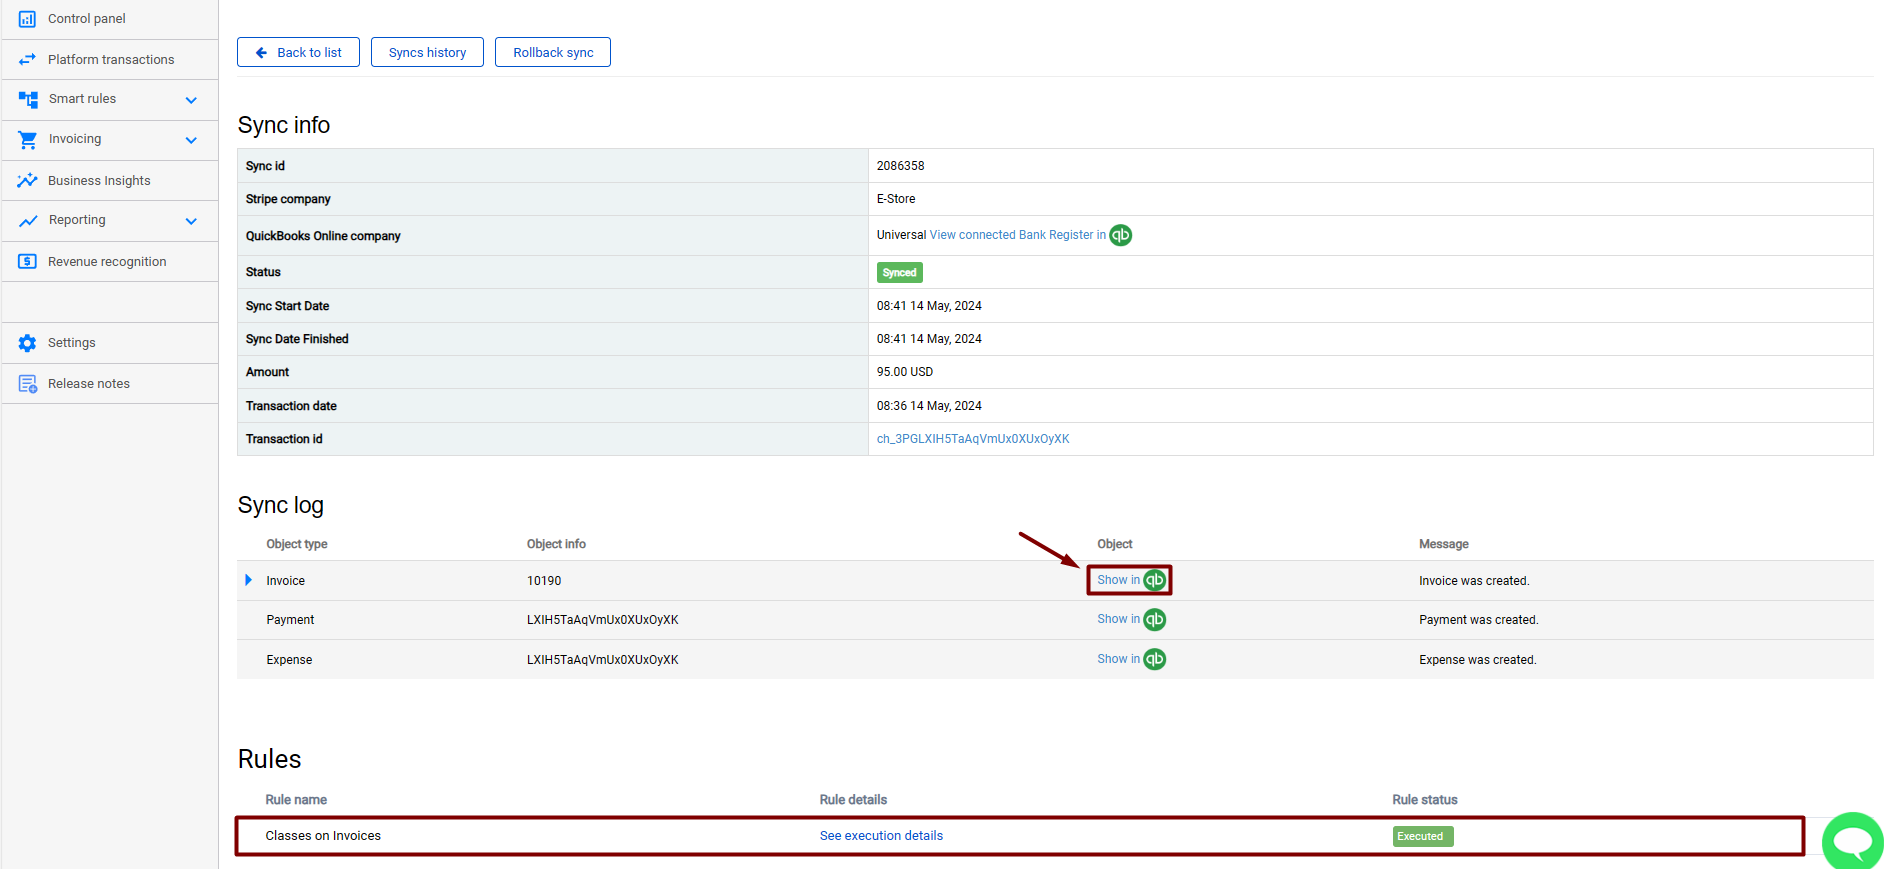
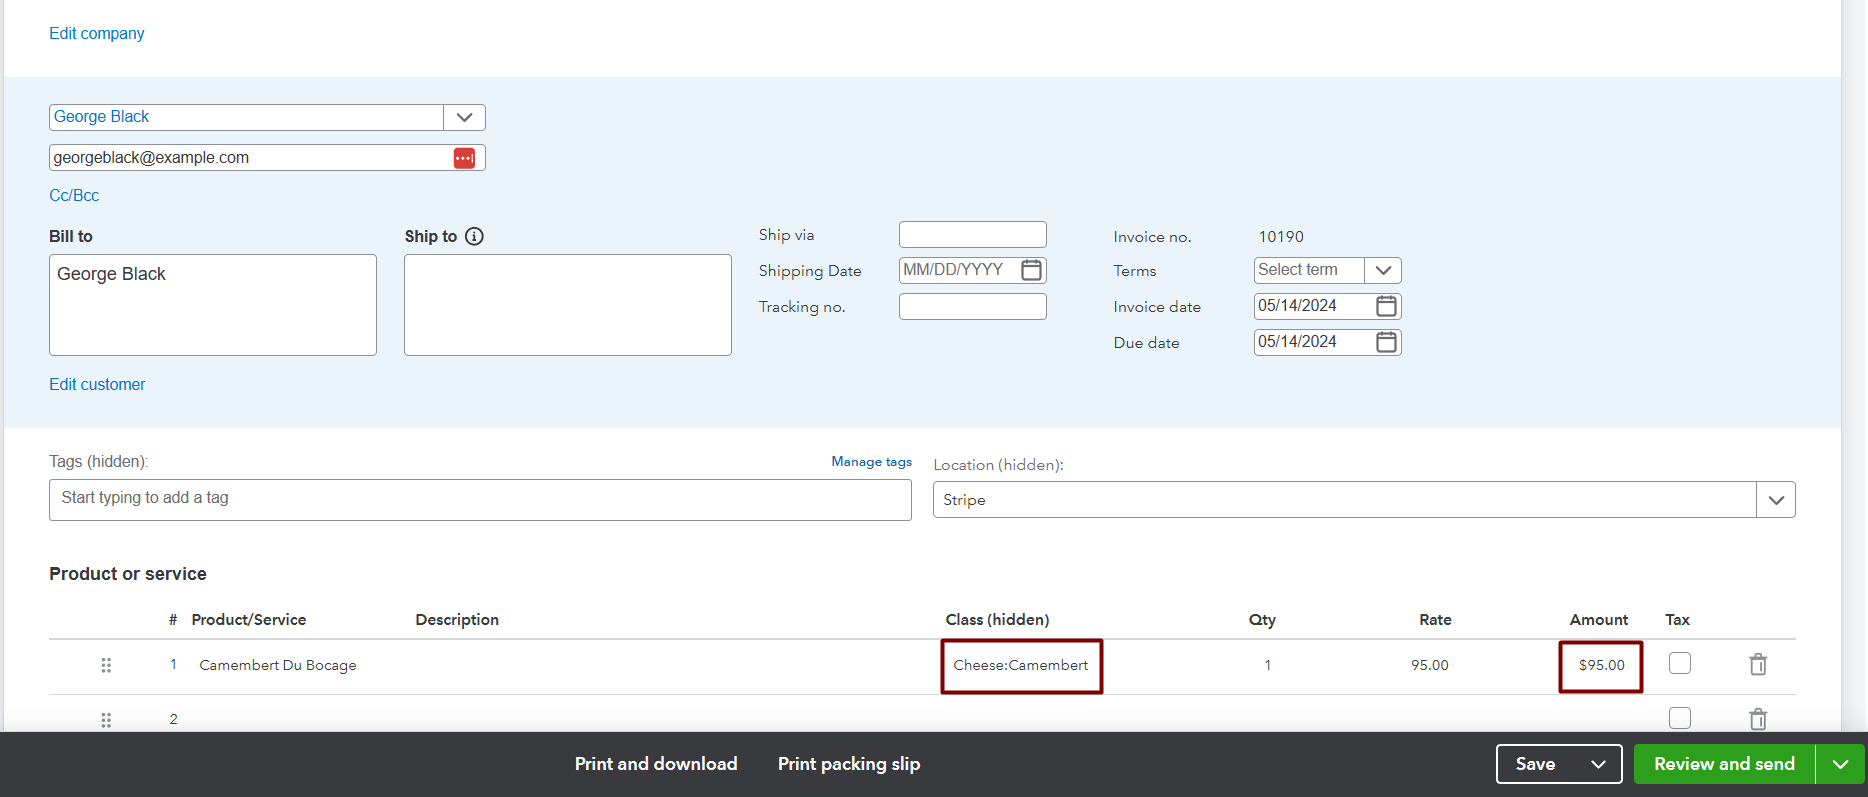
The amount of this transaction was less than 100, so the rule was applied to this invoice, and you can see the subclass was added automatically.
Run the report to see the results
To check a report by classes in QuickBooks Online, follow these simple steps:
1. Sign in to QuickBooks Online.
2. Go to Reports: Search for ‘Profit and Loss by Class’ or another class-related report.
3. Customize the Report: Apply any necessary filters.
4. Run the Report: Click ‘Run report’ to view your data.
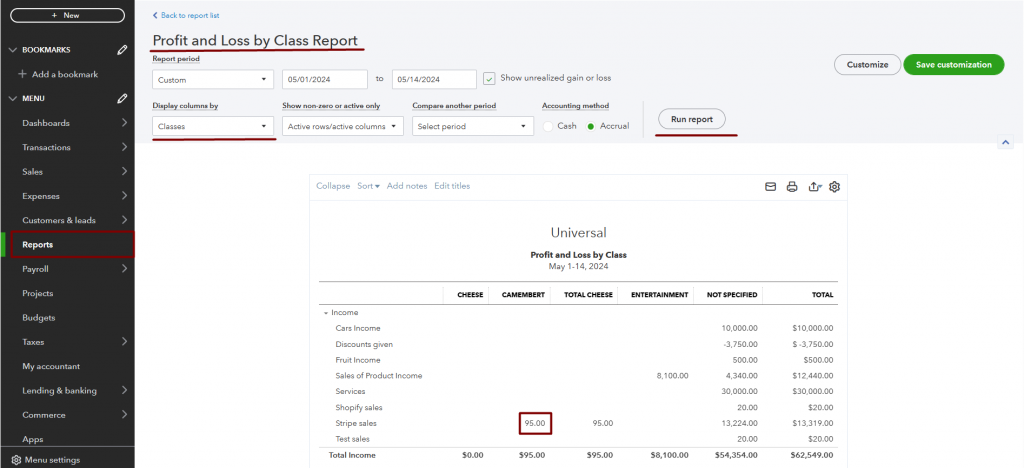
Congratulations, now you know how to automatically assign classes to transactions!
Reach out to Synder Team via online support chat, phone, or email with any questions you have – we’re always happy to help you!