
Synder’s Transaction Verification feature ensures that data imported from your sales platforms aligns perfectly with records in Synder. This guide will help you correctly fill out the required template for verification.
Step 1: Prepare the template file
To initiate verification, you must upload a file containing data from the integration you wish to verify transactions for.
Download the template
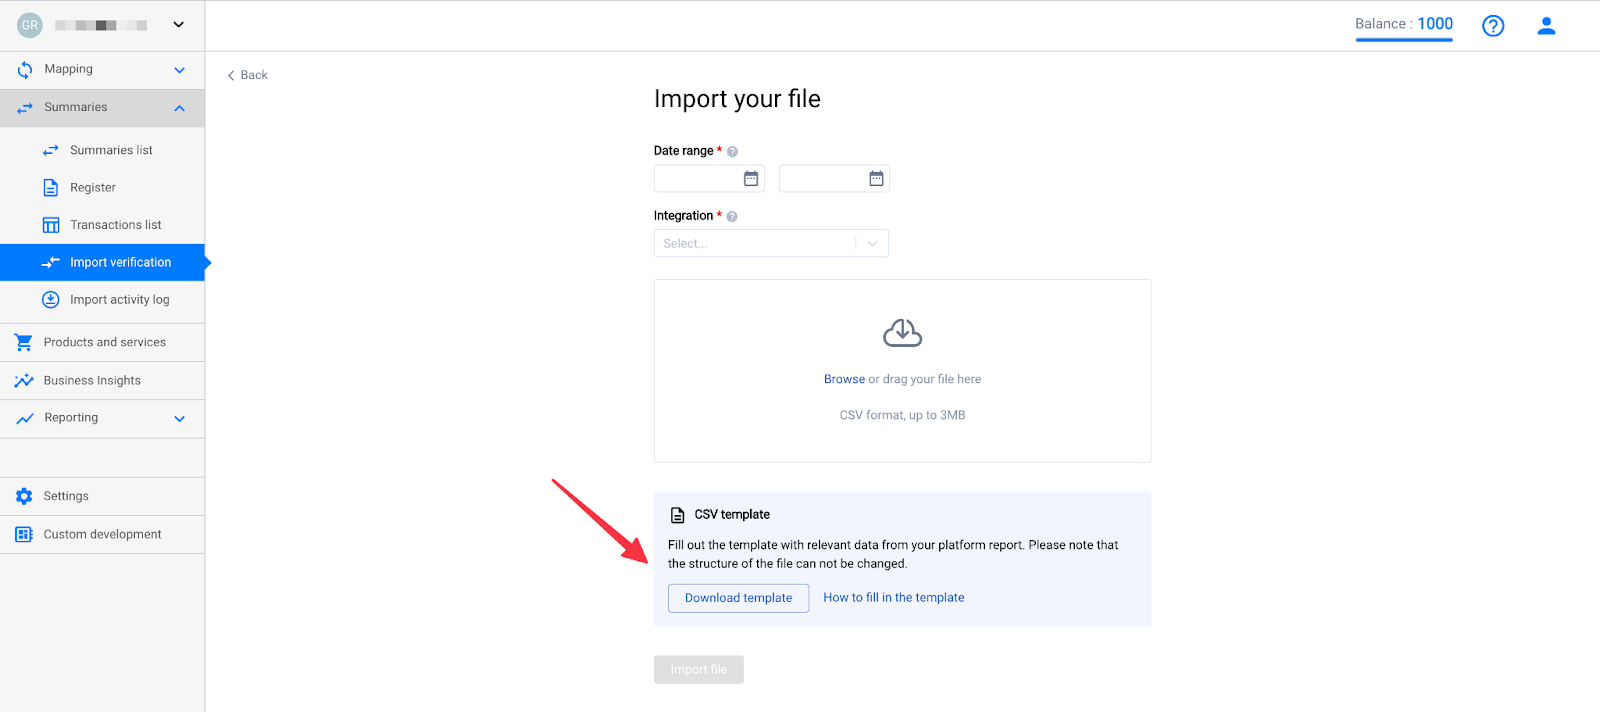
- Go to the Transaction Verification page.
- Click New Verification
- Locate the CSV Template section and click the Download template button.
- Save the template to your device.
Step 2: Fill out the template
Let’s review the required fields in the template and how to fill them correctly:
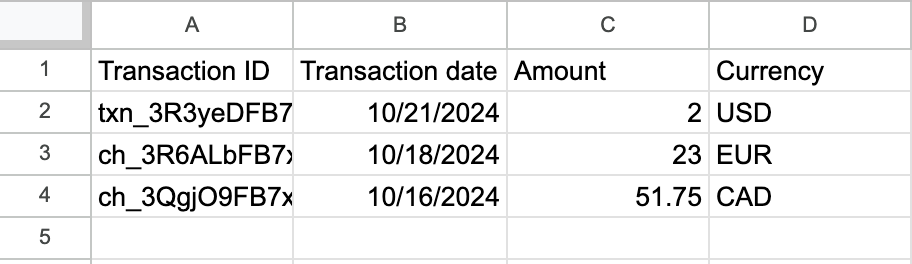
1. Transaction ID
The unique identifier for each transaction should come from the export file provided by the sales platform. Synder will automatically try to match it with transaction IDs listed in the Platform transaction tab, under the Transaction info column.
Note: This field is mandatory. Leaving it blank will result in a failed upload.
2. Transaction date/time
The date and time must be in the format MM/dd/yyyy.
Example: 10/21/2024
3. Amount
The total value of the transaction.
4. Currency
Make sure to use the 3-letter ISO currency code (e.g., USD, AUD, CAD, GBP).
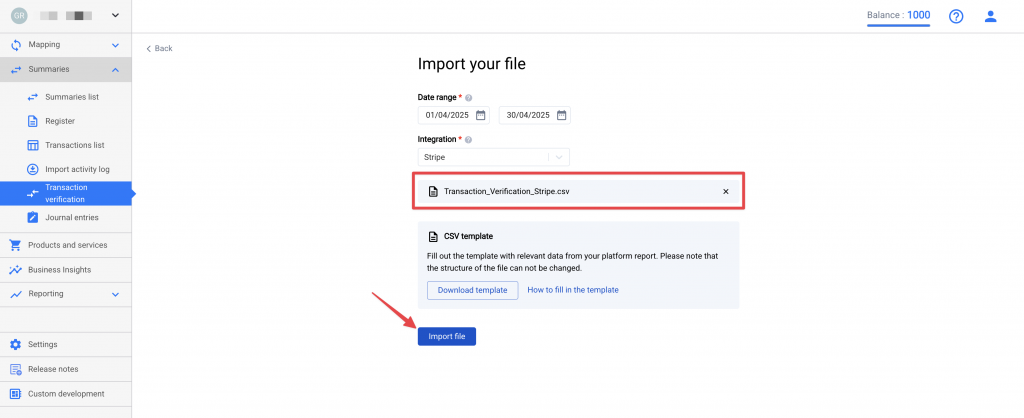
Step 3: Validate and upload the file
Once your file is ready:
- Upload it to the Transaction Verification page.
- Synder will automatically validate the file to ensure it meets the format requirements.
If there’s an issue, Synder will display an error message that includes:
- The row number with the issue.
- Details about the specific error.
Final notes
Taking the time to carefully complete the template will ensure smooth verification of your imported data. For further assistance, feel free to reach out to Synder support.