
This guide explains how to reconcile bank deposits when your Synder integration does not support automatic payouts.
In this case, transfer funds manually from the integration’s Clearing account to the Checking account to ensure accurate bank reconciliation.
Use this guide if:
- You use QuickBooks Online, QuickBooks Desktop or Xero.
- No payout transactions are created in Synder
- Your Clearing account balance keeps increasing
- Your integration is one of the following:
Afterpay, Authorize.Net, BigCommerce, Bluefin, Braintree, Clover, Ecwid, Faire, LawPay (AffiniPay), Magento, Walmart, Wix, Klarna.
Do not use this guide if:
- Your integration supports automatic payouts
- You’re troubleshooting a difference inbalances
After completing this process:
- Your Clearing account balance will decrease
- Your Checking account reflects the transferred funds
- Your bank reconciliation difference becomes $0.00
QuickBooks Online
You can account for transfers using one of the following methods:
- If the deposit description contains your platform name, create a bank rule.
- If the description does NOT contain your platform name, record the transfer manually.
Option 1: Create a bank rule
- Go to Transactions → Rules.
- Click New rule.
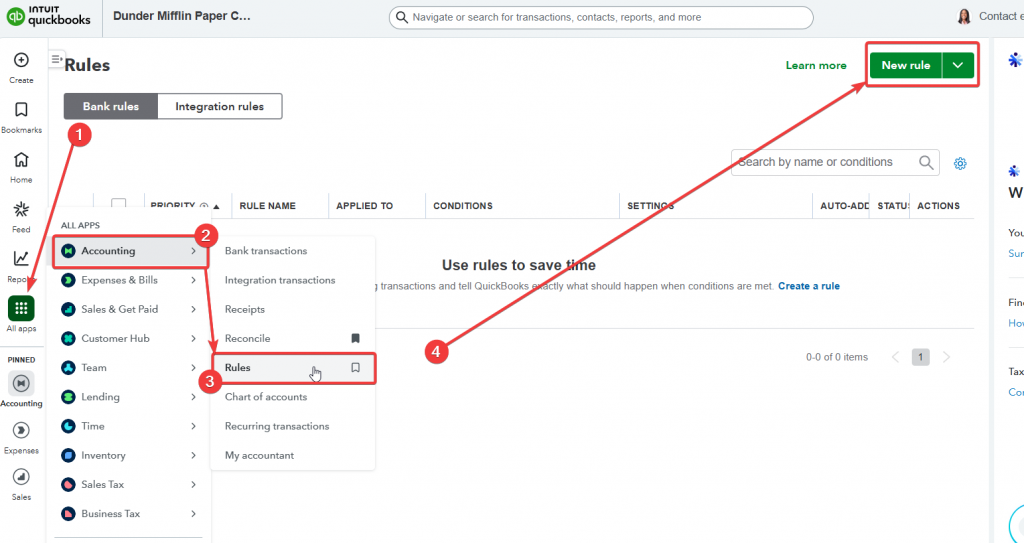
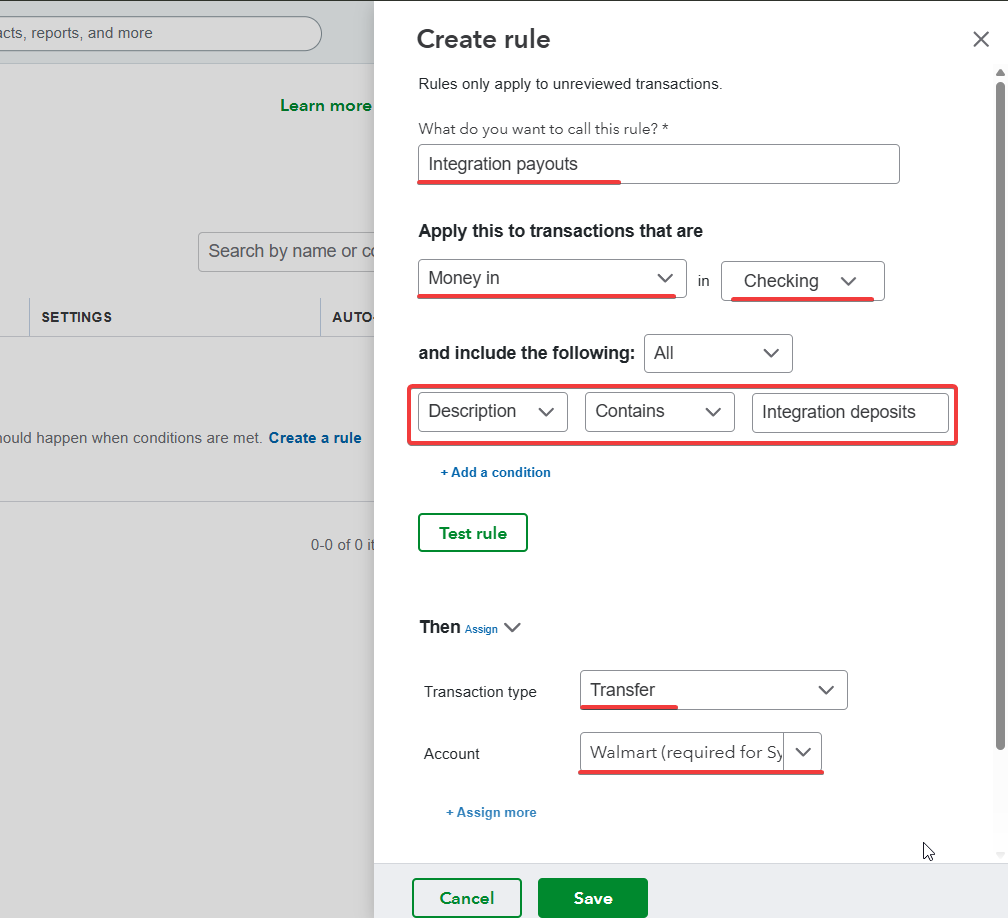
- Name the rule after your integration.
- Apply to: Money in and select the bank account receiving deposits.
- Set condition: Description → contains → [Platform name].
- In Transaction type, select Transfer. In the account section, choose your integration’s Clearing account.
- Click Save.
Future deposits that meet this condition will trigger a transfer of the same amount from the integrations clearing account.
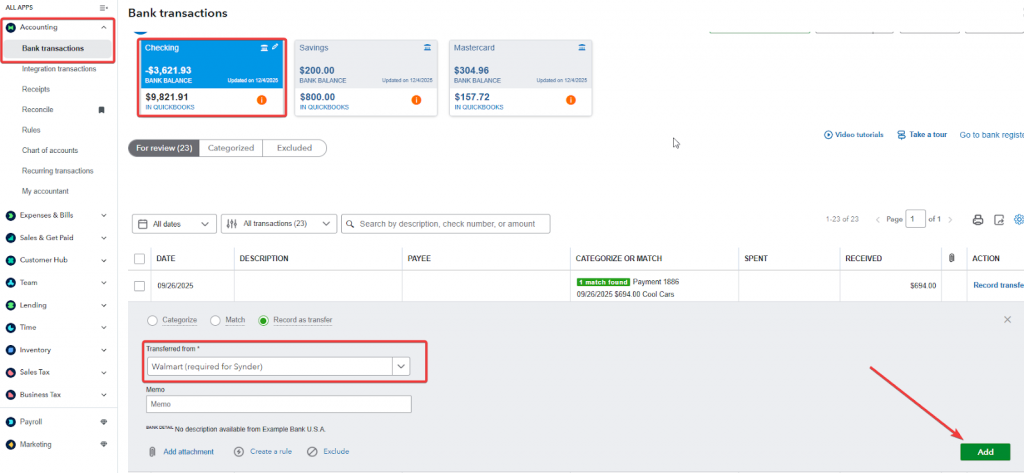
Option 2: Record the transfer manually
- Open the deposit for review.
- Select Record as transfer.
- In the “Transferred from” field, choose your integration’s Clearing account.
- Click Add.
QuickBooks Desktop
In reconciling in QuickBooks Desktop, you would need to create a manual transfer of funds from the Clearing account to the Checking account, and do the matching afterward.
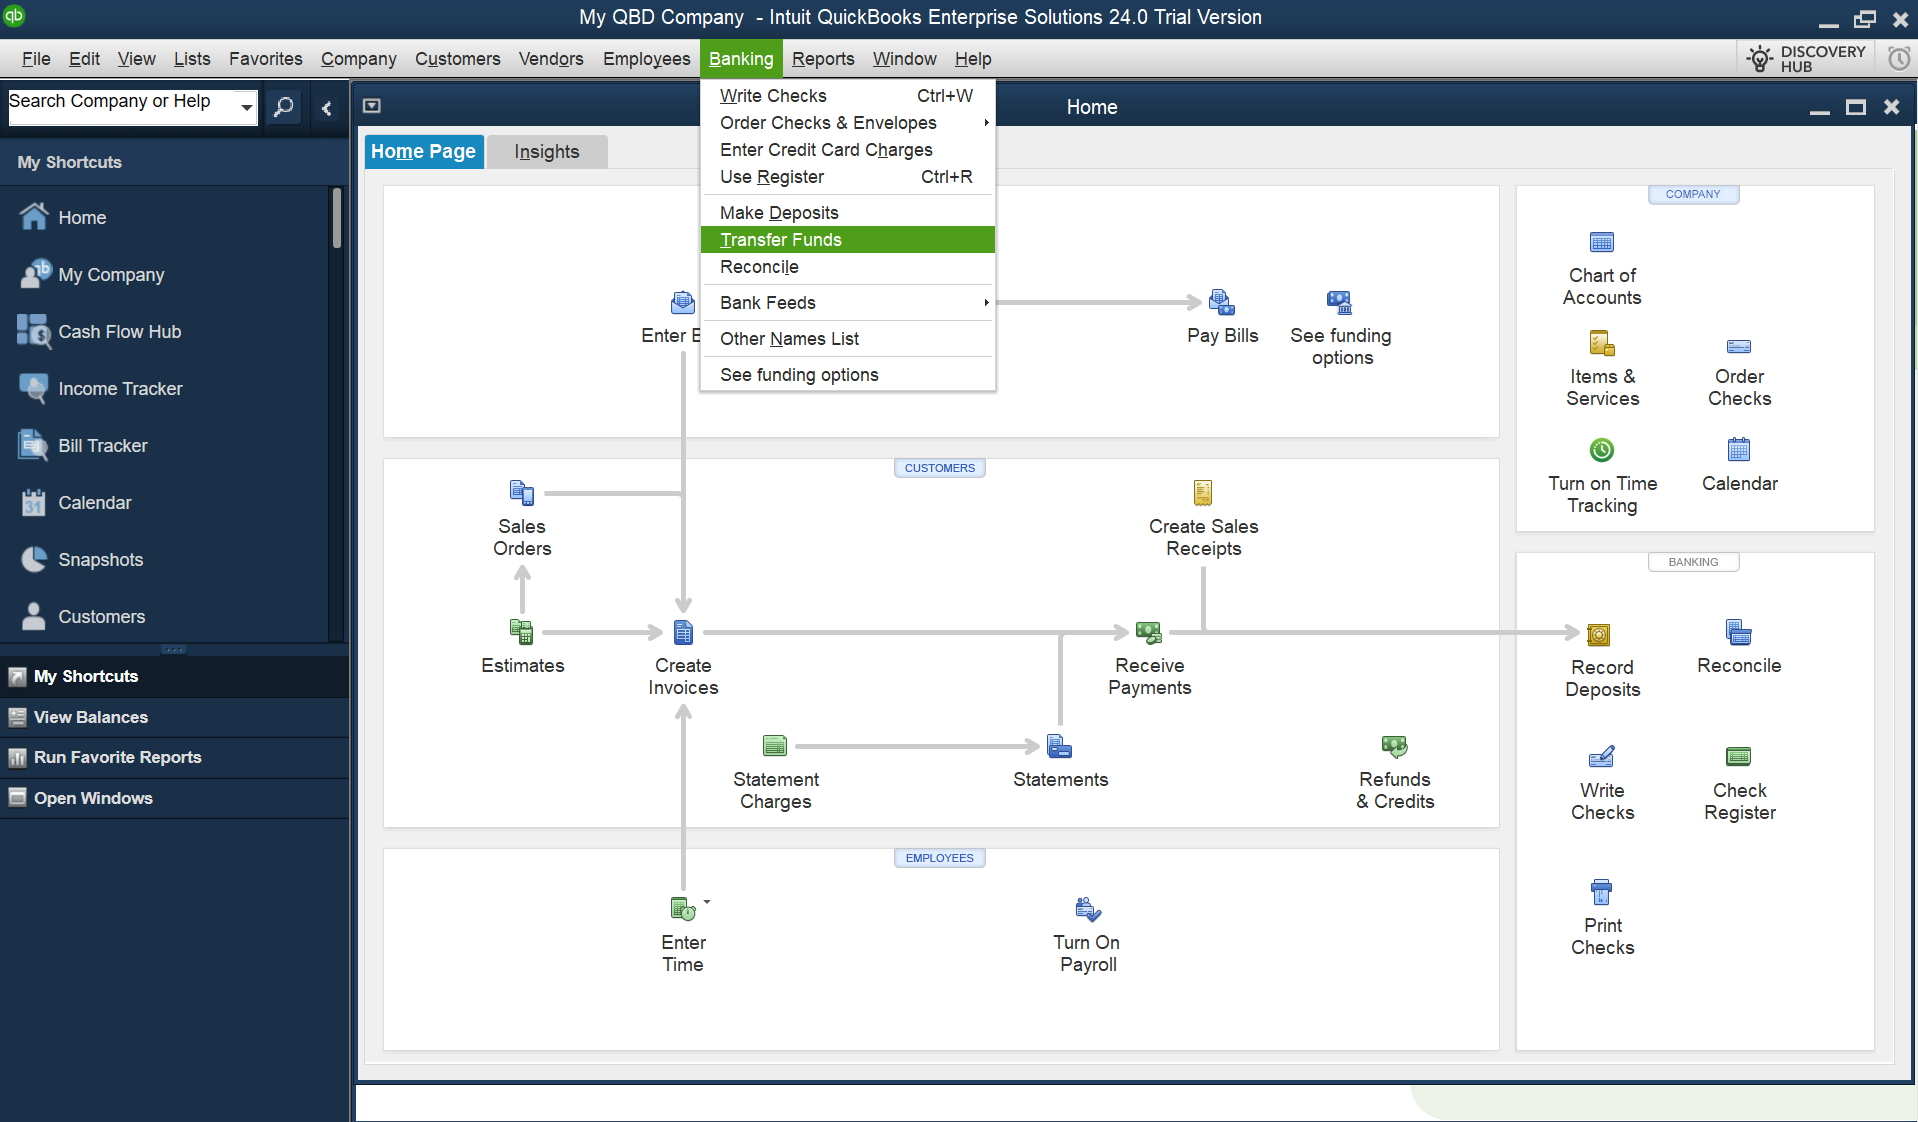
I. Create a manual transfer
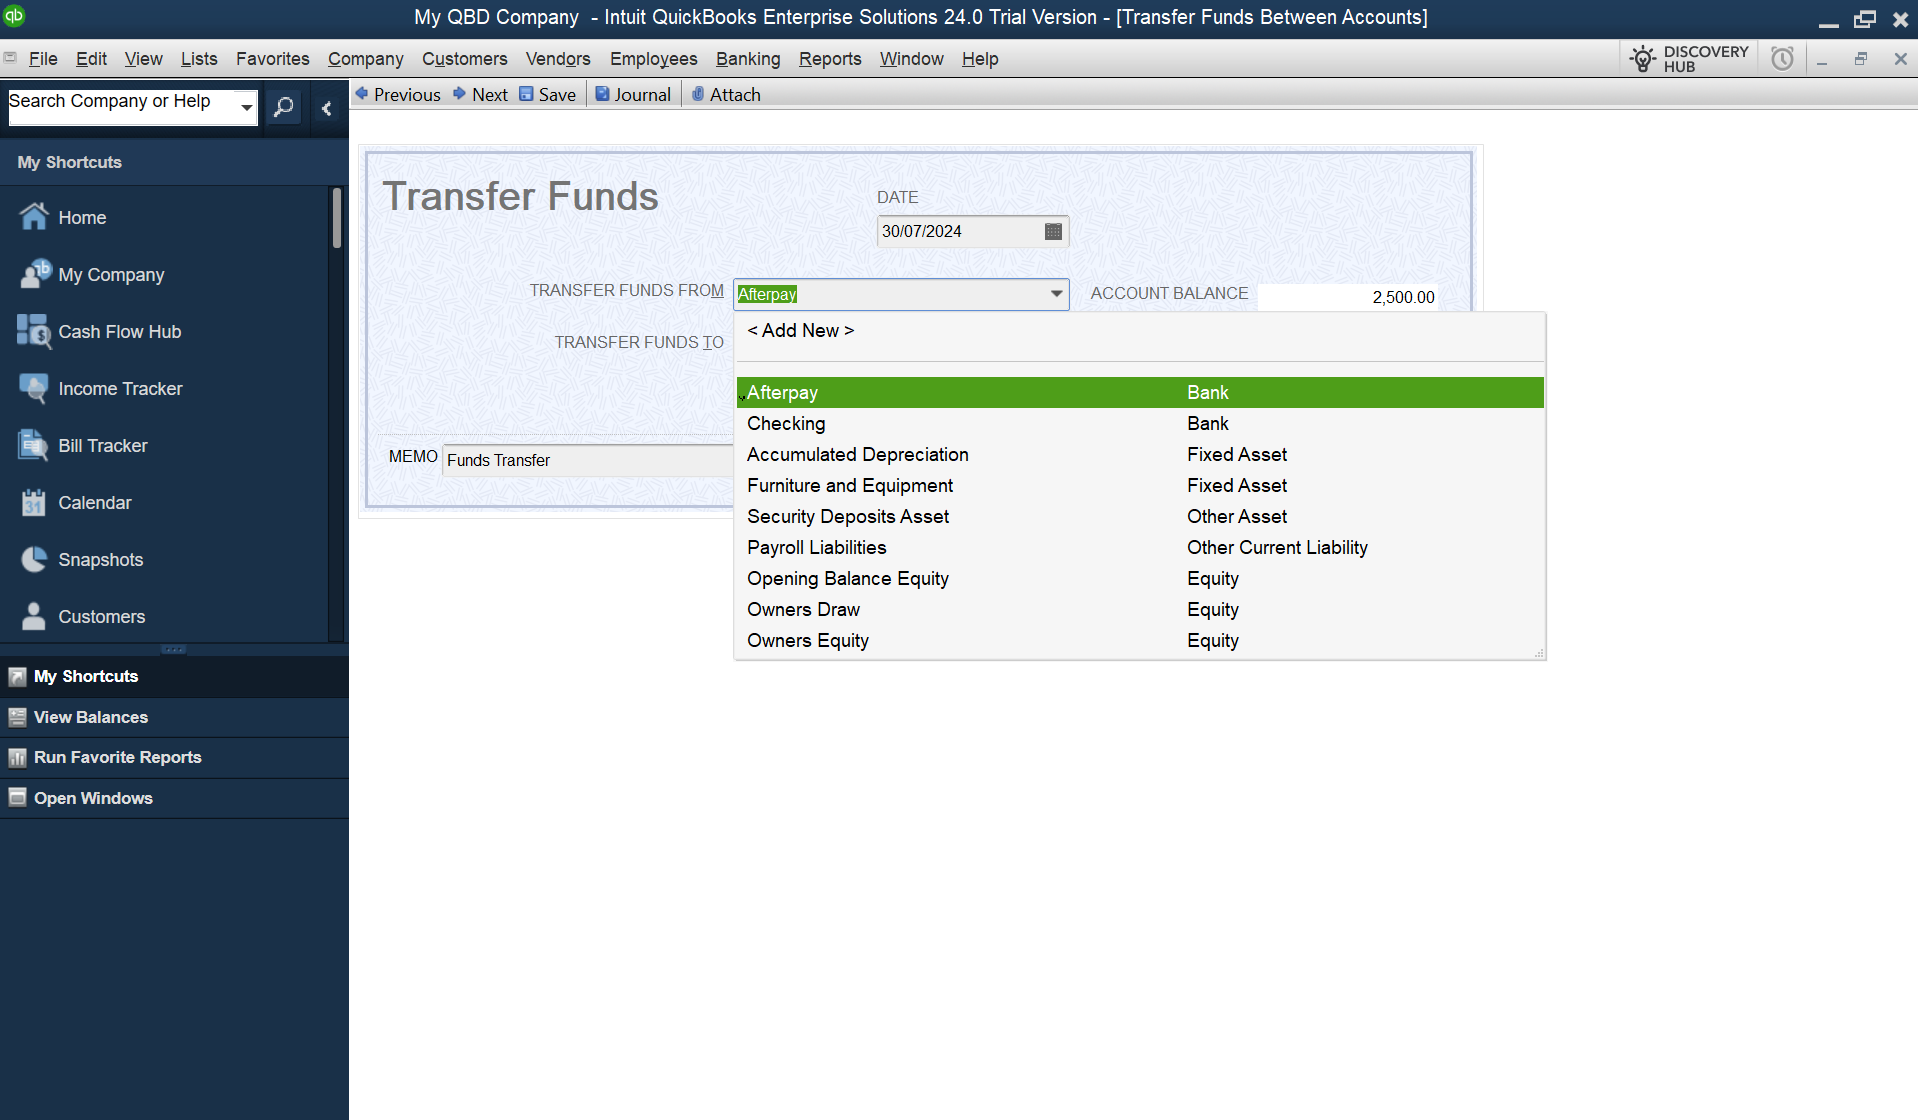
- Go to the Banking menu and select Transfer Funds.
- In the TRANSFER FUNDS FROM field, select your integration’s Clearing account.
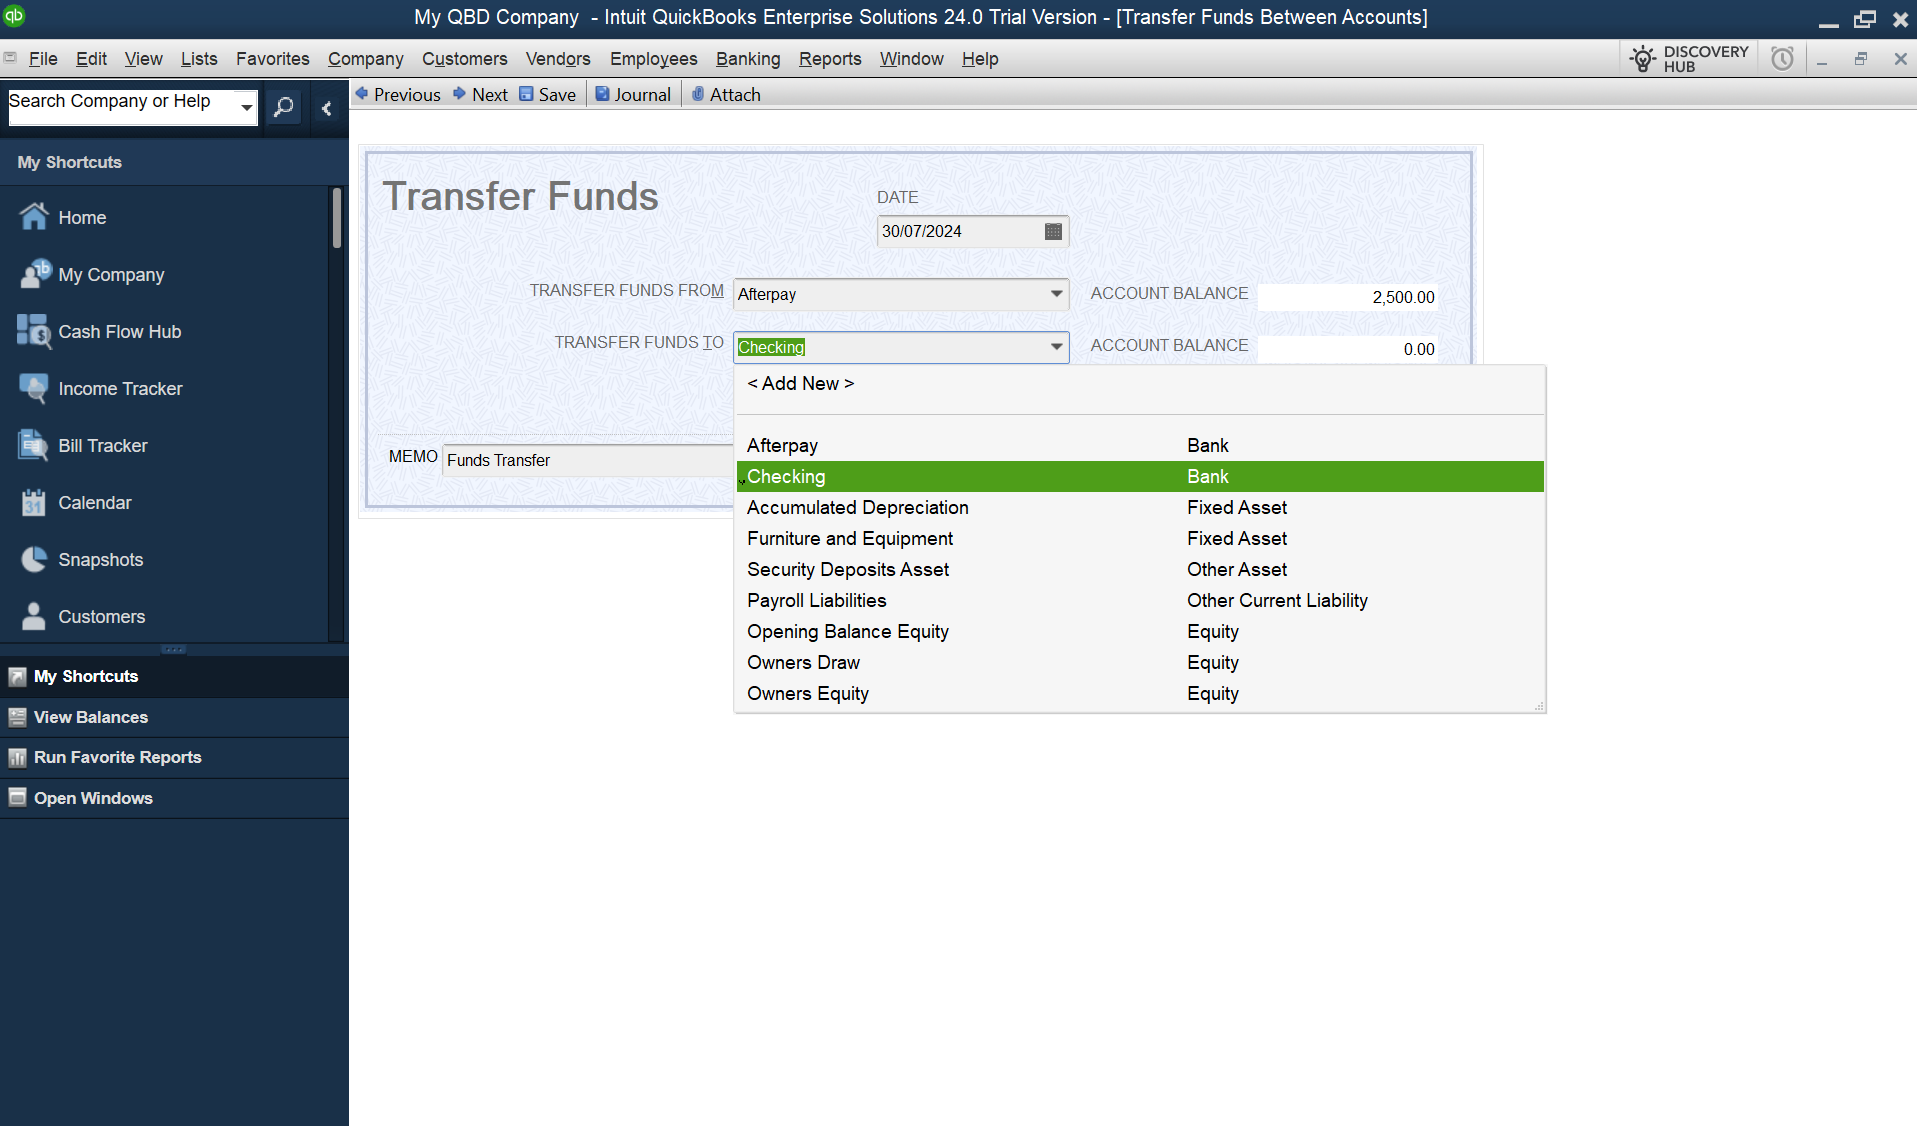
- In the TRANSFER FUNDS TO field, select the Checking account.
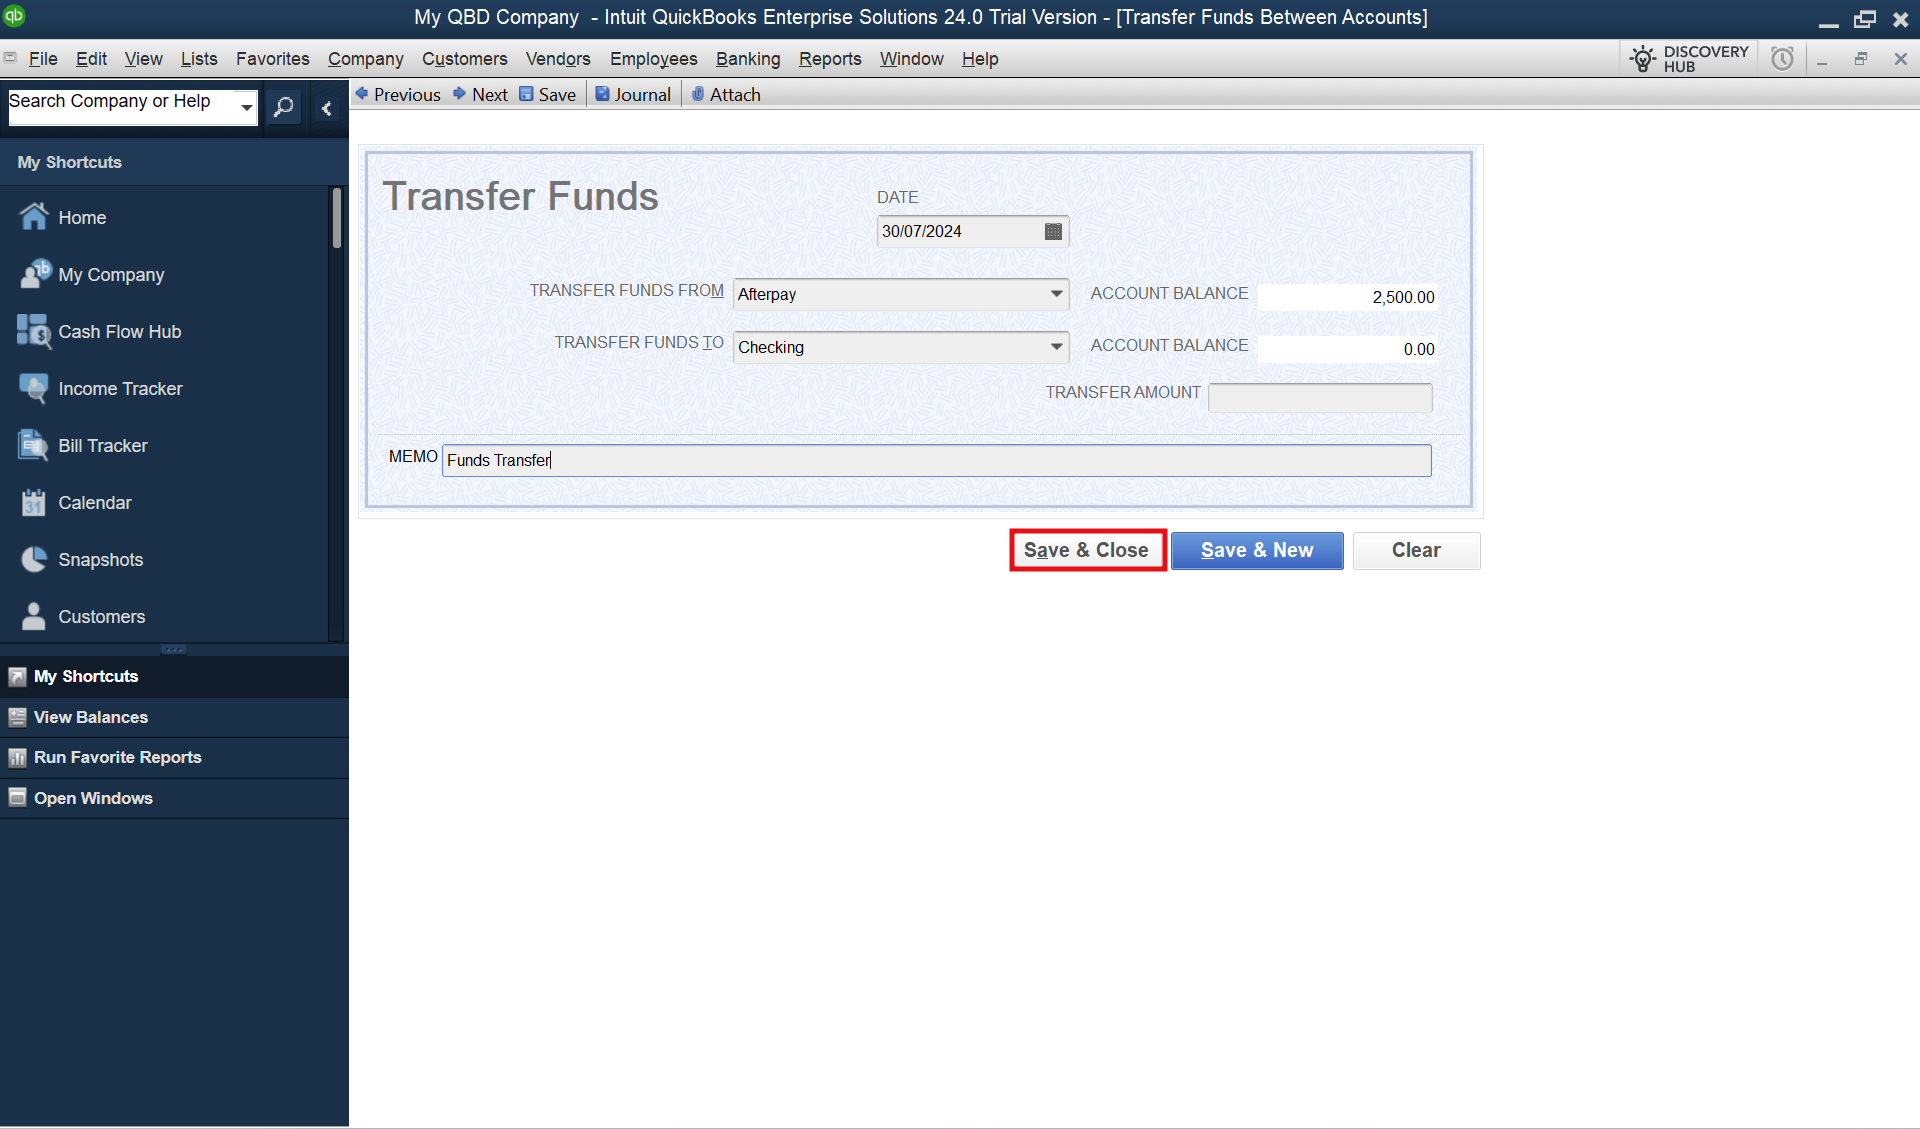
- Enter the amount and click either Save & Close or Save & New.
II. Match the transfer with the bank statement
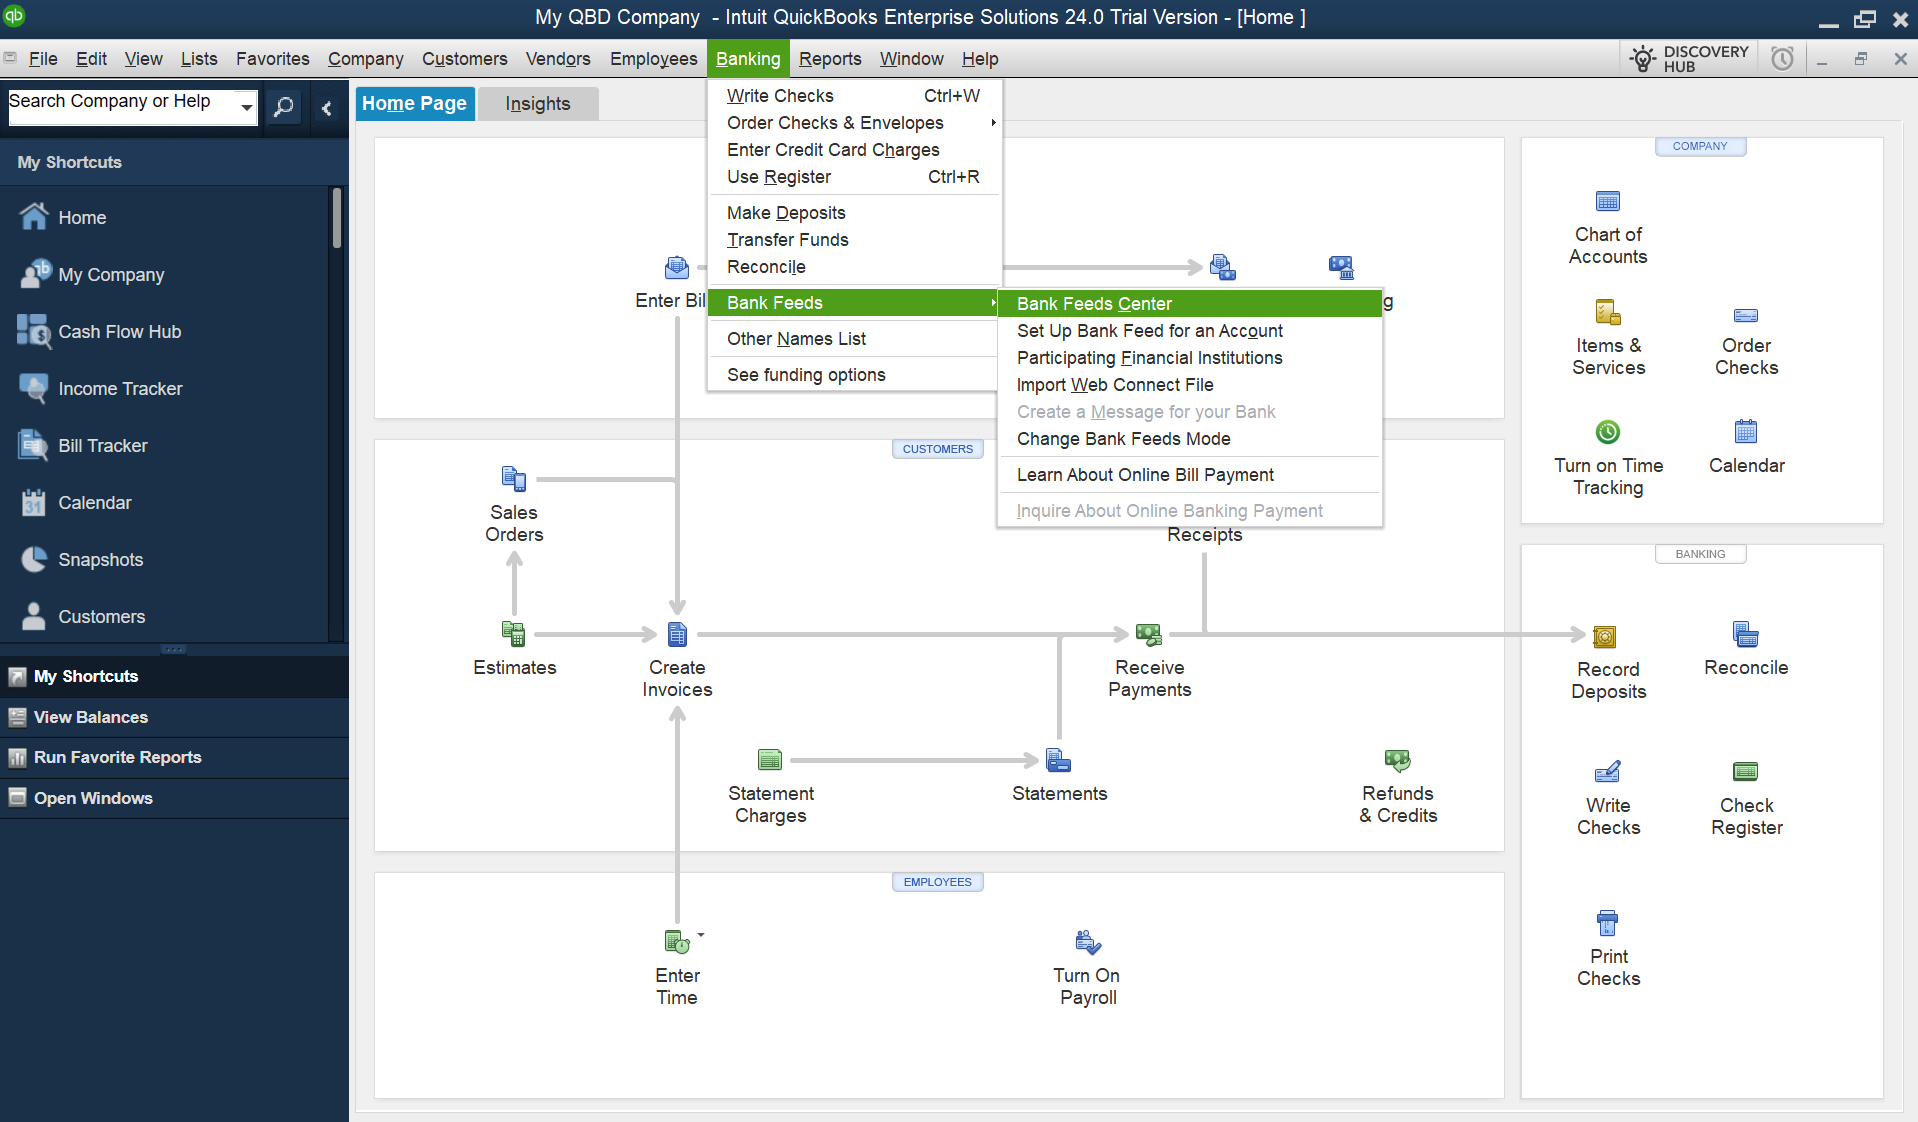
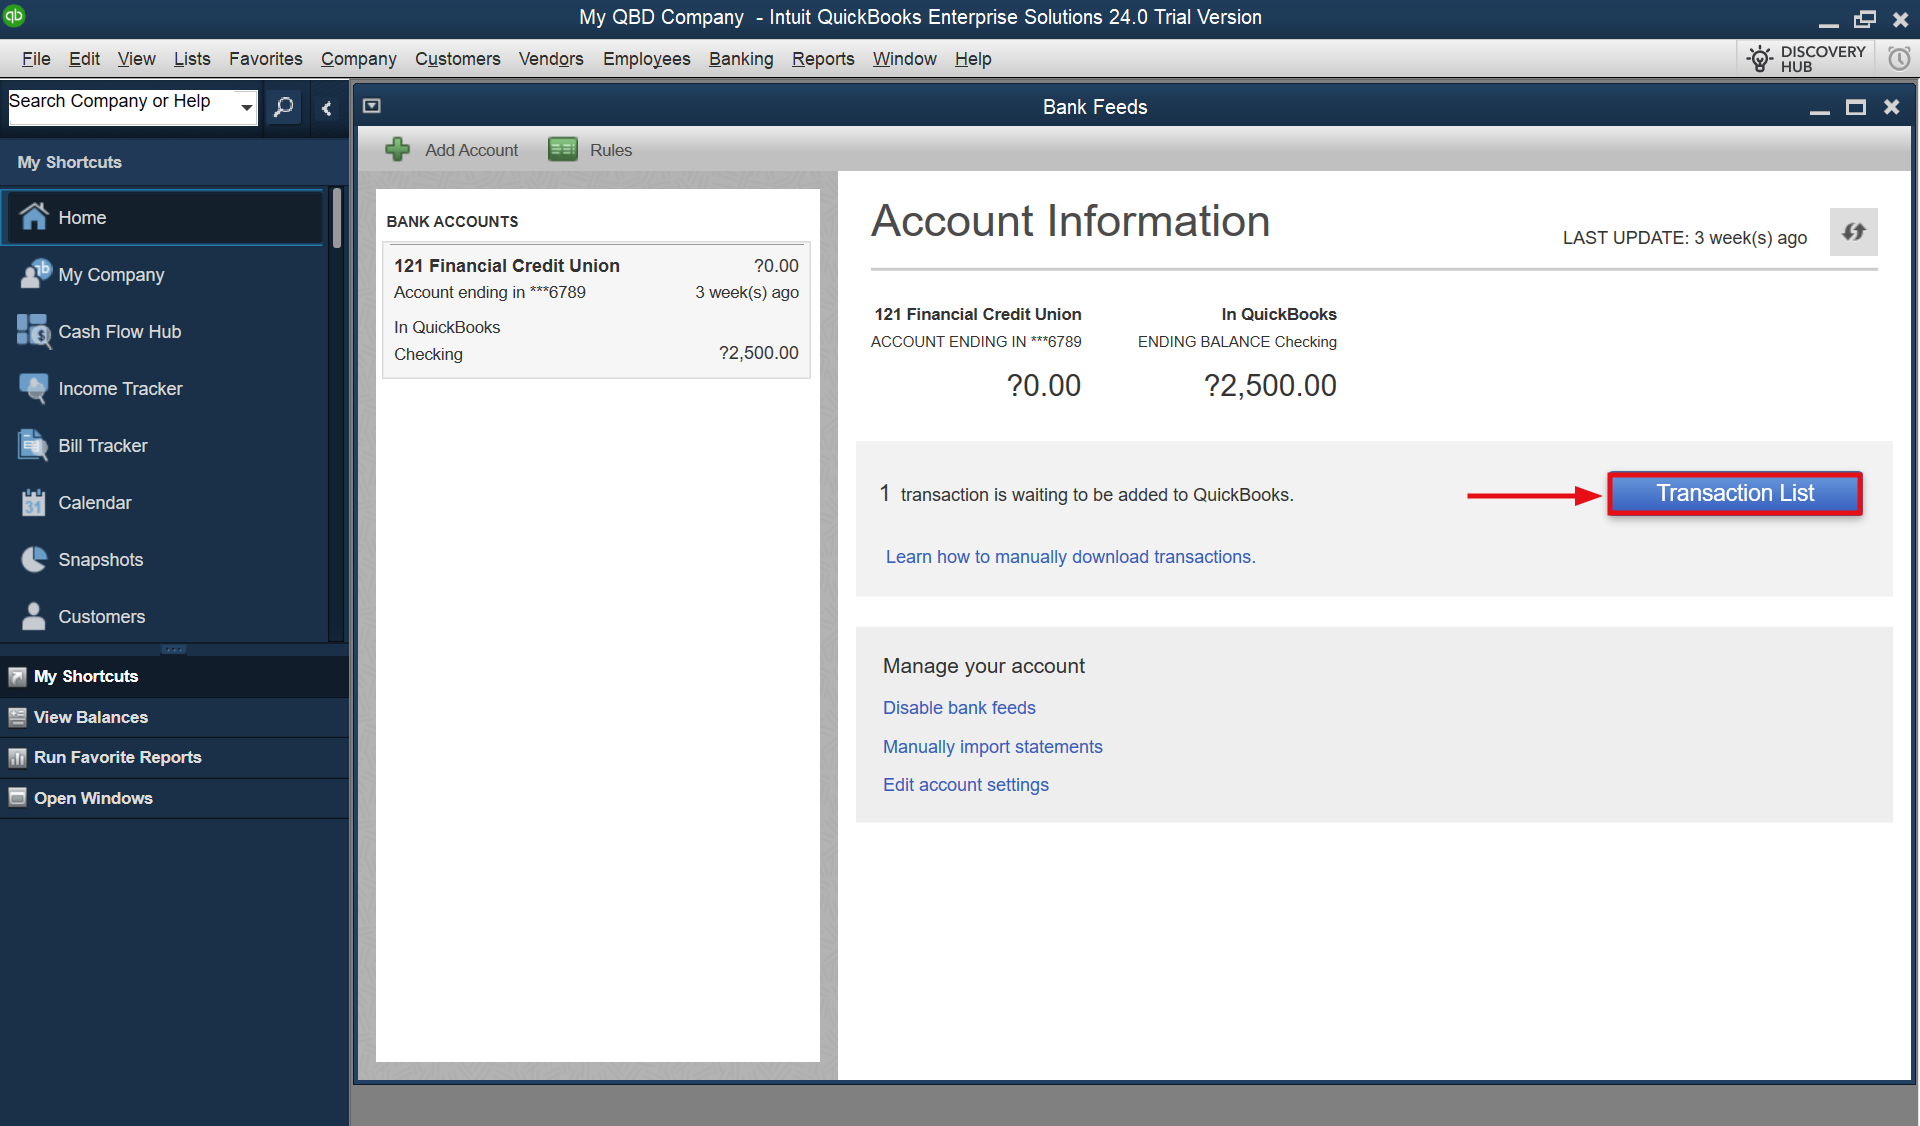
- Navigate to the Banking menu, go to Bank Feeds and select Bank Feeds Center.
- In the Bank Feeds Center, click on the Transaction List to view your bank transactions.
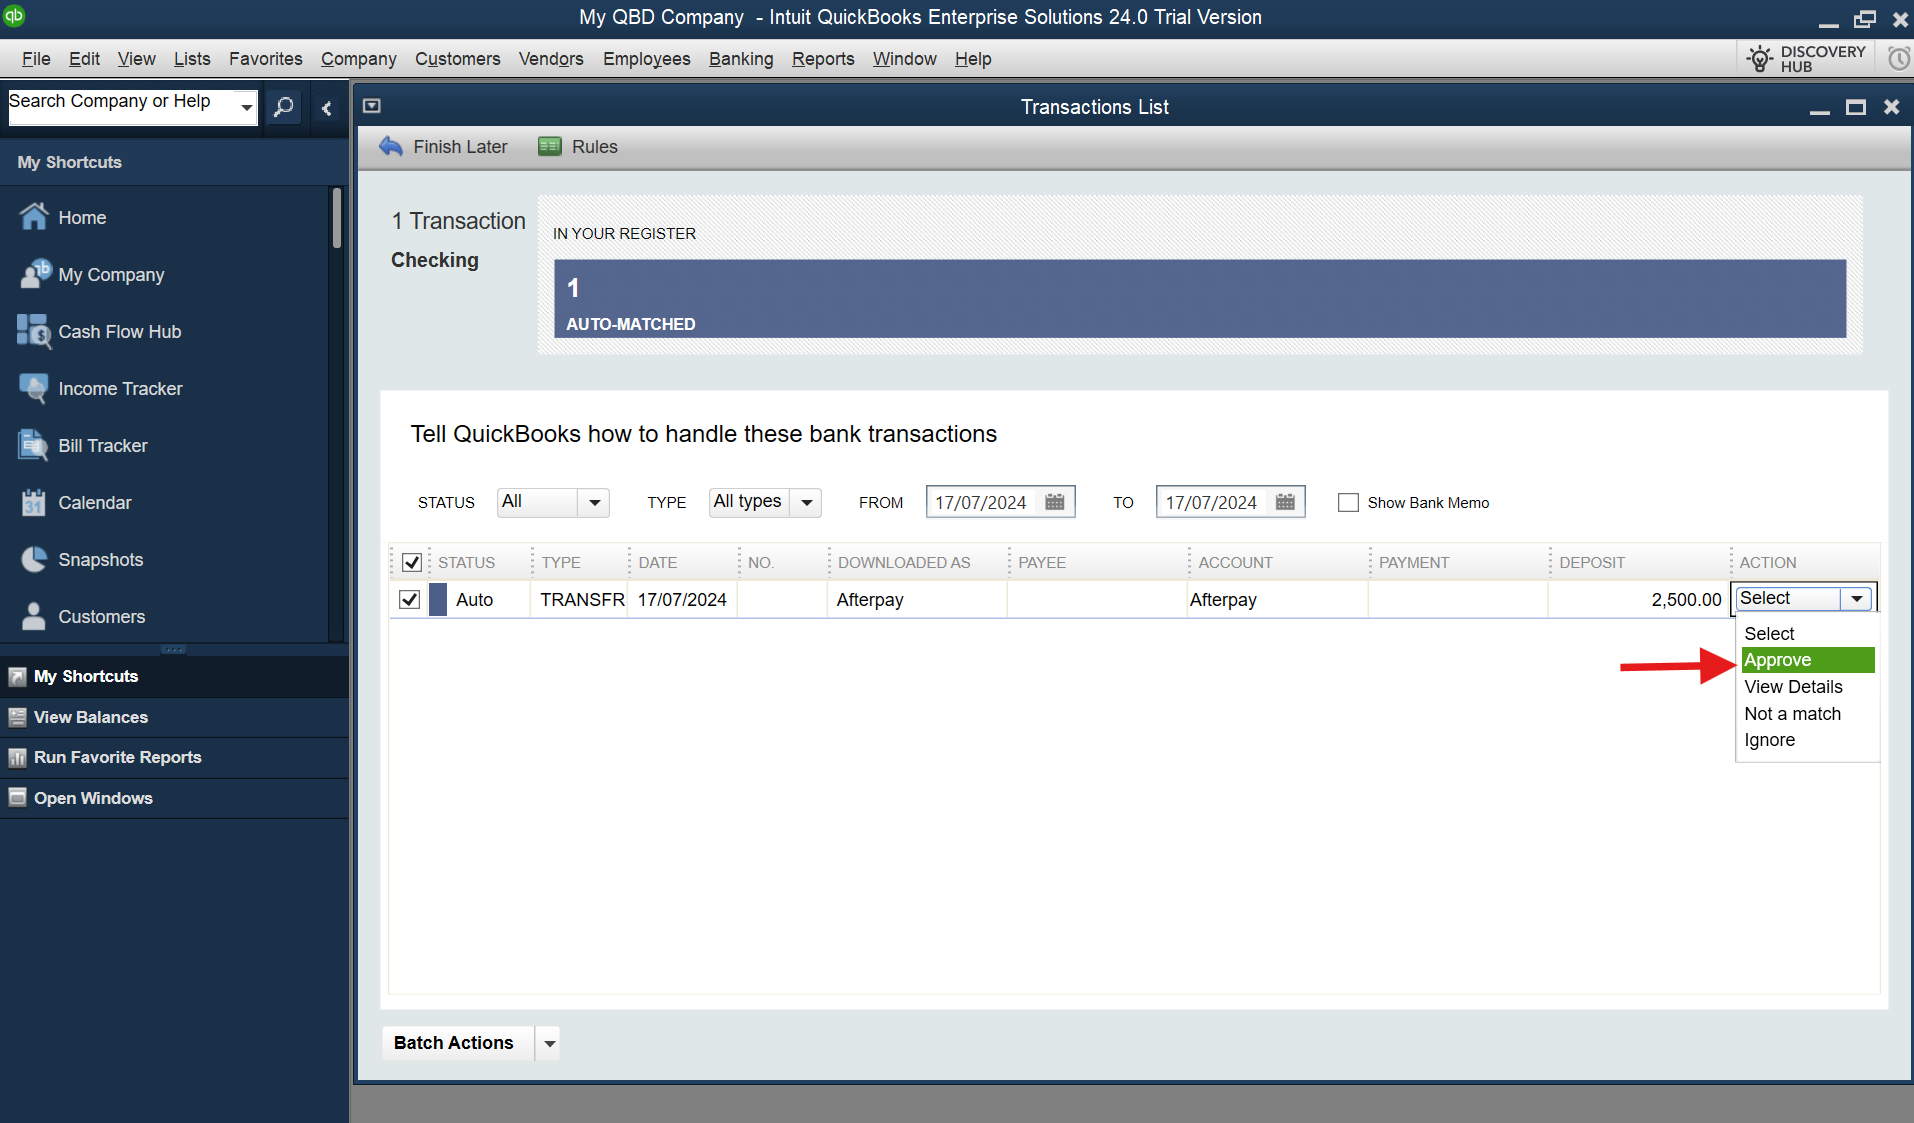
- Look for the manual transfer in the list of transactions. QuickBooks should automatically match it with the corresponding deposit in your bank feed.
- Once the transfer is matched with the deposit, click on Approve to confirm the match.
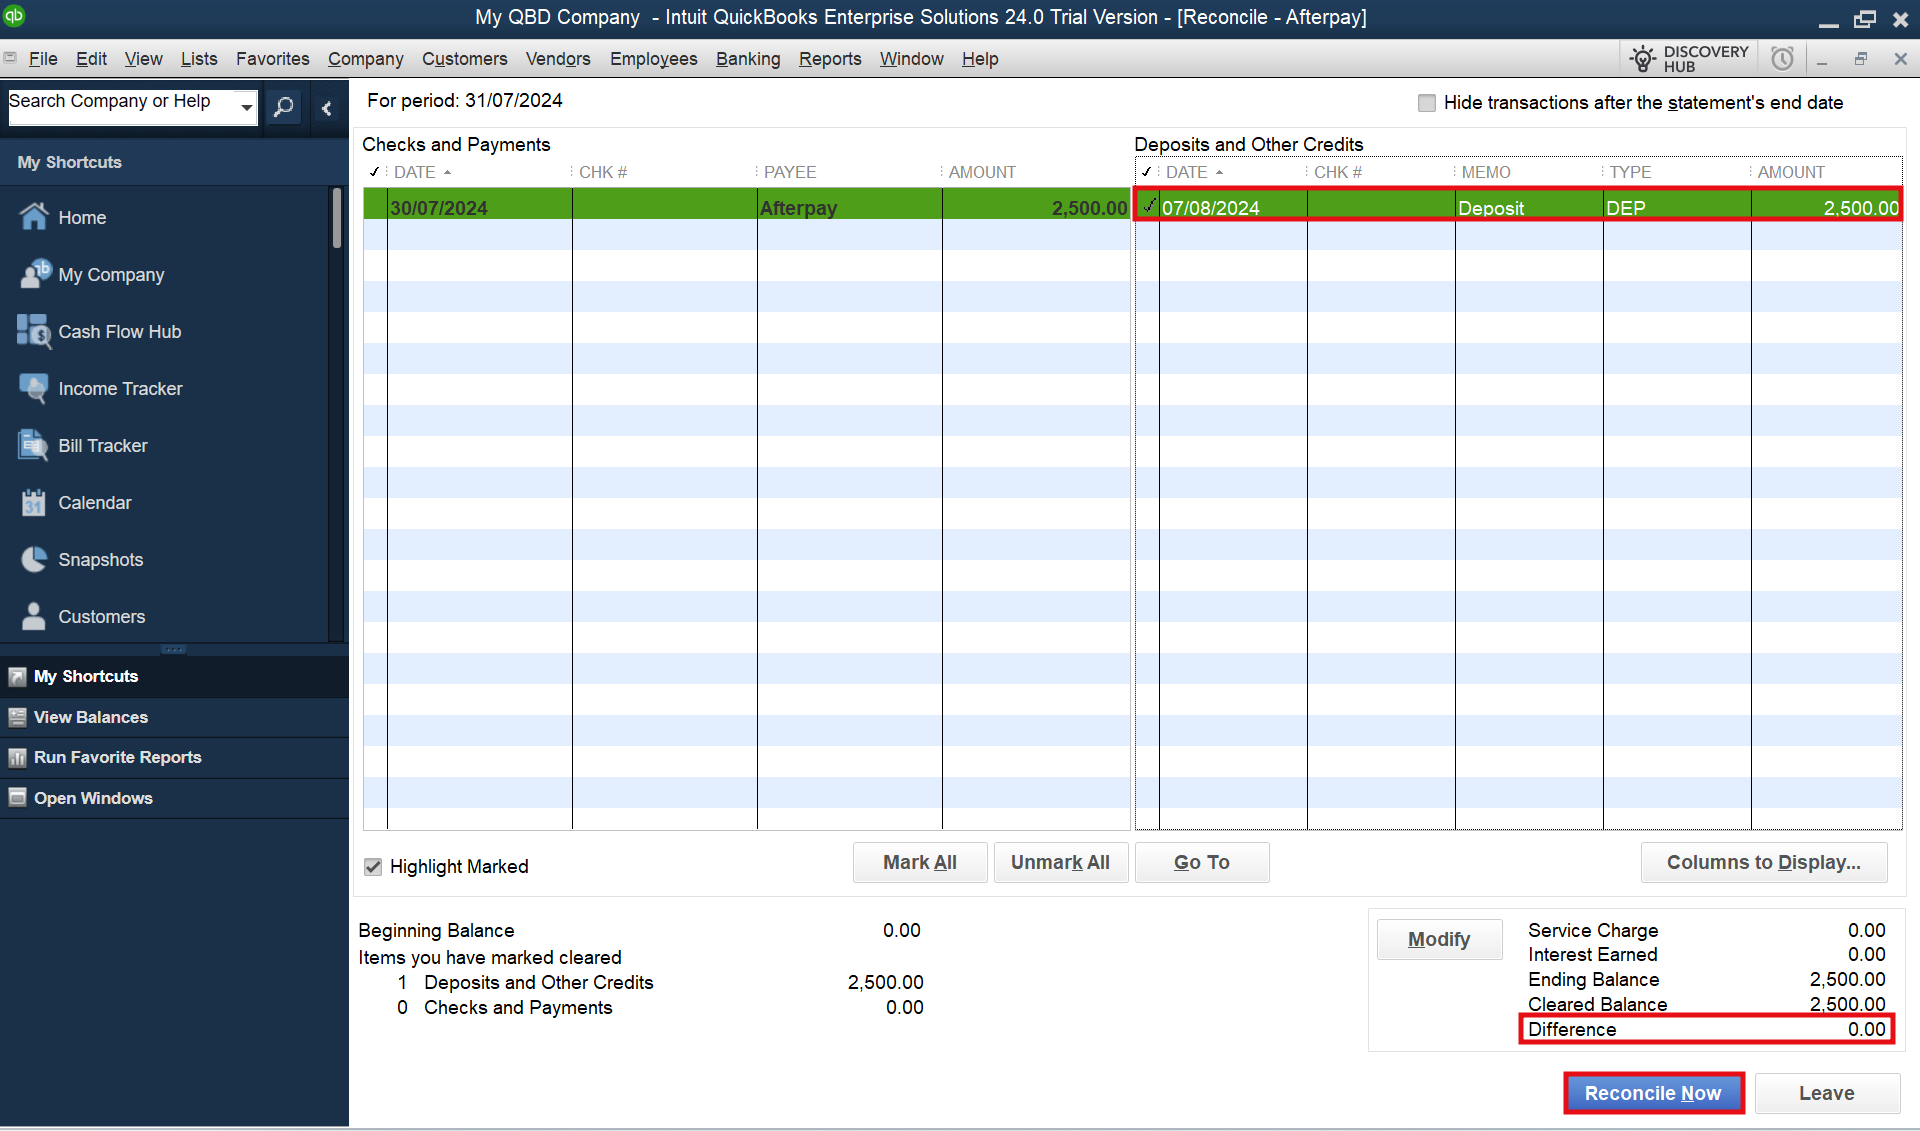
III. Start reconciliation
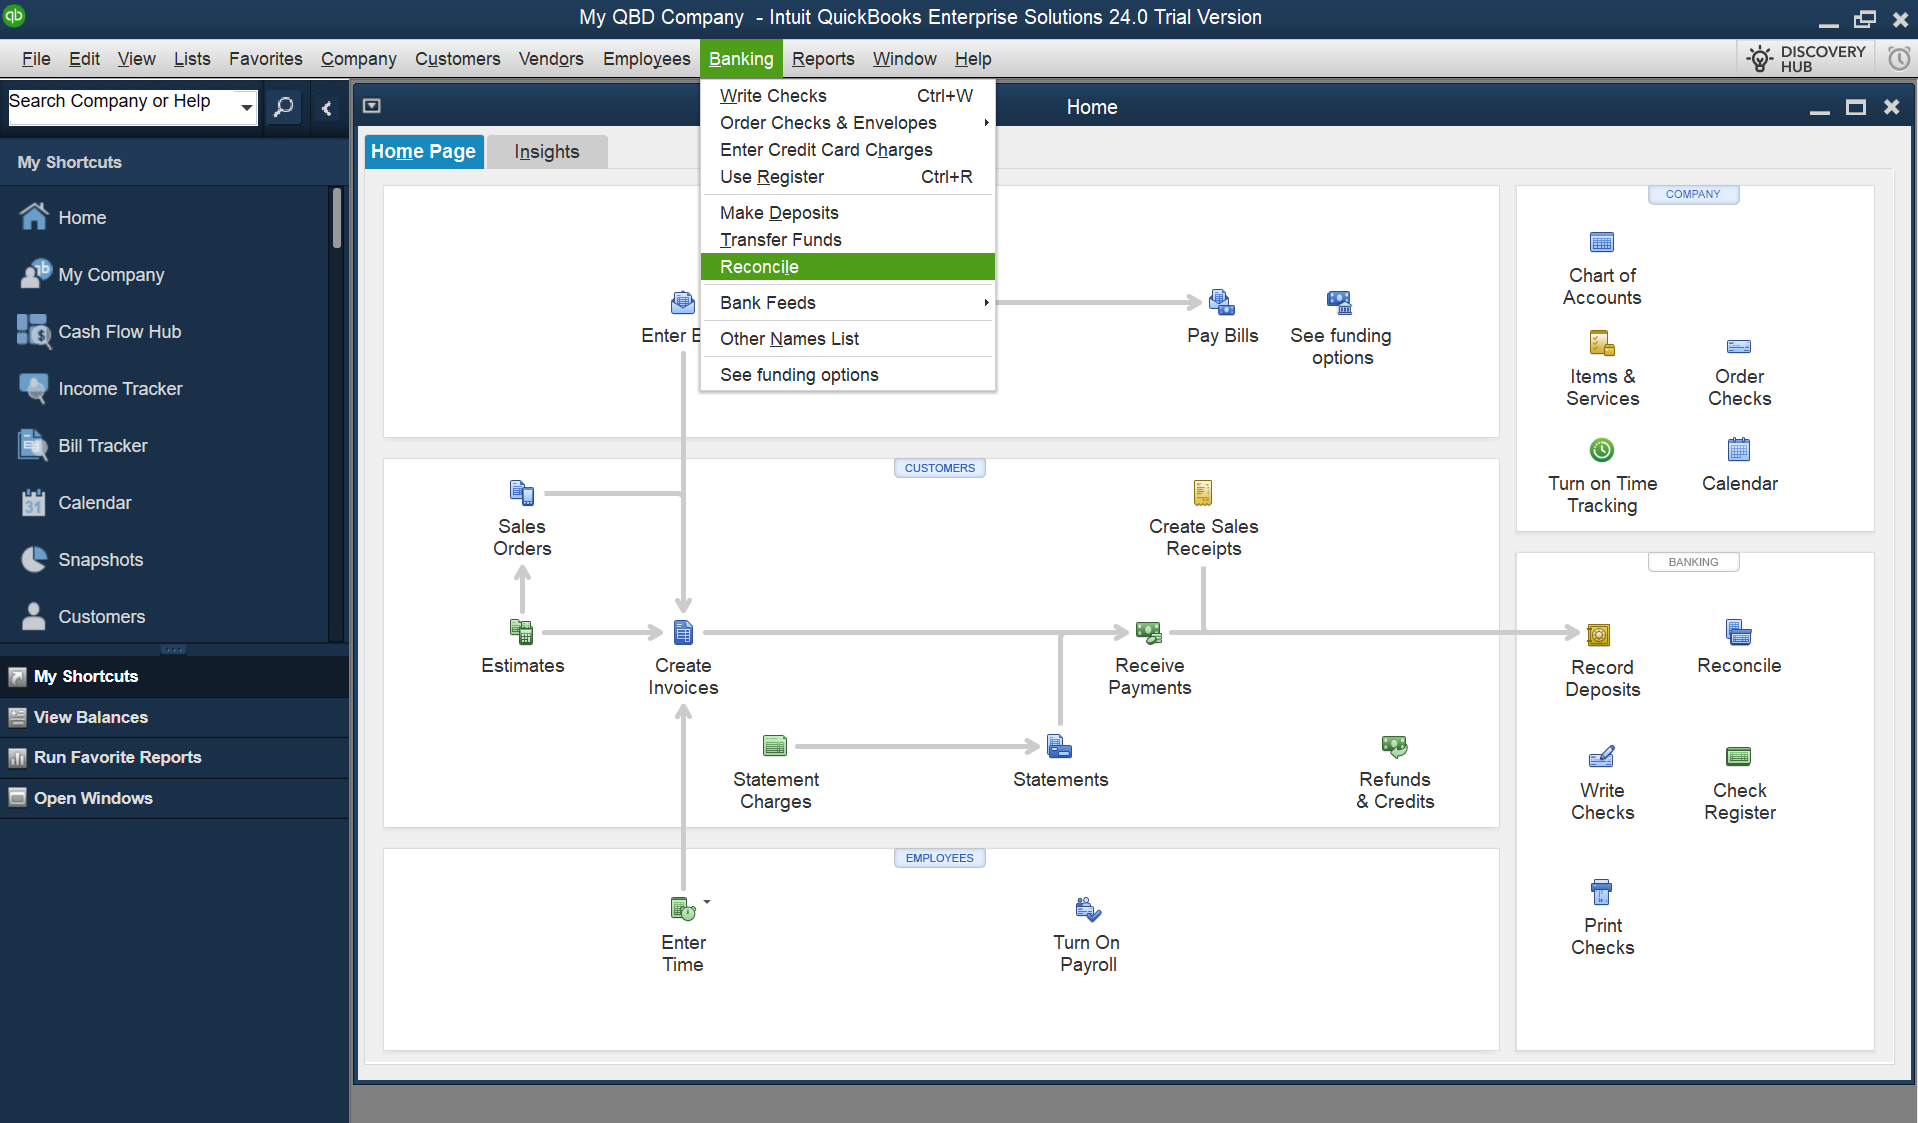
- Navigate to the Banking menu and select Reconcile.
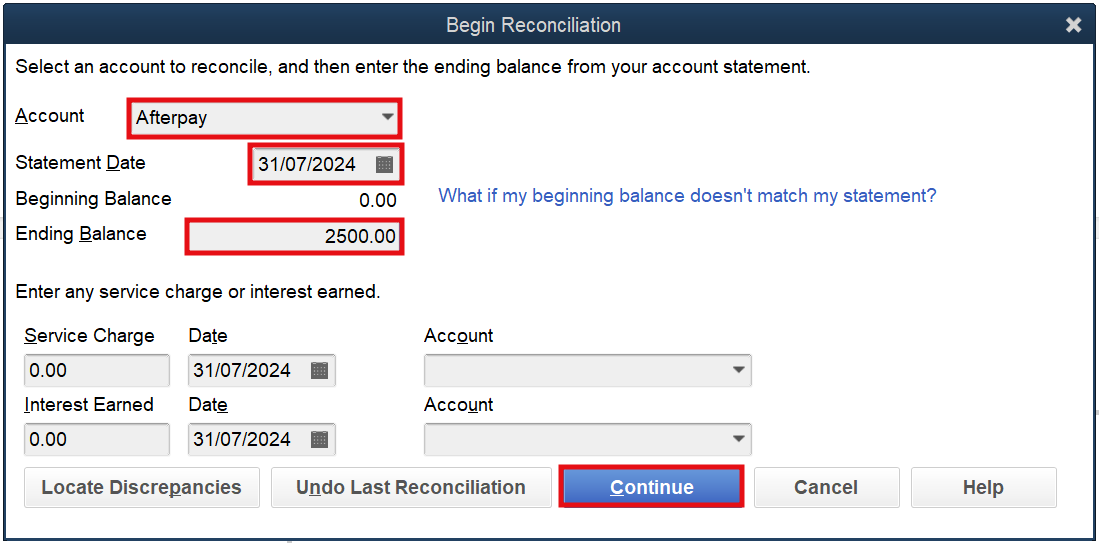
- Choose the bank account you want to reconcile and click Continue.
- Enter the statement ending balance and date from your bank statement, then click Continue.
- Locate the deposit from your integration in the list and check it off. This should correspond to the deposit on your bank statement.
- If there are any discrepancies, verify the amount and date of the transfer against your bank statement and correct any errors.
- Once all the transactions match and the difference is zero, click Reconcile Now to complete the reconciliation.

Xero
Step 1: Open the bank transaction
- Go to Accounting → Bank accounts.
- Open your Checking account.
- Find the deposit to reconcile.
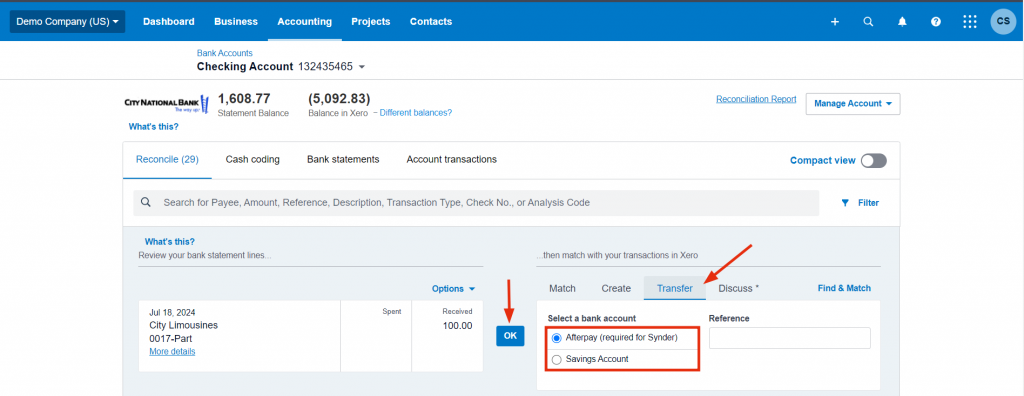
Step 2: Record as transfer
- Select the Transfer tab.
- Choose your integration’s Clearing account.
- Confirm the amount.
- Click OK.
Repeat the process for each deposit.
Address common mistakes
1. Clearing account keeps growing
- You may be categorizing deposits as income instead of transfers, or the rule in your accounting software is not running
2. Transfer option not available
- Make sure you’re categorizing from the bank transaction view.
3. Reconciliation difference is not zero
- Verify that the transfer amount and date match the bank statement exactly.
Reach out to Synder Team via online support chat or email with any questions you have – we are always happy to help you!