
Categorizing summaries in your accounting company ensures organized financial records and facilitates accurate financial reporting. Assigning specific categories aids in budgeting, analysis, and making informed business decisions based on clear insights. Moreover, consistent categorization enhances ease of use, supports audit trails, and ensures seamless integration with other software tools.
Overview:
- How to enable grouping by product category
- How to map product categories for Shopify, WooCommerce, Square
- How to map product categories for other integrations
- Important notes
How to enable grouping by product category
Here’s how you can enable grouping by product category if it’s available on your subscription plan:
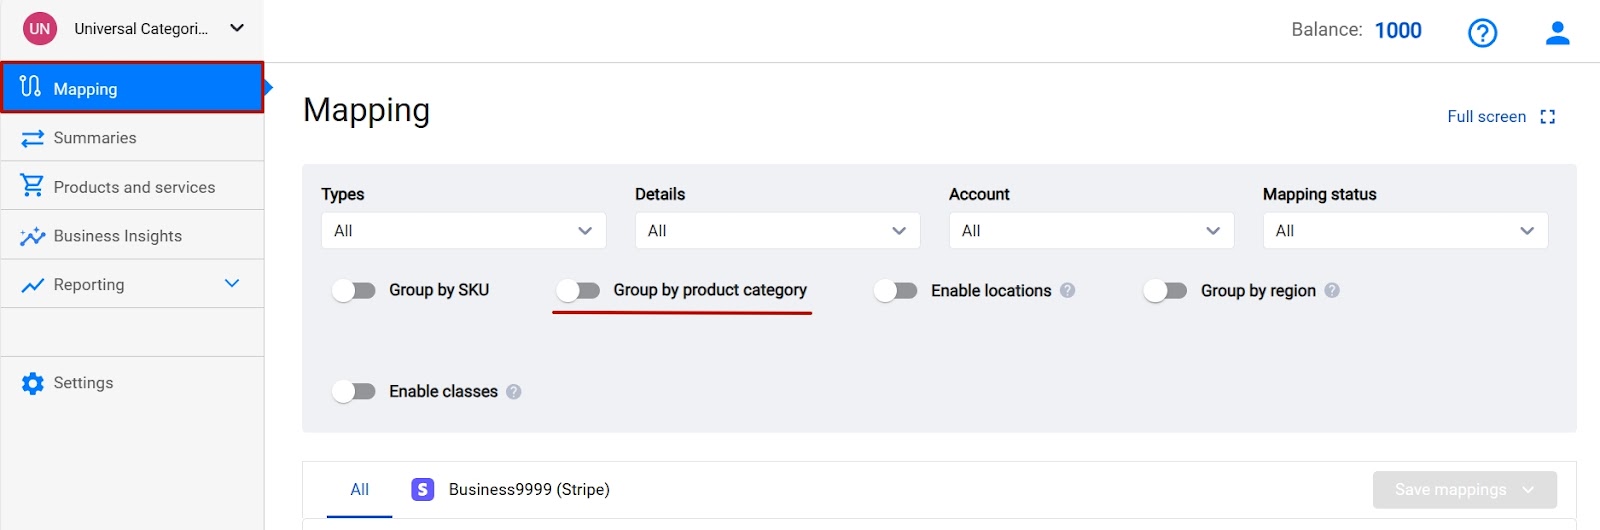
Step 1: Click on the “Mapping” tab on the left-side menu;
Step 2: Enable “Group by product category” and “Confirm” it.
Note: Alternatively, you can enable product categories in Synder Settings.
How to map product categories for Shopify, WooCommerce, Square
For Shopify, WooCommerce, or Square, your product categories will be automatically imported from your integration into Synder and displayed under the “Products and services” tab.
So once you enable the setting “Group by product category”, you’ll automatically see your sales broken down for the per category mapping. Map them and enjoy the results in your books.
Note: The “ready to sync” summaries will refresh automatically, and you will see new mapping applied to them.
“Synced” summaries have to be rolled back for the changes to apply.
How to map product categories for other integrations
For other platforms, you’ll either need to add categories manually to the products or upload them using a CSV file to be able to map by categories.
1) Map product categories
Follow these steps to add categories manually:
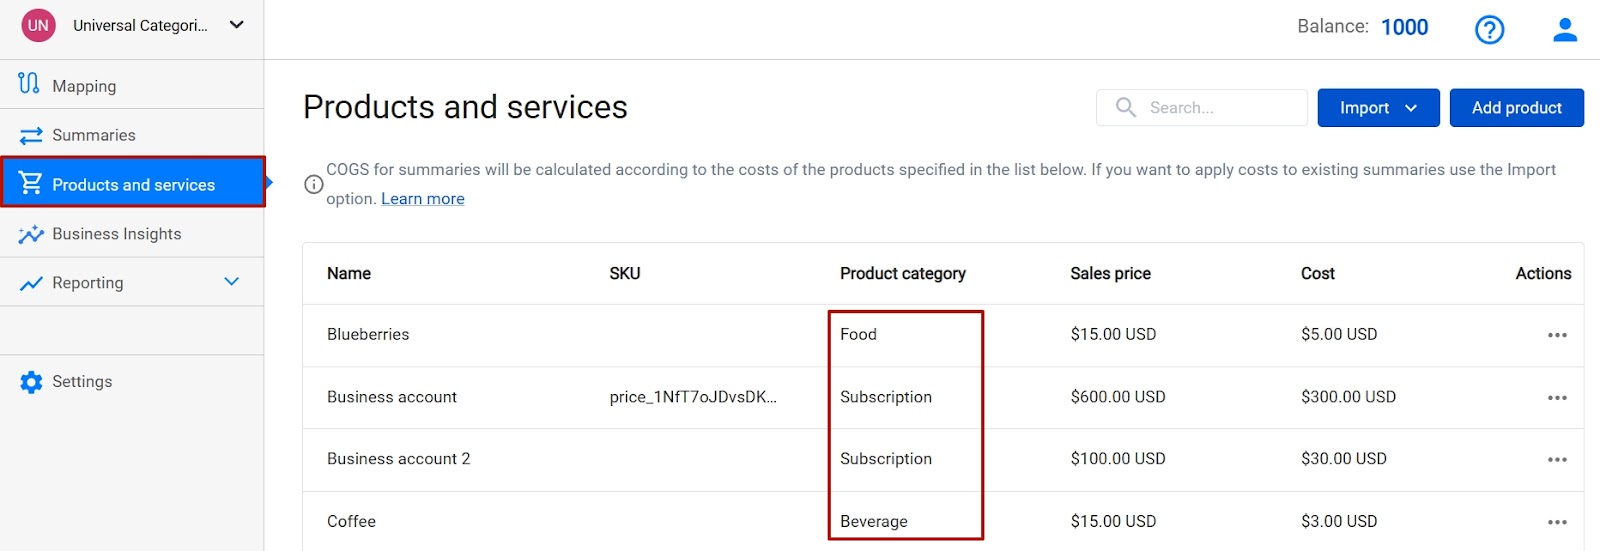
- Navigate to the “Products and Services” tab in Synder → locate the product you wish to categorize and click on the three dots next to it → “Edit”.

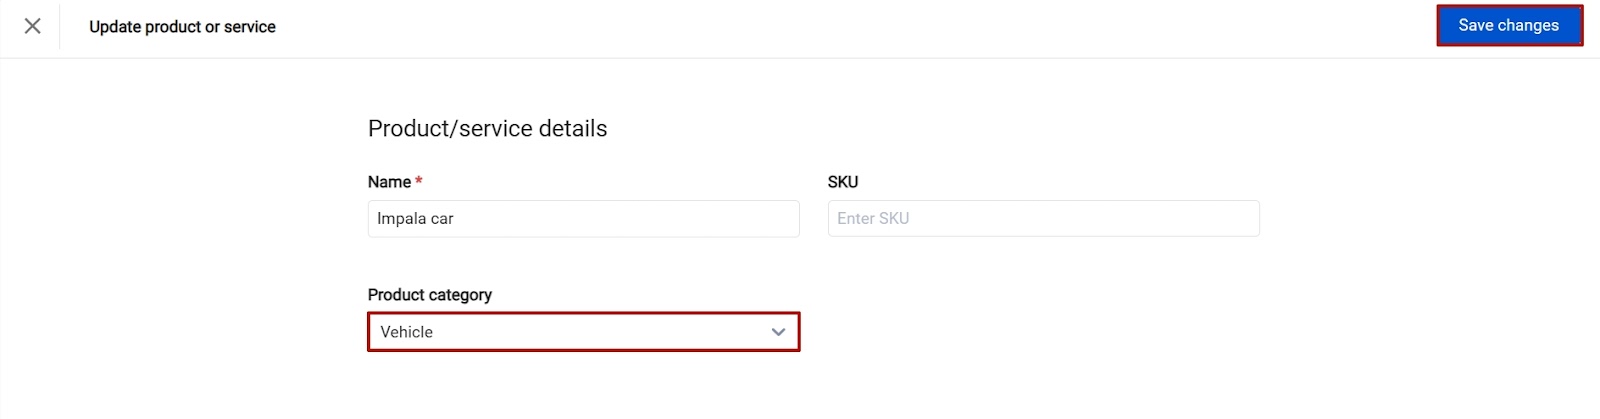
- Choose an existing category or create a new one for the product → click “Save Changes”.
- Repeat the process for any additional products.
To upload categories using a CSV file in Synder, follow these steps:
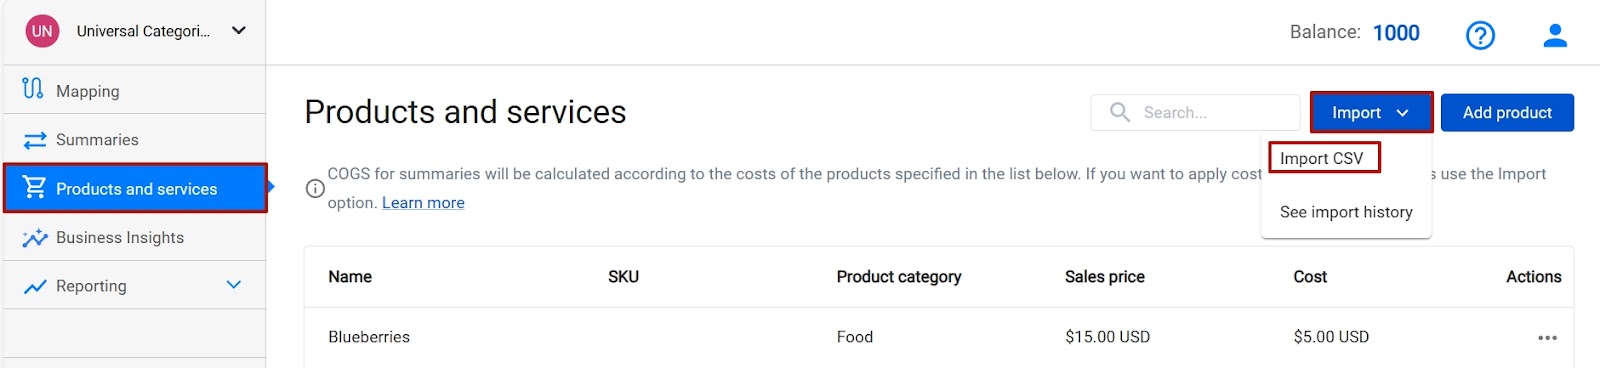
- Navigate to the “Products and Services” tab in Synder → click on “Import” and choose “Import CSV”.
- Download the provided template by clicking on “Download template”.
- Modify the template to list your exact product names or SKUs and corresponding categories, save the file.
- Click on “Browse” and select your saved file → Click “Import”.
Note: If a product and category aren’t yet in Synder, the system will create them during the import. If a product name or SKU from the file is found in Synder, the system will update its category based on the uploaded file (in the same way you can set costs for COGS tracking).
.

You’ll see the updated categories under the “Product category” column.
2) Map product categories
Once you have assigned product categories to specific products, enable the “Group by product category” setting as described above, and map product categories to the needed income accounts from your books.

Note 1: The “ready to sync” summaries will refresh automatically, and you will see new mapping applied to them.
“Synced” summaries have to be rolled back for the changes to apply.
Note 2: If you have assigned products categories AFTER enabling the setting on the mapping, make sure to refresh summaries to see the updated mapping!
Important notes
- The option to group your Summaries by product categories is exclusive to the Scale or higher plans.
- You have a choice to group sales by either product/SKU or by Product category. However, both grouping methods can’t be activated simultaneously.
- For each product catalog, Synder groups products with assigned categories into one mapping row. Products without categories are grouped under a ‘No category’ row in the mapping.
- If a category is missing when a summary is synced, the Description field in QuickBooks Online will display ‘Undefined.’
Reach out to the Synder team via online support chat, phone, or email with any questions you have – we’re always happy to help you!