
In this guide, we’ll explore how to manage fees from platforms that don’t provide Synder with fee information, simplifying your accounting process effortlessly.
Overview:
- Platforms that provide Synder with fees information
- Platforms that don’t provide Synder with fees information
- How to enter fees information:
Platforms that provide Synder with fees information
- Affirm
- Amazon
- eBay
- Etsy
- Faire
- GoCardless
- Payrix
- Nautical
- PayPal
- PinPayments
- Shopify
- Square
- Squarespace
- Stripe
- TikTok
- Walmart
- WooCommerce
Platforms that don’t provide Synder with fees information
- Afterpay
- Authorize.Net
- BigCommerce (If your store uses a payment platform from the list that provides Synder with fee information, connect it to Synder to eliminate the need for manual entries in your accounting system.)
- Bluefin
- Braintree
- Brex
- Clover
- Ecwid
- LawPay
- Magento (If your store uses a payment platform from the list that provides Synder with fee information, connect it to Synder to eliminate the need for manual entries in your accounting system.)
- ShipStation
- Wix (If your store uses a payment platform from the list that provides Synder with fee information, connect it to Synder to eliminate the need for manual entries in your accounting system.)
Note: If your WooCommerce store uses a payment platform from the list that provides Synder with fee information, connect it to Synder to eliminate the need for manual entries in your accounting system. If you use WooCommerce payments, the fee information will be fetched by default.
How to enter fees information:
Note: We suggest that you do this at the end of each month to account for monthly fees.
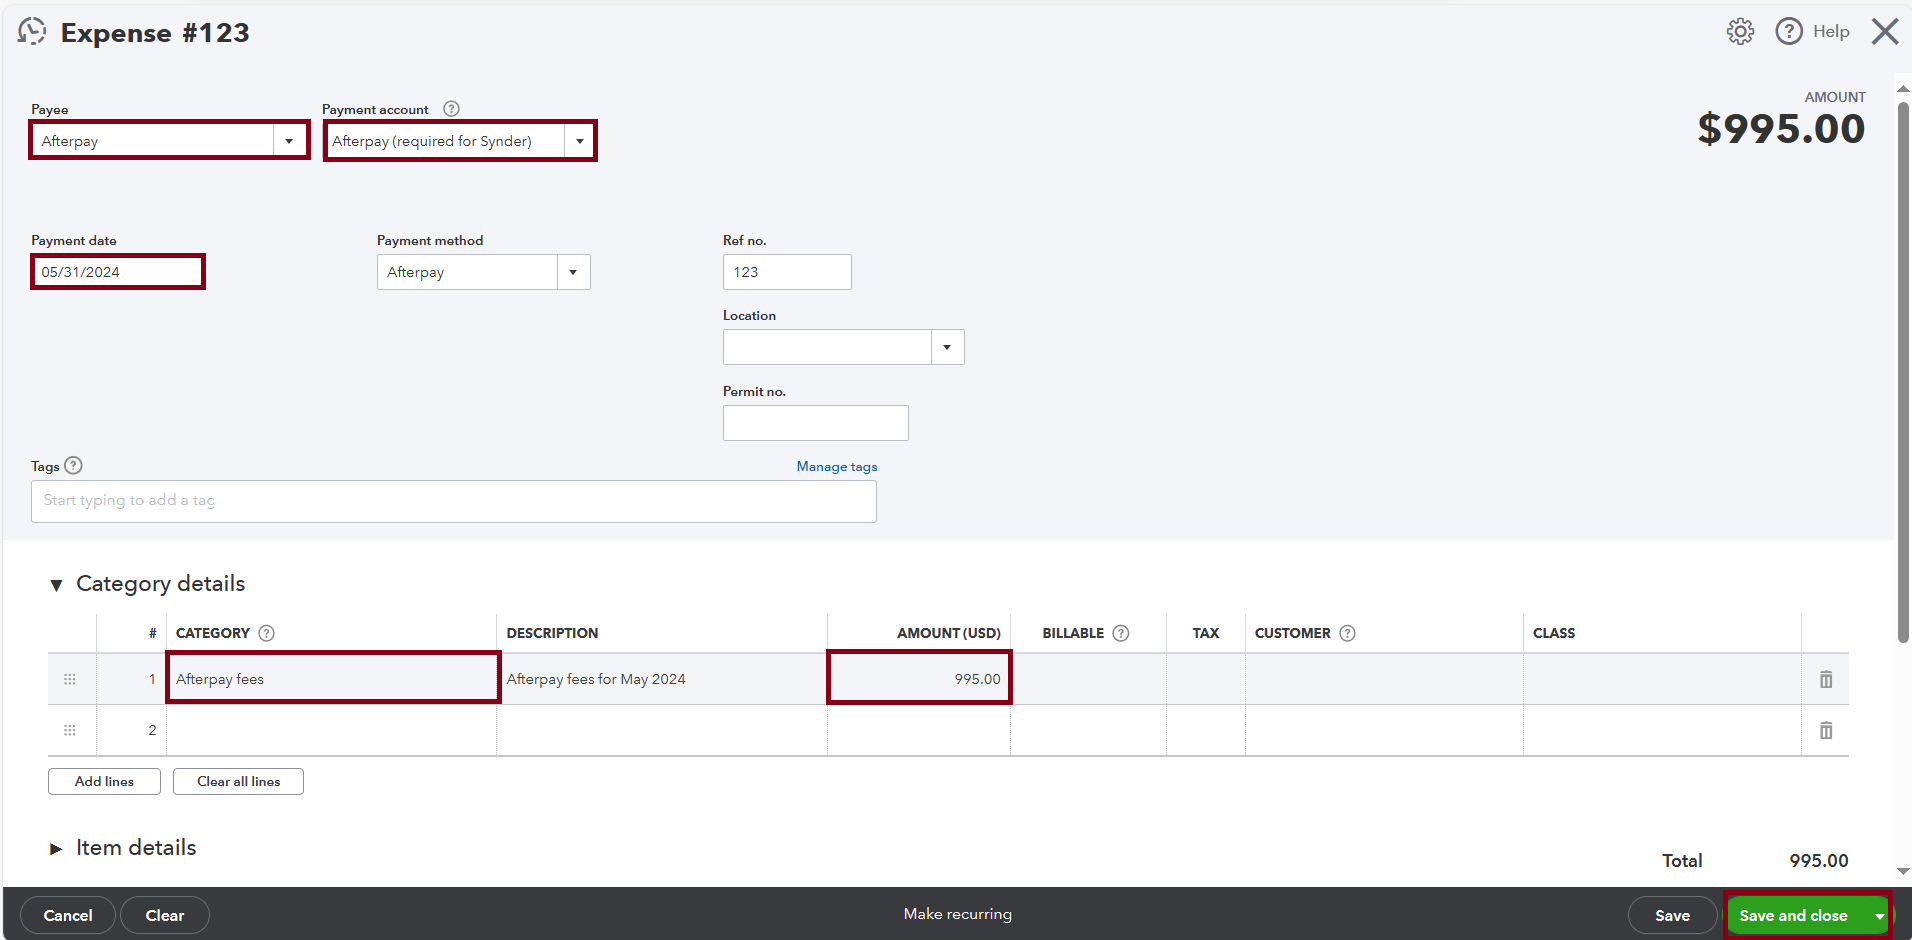
In QuickBooks Online
- Click on “New” in the upper-left corner and choose “Expense.”
- Fill out all the details such as the amount, the payee name, the date (typically the end of the month you account for the fees), select the payment account and the category of fees (classification used to organize and track processing fees).
- Save it.
Note 1: To check it, go to your payment provider’s website and log in → look for “Transactions,” “Activity,” “Payments,” or “Sales” in the main menu → click on a transaction to see detailed information, including fees → then go to “Reports” or “Statements” to generate or download fee summaries.
Note 2: Make sure to select the same account where sales transactions are recorded to match the balances between your payment provider and clearing account.
- The date (typically the end of the month you account for the fees).

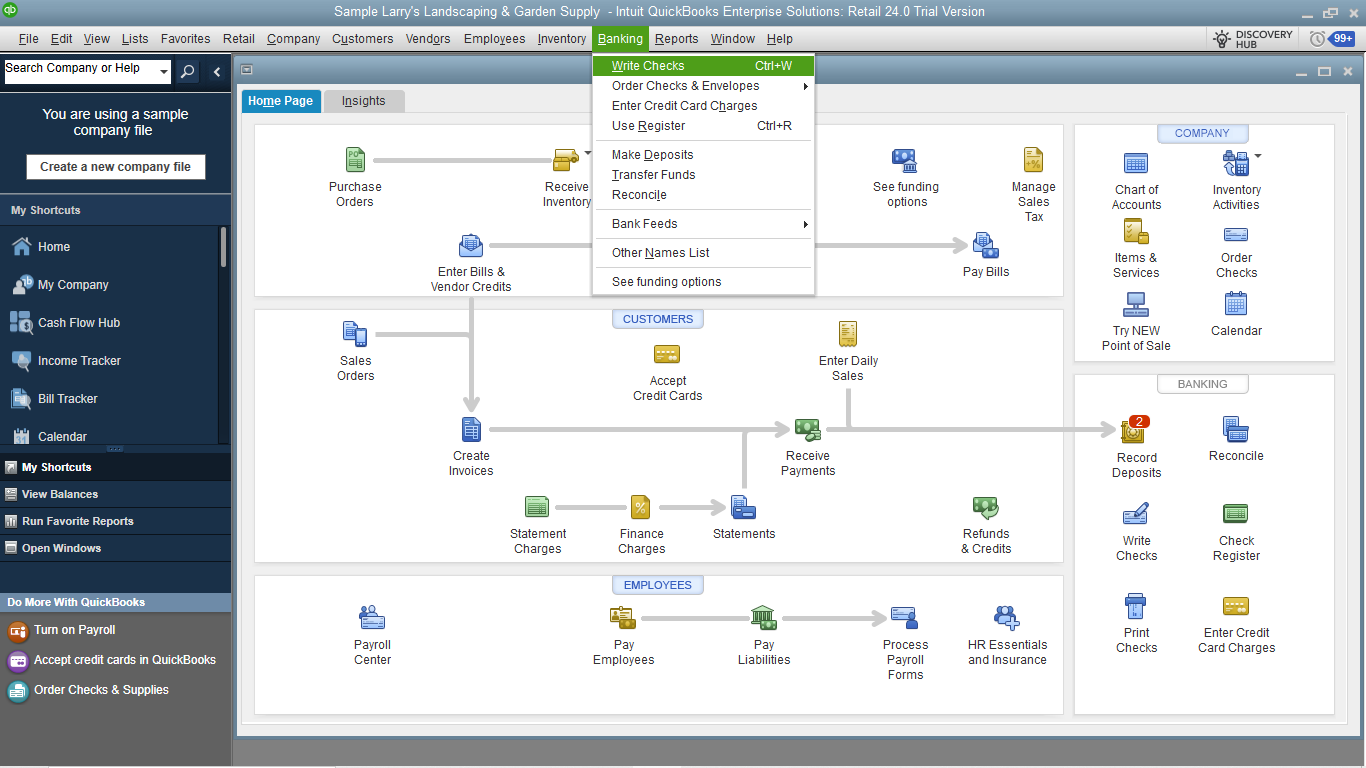
In QuickBooks Desktop
- Go to the “Banking” menu and select “Write Checks.”
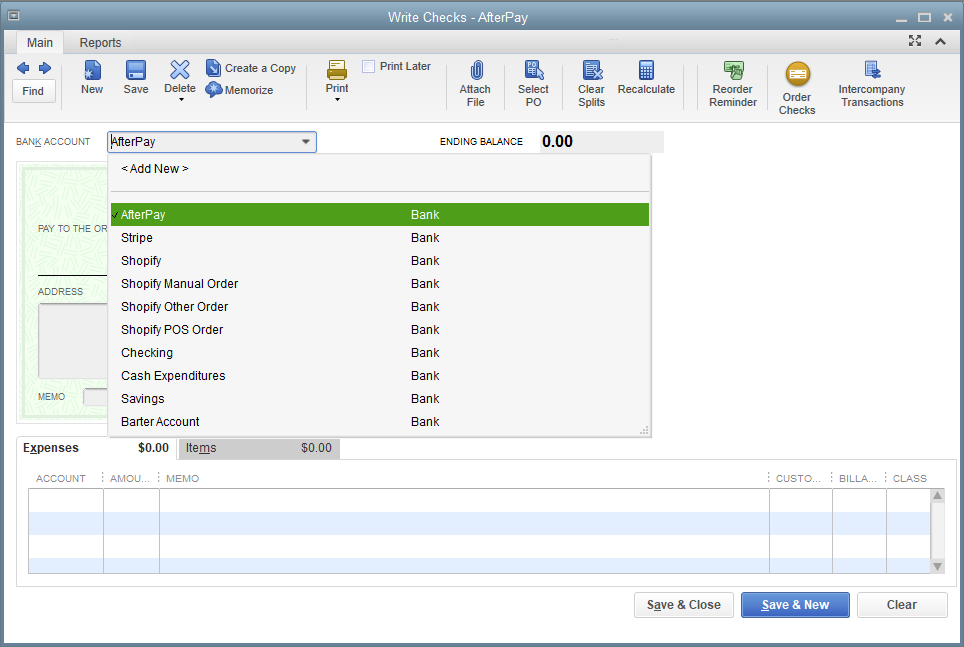
- Choose the bank account from which you want to write the check (use the same clearing account used for sales).
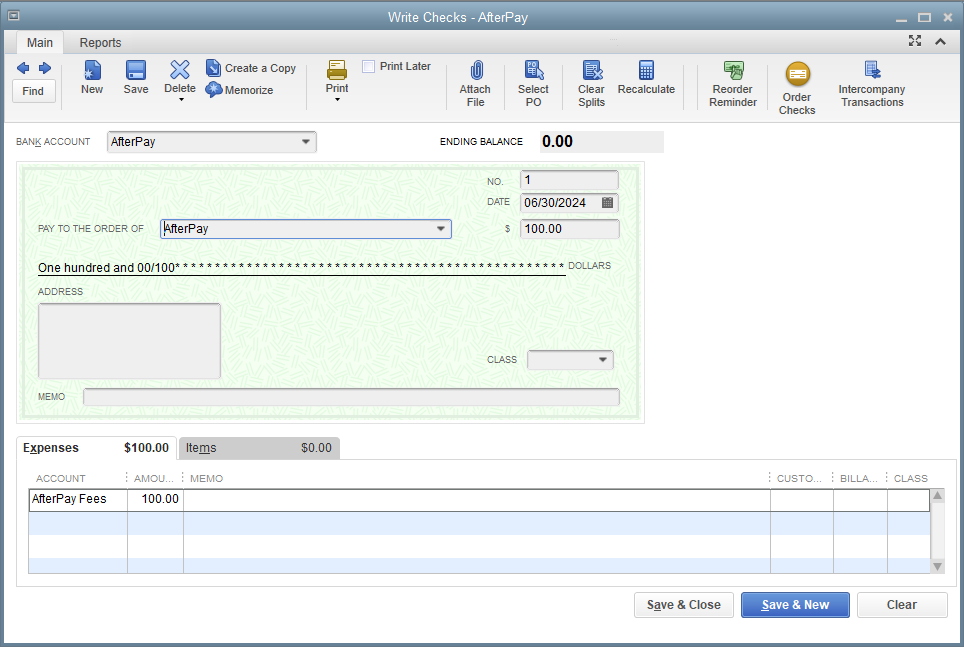
- Fill out all the details such as the amount, the account for fees, the vendor name, and the date (typically the end of the month you account for the fees).
- Save it.
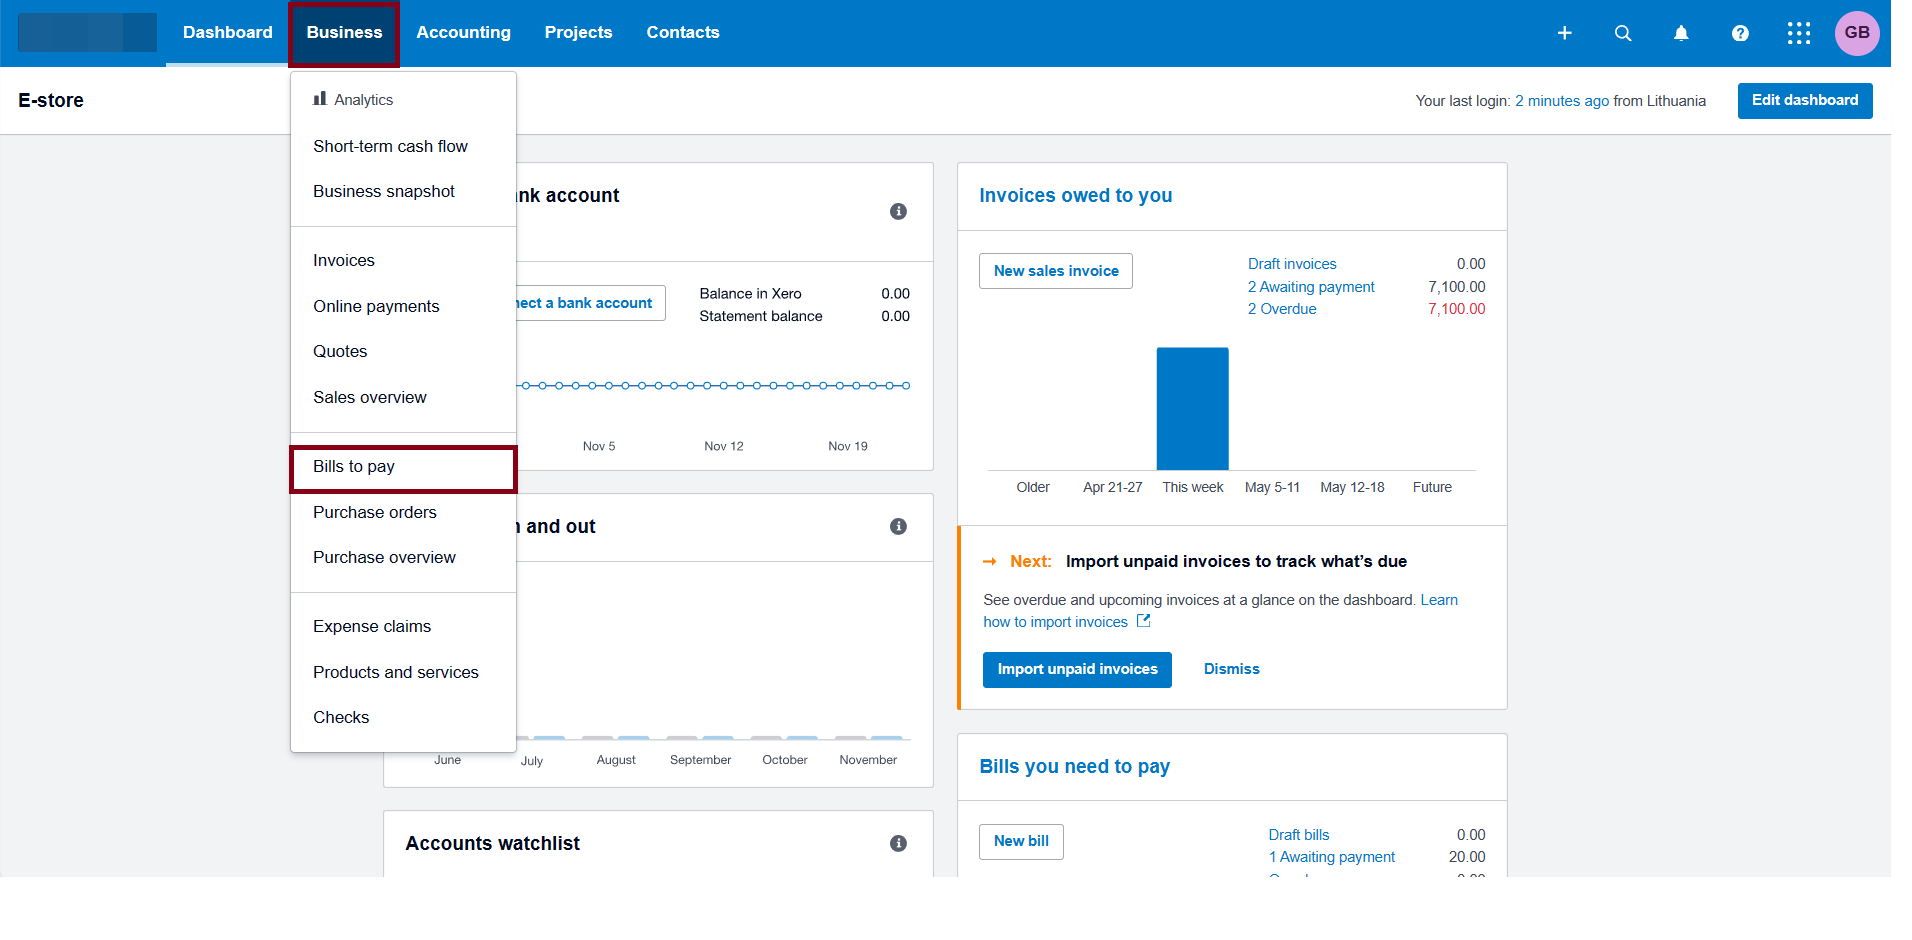
In Xero
- Go to “Business” and choose “Bills to pay.”
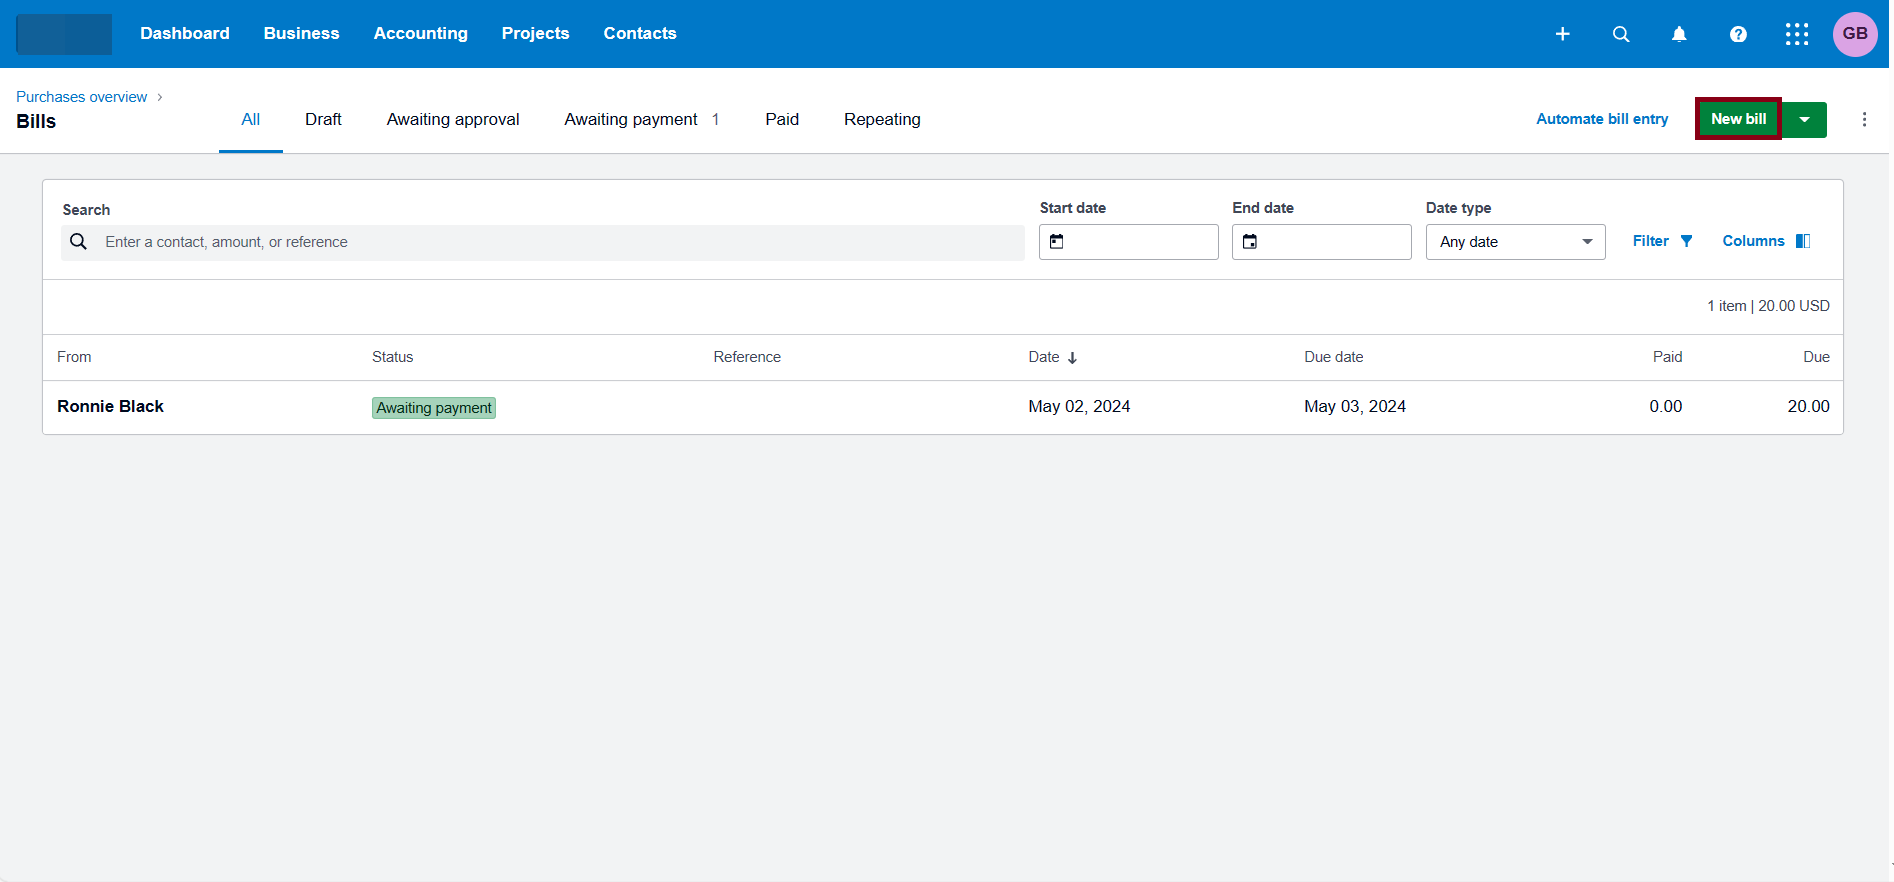
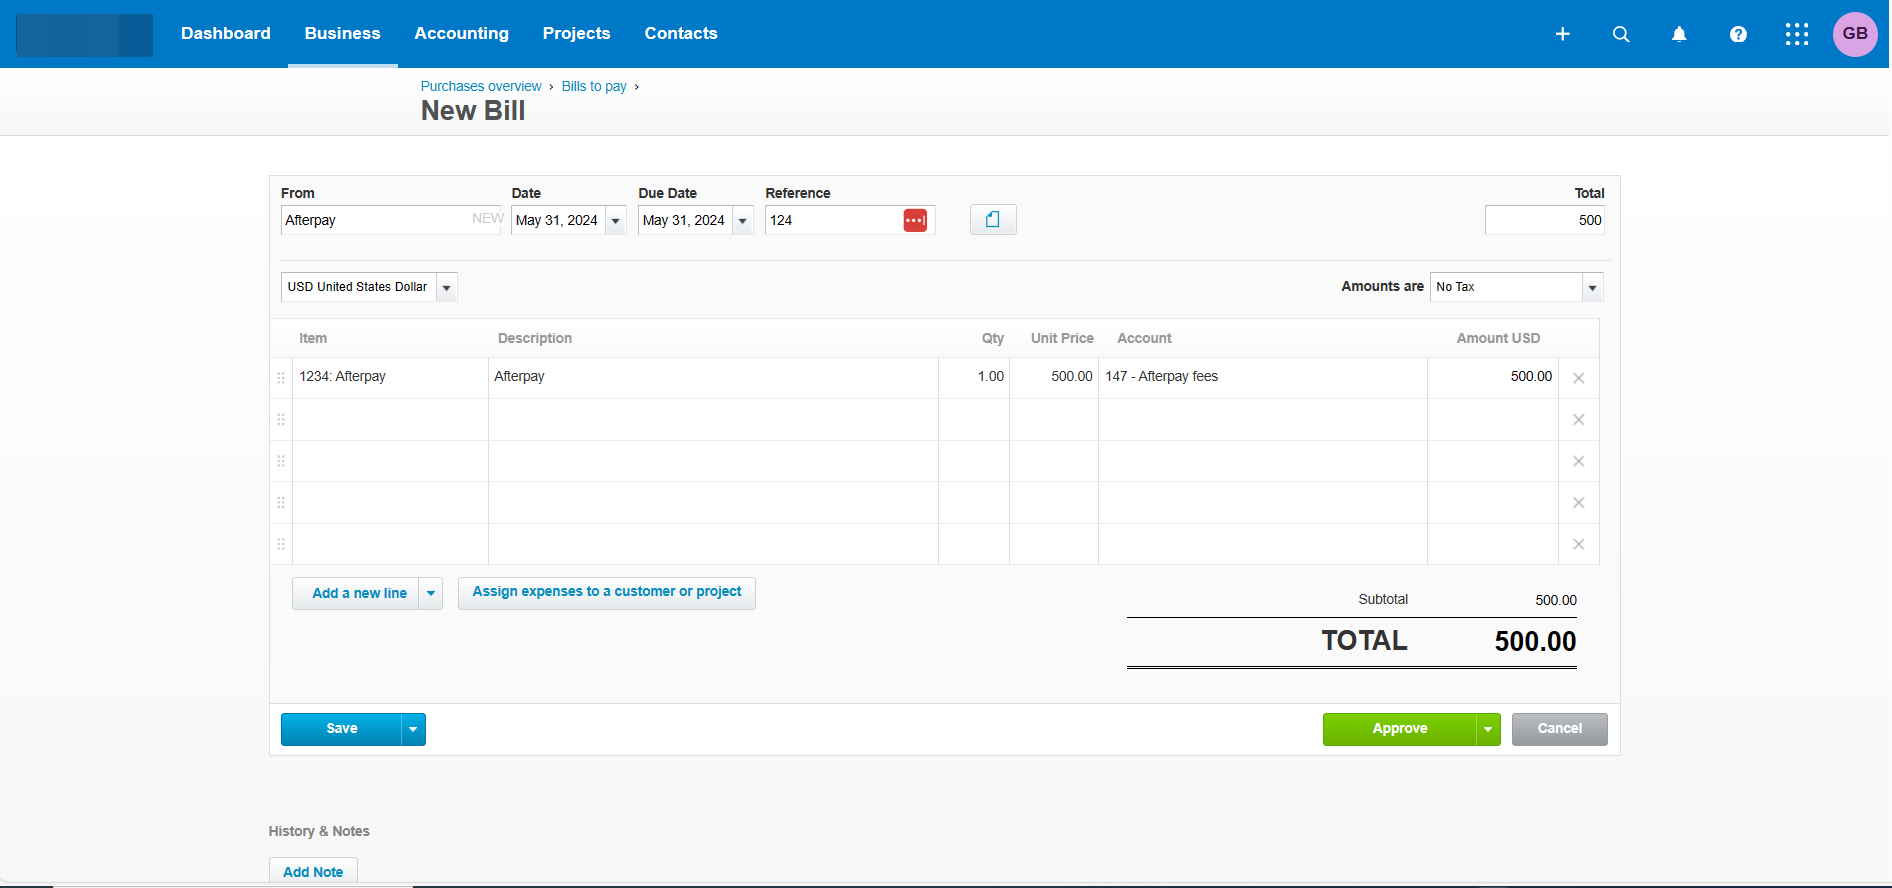
- Click on “New Bill” and enter the total amount, the vendor name, the date (typically the end of the month you account for the fees), select an account for fees, then click on “Approve”.
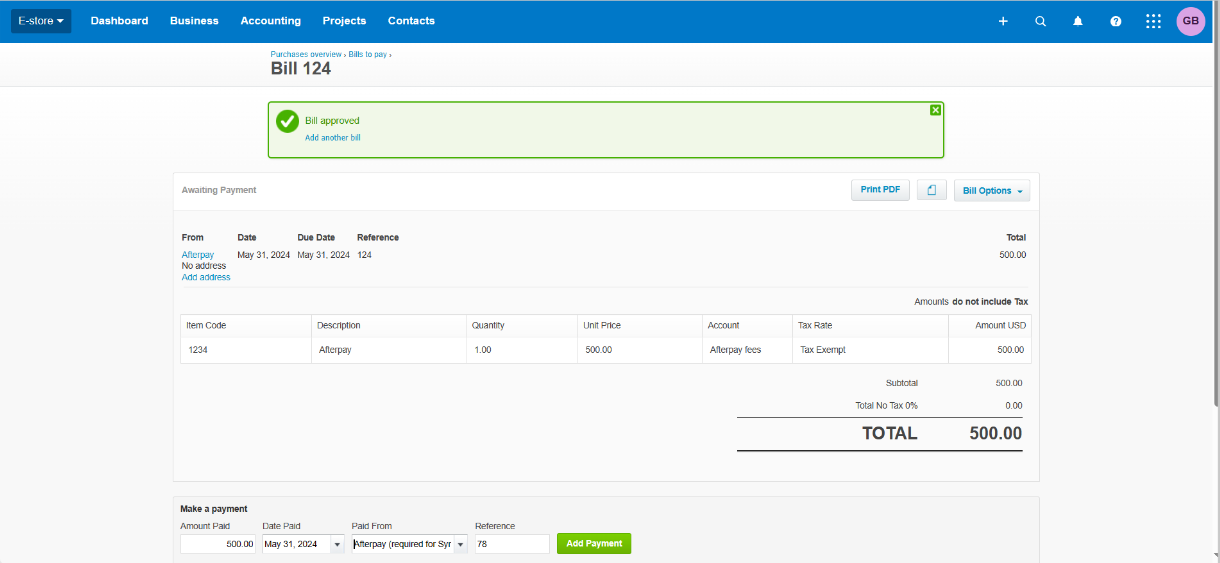
- After filling out all the details, click on “Add payment” and enter the same amount, select the same clearing account you use for sales, then save all the details.
Note: Alternatively, you can create a “Spend Money” transaction on the clearing account.
That’s it! Now you know how to handle platforms with no fee info.
Reach out to Synder Team via online support chat, phone, or email with any questions you have – we’re always happy to help you!