
You: You run one Shopify or Stripe store. You do your own books in QuickBooks Online or Xero. You’re tired of manually entering every sale, fee, and refund. You want your accounting to just… match reality.
This guide walks you through setting up Synder so your sales data flows into your accounting software automatically — no more copy-pasting from Shopify admin or Stripe dashboards.
—
What Synder Actually Does for You
Every time someone buys from your store, Synder:
- Creates a sales receipt (or invoice + payment) in QBO/Xero
- Records the processing fee (Stripe’s 2.9% + 30¢, Shopify Payments’ cut, etc.)
- Records the payout deposit that hits your bank
- Handles refunds, chargebacks, and partial refunds automatically
No more “where did that $47.23 deposit come from?” moments at reconciliation time.
—
Step 1: Create Your Synder Account
- Go to [go.synder.com/signup](https://go.synder.com/signup)
- Sign up as Business Owner
- Select United States (or your country)
- Choose your accounting platform (QuickBooks Online or Xero)
Tip: Use the same email you use for your accounting software. Keeps things simple.
—
Step 2: Connect Your Payment Platform
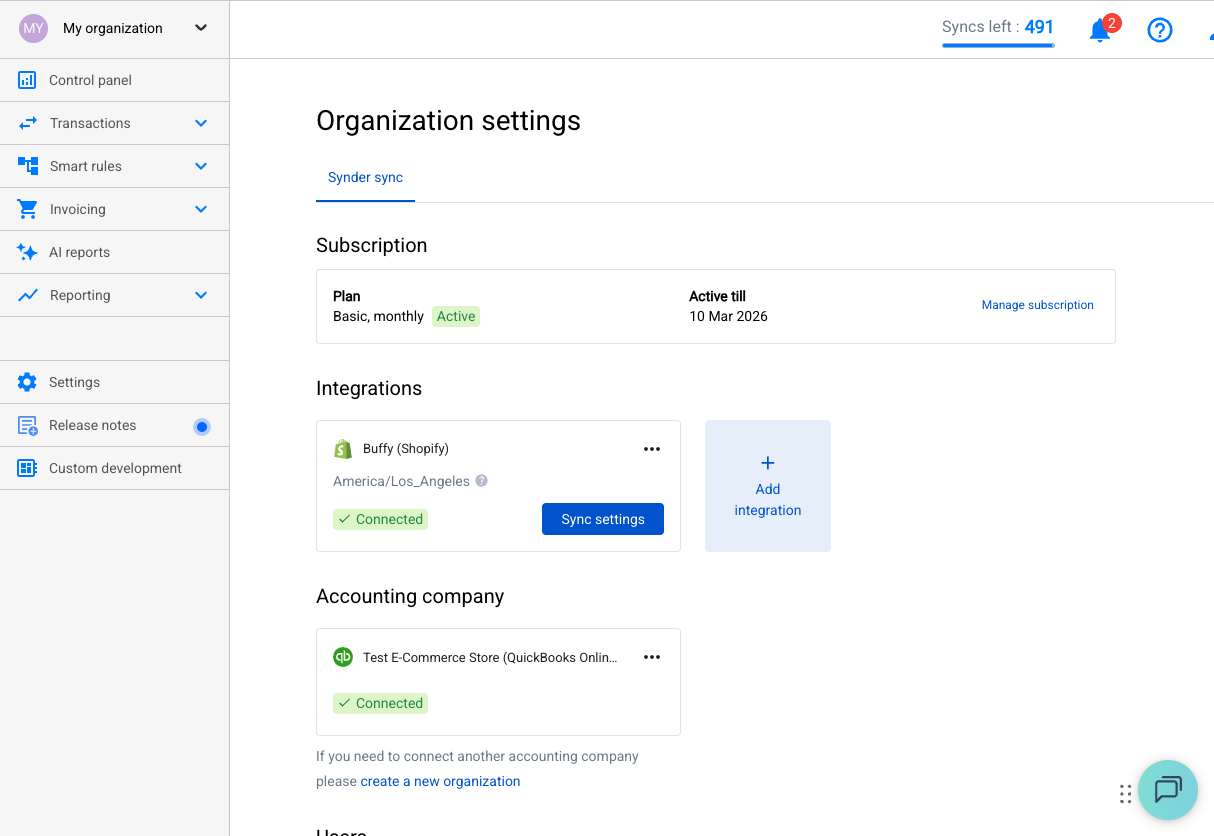
Go to Settings → Integrations → + Add and connect your payment processor:
- Shopify: You’ll authorize Synder to read your Shopify orders and payments
- Stripe: Connect in live mode (not test mode — that’s for demos)
Synder pulls transaction data from your payment platform, not your bank. That’s intentional — payment platforms have richer data (line items, customer names, fees) than bank feeds.
—
Step 3: Connect Your Accounting Software
Same screen — + Add your accounting platform:
- QuickBooks Online: Authorize via Intuit OAuth
- Xero: Authorize via Xero OAuth
Synder needs read/write access to create transactions in your books.
—
Step 4: Choose Your Sync Mode
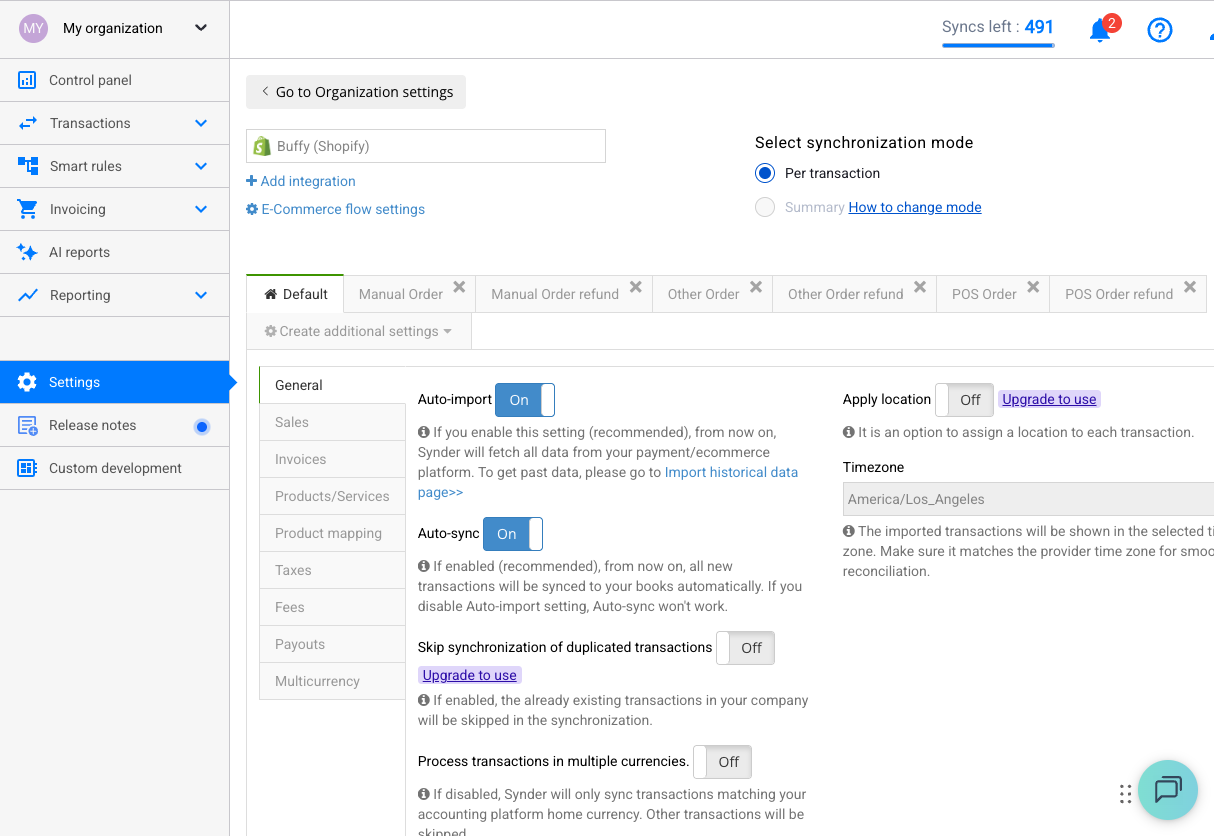
This is the most important decision. You have three options:
Per-Transaction Mode (Recommended for most solo owners)
Every sale, refund, and fee creates its own entry in your accounting software. You get full detail — every customer name, every line item.
Best if: You want to see each individual sale in QBO/Xero. You have under ~500 transactions/month.
Daily Summary Mode
Groups all your daily transactions into a single journal entry per day. Less clutter, still accurate totals.
Best if: You have high volume (hundreds of sales/day) and don’t need individual transaction detail in your books.
Payout Mode
Records transactions grouped by bank payout. Makes bank reconciliation dead simple — the amount Synder records matches the exact deposit in your bank.
Best if: Bank reconciliation is your main pain point.
—
Step 5: Map Your Accounts
Before syncing, tell Synder where to put things:
| What | Where (example) |
|——|—————–|
| Sales income | Sales / Revenue account |
| Processing fees | Merchant Fees / Bank Charges |
| Payouts / clearing | Stripe Clearing / Shopify Clearing |
| Shipping income | Shipping Income |
| Tax collected | Sales Tax Payable |
Go to Settings → General (or your integration’s settings tab) to configure these.
Common mistake: Leaving the default accounts. Synder will create generic accounts if you don’t map them, and you’ll spend time cleaning up later.
—
Step 6: Test with a Few Transactions
Don’t sync your entire history on day one. Instead:
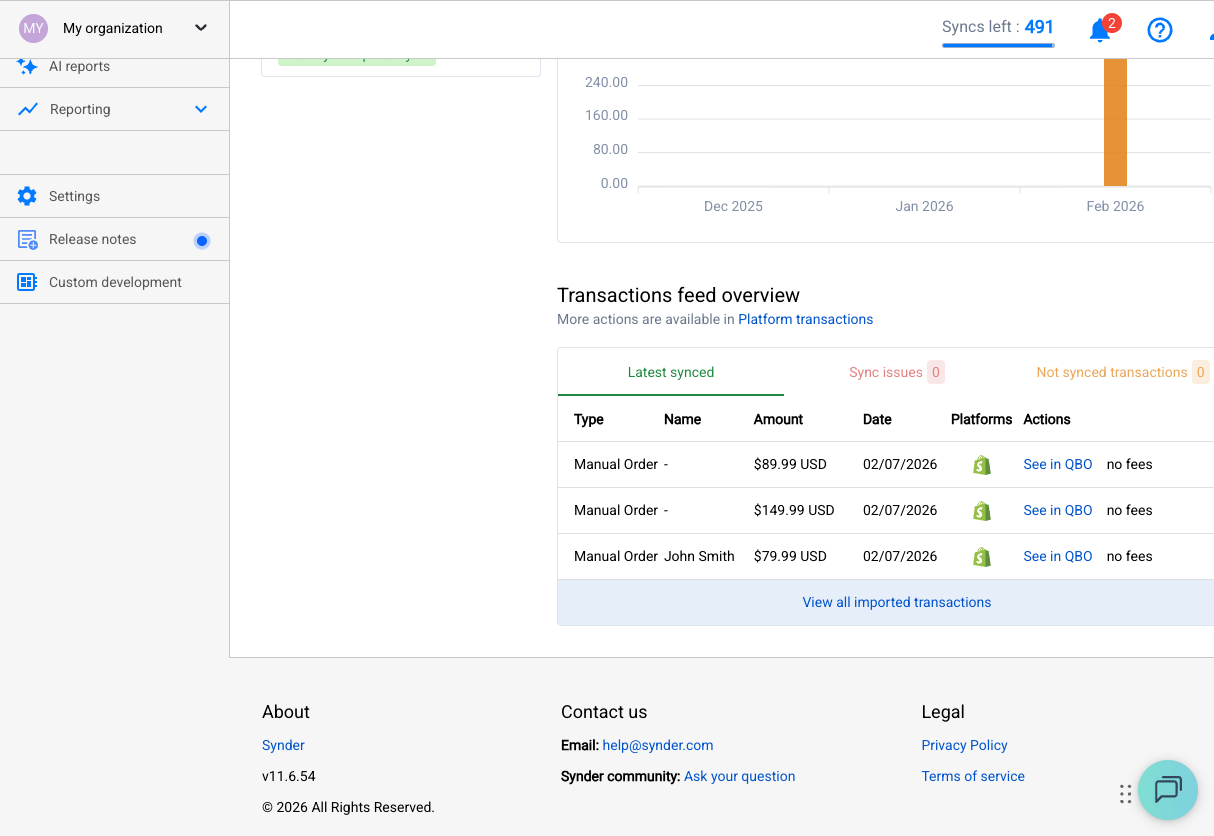
- Go to the Transactions tab
- Select 3–5 recent transactions
- Click Sync
- Open your accounting software and verify they look right
Check:
- ✅ Customer name correct?
- ✅ Line items and amounts match?
- ✅ Fees recorded in the right account?
- ✅ Tax amounts correct?
If something’s off, adjust your settings and rollback those test transactions (Synder can undo synced entries).
—
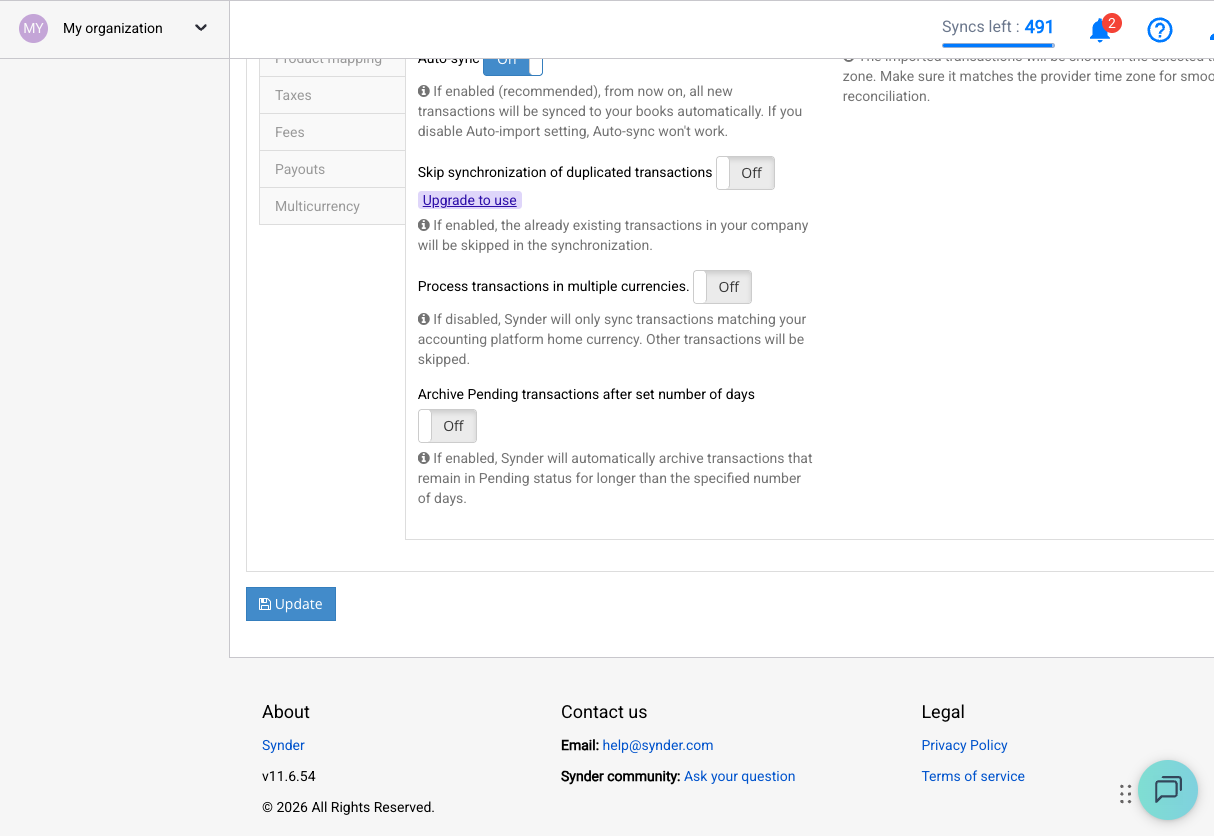
Step 7: Enable Auto-Sync
Once you’re happy with how test transactions look:
- Go to Settings → General
- Enable Auto-sync
- New transactions will now flow into your accounting software automatically
Important: Auto-sync only works going forward. It won’t retroactively sync old transactions. For historical data, use the Historical Import feature.
—
Step 8: Import Historical Data (Optional)
If you need past transactions in your books:
- Go to Historical Import
- Select your date range
- Review and sync
Heads up: If you’ve already manually entered some of these transactions, Synder has duplicate detection — but double-check anyway.
—
Common “Wait, What?” Moments
“Why did Synder create a product called ‘Shopify Product’?”
Synder couldn’t find a matching product in your accounting software, so it created a generic one. Fix: Create your products in QBO/Xero first, or enable “Common Product” in settings to map everything to one income item.
“My payout amount doesn’t match what Synder synced.”
This usually means some transactions within that payout haven’t synced yet. Check for failed or pending transactions in Synder.
“Auto-sync stopped working.”
Check Settings → General. Auto-sync might have been disabled (sometimes it happens after a re-authentication). Also check if it’s enabled for all transaction types — payments, refunds, etc. each have their own toggle.
—
You’re Set
That’s it. Your Shopify/Stripe sales now flow into your books automatically. At month-end, your accounts should reconcile without the usual headache.
If something breaks, check our troubleshooting guides:
- [My First Sync Failed — What Do I Do?](my-first-sync-failed.md)
- [Common Sync Errors and How to Fix Them](common-sync-errors.md)
- [Why Are My Transactions Not Appearing?](why-transactions-not-appearing.md)
Questions? Reach out to [[email protected]](mailto:[email protected]) — real humans, not a chatbot maze.