
- Setting up Stripe and Oracle NetSuite in Synder
- Step 1: Create your Synder account
- Step 2: Select your platforms
- Step 3: Connect Oracle NetSuite
- Step 4: Connect your Stripe account
- Step 5: Configure your settings
- Connecting Stripe to an existing Synder organization
- Reconnecting Stripe or NetSuite
Oracle NetSuite is a powerful enterprise-grade accounting and ERP platform designed to manage complex financial operations across growing businesses. Connecting your Stripe account to NetSuite through Synder enables you to automate the synchronization of payments, fees, and refunds, ensuring accurate and audit-ready accounting records.
With Synder, your Stripe transactions will be reflected in NetSuite exactly as they occur, allowing for smooth reconciliation, real-time insights into sales performance, and seamless payout tracking.
Setting up Stripe and Oracle NetSuite in Synder
Follow these steps to connect Stripe and Oracle NetSuite in Synder and start syncing your transactions automatically.
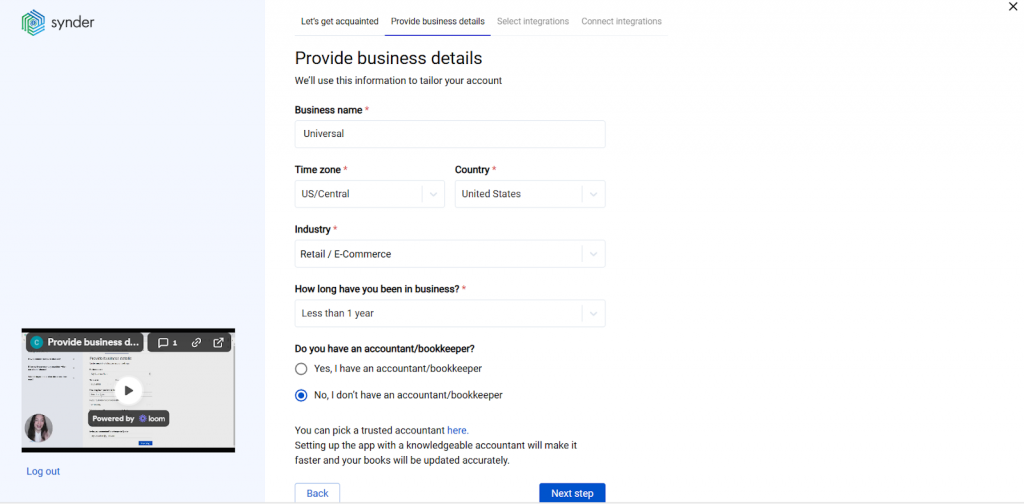
Step 1: Create your Synder account
If you’re new to Synder, begin by creating a free trial account:
Once your account is created, follow the setup flow and enter your business details.
Step 2: Select your platforms and sync mode
When prompted, select the platforms you’d like to integrate. You can connect multiple platforms at once, but for now, make sure to select:
- Stripe (your payment processor)
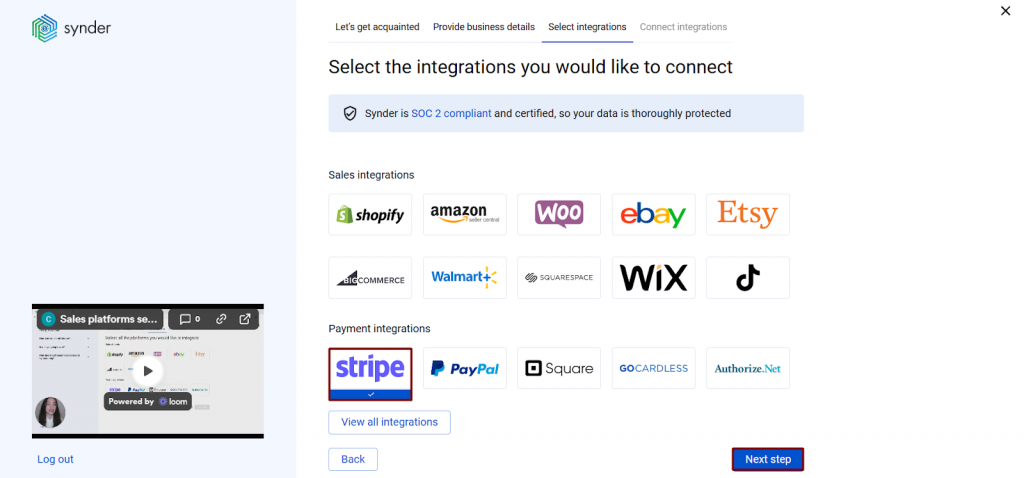
- Oracle NetSuite (your accounting platform)
You can always return later to add more integrations.
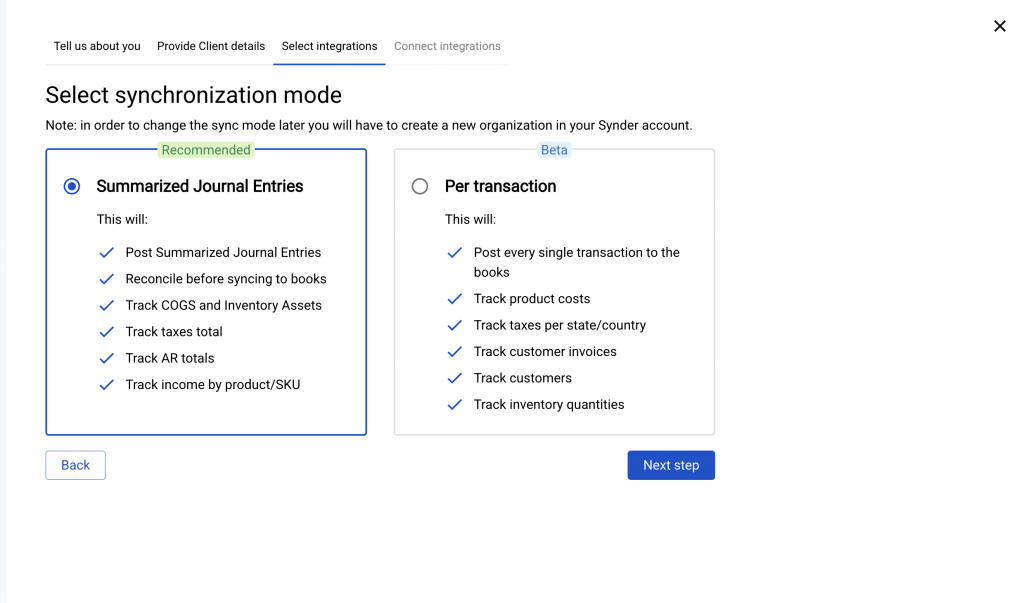
On the next step, we will select the sync method of the Synder Organization. For more details on each method, you can visit the following link
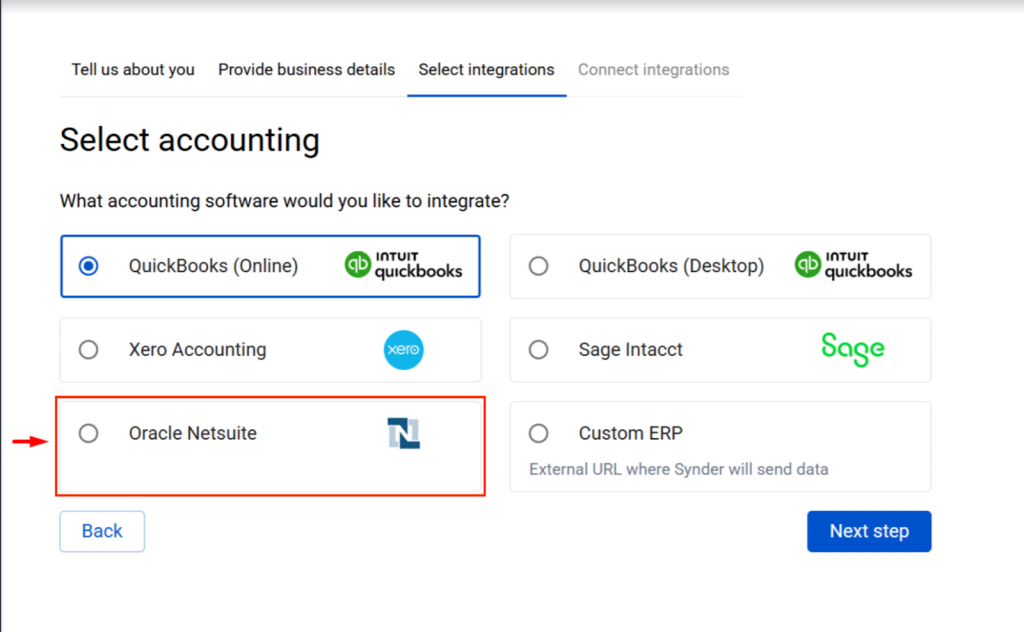
Step 3: Connect Oracle NetSuite
To connect NetSuite, you’ll need to provide your integration credentials:
- Account ID
- Consumer Key
- Consumer Secret
- NetSuite Role (Internal ID)
If you’re unsure where to find these, refer to our detailed setup guide:
👉 How to Create a NetSuite User and Retrieve Integration Credentials
Step 4: Connect your Stripe account
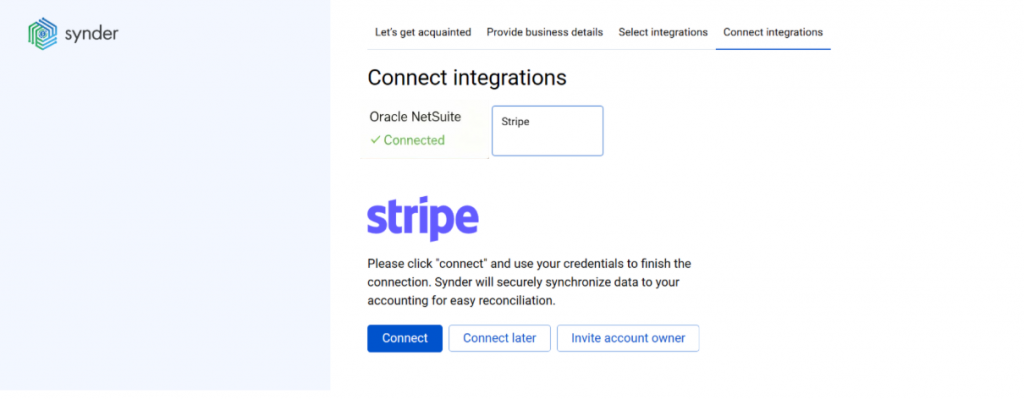
Click Connect next to Stripe and grant Synder permission to access your account. If you don’t have admin access in Stripe, use the Invite account owner option to send the connection link to the appropriate person.
After authorization, Stripe will appear as an active integration.
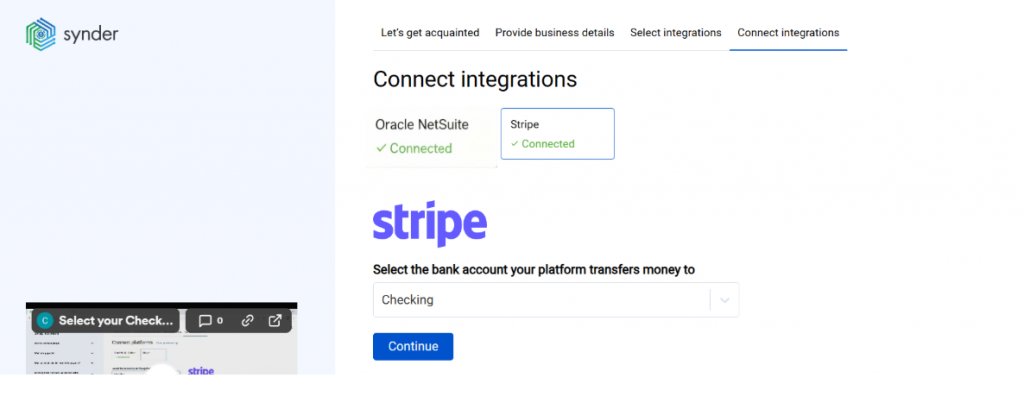
Step 5: Configure your settings
To finalize your setup, you’ll be prompted to:
- Choose an account in NetSuite to represent Stripe payouts (usually your Checking account).
- Review fee, sales, and refund mappings for accuracy.
- (Optional) Enable automatic synchronization to have Synder post your Stripe transactions to NetSuite automatically.
Once completed, Synder will start importing and syncing your Stripe data to NetSuite.
Connecting Stripe to an existing Synder organization
If you already have a Synder organization connected to NetSuite, you can easily add Stripe:
- In your Synder account, select your Organization (top-left corner).
- Go to Organization Settings → Integrations.
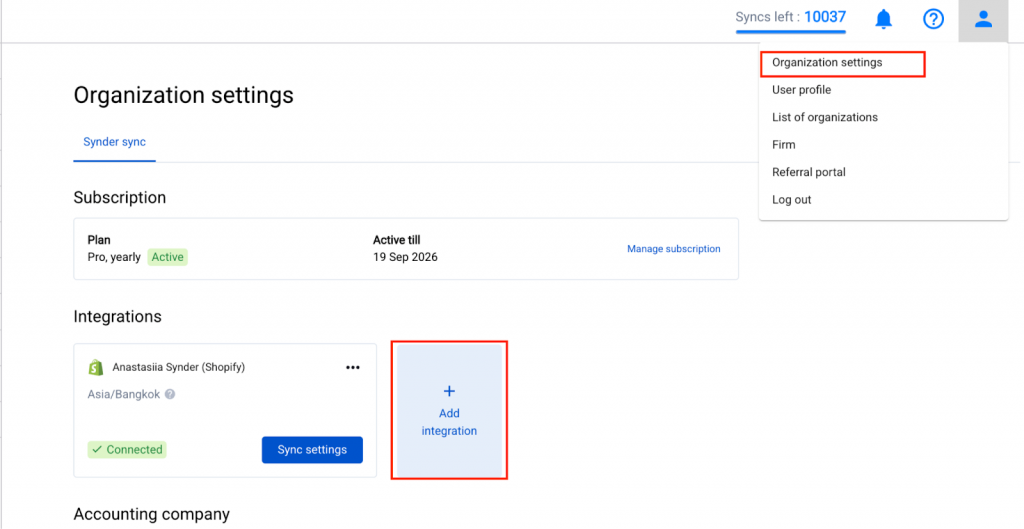
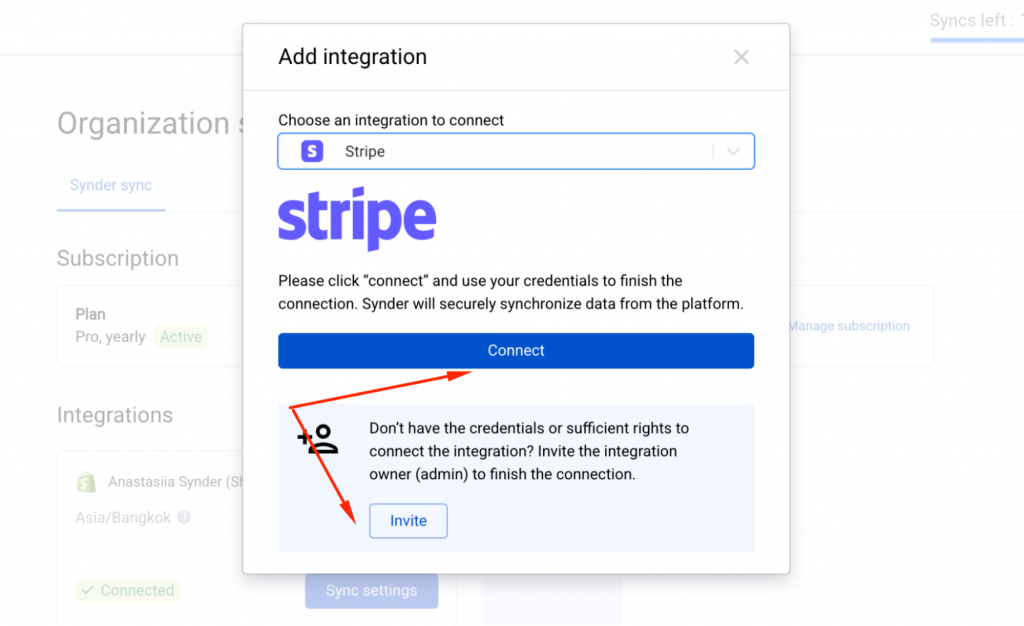
- Click Add integration and select Stripe.
- Authorize the connection through your Stripe account. Alternatively, if you don’t have admin rights, send an invitation to the account owner.
Your Stripe account is now connected and ready to sync with NetSuite. Review your configuration one more time before proceeding.
Once your integration is complete, here’s how Synder will handle your Stripe-to-NetSuite synchronization for accurate, automated bookkeeping.
- Reconciliation: Synder creates accurate journal entries that reflect Stripe payments, fees, and refunds, enabling one-click reconciliation in NetSuite.
- Multiple currencies: If your Stripe account accepts multiple currencies, Synder can track and post these to separate accounts in NetSuite.
- Refunds and adjustments: Synder records all refund transactions automatically to ensure your revenue and liabilities remain accurate.
- Automation control: You can toggle auto-sync on or off depending on whether you prefer manual control or full automation.
- Support for detailed tracking: Each synced transaction includes references, customer details, and Stripe transaction IDs for transparency.
Reconnecting Stripe or NetSuite
If your connection expires or authorization is revoked:
- Navigate to Organization Settings → Accounting Company (for NetSuite) or Integrations (for Stripe).
- Click Reconnect to reauthorize the integration.
- Approve the connection and return to Synder, and your sync will resume automatically.
Connecting Stripe to Oracle NetSuite via Synder helps businesses streamline financial data flow, reduce manual bookkeeping, and ensure real-time accuracy between payment processing and accounting. You’ll enjoy automatic synchronization of payments, fees, and refunds, simplified reconciliation, and improved financial visibility, all in one seamless workflow.
If you need any assistance with your Stripe or NetSuite integration, reach out to our Synder Support Team – we’re happy to help.